Tired of cold sandwiches for lunch? Shake things up with a wrap. Wraps have less calories than 2 slices of bread, are faster to make and hold everything together nicely. My favorite wrap cook book is Wrapping it Up by Vickilynn Haycraft. I like it so much I have 2 copies, one to lend to friends and one to use while my other is visiting a new home. In this book you will find detailed insructions for making a successful tortilla or wrap and lots of variations including Spinach tortillas, sweet cinnamon wrappers, sweet potato wrappers, peaches and cream wrappers, blueberry wrappers and more! Vickilynn is a dedicated whole foods cook and all of her recipes are formulated with both taste and health in mind. In addition to wrapper recipes her book has filling recipes and other meal ideas such as wrapper lasagna.
Super Frugal Spinning Supplies
One of my New Year's Resolutions was to learn to spin and I'm having a fun time fulfilling it :). I'm also finding out that there is an endless amount of money one can spend on the craft. At the same time there are lots of simple ways to get started by making the tools yourself. (Then if you feel the need to spend money, you can buy luxury fiber :).
Drop Spindle: These range in cost from $10 to well over $100. The best spindles spin fast, balanced, and a long time.
These can be made from common household items such as a dowel rod and an old CD.
http://www.joyofhandspinning.com/make-dropspin.shtml
http://danielson.laurentian.ca/qualityoflife/Fulltext/Textiles/Making_a_cd_drop_spindle.htm
Donut Bead Spindle Tutorial:
You can make a gorgeous spindle using a donut bead. You will need a donut bead (Jo-Ann or Ebay), a rubber grommet to fit the center (Home Depot or Lowes in the electrical department. Home Depot only carries theirs in a multi-pack for $3.50), some vegetable oil on a Q-tip, a chopstick, a hand drill, and a cup hook.
1. Drill the end of the chopstick and screw in the cup hook. Predrilling prevents the chopstick from splitting. You will need a drill bit slightly smaller than the cup hook screw. Too small and the wood will split. Too big and the screw won't hold.
2. Fit the rubber grommet into the center of the donut bead. This will take some finagling.
3. Rub the chopstick with oil and slide the donut bead in place high on the chopstick near the hook. The oil makes this so much easier! Then just wipe off the excess with a paper towel. Done!
After spending all day rounding up the supplies to make my own spindle (Pretty chopsticks were harder to find than I expected), DH suggested just buying one from KnotMyDayJob at Etsy would be a better use of time: http://www.etsy.com/shop/KnotMyDayJob
I bought one for my daughter's birthday and couldn't be more pleased with this seller! Here's a sample of her work.
Niddy Noddy:
These are used to wind of the yarn from a drop spindle and keep it from getting tangled while you tie it for setting the twist. These can be failry expensive in beautiful hard woods, but when made from PVC pipe they cost around $3 and can stretch and set the twist in water saving a step. Here are insructions:
http://www.doctordirt.com/blog/niddy.html
I used end caps on mine to keep the yarn from sliping off, to make it look better, and to keep the water from going inside when submerged.
Yarn Swift:
This is an aid for winding a nice center pull ball. It is possible to get along without one, but after doing that for awhile, I can see how nice it might be to have one. You can imagine my delight when I found the instructions to make one from plastic coat hangers and a lazy susan.
http://webeccasays.blogspot.com/2008/05/tilta-swift.html Thanks Webecca!
Ball Winder:
These fancy gadgets make a beautiful center pull ball of yarn with just the turn of a crank. They cost around $30 and ebay has an abundance of them but bidding often gets fierce at the end. While deciding if this is a hobby you will have for awhile you can make your own center pull ball using a simple dowel rod.
Here's a how to video:
Knitting Needles: These can be had very inexpensively from ebay, but it's so easy to make a pair, you might want to try.
http://www.craftster.org/forum/index.php?topic=285832.msg3237484#msg3237484
Here's a wooden pair:
http://hubpages.com/hub/How-To-Make-Homemade-Crochet-Hooks–Knitting-Needles
http://www.3gcs.com/adcock/free%20patterns/handmade_knitting_needles.htm
http://quidnunc.org/needles.html
(The last post used a knife to whittle points in the needles, but we've had good luck with a pencil sharpener.)
Here's step by step for making circular needles:
http://www.knittersreview.com/article_how_to.asp?article=/review/profile/061109_a.asp
Ring Bearer Pillow Pattern and Combo Pack
Use ribbon weaving to create a ring pillow to match your flower girl baskets. Save time and money shopping for just the right thing. Ring Pillows cost between $20 and $60 a piece, but with the simple instructions in this e-pattern you can make a custom pillow for a fraction of the price.
Ring Pillow E Pattern $4
Want to make both the ring pillow and flower girl basket to match? Buy the combo pack and save $2.
Flower Girl Basket and Ring Pillow Combo Pack $7
Woven Ribbon Flower Girl Basket
Baskets like these cost around $54!!!! The good news is they aren't hard to make for a fraction of the price. With a recycled whipped topping container and a couple of spools of ribbon (and a few other things) it's a piece of wedding cake :). This is the perfect wedding accessory for the bride who needs to be frugal but doesn't want to look cheap. You can make a basket in any color, or weave it in 2 colors for a checkerboard effect. The pattern is available as a 20 page ebook with 27 full color photos and is an instant download for only $5! Some sewing required. You may sell items made from this pattern if you credit the source of the pattern.
Handmade Roses
I'm doing custom sewing for a couple of weddings. One will take place this Sunday at a castle nearby. What fun! The other will be an outdoor affair in April. I'm having fun making frugal but gorgeous wedding accessories for the first wedding, (including a flower girl basket from a whipped topping container–Shhh. Don't tell.)
Part of my crafting includes making fabric roses. I found several interesting tutorials online. Not all of them will work for my projects, but I'm sure I'll find other uses for them. Here's a parade of my favorites:
These are gorgeous ribbon roses you'll have to click to see: http://hotmamashouse.blogspot.com/2009/05/ribbon-rose-tutorial-part-2-leaf.html
*********************************************************************
http://ilove2create.blogspot.com/2007/09/tutorial-fabric-rose.html
*****************************************************************
These roses are made from fall maple leaves!

http://haha.nu/creative/how-to-make-roses-from-maple-leaves/
**********************************************
From Portobellow Pixie: http://portabellopixie.typepad.com/
http://portabellopixie.typepad.com/RolledRosesTutorial.pdf
****************************************
These roses are cut and melted before sewing to make a realistic rose
Instructions: http://duhbe.com/blog/?p=807
Not feeling crafty? You can buy them handmade here: http://www.etsy.com/shop/DuhBe
***************************************************************
These roses are made from coffee filters! I've made a few and with the great instructions, they turned out pretty much like the picture. They are fun, but time consuming. In my opinion the results are totally worth it. The paints were a bit of an investment, but with a 40% off coupon not too bad. And a tube of paint makes a LOT of roses.

http://www.marthastewart.com/article/paper-roses
**************************************************
And a fantastic Valentine wreath from Sew Much Ado
http://sewmuchado.blogspot.com/2010/01/tutorial-fabric-flower-valentine-wreath.html
I just found a tutorial online to make play dirt from foam and felt, plants to plant in it with strawberries or pea pods that you can pick (with the aid of velcro). This would make the perfect snowy day craft for families wishing for spring. I think I have all the materials in my basement somewhere. Now to find some time. To find the tutorial, click here: http://ikatbag.blogspot.com/2009/04/dirt-foam-part-5.html
Snack Bars
A healthy snack in disguise :).
1. Sprinkle 1 cup of semi-sweet or dark chocolate chips (full of antioxidants) in the bottom of a greased 7 x 11 pan. Microwave for 1 minute or until the chips are melted. Spread smooth in the bottom with a heat resistant spatula.
2. Mix 3 cups of stuff together, such as: rice crispies, cheerios, wheat germ, wheat bran, cereal crumbs, rolled oats etc .
3. Pour 1/2 cup honey in a 2 cup glass measurer. Microwave on high for 1 minute. Stir in 1 cup peanut butter (smooth or chunky, your choice), untill well combined. Pour over cereal mixture and stir well.
4. Press peanut butter coated cereal into the chocolately dish. Chill for an hour or until the chocolate is semi-hard. Cut into 12 bars.
5. Call the kids and watch the bars disappear. Be sure to have plenty of wet rags on hand :).
Brandon’s Blessing
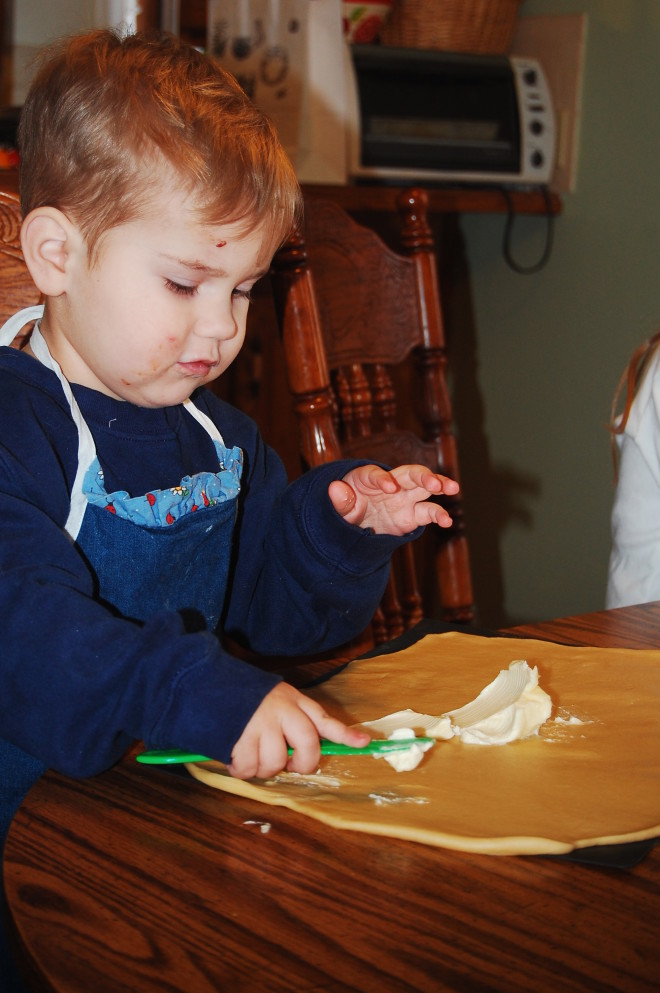
You may have noticed in the photos of the cream cinnamon rolls that Brandon's face looks really dirty. It isn't dirty (well it's kind of dirty), but all scratched up. Last Saturday we went to our cousin's for dinner and Brandon slipped on the ice going into their home. I went over to help him up and slipped and fell on top of him smashing his face into the cement. It bled pretty good and he was crying a lot.
I couldn't get up on the ice while holding him, so I sat behind the car and held him while I waited for Darren to come and help us. It took him awhile to help his cousin on the ice, so I just held Brandon tight and waited.
With Darren's help we were able to get in the house just fine and an ice pack and some cake and ice cream later, Brandon was happy and playing. A little while later Darren asked me if I had moved the car. I hadn't. It had slid down the hill on the ice. It only took me a minute to think about how long I sat behind the car holding Brandon unable to move and realized that God had preserved us from the danger of the sliding car.
Dry Beans Step by Step
Dry beans are fabulously good for you! They are low in fat, high in protein, fiber and folate. Beans can lower your cholesterol and may prevent cancer. One of the lowest cost sources of protein around, beans are super versatile and tasty too.
A little known fact about beans is that they make a nice fat substitute in baking. For recipes and ideas try out these links: http://everydayfoodstorage.net/2009/01/04/low-fat-brownies-with-out-applesauce/food-storage-recipes , http://www.yum-recipes.com/Recipe/Uncategorized/22852_Beans_As_Fat_Substitute.html
Cooking dry beans is easy! There are 3 methods to choose from, but with all 3 methods, sorting and rinsing the beans is a must. Sorting means picking through them and taking out the stones. These are the stones I pulled out of a 1 lb bag of beans from the regular grocery store shelf
Next rinse the beans in a collander to remove dust from the fields.
Next, choose from 3 cooking methods.
Method 1. (Takes the least amount of time and preserves all nutrients.) Place the beans and 6 cups of water per pound into your slow cooker and cook on high for 3-4 hours or on low for 6-8 hours. You can add a Tablespoon of salt and several cloves of garlic to the beans as they cook. There is a rumor that salt keeps the beans from turning soft, but it isn't true. If the beans won't cook soft, chances are they are old.
or
Method 2. (Saves energy and rinses off some of the gas producing starch.) Soak 1 lb of beans in 6 cups of water and 1 teaspoon of baking soda overnight.
Drain and rinse the beans in a collander. Add the beans and 6 cups of water to a stock pot. You may add 1 Tablespoon of salt and garlic if you like. Bring to a boil, then turn down to a simmer. Simmer for 3 hours or until the beans are tender.
or
Method 3. (Rinses off some of the gas producing starch and takes less time than soaking overnight.) Bring the dry beans and 6 cups of water to a boil. Turn off the heat and let set for 1 hour. Drain and Rinse. Bring the beans and 6 more cups of water to a boil. Add seasonings as desired. Simmer for 3 hours or until the beans are tender.
To make your beans into chili, add 1 lb of hamburger, browned, 1 chopped onion (cooked with the hamburger), 4 cups of tomato sauce, 1 Tablespoon cumin, and 2 Tablespoons chili powder. If you are cooking on the stove top, add water as needed to reach desired consistency. The slow cooker preserves the moisture in the chili.
Chili is great topped with shredded cheese, fritos, and flaked coconut. If you have never had coconut on your chili, you should try it at least once!
Cream Cinnamon Rolls: Cooking With Brandon
Cinnamon Roll Dough
1/2 cup warm milk
1 Tablespoon active dry yeast
1/4 cup melted butter
1/4 cup honey
1 egg
1 teaspoon salt
2 cups whole wheat flour (you may need another 1/2 cup)
In a mixer, combine milk and yeast. Stir until yeast is soft. Add butter and honey, mix well. Add egg and mix well. Add salt with the flour and stir until a soft dough forms that is not to sticky. Knead well. Let rise for 1 hour or until doubled.
Punch down dough and roll into a rectangle. (Our rectangle was the size of our silicone baking sheet.)
Spread the dough with softened butter. (We used 1/4 cup, but you could use more or less.)
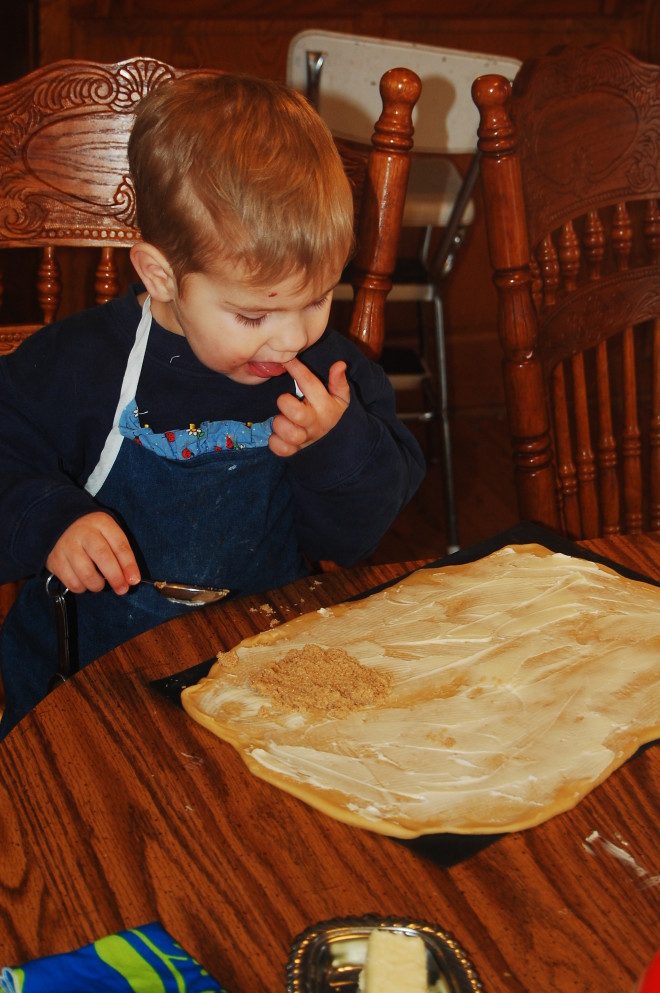
Sprinkle with brown sugar and cinnamon. (We sprinkled until it looked good, but 1/2 cup sugar and a teaspoon of cinnamon should be about right.)
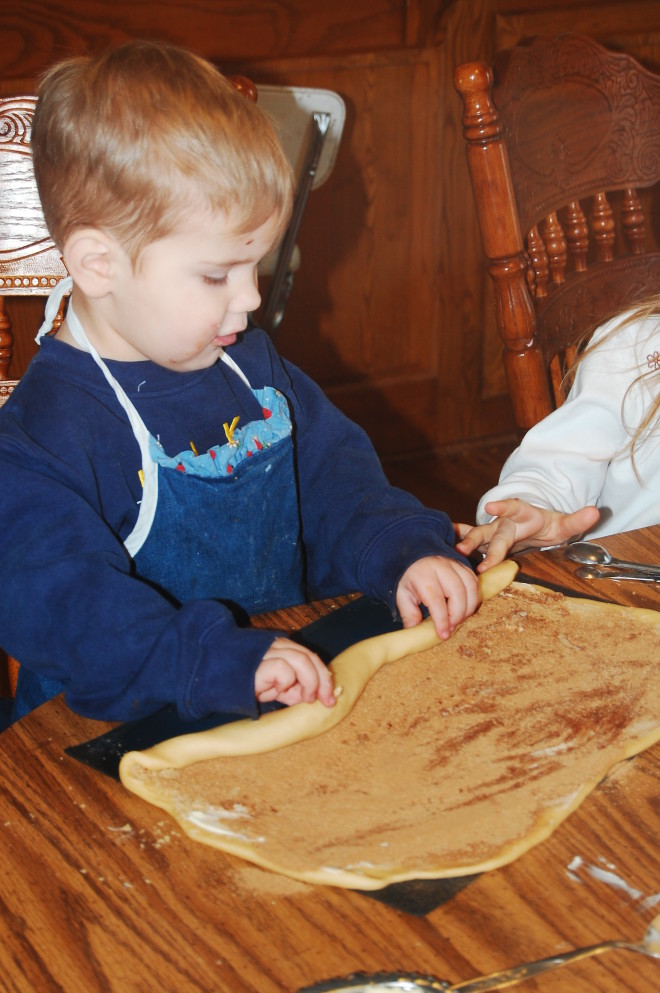 Roll up the dough so that the dough ends up as long as possible.
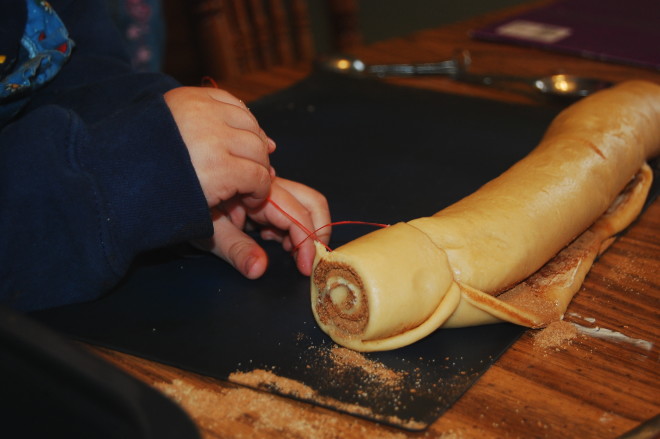 Cut the log into 12 rolls. Dental floss works great for this.
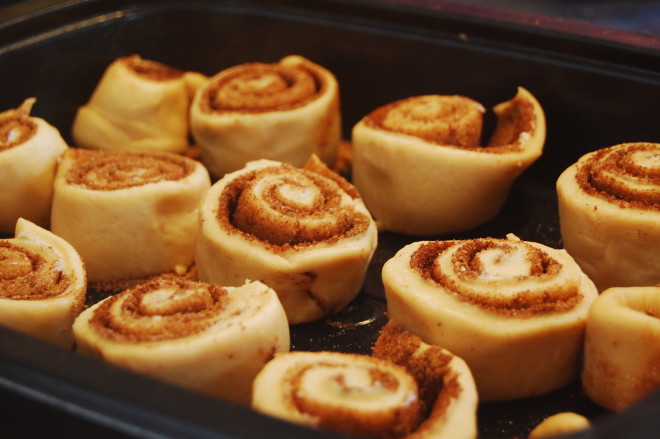 Place the rolls in a greased 9 x 13 pan.
 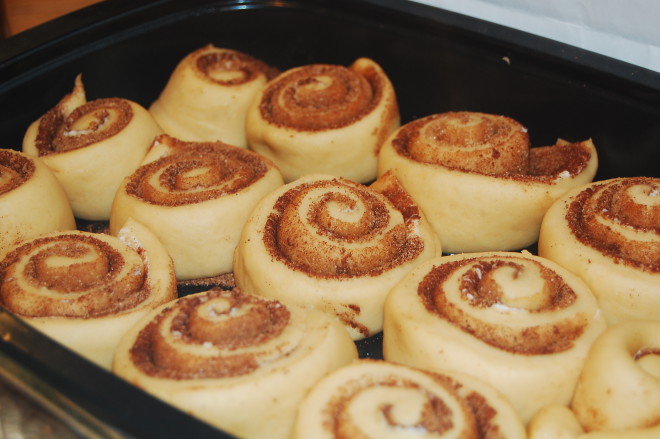 Let rise for 1 hour.
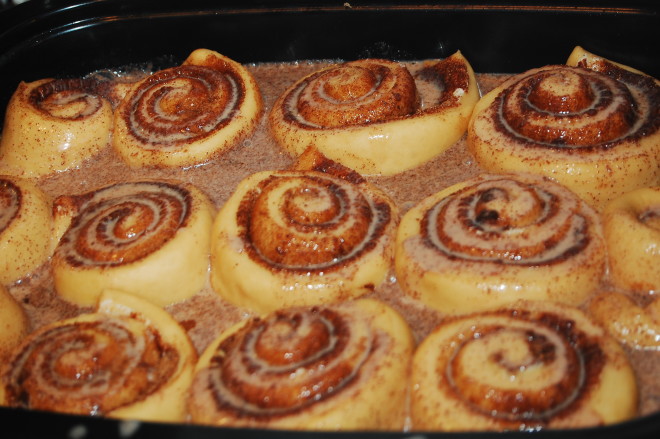 Mix 1 cup of sour cream (This was raw cream skimmed off the top of farm fresh milk that soured after 7 days. As a substitute, use buttermilk, cultured sour cream, or yogurt mixed with 2 Tablespoons of milk.) 1 teaspoon of baking soda, 1/2 cup brown sugar, and 2 teaspoons of cinnamon. Mix well and pour over rolls.
Bake uncovered at 350 for 30 minutes. Check the rolls after 20 minutes by pulling 2 gently apart to see if they are still doughy.
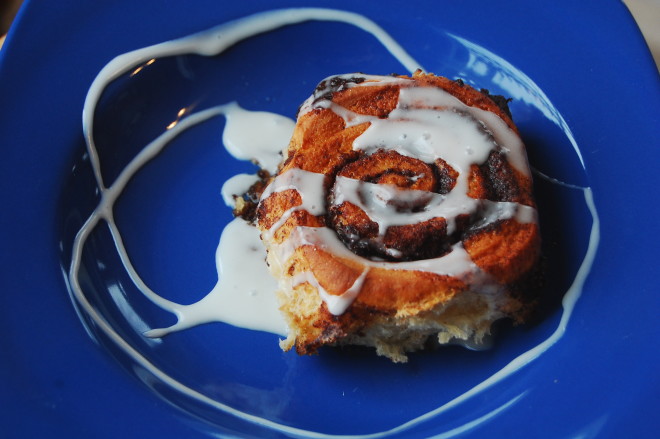
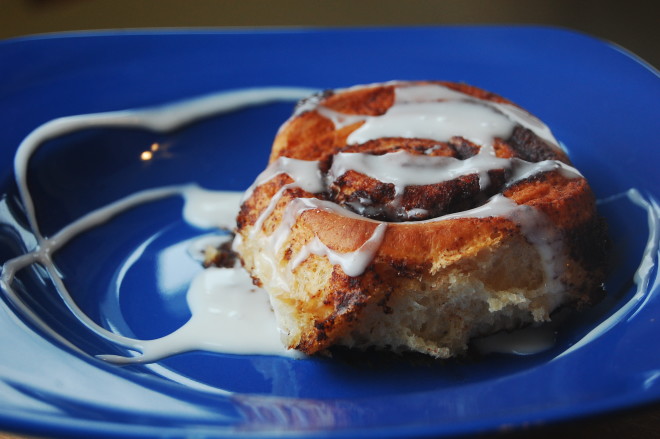
Mix a thin frosting with 1 cup of powdered sugar and 2 Tablespoons of milk or cream. Drizzle over the rolls. Serve warm with milk–Yum!


 Dry Beans

