Happy New Year Gift for You :)

Previous years my resolutions have been pretty awesome.  So awesome that they never got done :).  So this year I’m making one simple resolution and made it in a chalkboard print to hang in my office.  If you click on the link below you will get a printable PDF version that will trim to an 8×10 and fit in a standard frame.

Click Here to Download New Year chalkboard prints PDF

I made these after seeing Nest of Posie’s blog post here. Her Christmas prints are super amazing, way more amazing than these here.  I really like the chalkboard look, but not the chalkboard dust.  It’s a win-win :).


Jamberry Nails

Have you noticed my new advertiser? Heidi Perkins, Jamberry Nails Independent Consultant.  A few weeks ago, Heidi sent this cute little kit in  the mail.

I didn’t try them right away because I was afraid it would be time consuming and hard to learn to do.  I was so WRONG! I broke a nail a few days ago which forced me to do something quick.  And these nail decals seemed like the perfect solution.  They were!

These are super easy to do and while prep was really important (buffing and cleaning) it took less time than I expected. Plus there is no drying time like with nail polish, so I could get up and get back to work right away.  There are a ton of cute styles. I chose the red with white polka dots for Christmas, and this style would also be amazing for Valentine’s day.

Here are some of my other favorites:

http://www.heidiperkins.jamberrynails.net/home/products.aspx?id=55


The nail sets are $15 each, but are good for 2-3 sets of toes or fingernails. Shipping is just $2.99 on most orders. And it’s buy 3 get 1 free! These would make really cute end of the year teacher gifts with some pampering manicure set items.

Each set of decals comes with 18 individual nails in various sizes. I was able to get two fingers out of each decal by cutting them in half down the center–making 36 decals.  Which means 2 sets of fingers and 1 set of toes for me, plus some for my girls to play with.  The decals are supposed to last 3-4 weeks.  I’ve only had mine on for 3 days, so I can’t say yet how long they last for me.  I have washed dishes and showered with no trouble.  Peeling stickers off of new toys lifted the edge on my most used finger but it smoothed down afterwards just fine.

These are different than the real polish strip on the market.  There are more than one set of nails in each package, but they don’t come with application accessories like a cuticle stick or buffer-things we should have on hand anyway.  Jamberry nails are vinyl and odor free unlike the real polish strips.  And they are more durable too.  You will need manicure scissors or clippers, a good file, a buffer, a cuticle stick, a hairdryer or other heat source (like a microwaveable heat pad) and polish remover to apply. This might sound overwhelming, but don’t let it be. Gathering all the items together was the hardest part of the process.

Here’s a video to show how easy these are to use:


Christmas Photos

Monday we had 32 guests for Christmas and it was wonderful. But busy.  I just enjoyed the entire day and forgot to take a single picture! But the highlight of the day may well have been Darren’s sister’s kids playing a violin/cello duet of Oh Holy Night which was as beautiful a thing as you can imagine.  And at that moment the UPS man came with a Mary Kay delivery.  I hope he knew that gorgeous music was live!  You just don’t hear something like that every day.


Christmas morning I made sure to snap a few photos to remember things by.  This is our first Christmas in this house and the first Christmas Grant will remember–or not remember.  I can’t remember much from when I was 20 months old, come to think of it.

Our new tradition is to open up the sun room French doors where the children’s tree is.  They get their own tree to decorate with their precious hand made ornaments and whatever they want.  And I get my tree in the formal living room that is all silver and gold and as sparkly as I can make it.

We light the fire in the family room and the space heater in the sun room which looks like a fireplace too.

Stockings are first.  The kids don’t have to wait for us to open them, but they did. I’m glad.  As soon as I got up I slid the overnight breakfast casserole in the oven.  I made 2 small pans of it.  One with just sausage, egg, and cheese.  The other had green and red peppers and onions.  I was elated to find a southwest veggie blend in the frozen veggie department and all was on sale fro $.59 a lb.  Score!  No chopping veggies for this busy mama on Christmas.

The kids were so sweet together.  They each bought each other a gift–which made 30 items to open just from each other!  Then Darren and I bought them 3 things each.  Nothing was super huge and most of the children gifts came from Dollar Tree or Family Dollar on their black weekend 50% off sale.  But it took a lot of time to open everything.

Heidi helped Grant open his first gift which was a new rubber ball.  But after that Dub opened a remote control car which Grant wanted.

When we gave it back to Dub, he was NOT happy.

But unknown to us Grandma bought Grant the exact same remote control car which he was super excited to open later in the afternoon.

The best gift that I gave was a Dollar Tree dinosaur hat and a handmade dinosaur tail made from this tutorial.

Dub got one too.

But his favorite toy was a cardboard box.

Seriously we could all save a bunch of money and just give our kids big boxes and markers, lol.

Darren got a homemade bathrobe from me.  I bought the fabric for it 5 years ago and am just now getting it done, lol.  I also got him some beef jerky, special flavored coffee creamer (which he uses to flavor his workout shakes–we aren’t coffee drinkers.)  And a new pair of cuff links for his French shirts.

Darren didn’t get me a gift–his perfectionism got in his way of buying anything because nothing was just right.  But it made him a little miserable Christmas morning.  Thank goodness gift giving isn’t my love language.  I’m just as happy with a generous dose of praise.  But he promised me a shopping spree together which is way more fun anyway.

But I did get a gift from Jamberry nails–my new advertiser.  And I LOVE it!  Seriously ladies, you have to check these out. Click on the link to the right.

It just so happened that the day before I broke a nail below the quick–you know where it really hurts.  It didn’t break all the way across and I didn’t know what to do.  I couldn’t cut it that short and I couldn’t just leave it.  Then I remembered this package just waiting for a few minutes of fun.  The Jamberry nail decal smoothed right over the break making it strong and invisible.

We headed over to my  mom’s after morning packages and my nephew dog greeted us at the door.

Bwa ha ha ha!

My grandmother arrived about the same time we did.  And I noticed her festive nails right away.  So we took a picture together.

I’m so lucky to have Grandma still.  My kids have 2 great-grandma’s still with us!  And Grant especially loves them both.  He spent quite a bit of time playing a peek-a-boo with grandma through all the little sections in her walker.  And she enjoyed the attention too.

At some point the kids decided Grandpa would make a great dinosaur.  And they were right.

And my Aunt Christy told me about running a marathon 2 weeks ago for St Jude’s hospital in Memphis and made me cry.  She told me how at mile 23 the course went through the courtyard of the hospital and all the children were lined up along the side holding signs telling what their illness was and how long they had been there.  My Aunt is a beautiful woman but no spring chicken but she said to her friend, “There is no way we are walking this stretch.  Run now like you’ve never run before.”  And even though I wasn’t there I sat at her feet and cried.  And I held her finishing medal and cried some more.  And I told her I would consider running on her team next year–though getting away to Memphis the second week of December sounds like a hard thing right now.  And when I think how hard running the 5K was this fall–which is only 3 miles, running 26 sounds…well…crazy.  But I love St Jude’s and what they do for the children–and that makes me think that I really will try.

And then at some point we all giggled while Darren and Uncle Dave, both boyscout camping experts, struggled to put together a Doll tent. Which turned out super cute and has been played with a ton since.

And this is how I know the dino tails were a good idea.
image

This was my little dinosaur at the library today 🙂

Russian Orphans and Gingerbread Houses

I’m going to be a sewing maniac today, but first I wanted to share a few photos from the weekend.  Friday night our family worship group gathered in my home to put together Christmas boxes for an orphanage in Russia.  One of our member’s father visited there a few weeks ago on a missionary trip and what he found just about broke his heart.  Every child there was so precious and had so many needs. He felt almost powerless to help.

His daughter had the idea to recruit some help to gather necessities and some fun items to send out to the children.  All of our children helped choose what to gather.  Then on Friday we put it all out on my dining room table.

There were handmade hats and scarves (from all over the USA) and gloves.  Toothbrushes; soap and washcloths.  (Check out how cute these are!  Pam bought plain white washcloths then appliqued a heart on each one.)

For the Girls

For the Boys

There were small baby dolls; toy cars; bouncy balls and yo-yos.  Stamps; crayons, coloring books, calendars, pencils, silly bands, and bookmarks.  And for the older girls journals and lip gloss.  There was also gum and several kinds of candy.  Each of our children drew the age and gender of a child from the orphanage, then walked around the table choosing the right things for that gift.

Then the kids headed back to their parents to wrap a gift box so it could still be opened by Russian officials at inspection.

With 6 boxes to wrap (that was tricky!) I stopped taking pictures here.  But what a great evening!  It wasn’t without a little drama.  Some of the kids were confused and took more than one of each item for their bag.  It was traumatic on their egos to spread things out. But after explaining how the children might feel to find their friend with 3 and themselves with none…it made more sense. And my dear little Brandon thought he was making a gift for he and his best friend Isabelle to share.  When he found out that wasn’t the case, it was pretty awful. But after a few tears he was able to find the joy in giving a gift to a child he didn’t know who has nothing and will be able to truly appreciate it.

Then the next morning, I packed up the kids and headed to Grandma’s for our traditional gingerbread making party with cousins.  No kits were used here.  My mom bakes everything from scratch using a cast iron mold that she has had for nearly 20 years.

My nephew, Sean (what a cutie!)

Aunt Erica helping Brandon

My Heather

Heidi, almost 13! and my niece, Maddie.

Caleb

It was a hoot trying to get all of them to look at the camera at the same time.

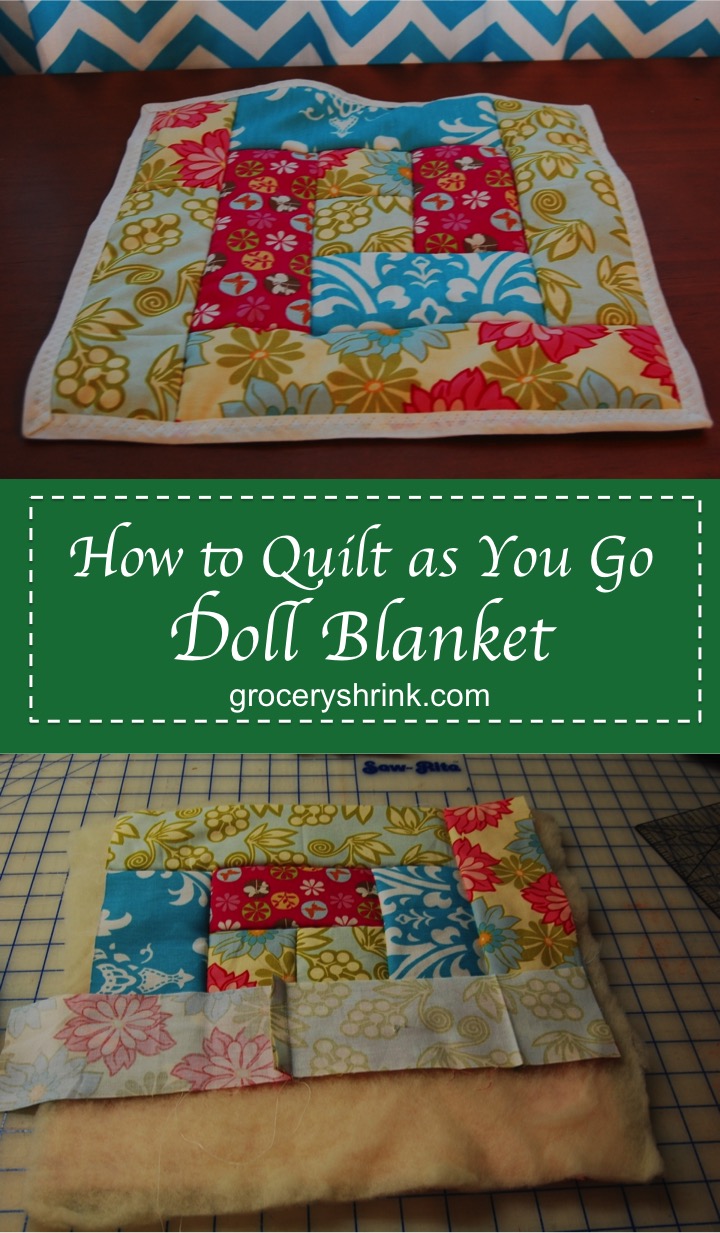
Doll “Quilt As You Go” Tutorial

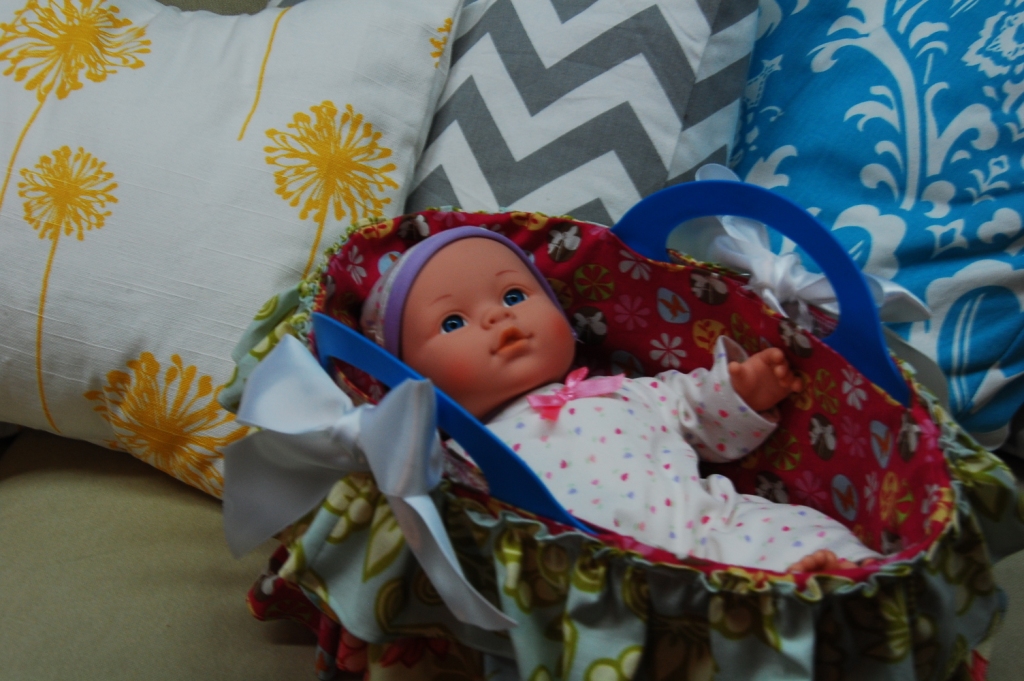
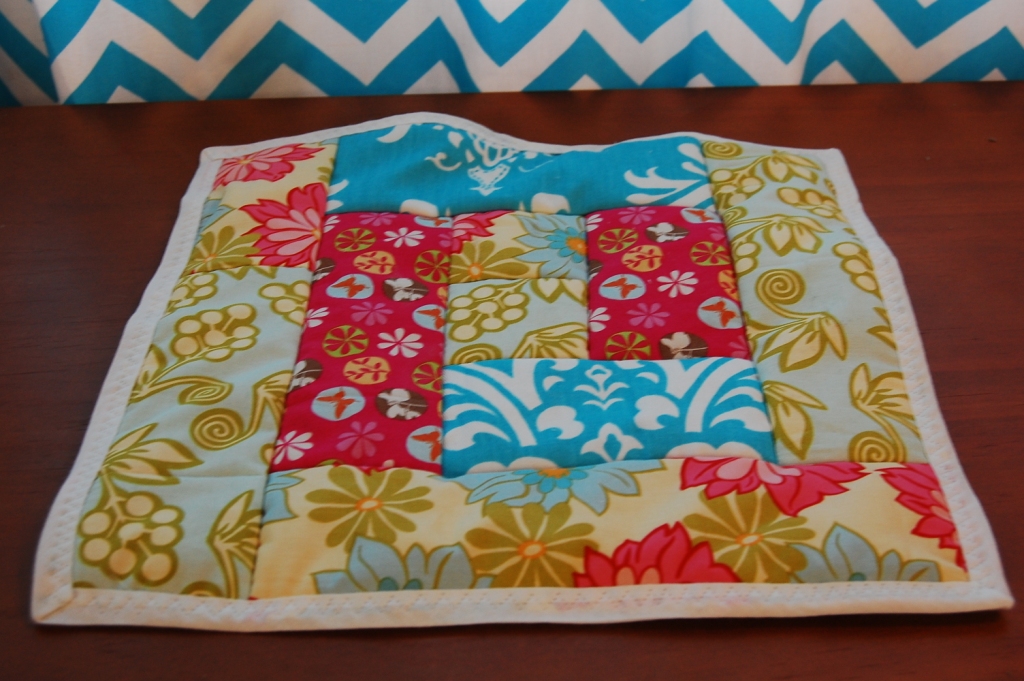
This adorable doll quilt is the perfect companion to our dollar tree Doll Bassinet/ Moses Basket. Tutorial here.

I used the leftover scraps from the basket to complete it.  It took about an hour from start to finish. This same technique can be used to make quilted bibs and larger throws for real babies or for nursing home residents.  It goes together super fast since you quilt it as you go and there is no hand sewing. (My choir students are working together to make a larger version. It’s a little more fiddly to make it bigger, but it still works.)

Read more

Doll Bassinet or Moses Basket Tutorial

Baby Doll Bassinet Pattern
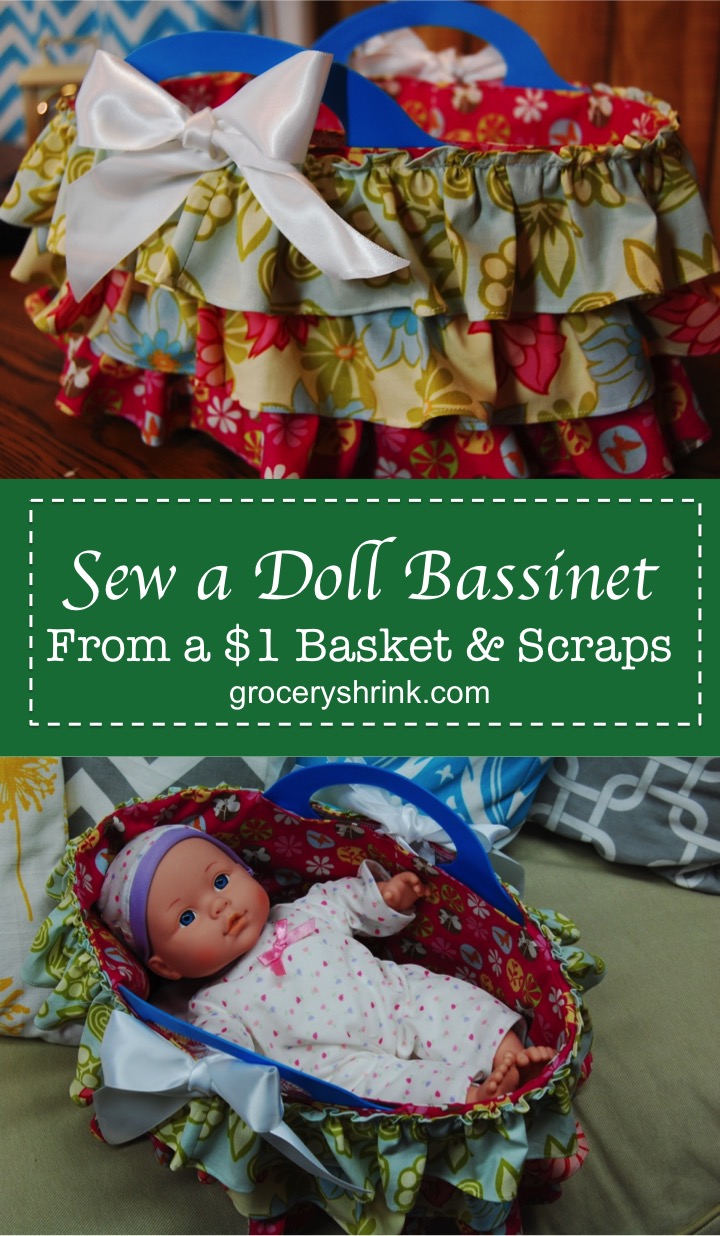
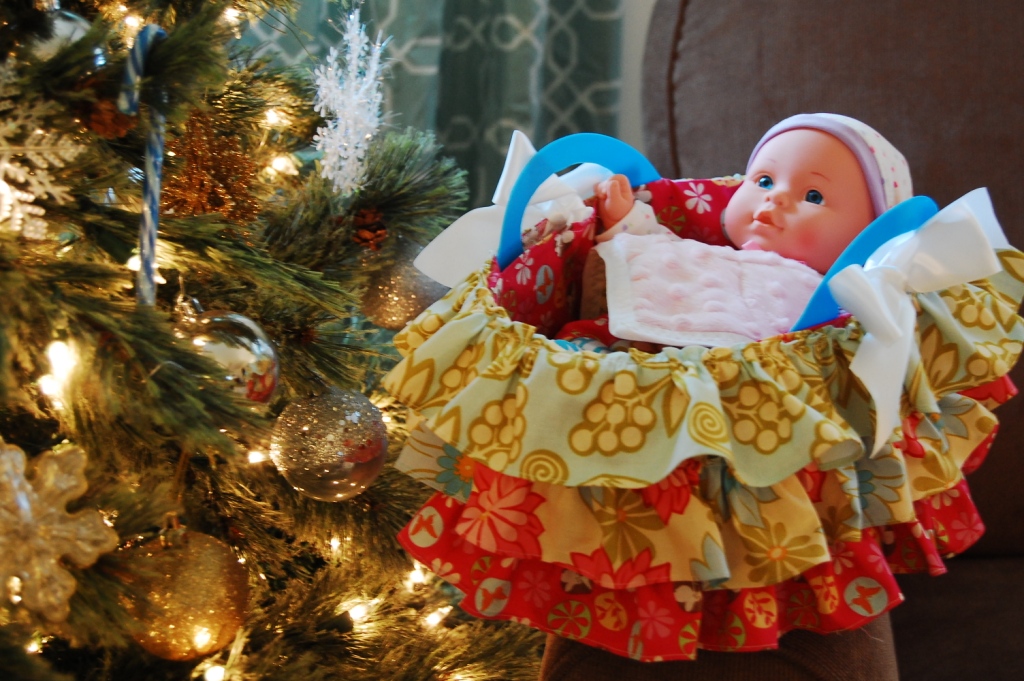
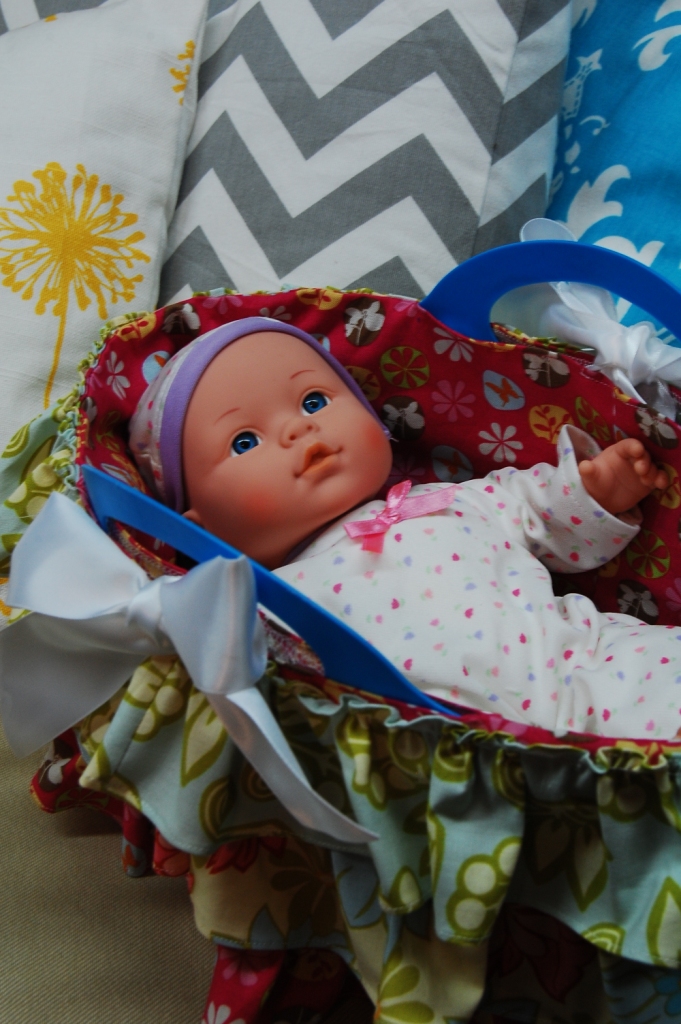
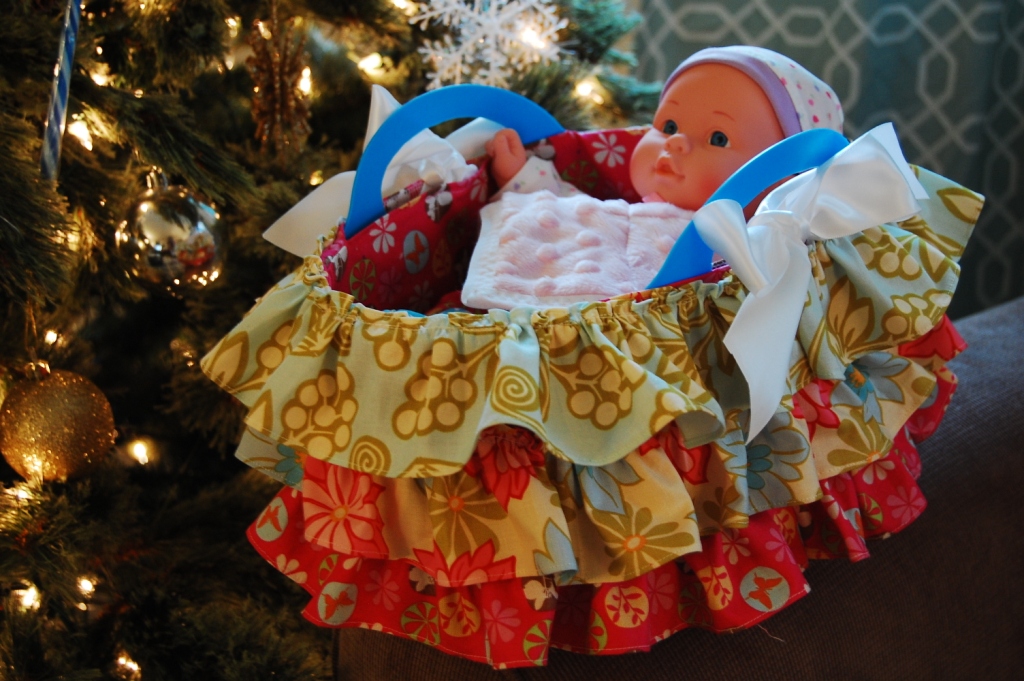
Wouldn’t a little girl you know be delighted with a new dolly and a basket to carry her in?
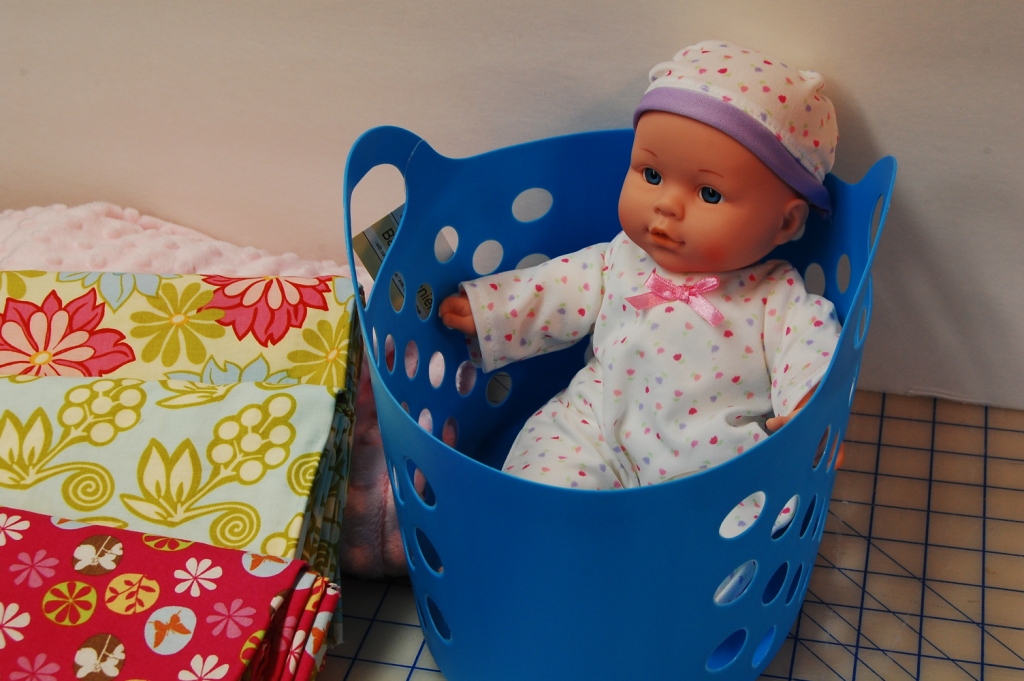
For an experienced seamstress, this project takes about 2 hours.  Plan a little more time if you are new at this.

You will need:

1 dollar tree basket.  This one is about 11 inches long by 7 inches wide (just slightly smaller.)

An 8-12 baby doll fits perfectly. My doll is 12 inches and is from Big Lots.  Just perfect for my 18 month old niece.  This one or this one would also be perfect.

3-4 fabrics.  I chose one for the mattress, and 3 for the basket cover. 1/4 yard of each is plenty–or just scraps.

A small amount of poly stuffing

1 1/3 yards of ribbon

Normal notions: thread, pins, scissors, etc.

Mattress Pattern Piece

1.  Mattresss:  Trace the pattern with a pen onto your mattress fabric.
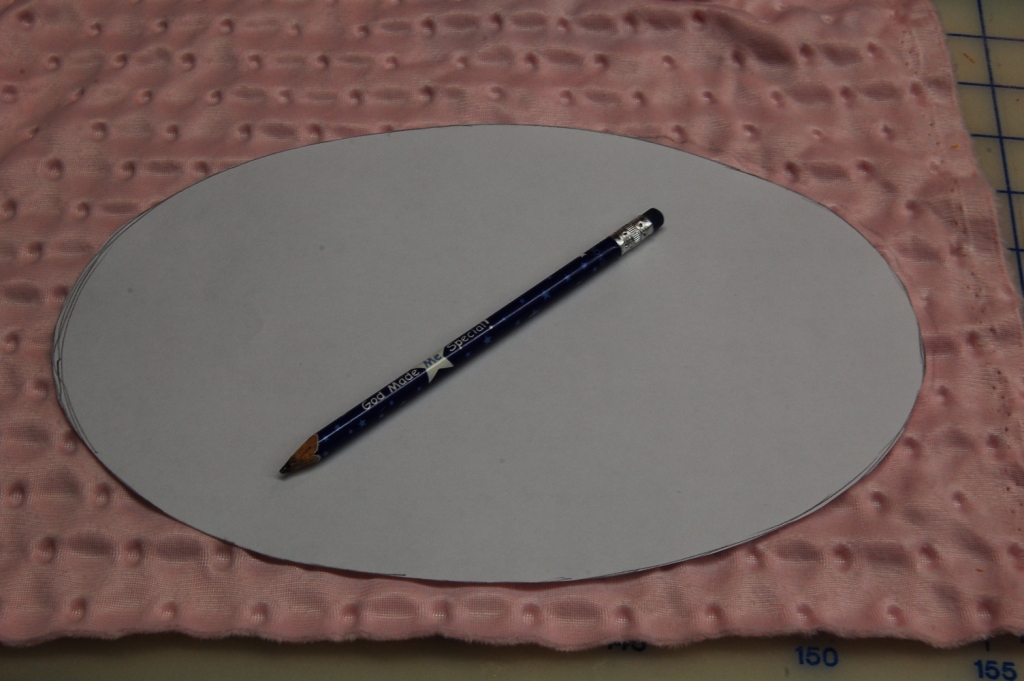
2.  Fold fabric in half and stitch on the drawn line, leaving an opening for turning.
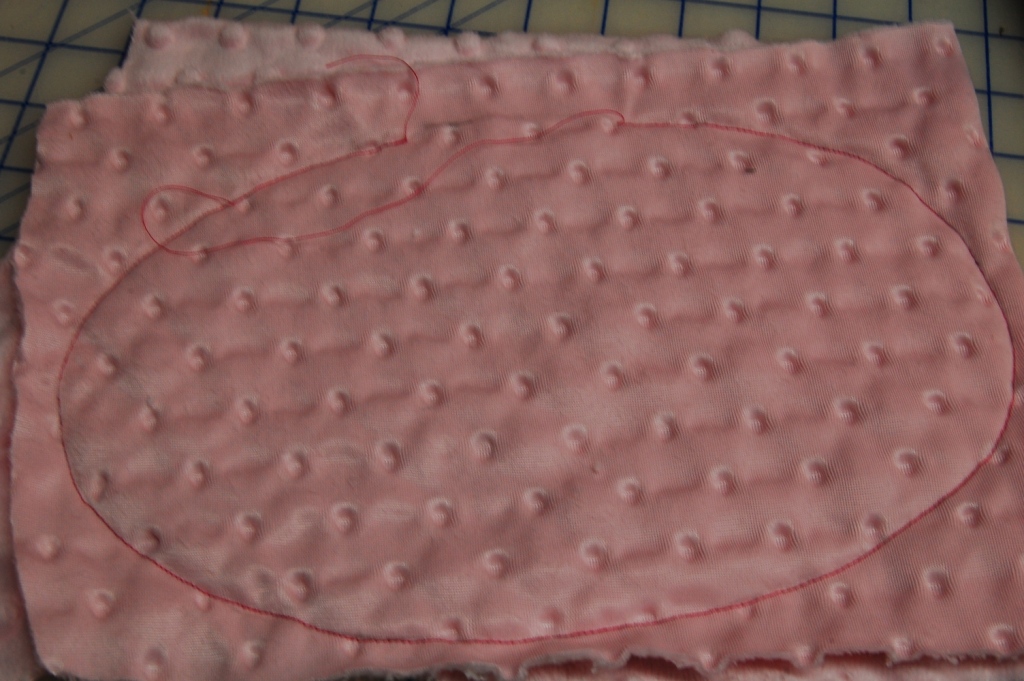
3.  Trim excess fabric leaving a 1/4 inch seam allowance.
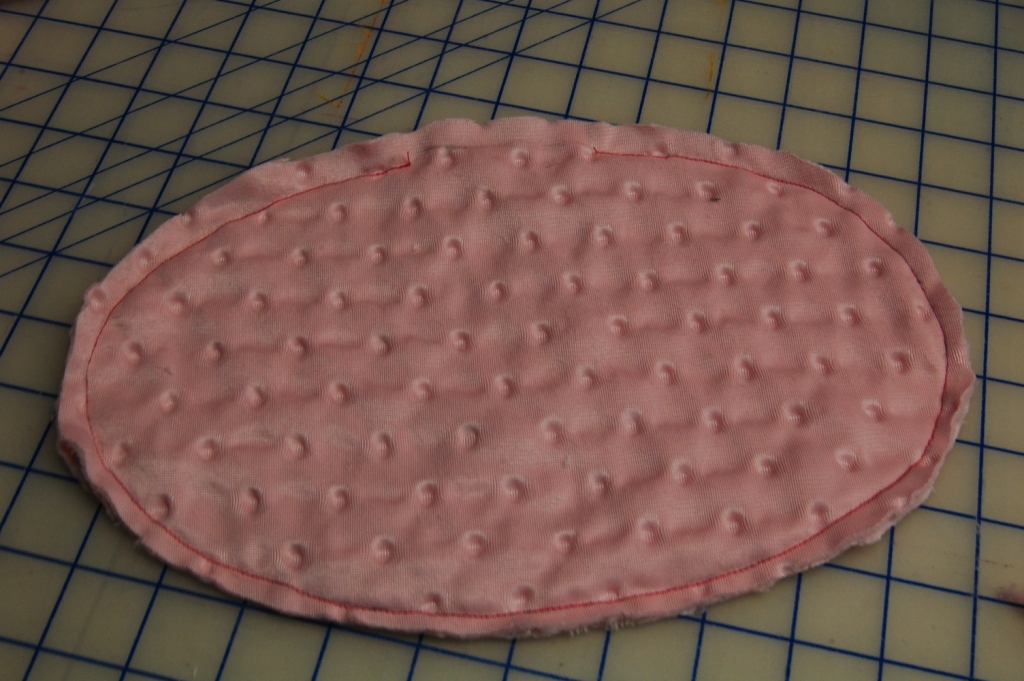
4.  Turn right side out and lightly stuff with a small amount of poly stuffing.
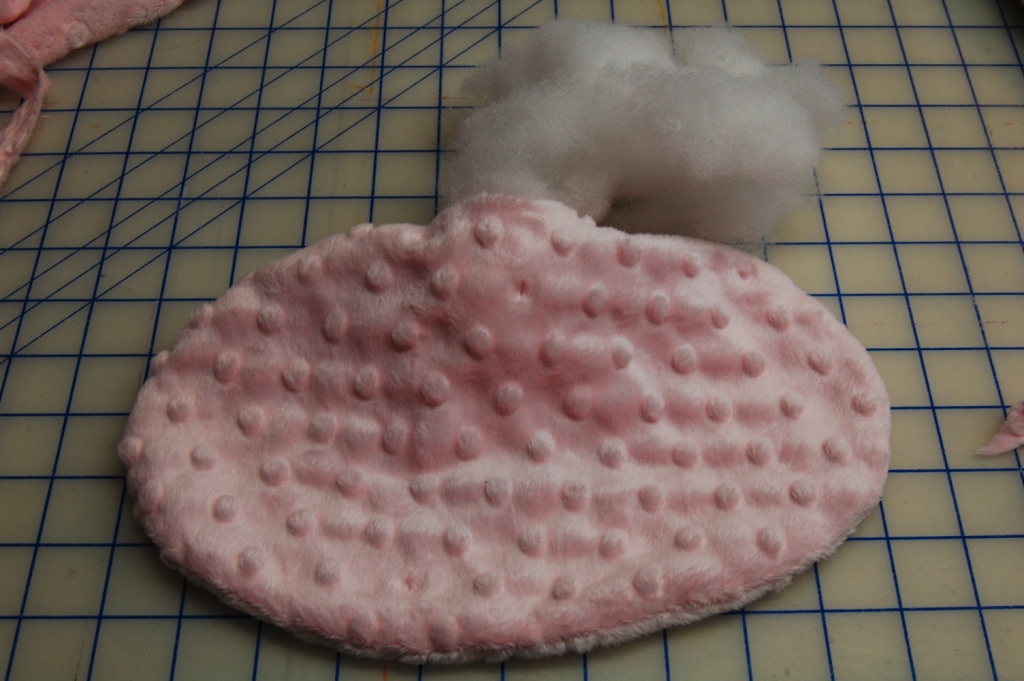
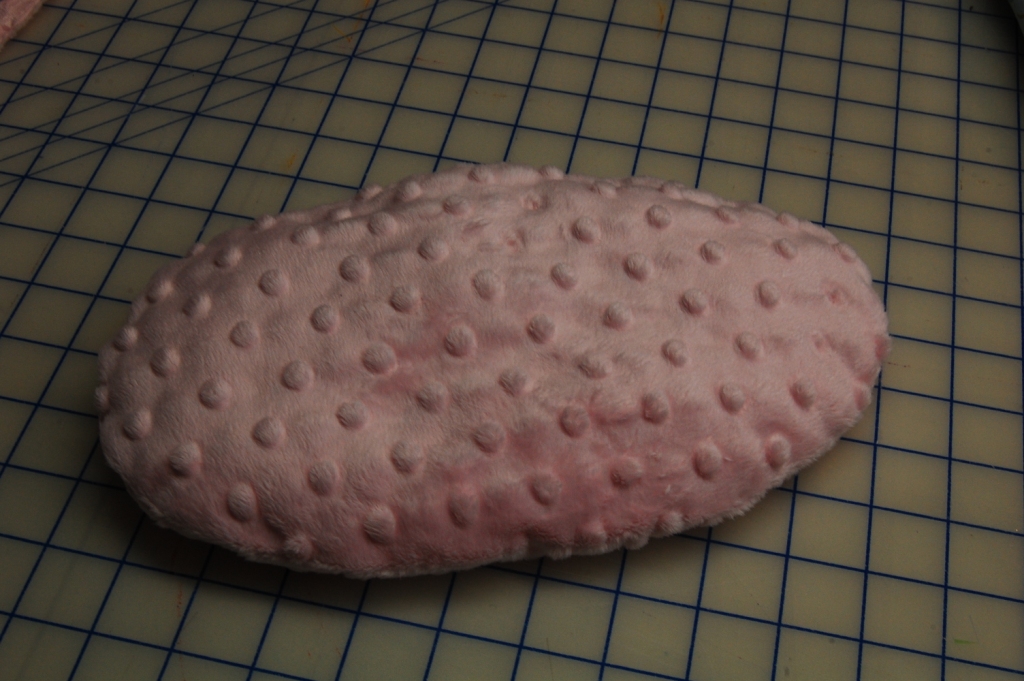
5.  Slip stitch the opening closed and set aside.
For the basket cover: Cut 1 oval

2 rectangles 6 x 31.75 inches for the lining

And 6: 3 x 31.75 rectangles for the outer ruffles. I cut 2 each from 3 different fabrics.
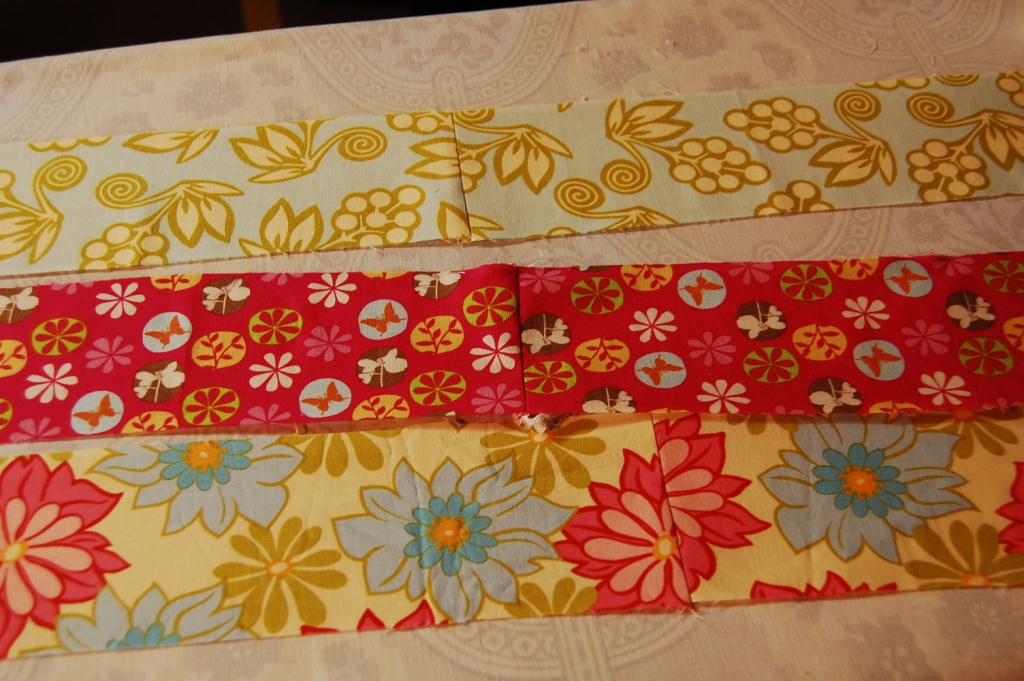
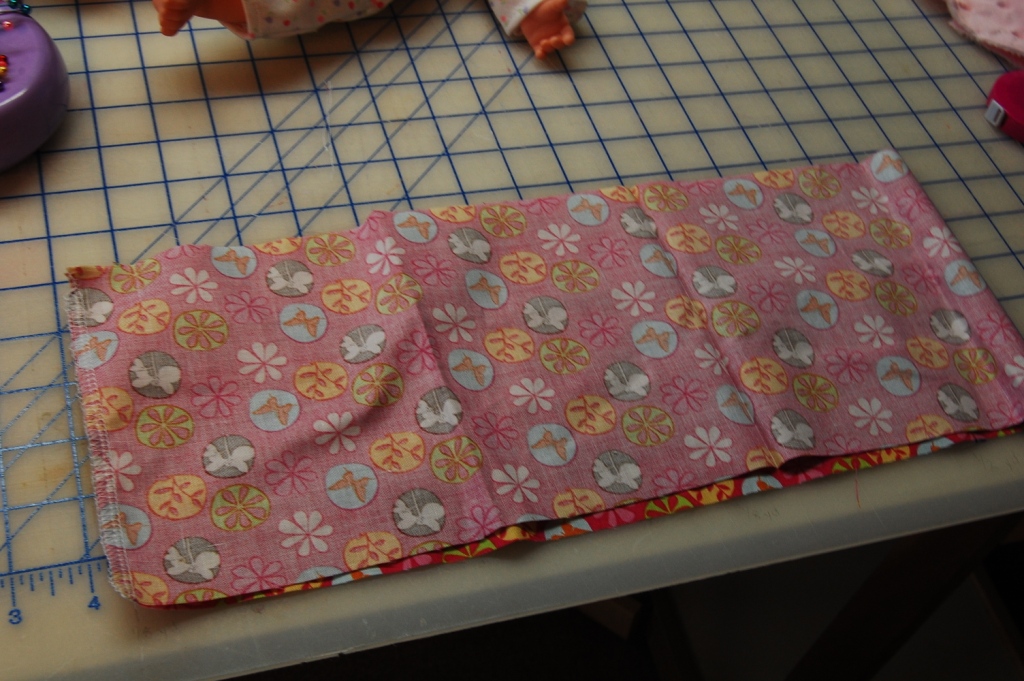
1. Sew each 6″ wide rectangle into a loop using a 1/4 inch seam allowance.  (I used a serger to keep it tidy, but you could zigzag the edges if you don’t have a serger.
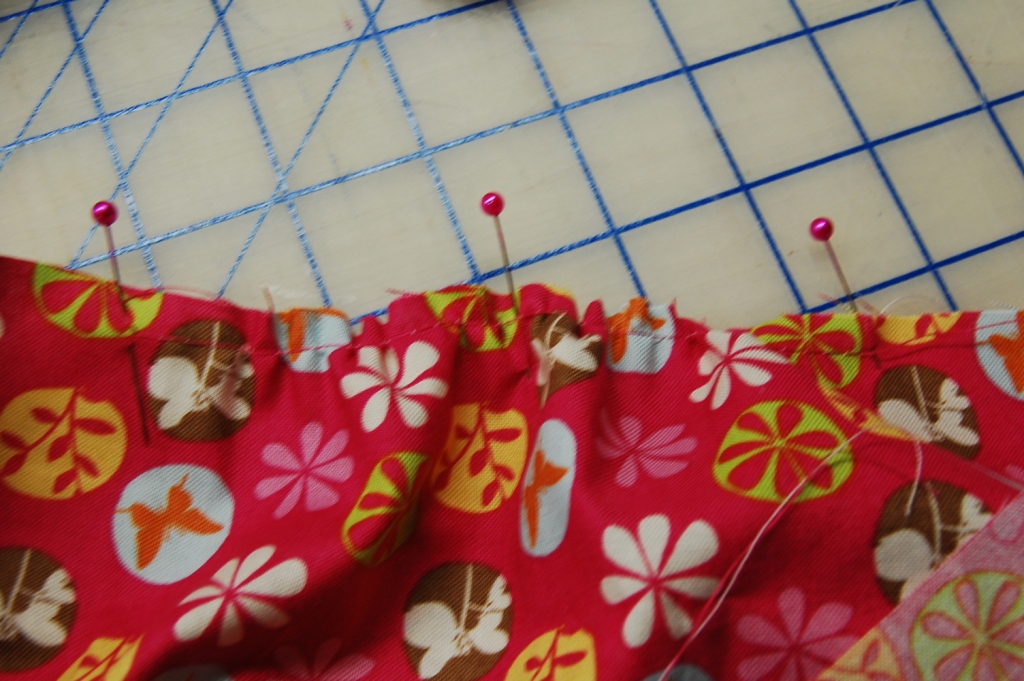
2.  On one 6″ tall loop of fabric only, run 6″ long swaths of gathering stitches on opposite ends from each other.
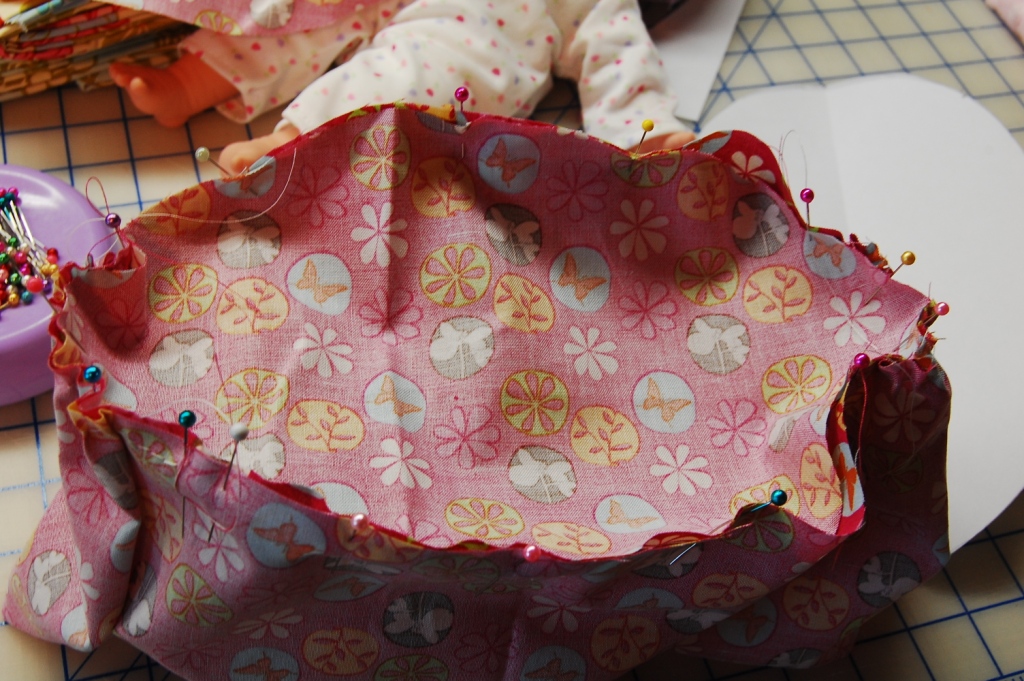
3. Divide both the oval and the loop of fabric (that you just put the gathering stitches in) into fourths.  Pin them rights sides together, matching the fourths and putting the gathering stitches around the oval ends to help everything fit well.  Stitch with a 1/4 inch seam allowance, then finish the raw edges.
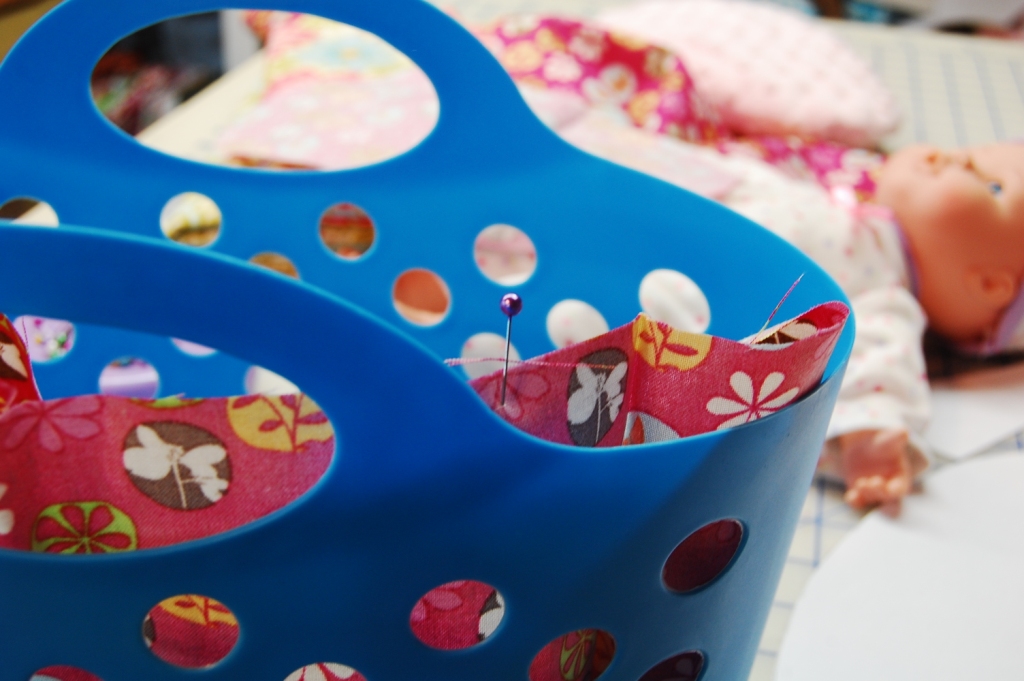
4.  Slip your liner inside your basket and mark each side of the handle with a pin.  Be sure to get the widest part where the handle meets the top of the basket.
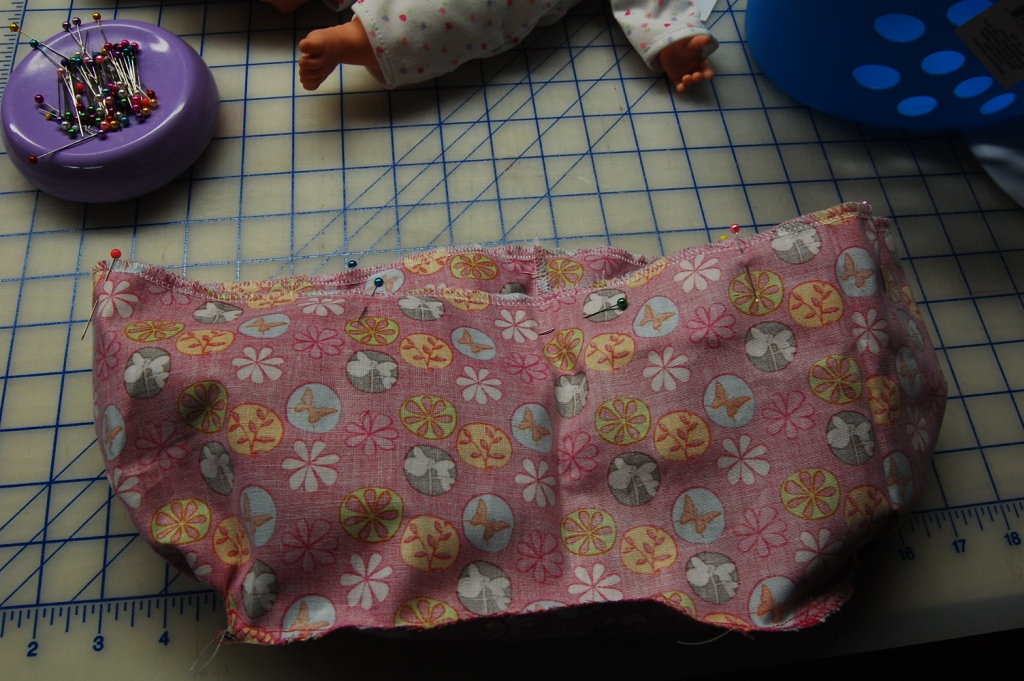
5.  (Note:  Before I did this step, I serged around the top of both loops of fabric so on step 6 the hemmed edges would be finished.)Pin your second 6″ tall loop of fabric to the top of the basket liner, right sides together.  Stitch with a 1/4 inch seam  leaving two openings for the handles between the marks you made with the pins.
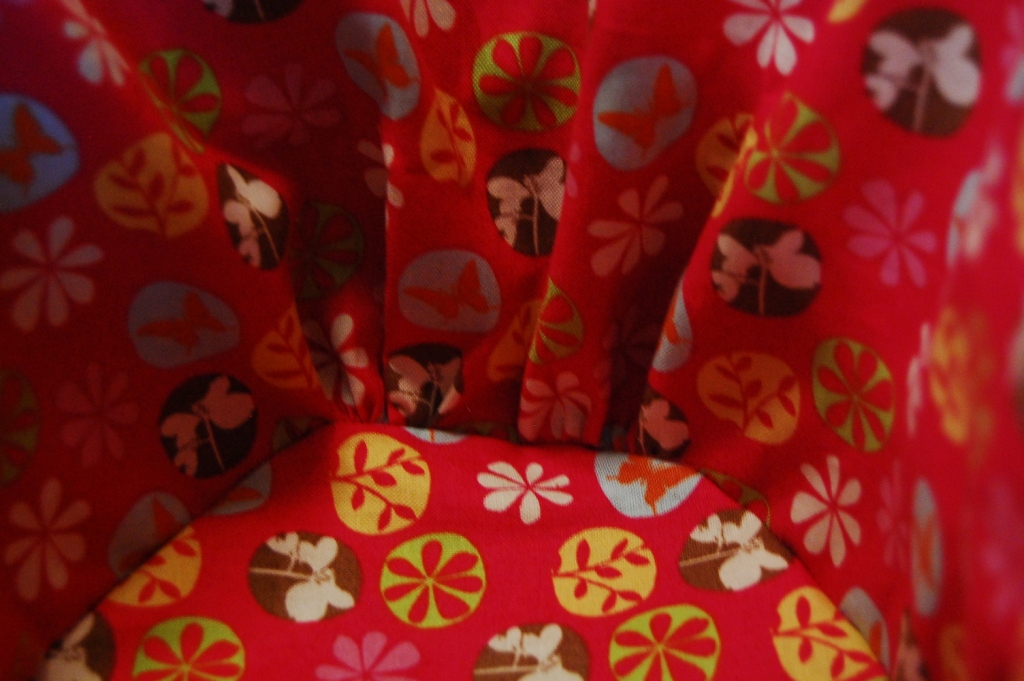
The ends will have cute little gathers like this on the inside.
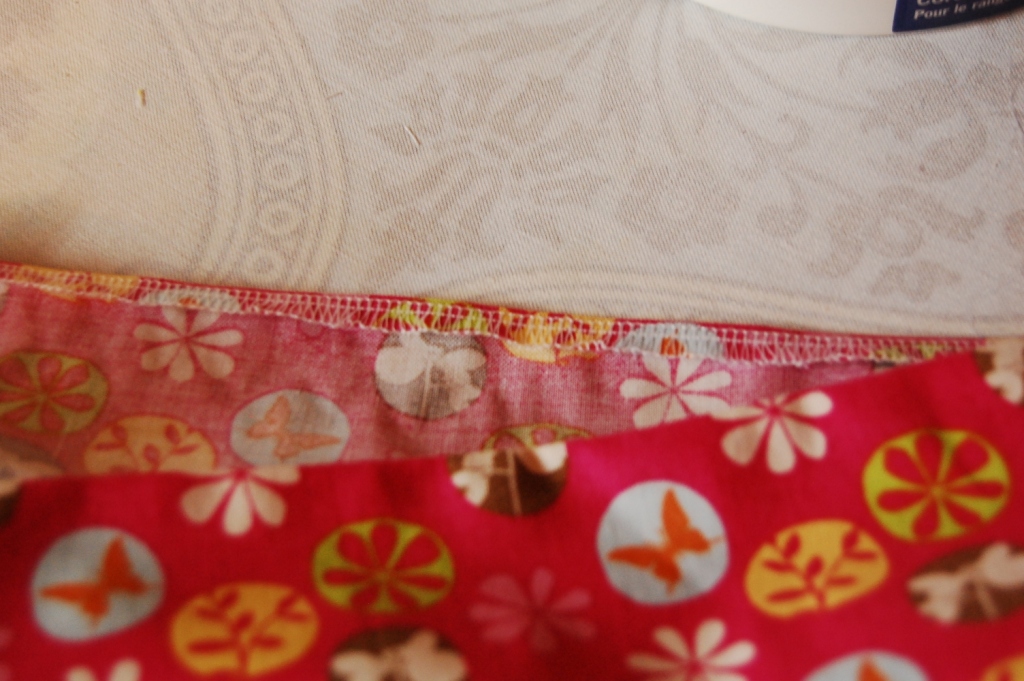
6. Press the seam allowance under on the openings left for the handles and top stitch all the way around to hem the edges.

7.  Make 3 pairs of loops for ruffles, by  sewing 2–3″ wide strips of fabric right sides together on the short ends, 3 times. Then hem both long edges of each loop. You could do it the hard way by double pressing narrow hems and top stitching or by using a rolled hem stitch on the serger.  I used a rolled hem foot on my sewing machine, tutorial below.
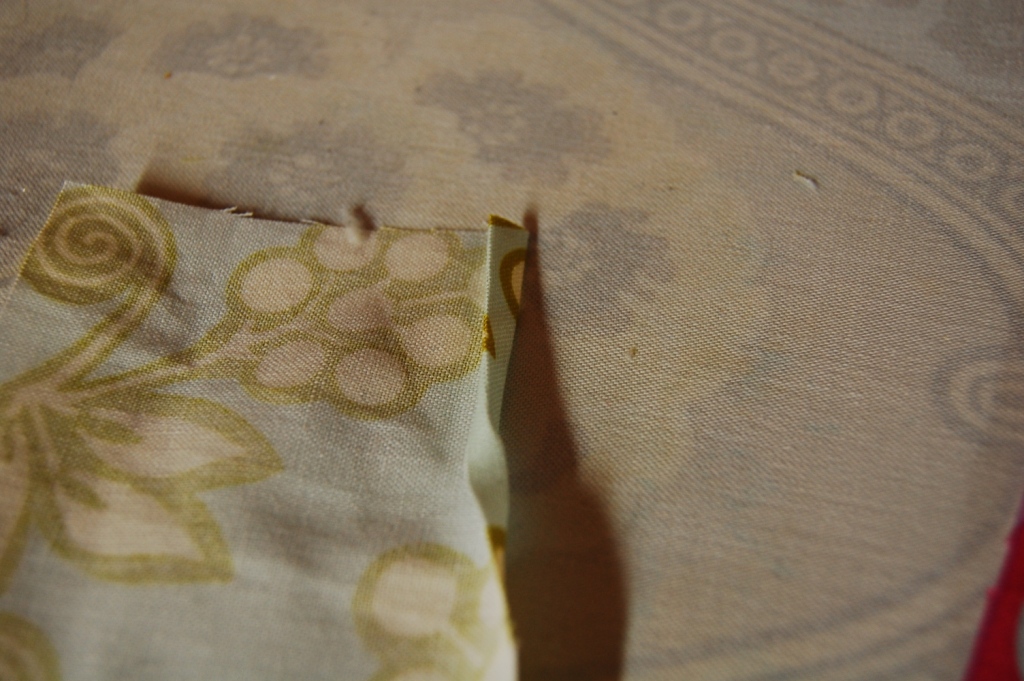
a.  First start your hem by pressing a small double turned hem about an inch down the strip of the fabric. (since it is hard to pull a seam through a rolled hem foot, I waited to sew my second seam until after the pieces were hemmed.
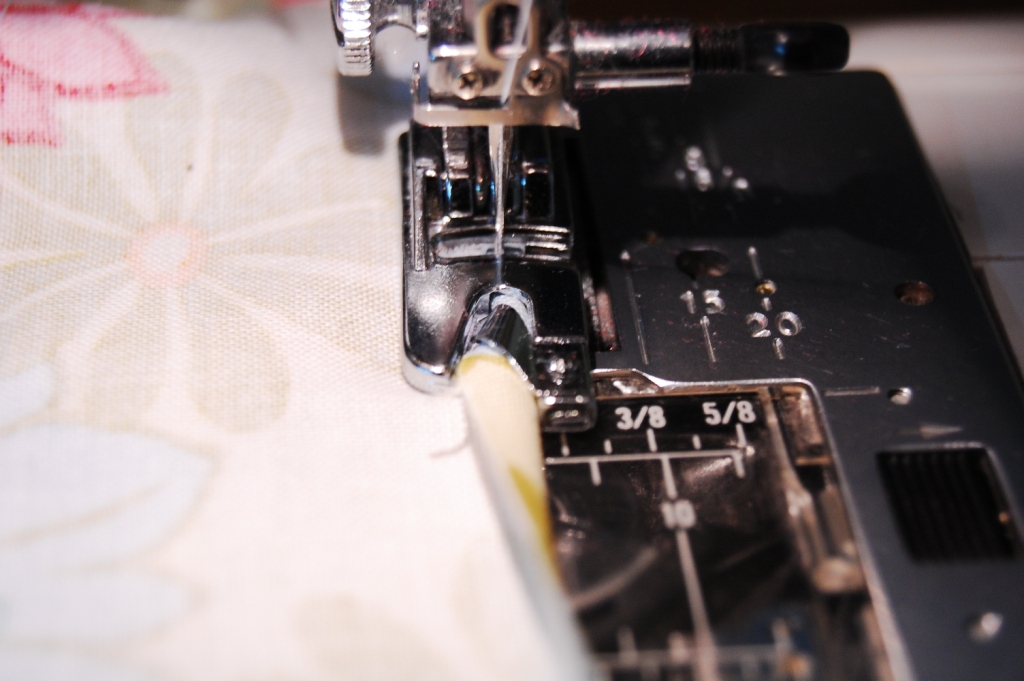
b.  Then slip your fabric into the foot so the raw edge fits into the guide.  The portion you previously pressed under is ready to go under the needle for a perfect (in theory) start.  As you feed the fabric through the foot be sure the raw edge is always fed into the guide correctly.  A little practice with some scraps will have you a pro in no time.
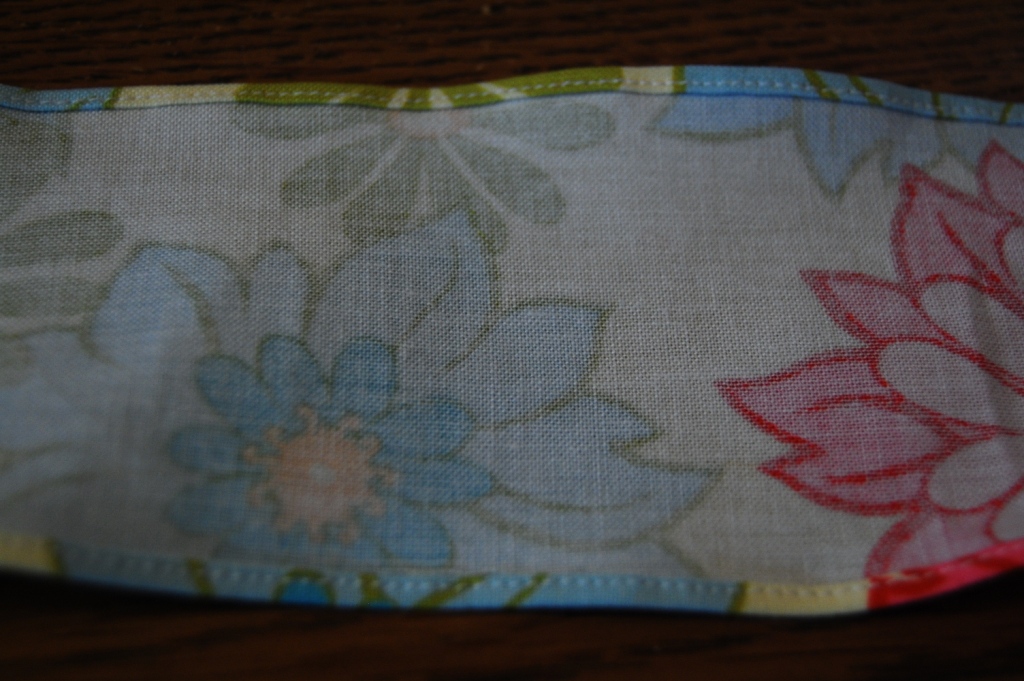

c.  It’s a challenge to go over the seam, you may need to use some gentle pressure to pull the seam through the foot. While you have your hemming foot out, hem the bottom edge of the basket cover too.
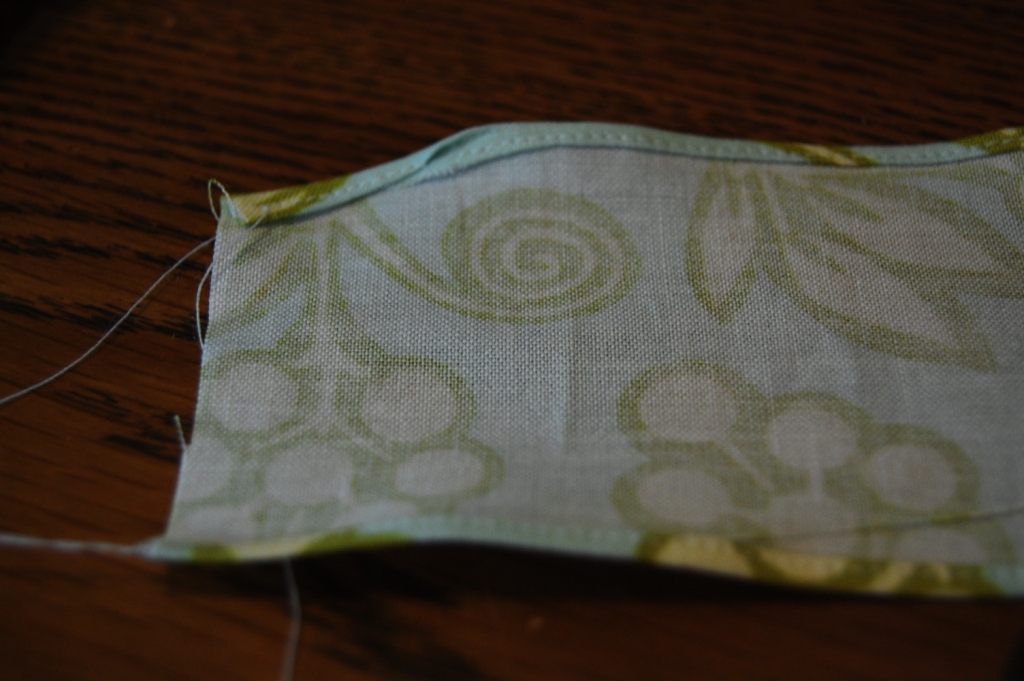
I had a rough start on this ruffle.  But once I got the whole thing put together it wasn’t very noticeable.  So relax and have fun with it.
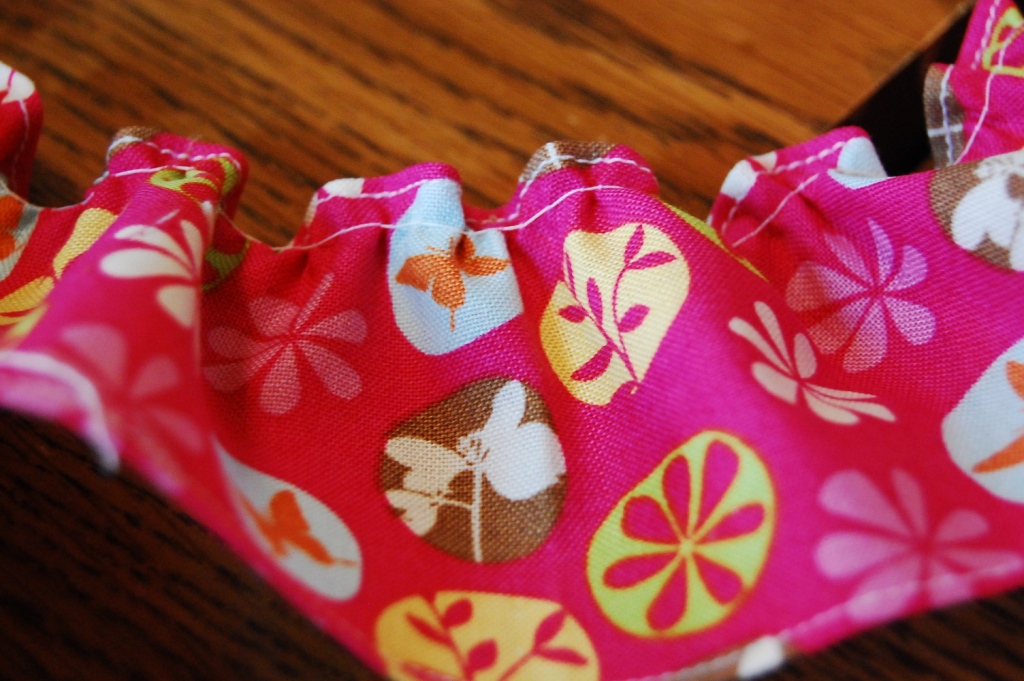
9.  Now that your ruffles are hemmed.  Divide them into fourths with pins, then run a single gathering stitch around the top.  (Hint, if you tighten your top needle tension as tight as it will go, the ruffles will gather themselves as you run the basting stitch. You will see be able to adjust them to fit as you go.)
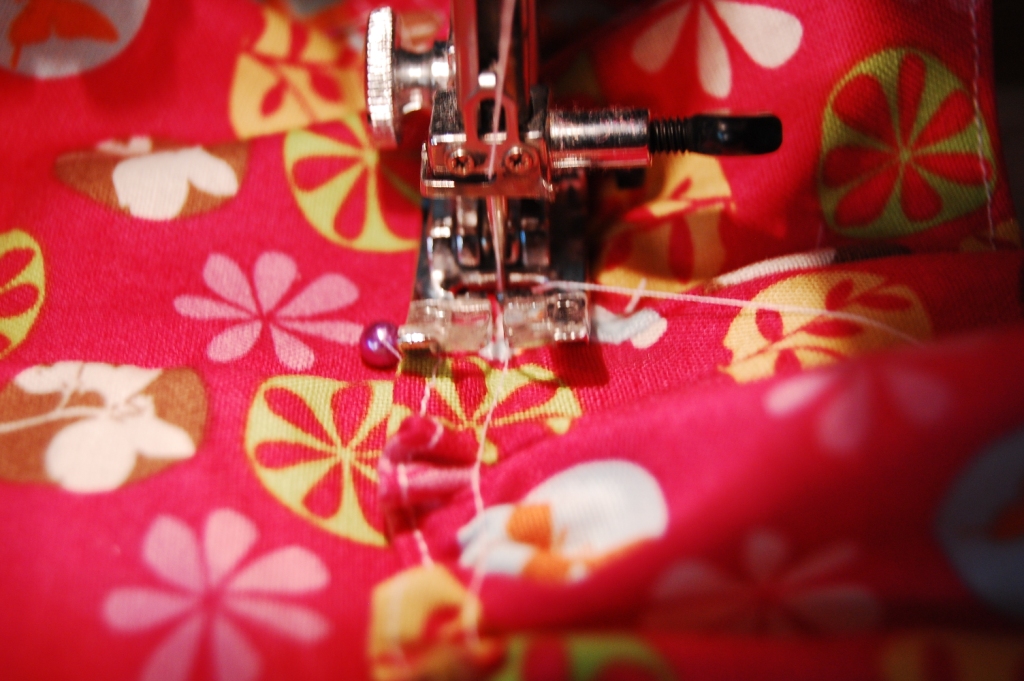
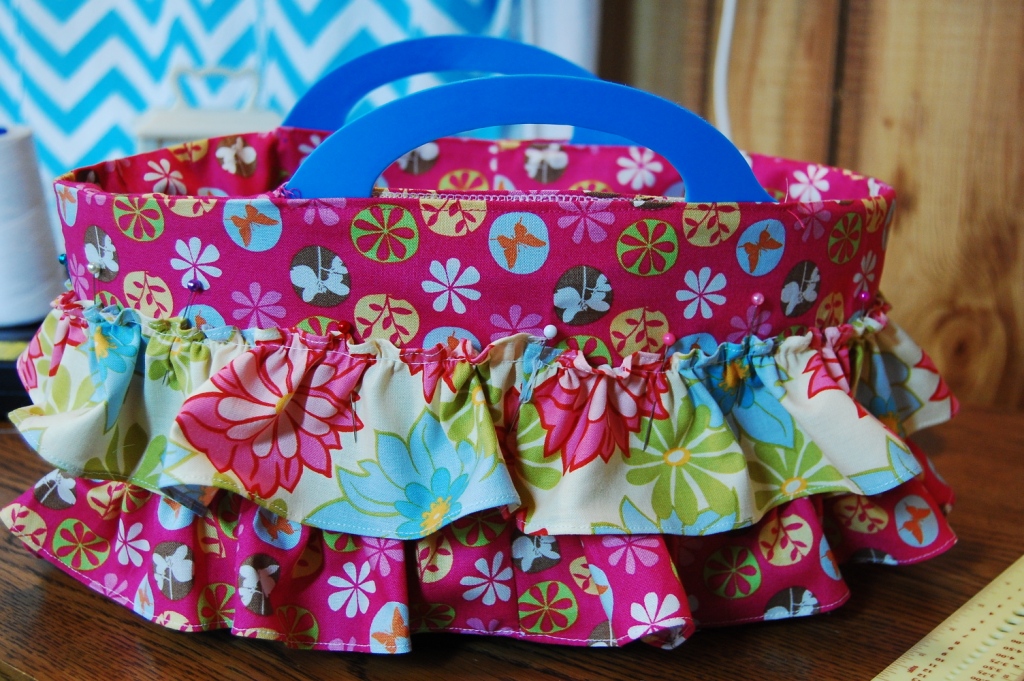
10.  Divide your basket liner in fourths too and pin your ruffle in place, matching the fourth markings and drawing up the gathers to fit. Pin the ruffle so the bottom edge of it lines up with the bottom edge of the basket liner. This was easy to do when the liner was actually on the basket.  Then top stitch the ruffle in place stitching right over your gathering stitches.
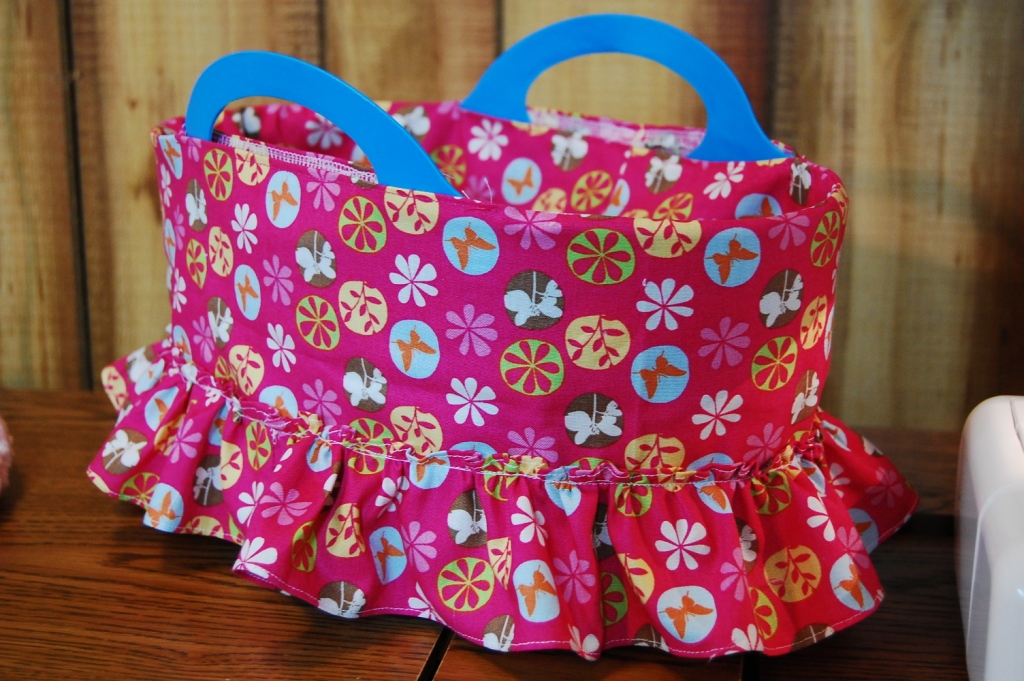
This is pretty adorable just like this. So if you want to, you can stop here.  Or add the next two layers of ruffles the same way, overlapping each row just a bit and lining up the top row with the seam line on the basket.
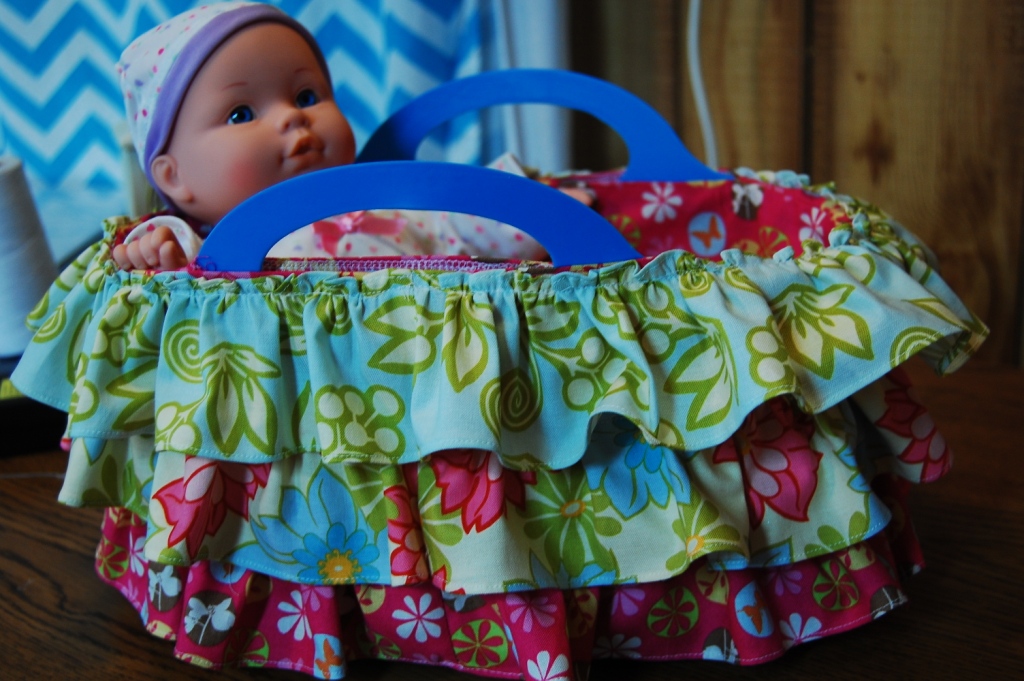
Almost Done!

12.  Use Fray Check or a candle to seal the ends of your ribbon.  Then pin in place centered on each side of the gap left for the handles.  Stitch in place along the same stitching line you hemmed with.
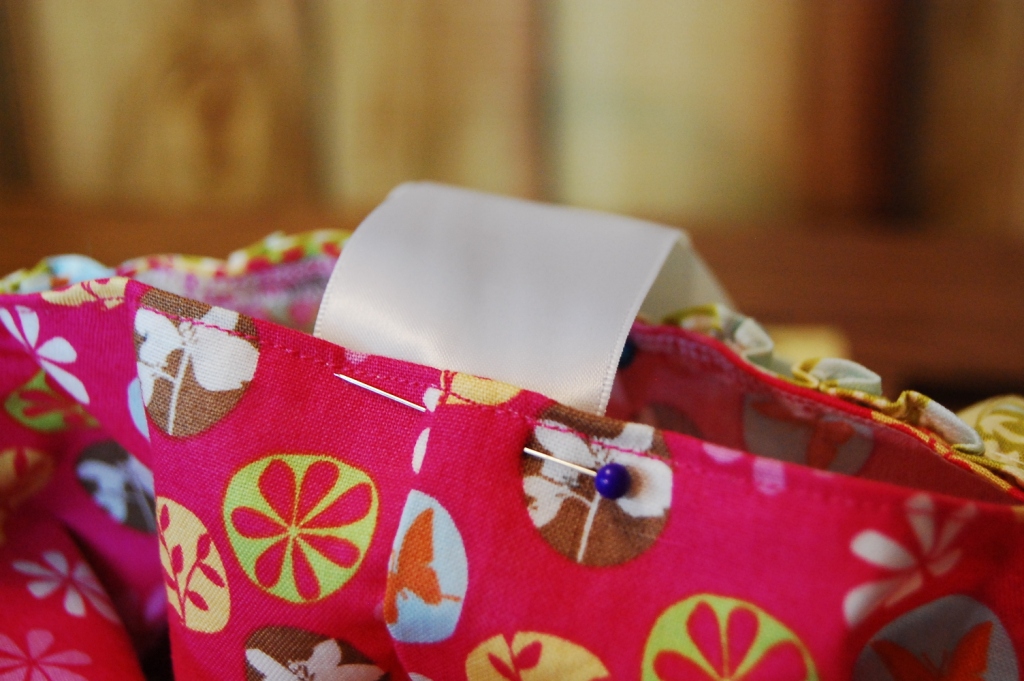
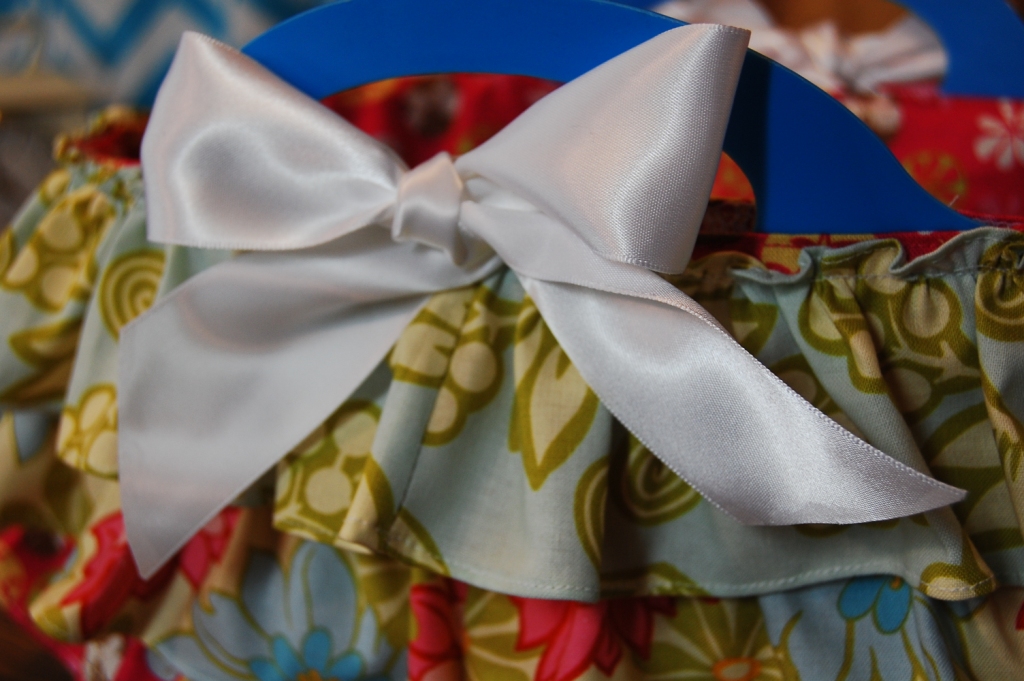
13.  Tie your bows, insert the little mattress and the dolly. Stay tuned tomorrow for the matching quilt tutorial.  You’ll be amazed how fast you can piece, quilt and finish it.  Great for last minute gifts.
 

Post contains affiliate links.

Bustled Table Cover

My old buffet was the wrong style for my new dining room.  But with so many projects pulling at our budget, buying a new one didn’t even tempt me.  I found a few yards of white fabric in my stash (That I have been saving for 10 years! gasp.  And that my mother bought many, many years before that.)

I made a simple table cover for the buffet by hemming the fabric into a huge rectangle. (That way I can still use the fabric to sew a gorgeous blouse one day–like I have been meaning to do for 10 years, grin.) The only problem was that the corners pooled on the floor–a tripping hazard and not very attractive either.

Maybe it was the white fabric that inspired me, but I instantly thought of a wedding dress bustle and applied the principle here. Here’s what I did:

1.  Fold the corner in half and find the center of the length.

2.  Bring the center up until the corner end just graces the floor.

4.  Cue the dancing baby while you tack the bustle in place with a needle and thread. (Which is totally removable so you can still make a blouse.)

5.  Accessorize and admire :).

Here’s a side by side before and after shot:

I can’t decide which part of this makeover is the best.  That it only took 20 minutes or that it was free.  Okay, now that I say that out loud–the free part is the best :).


Christmas in My Living Room and the Sky

image

Did I ever show you my when my furniture came in and then my new rug? How about my garage sale curtain brackets, finials from the scrapped Queen Anne Setee upholstery projecy, and bargain plain curtain rods from Lowes?  I finally put them all together and hung my Target curtains and love it!

Of course, I still haven’t painted, or done moldings, or found any art for the walls. But with a tree like that to look at, I can wait :).

image

Last week we went to Christmas in the sky. It’s a fireworks display choreographed to Christmas carols on a local radio station. We parked nearby and turned up the car speakers. Lots of cousins were there and everyone danced and laughed. But not many children actually looked in the sky.

image

Darren laughed that we could have just put a boom box in the yard and had some cousins over and had the same good time without the long drive. And he was right, but somehow stuff like that never seems to happen without scheduling it in like the city did.

image

And I would have missed Dub pretending to create the colorful explosions with his arms and fists. That still makes me giggle. But very quietly in case my boy with the fragile ego might hear.

image

OOh, did I tell you about my new love of the Dollar Tree? Oh please don’t tell me it’s all from China. La, la, la. I can’t hear you. Everything in this display was off the dollar tree shelves and I love it. Unfortunately Grant does too. He can’t keep his pudgy hands off it.

I also finished my dining room floor. The shiny poly totally makes the streaky finish okay with me. I will move in my
dining room table tonight. But will wait a bit before the big reveal.  I have a bunch of DIY to do still and it’s going to take some time.

So I’ll leave you now with one final shot of my tree. Ah. Isn’t she lovely?

image