3 Budget Saving Fixes

Oh, Girls!  I am in such a good place right now.  My adrenals are almost completely recovered. I have energy and life doesn’t feel overwhelming.  I know the blog has been quiet, but it’s not because things aren’t well here.  I’ve been enjoying my family and working on things behind the scenes at Grocery Shrink Plus and organizing our home.  I will be posting pretty randomly as I finish up some big projects.  If you are subscribed to the blog (form on the right), you’ll get an email when a new post is up.

I’ve made a few updates to the kitchen.  We are back at Baby Step #2, building our emergency fund, after our foundation repair last year drained it.  I’m content with letting the kitchen be unfinished for as long as it takes to get that emergency fund done.  It helps me to be patient now that the space is functional for cooking and family meals.

As I finished up a little project in the kitchen today, I noticed several things we did as temporary fixes to help us rebuild our savings.  I thought it might be fun to describe all of those in a video and show you our space.

Compared to where we started, this kitchen is a dream!  Oh my!  It’s so big and so much counter space.  I really love it.  Here are a couple of  before pictures:

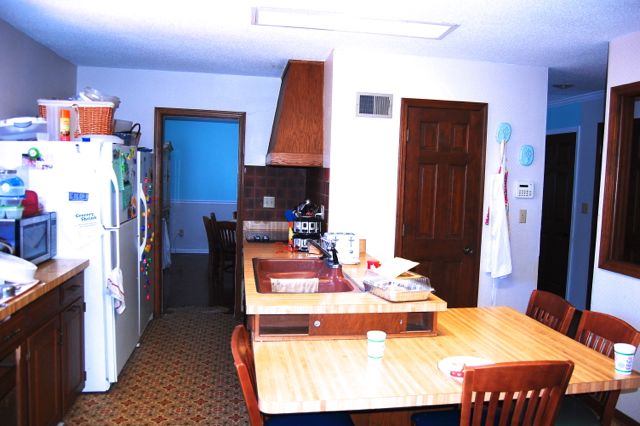
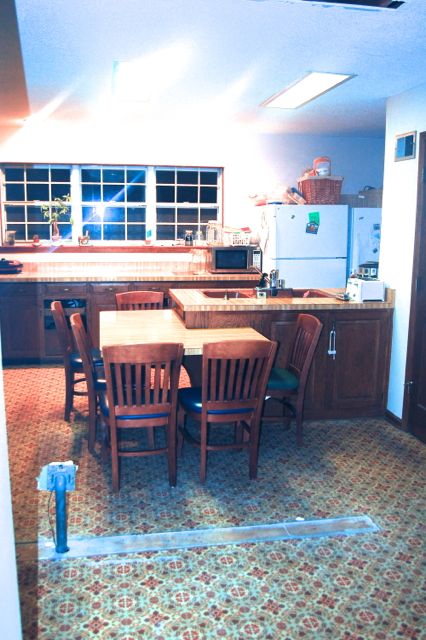
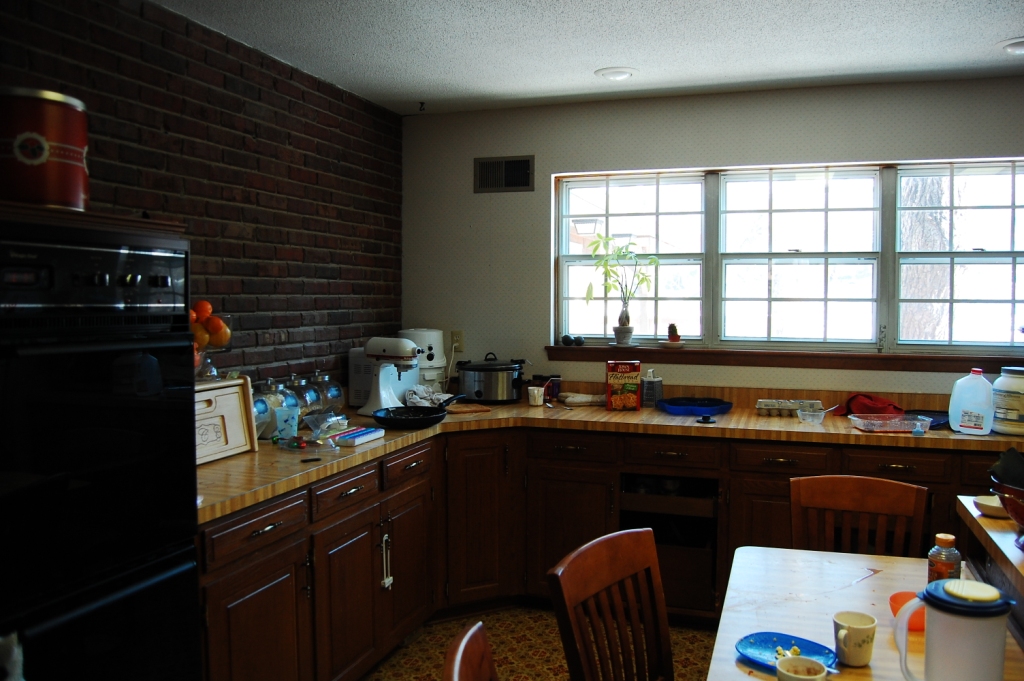
Here it is after gutting the area, right before the cabinets and floor went in.  (We were having a party anyway!)

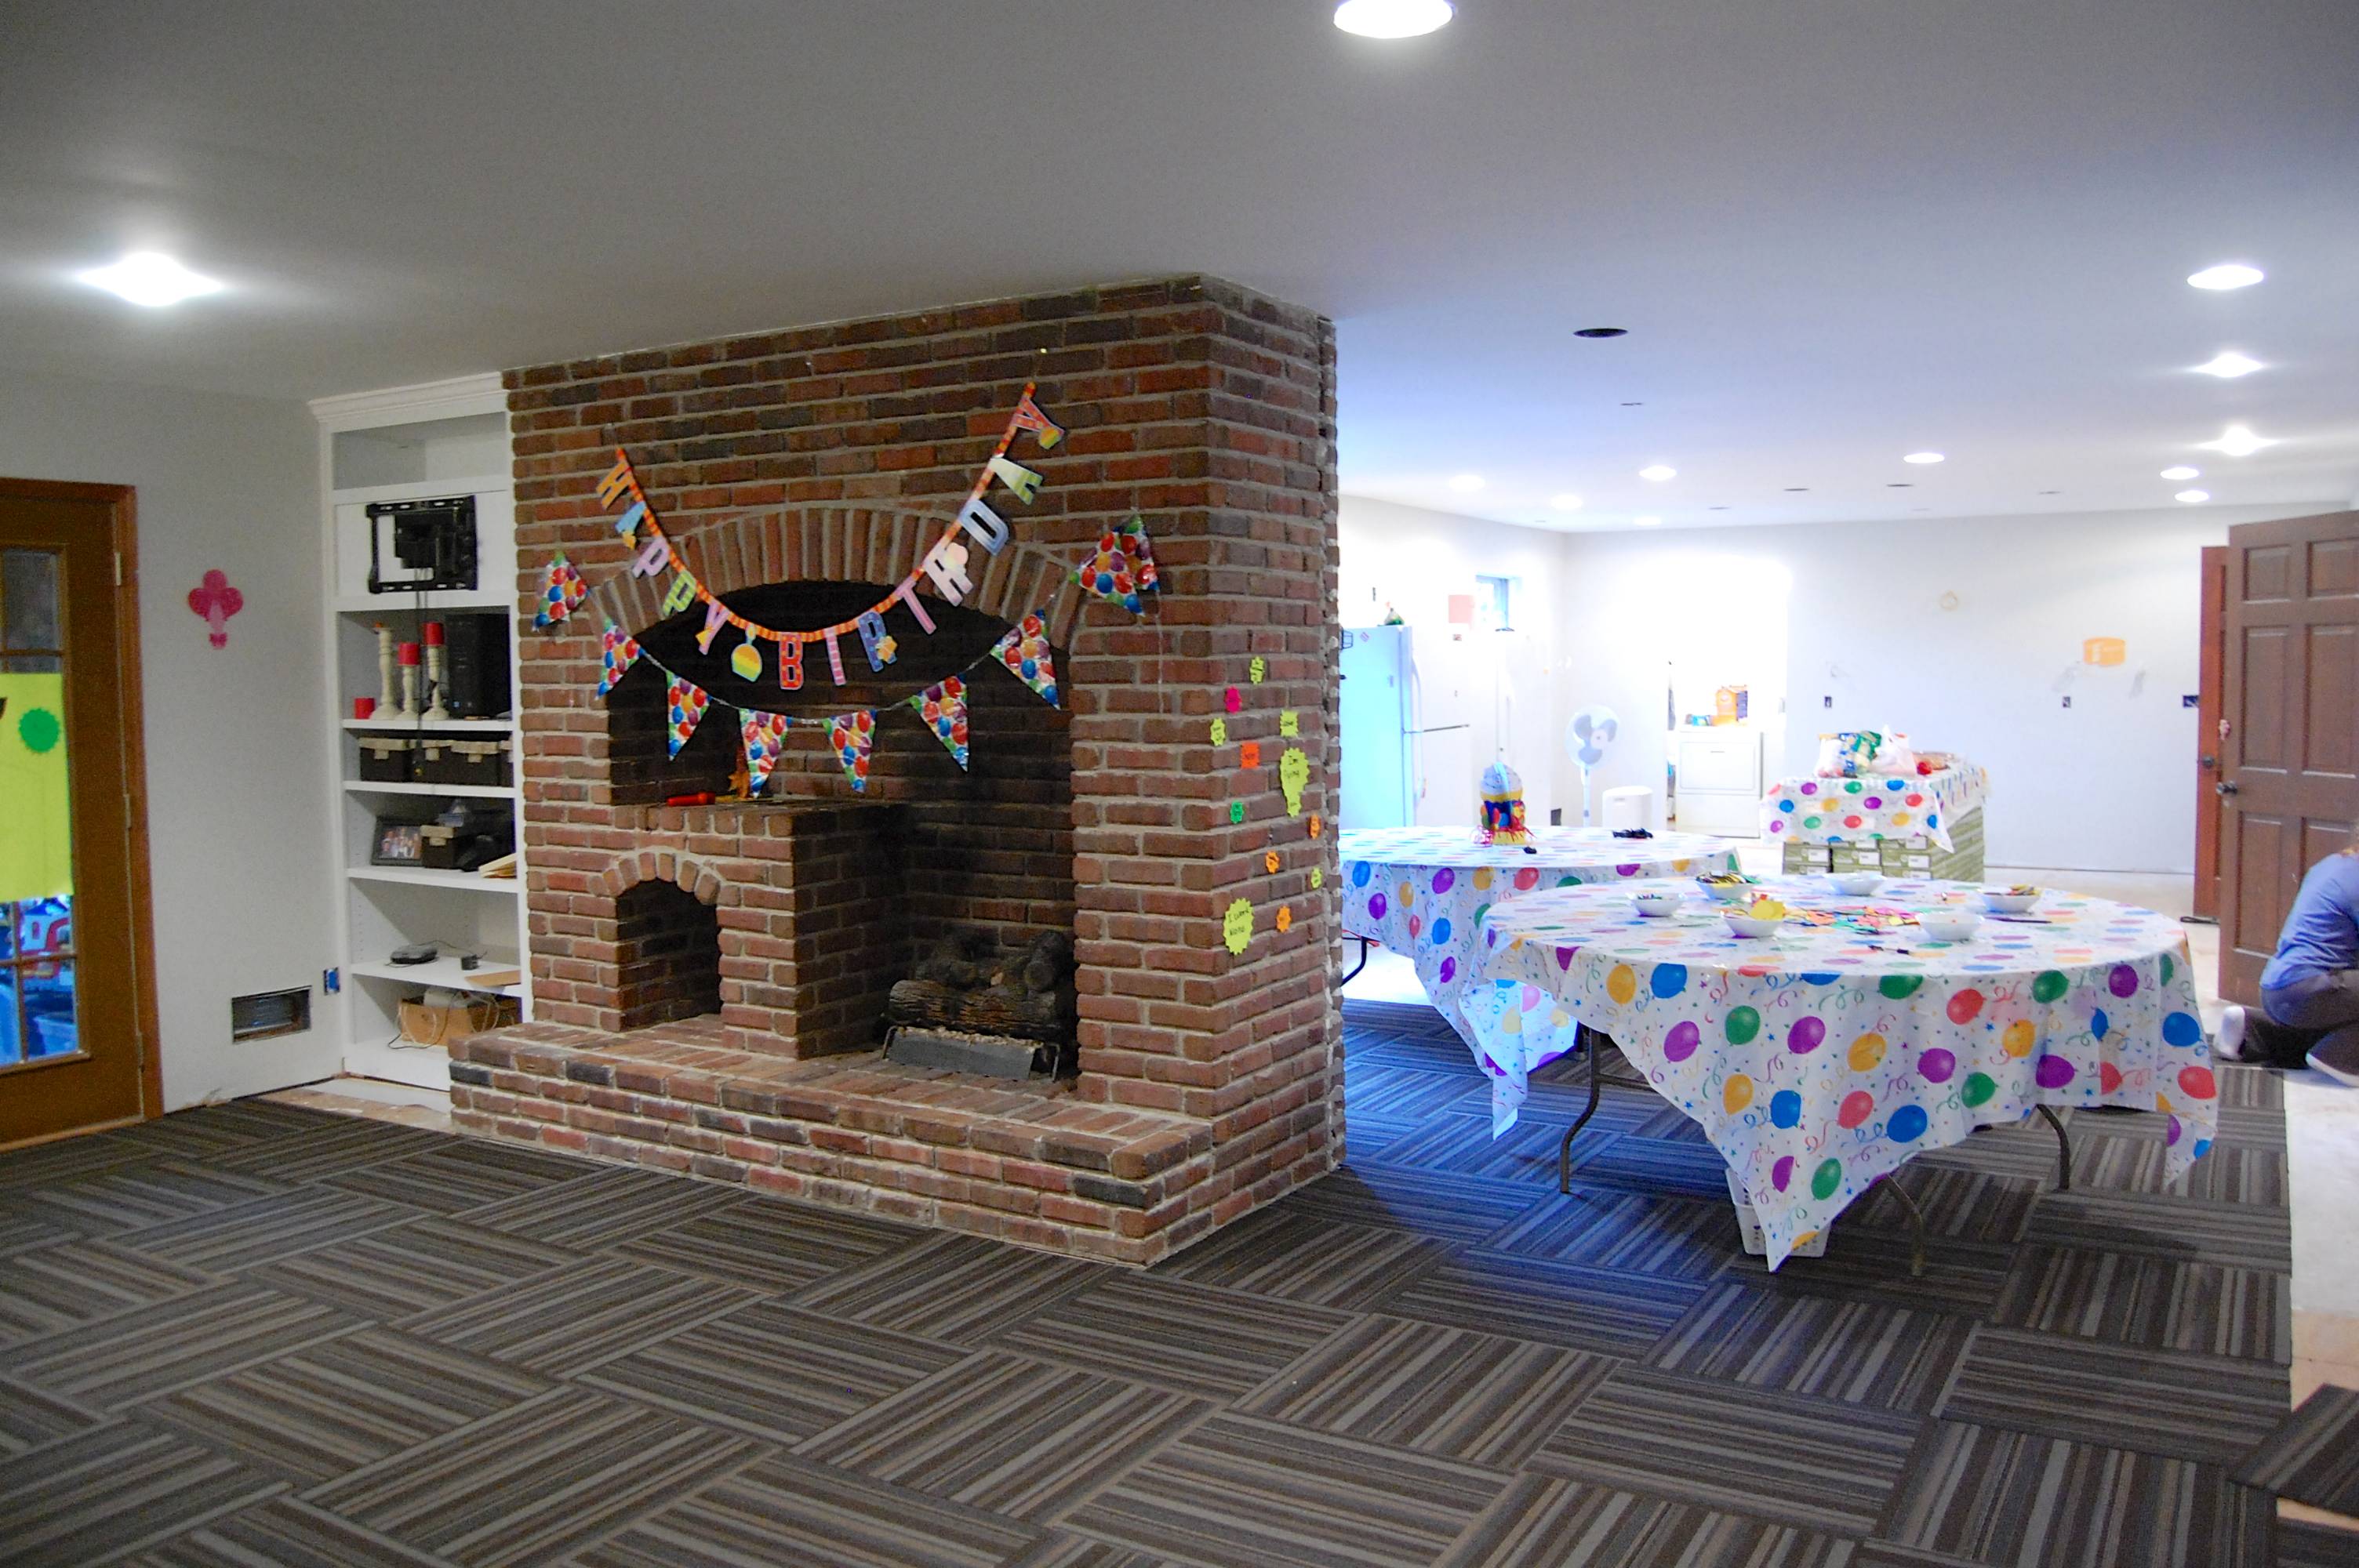
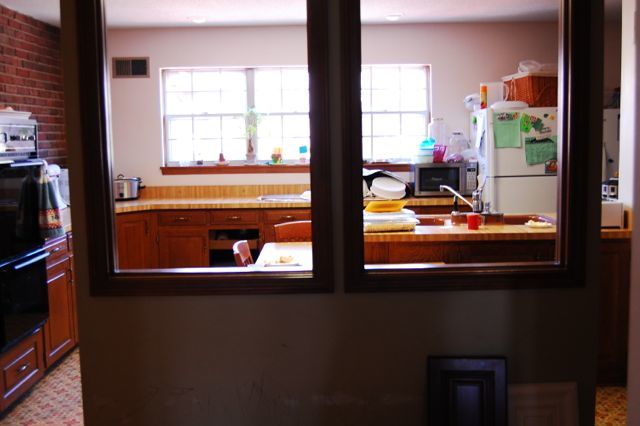
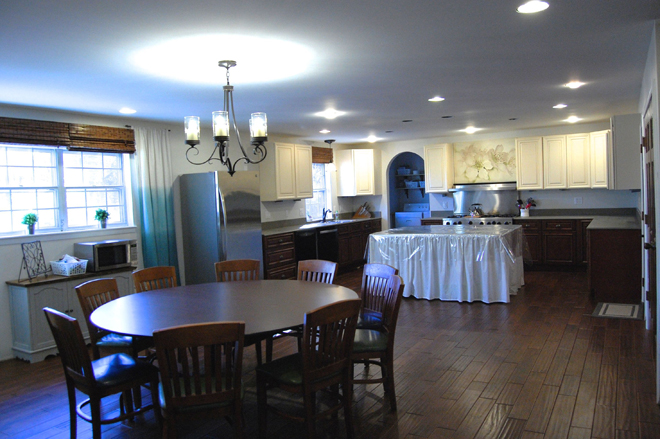
And here’s the most current view, taken standing beside the fireplace.:

It really is the same space and the same angle. We took down a few walls so it can be hard to realize it’s the same view.

I know the plastic cover on the island is “Grandma Chic,” but I don’t mind.   I have 6 kids that are good at rubbing mustard and chocolate into pretty things, and then feeling terrible about it, so the vinyl makes us both happy.

After I finished the video, I thought of a few things I didn’t put in there, like our big round folding table that we use for our meals. It was left in the basement when we bought the house.  We were excited to find it because it seats 10–which means a couple of kids can have a friend over and we can still sit together. In our previous house the table only held 6 and we took turns standing during meals.  I’m wondering if I could add some kind of skirt under the table similar to what I did to the island, except looking like a pedestal?  It would hide the folding legs and make it look more like permanent furniture while still letting us get our legs under comfortably.

The chairs around our round table were salvaged from a restaurant that closed.  We got 15 chairs for $100 a year or so ago.  They are pretty ugly right now and covered in food bits, but the padded seats are comfy and I like the craftsman style.  A little scrubbing, paint and upholstery will make them amazing.  It’s on my project list, probably over the summer.

Have you ever made a temporary fix while you saved up for something nicer?  Tell me about it in the comments.

Hold the Phone!!!

GroceryShrink Logo 1014

…literally!  Our menu service just added smart phone enabled shopping lists with the free Out of Milk app.  (No smart phone, no worries.  The pdf shopping lists aren’t going anywhere.)

out of milk

This means no more printing shopping lists.  It works on both iphone and android devices.  Family phones can sync up and share lists and changes. (So your spouse can shop from the list too.)
  • Upload the appropriate amounts for the size of your family (You’ll be able to choose from 2, 4, 8, or 12 serving sizes.)
  • Edit or delete list items
  • Add or edit prices to see what your shopping trip will cost
  • Cross off items as you shop with one touch
  • Items are uploaded by where you will find them in the store, but you can also drag them around to change the order
  • Lists available for both the everything and dinner only plans
  • Free for all current subscribers

This service starts Friday!  

I’m just a little excited.

Here’s a video tutorial on how to use it:

If you are a current menu subscriber, ignore the message below:

This Friday at midnight the menu subscription prices are going to double.
If you subscribe now you will lock in at the current low rate.  You have 3 days left to save.

Our guarantee: 

Once you enroll, your price will never go up as long as you are a subscriber.

How to Make Homemade Fortified Almond Milk

I turned my nose up at vegan milks for years.  Real milk has protein and calcium, it’s affordable, and tastes great.  Why mess with a good thing?

Then I met up with the symptoms of lactose intolerance.  Sometimes I could eat dairy products without consequence and sometimes I would be doubled over in pain.  It was like a dietary game of Mumblety peg.

Almond milk sparked my interest when I found out it only has 30 calories per cup, is low in carbs and tastes pretty good.  It boasts a good serving of calcium, but only because it is added artificially.  This is not a drink for babies or kids unless the diet has other rich sources of fats or protein.

Almond milk makes good smoothies, custards, cream soups, cream gravy, and fettuccini sauce.  It costs about $3 for a half gallon, or $6 a gallon.  The cost is about 50% more than regular milk.  My children do not show signs of lactose intolerance or milk allergy so I do not feed them almond milk.

It’s not hard to make homemade almond milk and homemade costs quite a bit less than store bought–PLUS Almond flour is a by-product of almond milk production.  That’s good news for low carb and gluten free bakers everywhere.

At Costco, almonds are $15 for 3 pounds.  (Or almonds that haven’t been treated with fungicide are available at Trader Joes for $6 a lb.) It takes 2 oz of almonds to make a half gallon of milk.  So one 3 lb bag of almonds makes 24 half gallons (plus almond flour) at $.62 each.  If you want fortified almond milk that has the same nutrition as milk, you will want to add 8 calcium, magnesium, vitamin d3 tablets.

Adding vitamins adds to the cost slightly.  These tablets* are $.07 each and I would need 8 of them to create a homemade nutritional profile comparable to store bought almond milk.  Homemade fortified almond milk is $1.18 per half gallon vs $3.28 for store bought for a savings of $2.10.

Here’s how to make your own almond milk.

Measure 1/4 cup of almonds into a class cup and cover with twice as much water. 1/4 cup of almonds makes 1 quart of milk.  1/2 cup makes half a gallon–the same as in the typical grocery store carton.  Let stand for 8 hours or overnight.


After 8 hours, drain your almonds, then place in a blender.  Add a generous pinch of sea salt and any supplements or flavors (like vanilla and honey or stevia) you are adding.  I used 4 calcium tablets so each cup of milk would have 30% RDA of calcium, plus magnesium and vitamin D3.

Cover with just enough fresh water to keep the blades running smoothly.  Too much water will allow the almonds to get away from the blades and not grind as fine.

Blend for a couple of minutes until the nuts are all ground up into tiny bits.

Strain though a nut bag (I use a huge straining bag that I purchased for Kombucha.)  Amazon* has nut bags also, or you could use cheese cloth, a clean flour sack towel, or even a coffee filter.  They all work, but the nut bag is fastest and easiest.  At the end, give the mass of ground nuts a good squeeze to get as much water out as possible.

Pour the strained milk into a canning jar.

Pour in enough fresh water to make a quart, or half gallon–whatever you used enough nuts for.

Voila!

Now scrape the nut meal out of your straining bag (or whatever you used.)  Spread it onto a silicone mat, wax paper or parchment.  Let it dry thoroughly.  (In the dry weather, mine dries overnight.)  If it’s humid, you can spread it on a cookie sheet and bake at 200 degrees for 2 hours.  Then turn off the oven and let it stay in there for a few hours more. Transfer the dry stuff back to a clean dry blender cup and pulverize it super fine.  Use it as you would any almond flour.

Q.  How long does the almond milk last?

A.  If you are using raw almonds it will go “sour” in 3-4 days.  Costco’s almonds are  blanched and the milk lasts longer.  I’ve gone a week and it was still fine.  It’s never lasted longer than that, so I can’t say when it sours.

Q.  Shouldn’t you remove the skins from the almonds first?

A.  Who’s got time for that?  The milk tastes great either way.  With the skins on the almonds, the almond flour will have flecks of color in it, compared to commercial almond flour which is just white.  I haven’t noticed a difference in performance between the two flours.  And the almond milk comes out white either way.

Q.  I don’t like almonds.  Can I do this with other nuts?

A.  Yes.  Cashews and sunflower seeds work especially well.  Let me know if you try it :).

More questions?  Concerns?  Put them below.  Have you ever made your own almond milk?

* P.S. The Amazon links are for your benefit only and are not affiliate links.  As a Missouri resident I am not eligible to be an Amazon Affiliate.

Allergy Free Creamy Wild Rice Chicken Soup

Creamy Wild Rice Chicken Soup

One of my strategies for sticking to my elimination diet is making a big pot of something delicious and eating it for every meal until it’s gone.  Then making something new.  My family doesn’t touch it (except to taste it’s amazingness), and I cook them a traditional yummy dish.  It sure beats cooking 2 different meals every time and we can still sit down together for a family meal.

DSC_3371

My first big delicious pot was this Creamy Wild Rice Chicken Soup.  I splurged on fresh mushrooms and it was worth the extra $1 over buying canned.  A little treat like fresh mushrooms made it feel like a privilege to eat it instead of a sacrifice. It really was delicious.  I sprinkled some crushed Van’s gluten free crackers over the top.  Soooo good.

DSC_3373

I always feel funny typing the words “allergy free,” because nothing is truly allergy free.  I have a friend who’s allergic to chicken….and another who’s allergic to almonds and coconuts. But really, you can sub for almost anything in here.  Plain rice milk will work fine, and another oil can be used instead of coconut oil.  Flaked white fish would work instead of chicken. Own this recipe and make it fit your needs.

DSC_3367

This is also Trim Healthy Mama friendly under E meals.  And Fit Yummy Mummy friendly too.  It’s gluten free/dairy free.  But still super delicious.

Creamy Wild Rice Chicken Soup

1 lb fresh mushrooms

1 medium onion, chopped

1 clove of garlic, minced

1 Tbs Coconut Oil

1 cup of wild rice (Plain, not the mix kind.  I found mine in the bulk food section of our health food store.)

3 medium carrots, peeled and sliced

2 stalks of celery, diced

1 lb boneless skinless chicken breasts

4 cups water

2 tsp salt

1/8 tsp black pepper

1/2 tsp each thyme and rosemary

2 cups almond milk

Melt the coconut oil in a skillet and sauté onion, garlic, celery and mushrooms until fragrant and tender. Stir in wild rice and cook a few minutes longer, until toasted.  Transfer everything to a stock pot and add remaining ingredients.  Bring to a boil, then reduce heat to a simmer.  Cover and simmer for 30-45 minutes or until rice is done.  Shred chicken with two forks (or pull out of the pan and chop with a knife.) Stir in almond milk and chicken and heat just until warmed through.