Easy No Bake Eggnog Pie 2-Ways

Easy Eggnog Pie 2 Ways---delicious and creamy with weight loss versions too

This light creamy pie is perfect for last minute desserts.  It’s fancy enough for company or basket dinners or even a neighbor Christmas gift, but so fast even a stressed out Mama can whip it up.  Graham cracker pie crusts are easy to make but for $.69 each at Aldi, I just buy them and keep several on hand at all times.

The first version uses instant pudding mix and sugar free works just fine.  If you want to replace the Eggnog with a non-dairy version, you’ll need to add additional thickener like 1/2 tsp of Xanthan gum or Glucomannan powder.  There’s something about the dairy milk protein that is essential to thickening up instant pudding mix properly.

Eggnog Pudding Pie

1 Graham Cracker Crust

1 box, Instant Vanilla Pudding

1 cup Milk

1 cup Prepared Eggnog

4 oz Whipped topping

Beat the milk, eggnog and pudding mix together.  Pour into the crust.  Let chill for at least 30 minutes then top with whipped topping.  Alternately the whipped topping can be folded into the pudding mixture and spread into the crust.  Sprinkle with a little nutmeg.


This second pie is a no-bake cheesecake that is easy to make fitness friendly.  For the most diet friendly, skip the crust and use a homemade sugar free eggnog, recipe coming soon.

Eggnog No-Bake Cheesecake Pie

1 Graham Cracker Crust

8 oz Neufchatel Cream Cheese

8 oz Plain Greek Yogurt

1/3 cup Sugar or Erythritol

1 cup Prepared Eggnog (Regular or Dairy Free)

1/4 cup water

1 Tbs or 1 Packet Unflavored Gelatin

4 oz Whipped Topping

Sprinkle gelatin over 1/4 cup water in a medium sized microwaveable bowl.  Let stand for 1 minute or until gelatin is dissolved.  (It will be clear and no longer yellow in color.)  Microwave for 1 minute or until melted, clear and smooth.  The gelatin will bloom and spill over if your bowl is too small.

Meanwhile beat together cream cheese, yogurt, sweetener, and eggnog. Beat in gelatin mixture.  Pour into crust and chill until firm (about 3 hours.)  Spread with whipped topping.


So what’s your favorite easy Christmas dessert?  I’m looking to expand my repertoire!

The Busy Mom’s Dinner Survival Guide

I wrote this post 3 years ago, and as I re-read it over the weekend, everything was still true. The busy season of parenting can last a long time–eek! It’s a little easier now having a teenage driver (who paid cash for her own car,) plus more kids old enough to help with food prep, but I still rely on all of these tips to keep affordable food on our table.

Today we have basketball practice for 2 teams, 2 ballet classes, Boy Scouts, Handmaidens, Lamplighters, and Trailblazers, plus practice time for 2 violin and 4 piano students.  Those are just our after school activities.  We’ve talked about limiting kid activities more, but when it’s time to choose the thing to drop, we freeze up.  Each child only plays one sport at a time and the club activities are part of our church—it’s just when you multiply it times 6, it gets a little nutty.

I was fixing a quick supper tonight in between my taxi duties and thought how my meal standards were lower on nights like these. It’s not that what I was fixing wasn’t healthy, it was just simpler–not as many dishes.  I threw some turkey burgers on the indoor grill and serve them with Whole Wheat bagel thins and a condiment bar.  Done.

When I grew up, my mom had an elaborate meal almost every night with at least 3 veggie side dishes and often fresh baked muffins too.  We sat down together and had an electronic free dinner in the dining room with good conversation.  It was awesome! On our quieter nights, I try to make meals like my mom did, but today I’m giving myself grace for the busy.

When we order at a fast food restaurant, we never order drinks and rarely order fries.  It’s more affordable that way, and realistically there are enough calories in the sandwich without the extras.  So I decided that less side dishes at home was ok too–only better.  It costs less and has whole food ingredients.  win-win!

Here are the ways I survive on busy nights:

1.  Crock Pot it–When I remember, I put something in the crock the night before (then chill in the fridge to start in the morning) or in the morning.  Especially a dump and go soup like this one or this.

2.  Breakfast for dinner–pancakes, French toast, or bacon and eggs are fast to make and everyone likes them around here.

3. One pot it–Making an all in one meal in the skillet (like Skillet Lasagna, or Stir-Fry) is not only fast, but makes clean-up easier too. Just searching “one pot” on Pinterest brings up a whole bunch of yummy ideas.

4.  Cold Cuts–If I can’t do anything else, I can throw out a sandwich bar.

5.  Baked Potato Bar–Potatoes cook really well in the slow cooker.  You don’t even need foil.  Just scrub them and toss them in.  And if you forget, 8 minutes in the microwave will save dinner. Perfect toppings:  armed up chili (out of a can or leftovers); steamed broccoli cuts; cheese, bacon bits, green onion, sour cream, ranch dressing. Baked sweet potatoes work great too.

6.  Taco Bar–I put 2 lbs of ground meat (beef or turkey) in the slow cooker (still frozen!) and 4 tablespoons of taco seasoning.   Then cook on high for 3-4 hours or on low all day.  When it’s dinner time I just break up the meat with a potato masher and set out the condiments for taco night.

7.  Rotisserie Chicken:  Costco sells these for $5 each.  They say they are all 3 lbs, but that’s just the minimum weight.  I look around for the biggest ones and have scored a 4 pounder before. The price is the same.  We eat these with warmed up canned or frozen veggies and a tossed salad from the fridge.  I throw the leftovers in the fridge to boil up for soup on a calmer day.

8.  Get a child to cook.  I’m blessed to have older kids (Aged 14, 12, 11, 9, 7, and 3.)  Tuesday is kid’s cook night.  I just print off the Tuesday dinner recipe from the GSP menu plans and hand it to the kids.  Then I work nearby in case they have questions.

9.  Have a FULL pantry.  Cooking on the fly only works if you have plenty of ingredients on hand.  If you’ve been stocking your pantry with the Grocery Shrink method, you’ll be good to go.

How do YOU manage dinner when life gets a little too busy? I’d love to hear your tips.

8 EASY steps you can take right now to CUT your grocery bills! (I bet you’re NOT doing #1 or #5!)

In October, I did something crazy and drove by myself to Dallas, TX where I had rented an apartment for a week with a complete stranger, Nicole Rule.  She turned out to be my life line and kept me from getting lost in the big city.  Nicole is a Mom of 4 adorable kids and writes at Greatest Worth about living intentionally, starting with money.

Today she’s going to share with us how she keeps her grocery budget down.

Here’s Nicole:

Hello!

I’m so grateful to Angela for giving me the opportunity to share how my family has managed our budget – namely our grocery budget – over the past 8 years.

First, a little context (after all, back-story is always fun): we paid off $100,000 in debt in 26 months and learned to live with purpose and from our values in the process. Of course, during that time we had to figure out how to cut spending so that we could put more money towards what we wanted. And, what we wanted most at that time, was to pay off our debt!

Fast forward to today and our household consists of four (growing) children ranging in age from three to nine years old and two active adults. This translates into needing a LOT of groceries to satisfy everyone. We needed to find some good strategies to cut our grocery bill. And fast.

According to USDA Cost of Food Plans our family of six should be able to survive on a monthly budget of $853.60. This is their “thrifty” plan.

I calculated this by taking their value for “Family of 4 with children ages 2-3 & 4-5” and adding it to the value for “Individual Child 6-8” and “Individual Child “9-11.”

They also provide numbers for “low cost,” “moderate cost” and “liberal” plans.

Our personal “low cost” monthly budget, according to USDA charts would be: $1114.20

Since we’re going for shrinking our grocery bills, I’m not going to go over the moderate and liberal plans.

Read the USDA fine print and you’ll see that these plans include all the food needed to prepare ALL snacks and ALL meals at home. While it isn’t likely that you’ll never go out to eat, I will say that our family rarely did during the time of our debt payoff. We had a mission, and that mission was more important to us than a trip to Chick-Fil-A or sushi!

You’ll have to decide what works for you and your family. If you’re convinced that you can’t go without a restaurant trip here or there, make another line item in your budget separate from your “Groceries” line item. Awareness is key to tackling debt, and awareness is built on honesty.

Our actual budget comes closest to the “low cost” monthly suggestion put out by the USDA. Right now, we hover around $1100 per month for our family of six. And, especially these past few months when we’ve been actively trying to spend less (since I started a new business and have a much lower income), we’ve actually stuck to it!

Here are some tips to help you do the same!

  • What is your WHY?

First and foremost, what is your “why” for wanting to cut your grocery bills? Do you want to work less hours and stay home with your kids so you’re trying to figure out ways to cut your budget? Do you want to make space in your finances so you can take a dream vacation? Are you trying to put some money into college funds for your kids?

Figure out your why and the rest of this will feel like a fun game instead of a horrible chore.

1. Shop through your freezer and fridge first.

I like to take a look at what I currently have in the fridge and freezer BEFORE I make a menu.

According to the EPA, a typical family of four in the US wastes about $1600 annually on produce alone! That’s a significant cut in your grocery budget right there! If you could save $1600 on groceries that would give you $1600 more for debt reduction, college savings or for that dream vacation you’re drooling over.

Seriously, look in your fridge and base some meals off of produce and protein that’s ready to be used.

Also, I buy meat in bulk (often directly from a farmer which is cheaper for much higher quality) and then freeze it. This step is crucial to me cutting down on my monthly budget. If I check the freezer and base all of my meals off of meat that I have on hand, my costs are cut dramatically. I’m sure I save hundreds, maybe a thousand or two a year on this trick alone.
2. Create a menu. (Or purchase Angela’s monthly menu plans – it’s a steal and the work is done for you!)

This is the part that usually trips people up.

Make a menu? I don’t have time for that.

So, if time is an issue you have a couple of choices.

1) purchase Angela’s ready made menu plans. It’s a giant value for what you get and there are even options for specific diets, such as gluten free. OR,

2) after the kids are in bed, make a glass of tea and DON’T scroll through your Facebook feed, and DON’T turn on “This is Us” (OH how I love that show!).

Instead get settled in for menu creation! You’re going to use this next hour to search Pinterest, or your favorite cookbook for some inspiration on what you’d like to make that week!

The first step in menu creation, is to be realistic about your week. If your kids have after school activities on Tuesday and Thursday next week, don’t plan on making a roast chicken dinner. Find a couple crock pot meals that set you up for success and have dinner done for you by the time everyone gets home! Or, use your Instant Pot to get meals done in an hour. We’ll sometimes cook something the night before in our Instant Pot and just reheat when it comes to dinner time!

Next, look at that list of meat and produce that you already have in your fridge – because you did step 3, right?! Base a couple of meals off of what you have on hand.

  1. Create a grocery list based on that menu.

As you’re going through and creating a menu, write down the ingredients you’ll need for each meal to make it a success. (We’re trying to only go to the grocery store once per week. It’s crucial to stay out of that store to avoid impulse buying – here’s an article on how grocery stores are designed to get us all to impulse buy!)

Write down everything that’s in the recipe and then move on to the next recipe. Don’t worry about whether you have the stuff needed or not right now. There’s nothing worse than getting up and down twenty times while you’re trying to plan out a menu! We’ll address that in the next step!

Side note: We really only plan our dinners so strictly, but remember you’ve got kids’ lunches to pack (maybe even lunches for you and your partner) and breakfasts to make. Think if there’s anything specific that you want to make for those meals and add it to your grocery list.

We have a “staples” grocery list. Things that we always need on hand to make breakfast and lunch go smoothly. Take the time to create one of those lists and you’ll never be caught saying, “shoot, I forgot the milk!” again!

  1. Shop at home first.

This goes back to number two, but instead of just focusing on perishables, rummage through your shelves and cabinets and closets. Take your grocery list with you and check off what you find.

You know that feeling when you get home from the grocery and you’re putting stuff away and then you see it. Dang. You already had cottage cheese and mustard and milk and onions. You overspent and you’re likely to have some of this go bad. Double dang.

This step has revolutionized my shopping budget. I am one of those, “I’ll just get another jar so we’ll always have mayo on hand” kind of girls. It can be ridiculous when I put the third jar of mayo up on the shelf. Let’s do it differently together.
  1. ALDI or Lidl or Anything from this List

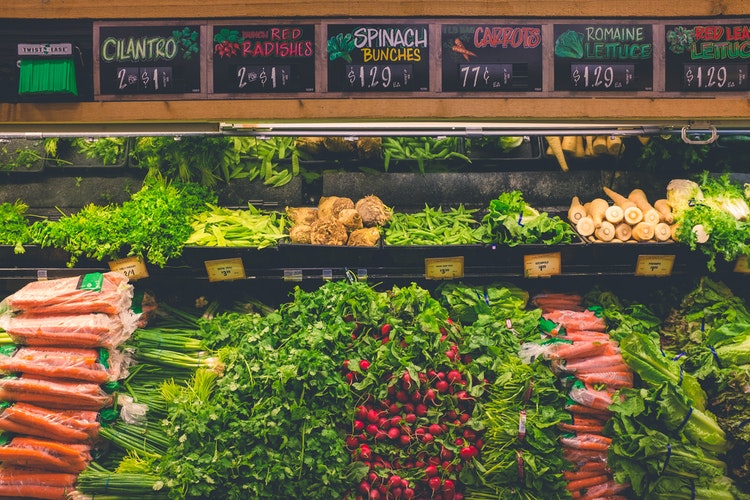
Find the store in your area that is offering groceries at a deep discount. It will be a time and money saver. I used to shop at FOUR different grocery stores just to get the best prices. I wasn’t taking into account my time and what that’s worth.

For us that store is ALDI. I’ve started going to ALDI first, and cutting about 1.5 hours off my grocery shopping time! The trick is being willing to go to more than one store. Often ALDI does not carry everything on my list. But, for the discounts, I’m willing to manage that!

Their selection of fresh produce has gotten so much bigger and better. And their organic selection is also growing. I found organic cage free eggs there last time I went. Awesome sauce.

So, I shop at ALDI first!

  1. Shop your local farmer’s market.

I also make a little separate list for those items that I know my farmers will have. This produce is SO much tastier, fresher and healthier than the store’s counterpart. It’s also equally, if not more affordable – when compared to Whole Foods, or, even our regional chain’s produce.

Even if ALDI has organic carrots available, but I know my farmer will have organic carrots – I buy them from the farmer. The food is SO. Much. Better. So much better, in fact, my children ask for the carrots regularly as a snack!

They do NOT do this with ALDI carrots.

Enough said.


  1. Have potluck dinner parties.

Especially if community is one of your family values. These dinners are a great way to build community while on a budget.

Since hosting dinner parties can get a bit pricy, potlucks are an easy way to share the burden. Especially if you’re trying to build this into your weekly grocery budget.

Invite friends over. Make a big soup – an ancient, economical way to feed a large group of people. Have your friends bring salad and bread. Dinner is served and you’re not out double your dinner budget!

That’s it! Those are my tips for how to cut your grocery bill right now. I know some may feel a bit time consuming (creating a menu, anyone?) and I know that it never seems easy to start something new. But, you have a choice.

You can see this moment in your life, with this calling to change your relationship to money, as an opportunity to find creative, inspiring new strategies, or as a burden and chore. It’s that simple – a choice.  

If you haven’t done so already, spend some time exploring and working through my “Defining Your Values Workbook.” What is important in your life? What action steps are going to get you closer to your long term goals?

It may seem like I’m being dramatic. How can defining my values and goals lead me to creating a menu? And how will all of this get me moving towards my long term goals?

I’m living proof that it can.

I believe it’s all the little things we do throughout the day that make up our lives. And those little things, if strategic and moving us towards what we want more of in life, will lead to a more authentic and fulfilling life.

I wanted to pay off my debt so that I could have freedom to follow creativity and inspiration. So that I could be home with my kids during their little people stage.

So I could have the freedom to choose the life I wanted, not resent the life I was given!

Defining my “Why,” creating a weekly menu, cutting my grocery spending have ALL played into my realization of those goals.

What is your big picture reason for cutting your grocery bills?

Write it down, and put it on your fridge. Keep this dream active and alive so you can feel it in your bones. Keep that bigger picture in your mind so that when you’re tempted to throw the menu out the window because you just don’t have time this week, you’ll remember. And you’ll MAKE time to create the menu one. More. Time.

Because that’s all we can do friends. Take it one day at a time.

Thanks for letting me share with you all today. If you’re interested in “Defining Your Values” or learning more about me and my mission to guide women to live intentionally, starting with their finances you can visit me at greatestworth.com! Come by and say hi. I can’t wait to meet you!
Also, click here if you’re interested in my FREE Budgeting Tips Printable that has even more tips on how we’ve saved thousands on groceries over the past 8 years!


 

The Best Chili for a Crowd

It’s the time of year that we have a constant flow of guests in our home, and since our household alone is 8 mouths to feed, adding another family makes quite a crowd!  A few weeks ago I was having a garage sale, which if you’ve done before, you know it’s time consuming.  In my zeal for hospitality and in the tradition of believing I am capable of more than I am, I also invited a family over for dinner.

I had two choices: 1.  Call them up and reschedule and admit that I am a mere human.  or 2.  Run around like a crazy person and make our home present like we are NOT hoarders AND fix food worthy of guests while I’m sitting outside running a garage sale.

I, of course, chose 2.

To do that, I needed help.  My mom came to help watch the sale, which thankfully she loves to do.  And I filled the bread machine with pumpkin cinnamon roll dough.  While that was mixing, I browned the beef and onion, and threw the rest of the ingredients for 2 gallons of chili in a couple of crock pots.  Then ran around picking up the clutter so when the kids walked in the door after school I could arm them with dust mops, brooms, and microfiber cloths.   There were several hours in between those few chores and the kids coming home that I could help with the sale.

While the kids were cleaning, I rolled out the cinnamon roll dough and prepped them for the 2nd rise.  By the time our guests arrived, we looked like we lived in a reasonable state of cleanliness and you could smell good things coming from the kitchen..

I was feeling a little bit like a domestic Wonder Woman, when one of our guests gave my chili the side-eye. It was a horrible moment, because the only other things on the table before the cinnamon rolls came out, were shredded cheese, fancy applesauce (out of a jar), various crackers and corn chips.   Showing his good breeding, he cautiously took a bite, then devoured the whole bowl full.  After dinner, he admitted it was the first bowl of chili he liked.  To be honest, It was the best bowl of chili I’d ever eaten myself.

I figured that made it worthy of sharing with you guys.  I didn’t work from a recipe and just threw together some things I had in my pantry, which became a happy accidental success story.  Thankfully I wrote it down as I went, just in case it turned out well.  If you are in charge of chili for a fundraiser dinner, please consider this one.  There aren’t any tomato chunks or weird ingredients like pork breakfast sausage. (Yes, I’ve seen that done!)

The Best Chili for a Crowd

4 lbs, lean ground beef

2 onions, finely chopped

2 cloves garlic, minced

6 cans, 15 oz chili beans, undrained

2 cans, 24 oz crushed tomatoes, undrained

1 quart beef broth

1/2 cup Grocery Shrink Chili Mix

Brown the ground beef with onions and garlic.  Then divide between two 5 quart crock pots.   Add exactly half of the remaining ingredients to each pot and cook on low for 6-8 hours.   The long slow cook allows the flavors to blend with fabulous results.   Alternatively this can be made in one of the giant roasters.  It halves and doubles well.

I bought all of my ingredients from Aldi, except for the ground beef, which my father-in-law raises himself.


How to Stop an Impulse Buy

I don’t know about you, but I struggle with sale anxiety.  I’ll see a sale advertisement that everyone seems to be buying and think I should by it.  The crowd can’t be wrong…right? Or even worse, I get wrapped up in a new hobby or craft project and buy all the things associated with it, then realize I don’t have the time for it after all.

Just recently I saw my niece hula hoop.  She was really good and it looked so easy. I remarked how tiny her waist was and her mom said it wasn’t that tiny a few months ago. She said they watched her waist whittle away the more she hooped. Then I thought I really needed a hula hoop.  I watched “how to hoop” youtube videos for beginners. I researched all about the hoops and what kind would be best.  I was never successful in the past with a hoop and found out it was because the hoop was too small and light weight. I started to believe that if I bought the $70 hoop, I could really do it.  I could hula hoop while watching my favorite show and in a few months my waist would be tiny like my 13 year old niece’s.

I didn’t buy the hoop.  Instead I thought about the Gazelle walking machine that I sold at a $200 loss at my garage sale, the aerobic step, the yoga bricks, the Home TRX system….you see where this is going.  I still put a moderately priced hoop on my Christmas list, but this is something I need to think about more.  Will I actually do it?  Or is it a waste of money?

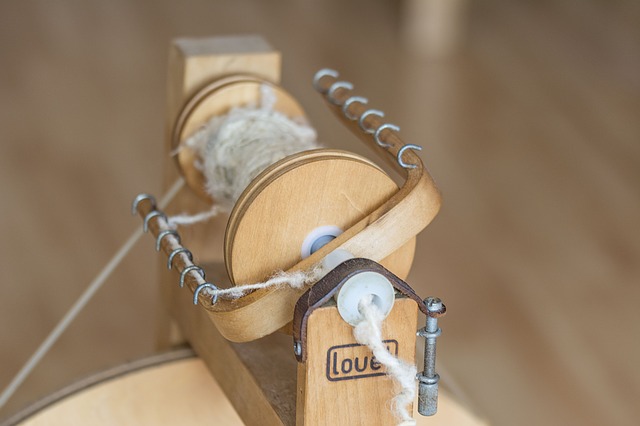
I have a spinning wheel, wool carders, drop spindles, a whole bin of roving, and even owned an angora rabbit at one time so I could harvest my own wool.  That was all because I thought hand spinning, then knitting a set of angora ear warmers would make watching peewee soccer games in cool weather more comfortable.  I think I saw it on a blog post featured on pinterest one time, and went totally overboard. I can’t tell you the last time I spinned something and my handmade stuff wasn’t as nice to work with as yarn from the store.

It’s no better when an ad pops up on facebook and shows all the cool gadgets or cute outfits, or special apps that let you buy all the things at a deep discount.  It’s even worse when a blogger I love will show off her new thing (especially home decor thing.) Those are the items I want to buy the most. I will follow the links, read the reviews, look for the best prices and then quickly stop myself from buying a bunch more stuff to clutter my life and stock next year’s garage sale at a loss. Only because experience is a great teacher.

You may already be great at saying no to impulse buys, but just in case you struggle like I do, here are a few questions I ask myself before I buy:

  1. Am I buying to cover up a feeling of inadequacy or to mask emotional pain?
  2. Did I know I had a need before I saw the ad or item?
  3. Do I have the cash for it?
  4. If I use the cash for it, what opportunity will I be giving up in exchange?
  5. Are the reviews complimentary?  Are the reviews fake?
  6. How long did I have to work to earn this money?
  7. What’s the worse thing that will happen if I don’t buy it?
  8. Where will I put it?  Will it add to the clutter?
  9. How long before it ends up in the donation pile?

Shopping and buying stuff is a natural part of life. The key is to let your shopping work with your goals and to not give up what you want most, for what you want now.

What do you think?  Do you have special tricks to keep yourself from buying stuff you don’t need but really want anyway?

Our Thanksgiving Table, On letting children help, and Easy Roast Turkey

We hosted Thanksgiving this year, for our first time ever.  I roasted a 26 lb turkey, which didn’t go well the last couple of times I tried it.  It made me nervous, but it came out beautifully.  I’ll share my super easy recipe at the end.

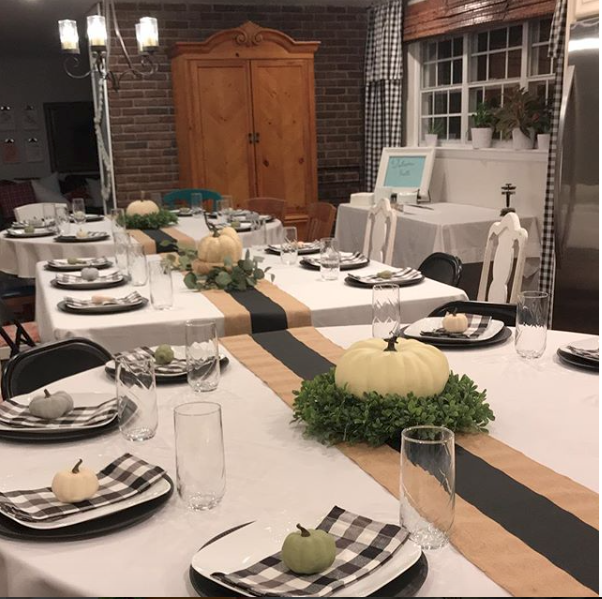
We had 19 guests, but thought planned for 22. I set up two 6 foot round folding tables and pushed 2 rectangular folding tables together in the middle for a circle, square, circle configuration.  My goal was to feel like we were all sitting at 1 table, but be able to still walk around the room as needed.  It worked!

We’ve still never gotten a real table for this room. I keep thinking I’m going to build one and have several pinned in my “wood” pinterest board.  Other things take priority, so it will probably be a few years before I actually build something.  With a table cloth, we mostly forget our every day table is a portable fold up tables.   I used 2 of these and 2 of these tablecloths for this setting and love that they come in a ton of color options for a great price.  I also grabbed 3 of these runners to dress it up.  I had planned to write scriptures down the middle layer with chalk, but in the end, we liked the simple cleanliness of it all.

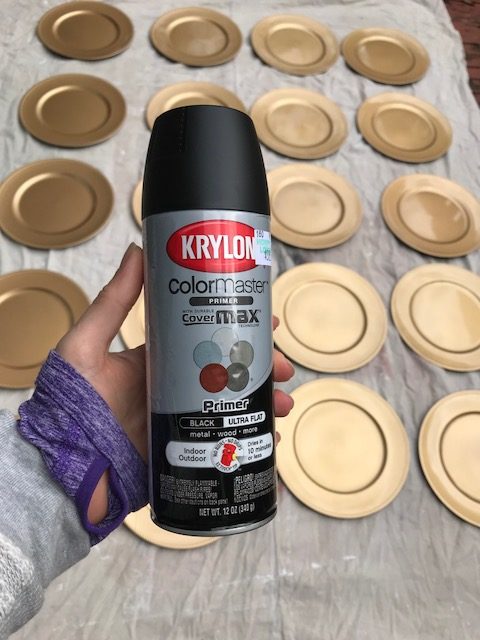
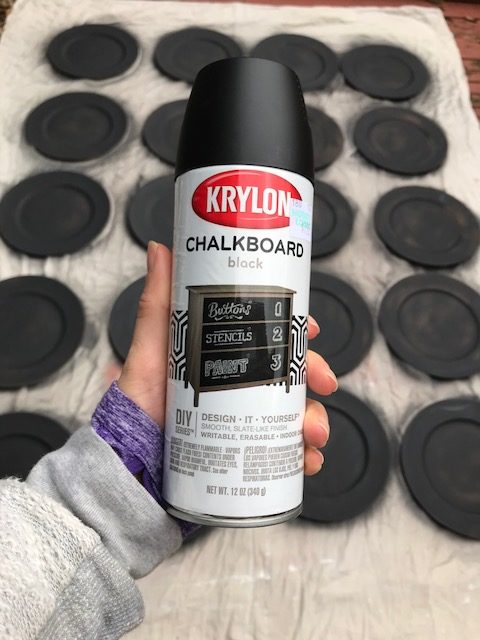
The black chargers are Dollar Tree gold chargers that I spray painted with chalk paint.  One can of paint and one can of primer did all 22 chargers.  I topped the chargers with my every day white Corelle plates.

I grabbed buffalo check napkins which match my curtains (ahem tablecloths with a rod pocket sewed in the top.)  I saved the napkins to use the first time for the Thanksgiving table, but they will be our new everyday napkins since the old ones are worn thin.

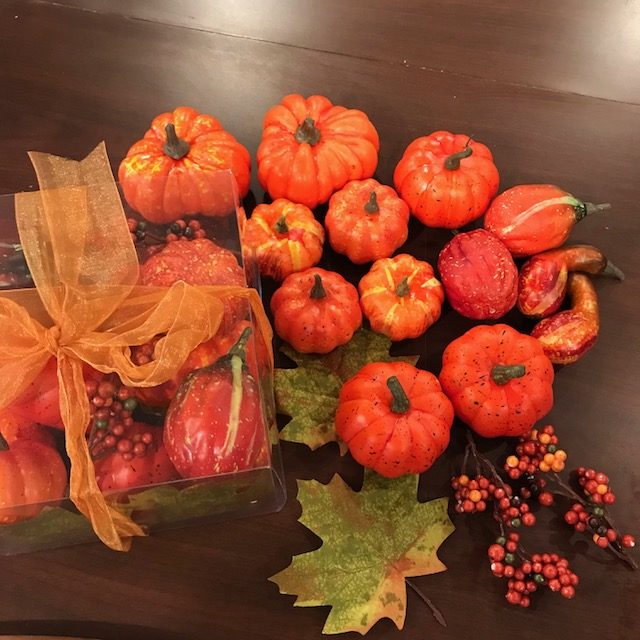
The day after Halloween I bought a couple of boxes of foam craft pumpkins on clearance at Hobby Lobby.  They were glow in the dark orange, so the kids and I painted them to look like heirloom pumpkins.  Walmart is the best price for craft paint even with sales and coupons if you ever wondered.

Then we printed up some name tags and tied them to the stems with jute twine from the Misc. drawer.

While the clearance sale was on, I also grabbed 2 large heirloom pumpkins.  They cost about the same as buying real pumpkins, but won’t rot and I can use them year after year.

This is a fake one on a burlap wrapped Dollar Tree Foam Wreath and Ikea Eucalyptus branches.  I had the branches on hand and just pulled them out of the arrangement they were in to try to beef up the table.

This pumpkin is real.  My guests thought they were all real until they touched them.  The faux boxwood wreaths are from Ikea and were on my front doors just the day before I set the table.  It was all clever and fun until a spider walked out from the wreath and ran across the table during dinner.  EEEEK!

We placed a butter dish, salt and pepper shaker, roll basket, and gravy boat on every table.  (I asked some of the guests to bring theirs so we’d have enough without buying extra things.) All the other food was served buffet style.

My oldest daughter helped me arrange the table settings and place cards the morning of Thanksgiving, and I watched her running around in a frenzy, shooing the younger children out of the room because they weren’t doing things perfectly and being completely frazzled.  In that moment I saw a perfect reflection of myself during her younger years.  I felt convicted and grateful simultaneously.  Sorry that she was only living what she had seen, and glad that she was still in my home and mine to teach.  So I apologized to her for her crazy holiday mother from her childhood, and we had a talk about the value of little hands and how their imperfections make life that much more sweet.

Two things made our holiday especially less stressful.

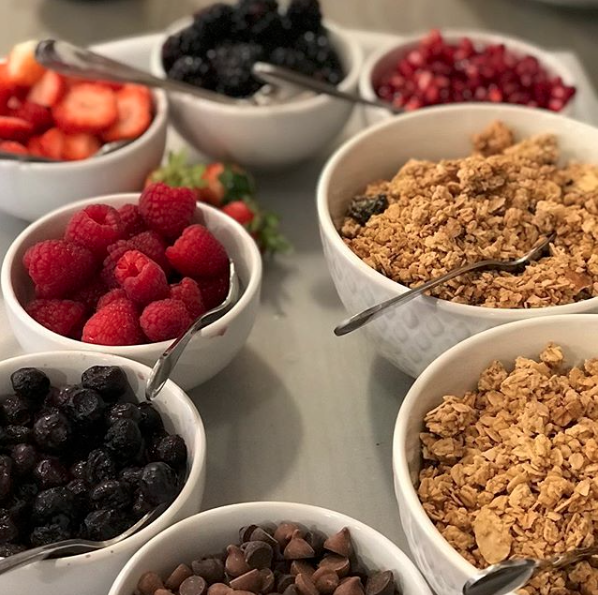
A.  I set out a yogurt buffet for breakfast, so I didn’t have to cook and they could come in and grab something when they were ready.  I even let them eat at the coffee tables since the kitchen tables were already set for lunch.  Everything was from Aldi and I was so excited that they offered fresh raspberries and blackberries for $1 a clamshell the day before

B.  I roasted the turkey the day before and carved it up into 9×13 pans.  Then I poured the broth back over the meat to keep it moist.  Then Thanksgiving morning, I reheated the meat in the broth.  After we transferred the meat to a serving platter, I could still make gravy out of the broth.   So here’s my super easy Turkey Roasting Instructions:

Super Easy Turkey Roasting Instructions:

  1.  Thaw the bird in the refrigerator ahead of time. Here’s a handy chart.
  2. Preheat the oven to 400 degrees.
  3. Don’t wash it, but do pull out the neck and the bag of giblets.  (Or leave it in, it really doesn’t matter.)
  4. Place a wire rack in a large, deep roasting pan.  Place the turkey breast side DOWN on the pan and rub it all over with melted coconut oil (about 2 Tbs) and sprinkle with salt.
  5. Roast at 400 for 1 hour (this seals in the juices), then without opening the door turn the temperature down to 350.  Cook for 1 hour longer.
  6. After the bird has been in the oven for 2 hours.  Take it out and flip it over so it’s breast side up. Rub it all over with coconut oil (2 more Tbs) and salt again.  Then stick the probe of an oven proof digital thermometer with alarm in the thickest part of the thigh.  (The thigh is right inside the leg.) Put it back in the oven and shut the door with the alarm part of the thermometer outside the oven.  You’ll close the door on the cord.
  7. Then leave it be until the alarm goes off.  If you want an estimate for how much time you’ll need, here’s a handy chart.
  8. When the alarm goes off, set the turkey and pan out of the oven and let it rest for 1 hour.  This allows the juices to reabsorb into the meat, but if you carve it right away it will all run out and be dry.

We still haven’t put up any Christmas decorations, because we have 6 of these until next Wednesday.  It’s worth the wait.

How was your Thanksgiving?  Is your Christmas tree up?


6 Doable Ways to Get Christmas Cash Fast

Aak! it’s already November and if your social media is full of moms bragging about their Christmas shopping escapades while you’re still wondering how you’re going to avoid Christmas debt, you might be feeling a little discouraged.  No worries!  Here are 6 ways to get Christmas money fast that will have you singing “Joy to the World” in no time.

  1. Donate Plasma to get paid and save a life at the same time. Plasma is the clear portion of the blood and is used for preemie babies, burn victims, hemophiliacs and other cool medical rescues.  Since they separate the blood and give you back your red blood cells, it is safe to donate twice a week.  Most centers pay on a reloadable visa card and pay more for the 2nd visit per week than the first to encourage you to keep coming back.  My husband and I both donated when we had an income crisis a few years ago and together earned $450 a month for a few hours a week of our time.  They had free wifi for us while we were there and I enjoyed some downtime surfing Pinterest or watching a movie. If you try it, you’ll need to call or go on their website to schedule your first appointment since it takes a bit longer for the full health screening.  Always take a blanket and a stress ball to squeeze with you (it helps the blood flow faster and those places are COLD.)   And have something to drink and a snack in the car for your drive home. (Our center wouldn’t allow us to bring food or drink into the building.)   The center will guide you on your eligibility to donate. Some medications, health conditions, recent tattoos or piercings or trips outside the country will disqualify donors.

2. Host a Mom’s Night Out. Plan some easy kid’s crafts, homemade pizza, games, and a movie for a whole pile of kids and announce you are open for business among your social circle for date night drop offs.  Charge what you like, but you might consider $15 per child for a 3 hour window.  If you want to give multi-child discounts, it’s totally up to you.

3. Clear out some Clutter. Before the season brings a whole host of new things into your home, clear out what’s not useful to you anymore. Craigslist is still a great option for selling your stuff, but there’s also OfferUp, and Facebook Marketplace.   Beyond furniture, people also use them to buy household items like linens and decor, clothing, baby gear, and household items.  Some people are even selling their extreme coupon hauls there.

4. Hire out for No Judgement Emergency Cleaning. Most charge around $20 an hour and work fast. You could even have an option for the jobs most people hate:  bathroom cleaning and kitchen floor mopping.  I’ve hired people before and I became frustrated if my helper wasn’t self-directed.  If you hire out, bring your own supplies and have a checklist for yourself, so you know exactly what to do without being told.  You can present the checklist ahead of time so your client knows what to expect.

5. If you have at least a bachelor’s degree you can teach English to Chinese students online.  The pay is between $14 and $22 an hour, but requires a 6 month minimum commitment.  You can find out more here.  I have a personal friend who is doing this right now and LOVES IT. She offered to help guide you through the process.  Shoot me an email at angela@groceryshrink.com and I can forward it on to her.

6. Monetize your skills.  Do you crochet? Sew? Paint? Bake? Decorate? Organize? Extreme Coupon? Style hair or apply makeup? Write in cool fonts? What do people constantly ask you about for advice? Offer group classes and make sure to charge enough to cover supplies plus your time.

The ideal way to plan for Christmas, is to set aside a little bit every month.  We take ours out in cash on pay day and put it in an envelope.  If you set aside $50 a month, by the end of the year you’ll have around $600 for gifts in a sinking fund.   Need more?  Saving $75 a month will get you $900 and $100 a month builds up to $1200.  When budgeting for Christmas, I often think about the gifts and forget to plan for sending cards, special foods and clothing. The sinking fund should be large enough to cover all those things.  How much should your Christmas budget be anyway?  Find out more here and here.


Texas or Bust

I just got back last night from an extended weekend in Bryan, TX for my husband’s high school reunion and am leaving tomorrow to drive back down to Dallas for FinCon17.  We looked at the option of dropping me off in Dallas so I wouldn’t have to do so much driving, but I wouldn’t have a car that way, and would have expenses of taxi and flights, plus I’d miss all the parent teacher conferences.  I needed to see my people.

They handed me this picture at the casual luncheon and my dreamboat mostly looks the same, except for his neck width.  I was like wowza, were you power lifting?  And he said, “Nope, that was from practicing headers with the soccer ball.”

We took Darren’s parents down with us, so they could see all the old places and friends again.  The bonus was great conversation and me never touching a steering wheel for the whole weekend.  The downside was blowing right through Waco, TX without even a glance at Magnolia, because I didn’t get to touch the steering wheel all weekend.

We visited dear friends who built this house in the shape of a barn and it’s full of charm.  When I came down 20 years ago, it was the house that inspired all my dreams of what I wanted my grown up home to be.  I posted more pictures of it on my instagram account.

The lady of the home is now 84, but looks at least 20 years younger.  We chatted about her nutrition and beauty secrets which include using a facial brush and a bentonite clay/apple cider vinegar mask.  She shared a string of testimonies about how Jesus has blessed her life.  And also how her husband holds her hand everywhere they go, because she needs the stability, but it makes them look like young lovers.  Which I love.

I thought I would be able to bake, photograph and post all the recipes for the 31 days of Pumpkin before we left, but I wasn’t thinking about trimming out, caulking and painting our attic space and turning it into a guest room right before it becomes the new master bedroom that week as well.   Or on our washing machine breaking and all those trips to the laundromat.  I’m still a little disappointed with Whirlpool who should have had a part recall, and at the Sears repair service who tried to charge us $100 extra on the part over their website price and $300 in labor for a 15 minute fix.  But we fired them all and Darren fixed it himself.  If there’s a lesson in this, it’s to not let anyone pressure you into a $600 repair and that it’s ok to take time to research all your options.

I’m not sorry I tried the Write31 Days challenge.  I definitely got a lot more blogging done than I would have without it, but I’m waving the white flag until I get back from my second trip to Texas.  It was a 12 hour drive to Bryan and will be 9 hours for me to go back to Dallas for FinCon17.  So it’s kind of a big deal to my introverted self, especially since I’m driving alone and rented an airbnb with a complete stranger.

I’ll post the rest of the recipes before Thanksgiving, but I’m ready to add some other topics of blogging back in too–like our Makeover Monday posts.  Speaking of which, I only have 2 rooms left in the queue for Makeover Monday, so it’s a great time to submit your room for consideration. You can email your before pictures to angela@groceryshrink.com with a few thoughts about your hopes and dreams for the space.

P.S.  This is our selfie from Friday night football and all I have to say about that is they take their football VERY SERIOUSLY in Texas.

P.P.S. This is Irlen Syndrome awareness week and I’m loving my new, lighter colored lenses. My color lightened because my brain healed and changed some while I was wearing my first pair of Irlen Filters. You can hear about the latest research from Cornell University from this facebook live.

P.P.P.S. We are starting a Healthy Holidays fitness challenge in November that will help us reach and keep fitness goals while still indulging in some of the holiday food traditions. All members of groceryshrinkplus can join the challenge for free with special meal plans (and prizes) provided.


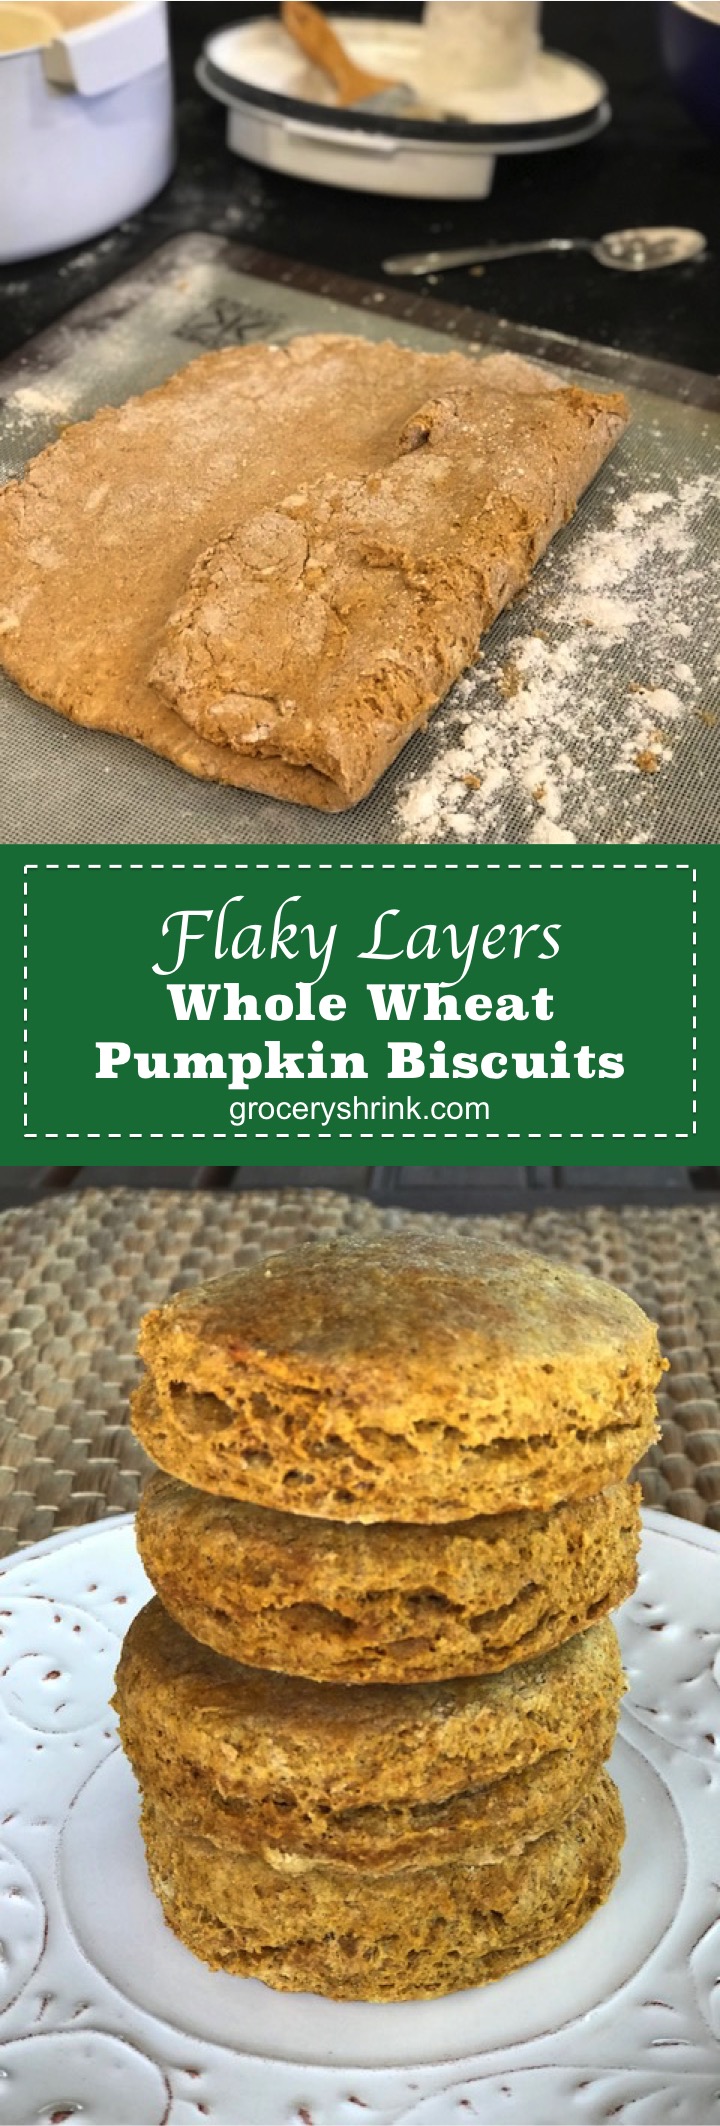
Flaky Layers Whole Wheat Pumpkin Biscuits

These slightly sweet, spiced biscuits are perfect for a grab and go breakfast, after school snack, a side dish for hearty stew or as part of a brunch menu.

Flaky Layers Pumpkin Biscuits

3 cups Unbleached Flour (or Hard White Wheat Flour or WW Pastry Flour) The pictures show the White Wheat option.  I ground the flour fresh just before baking for maximum nutrition.

2 tsp baking powder

1 tsp baking soda

1/2 tsp cream of tartar

2 tsp pumpkin spice

3/4 tsp salt

1/2 cup cold butter

1/2 cup Buttermilk (If using homemade Buttermilk, reduce by 1 Tbs)

1 cup Pumpkin Puree

1/4 cup Real Maple Syrup or Honey

Preheat oven to 400°.

2. Lightly spoon flour into dry measuring cups; level with a knife. (This time don’t measure by scooping.)Combine flour, baking powder, baking sods, pumpkin pie spice, and salt in a large bowl. Cut butter into small pieces and then use a a pastry blender to work it into the flour mixture until mixture resembles coarse meal. Chill 10 minutes.

3. Combine buttermilk and maple syrup, stirring with a whisk until well blended; beat in  pumpkin. Add buttermilk mixture to flour mixture; stir lightly just until dough comes together.  Do not over work. Some loose flour is ok.

4. Turn dough out onto a lightly floured surface.  Do not knead and roll dough into a 1/2-inch-thick rectangle; lightly dust top of dough with flour. Fold dough into thirds. Roll again into a ½ inch thick rectangle; dust top of dough with flour. Fold dough into thirds then gently roll to a 3/4-inch thickness.

6. Cut dough with a 2 inch biscuit cutter. Place biscuits, 1 inch apart, on a greased baking sheet.

7. Bake at 450° for 12 minutes or until golden. Remove from pan; cool 2 minutes on wire racks. Serve warm. Yield 12 biscuits.

Slice your cold butter into pats before using the pastry cutter.  It will make the cutting in go much faster.

Here’s what it will look like when you’re done cutting in.  You’ll still want some fairly large pieces of butter–like pea sized.  This will help make the layers.

Your pumpkin/buttermilk mixture will look like this.  At first when you try to stir it in, you won’t think there’s enough liquid, but I promise there is.

This dough is DONE mixing.  Please don’t keep going until all the flour is mixed in.  Your biscuits will be tough.  Start rolling without kneading at all.  In the layer making process the dough will fully come together.  I use a silicone mat which makes the layers easier.

Rol it 1/2 inch thick them lightly dust the top with flour.  

Lift the mat to fold the dough into thirds.  The bottom part of my dough was a bit sticky, so I used a spatula to scrape if up, then dust the mat underneath again.  Roll it out like you did the first time.

Then fold it up again.  Keep it lightly dusted if it’s sticking.

This dough here just needs a light rolling to be ready to cut.  I over did mine.  They still tasted good but weren’t as thick as I like.

I wish I had rolled my dough a little taller.  It’s only about 1/2 inch, but it might have made them tough to start again.  Make yours taller.

The last biscuits on my pan are a little wonky, but I choose not to knead the dough for the second roll out.  I just kind of bunch it together to keep the light and flakey texture.

These are delicious with butter, but pumpkin butter is even better!

This is day 15 of 31 Days of Pumpkin Recipes

1 Pumpkin spice mix

2 Homemade pumpkin puree

3 Pumpkin Sugar Cookies

4 Pumpkin Dinner Rolls

5 Pumpkin Cinnamon Rolls

6 Pumpkin Bagels

7 Butternut Chicken Stew

8 Healthy Pumpkin Pecan Scones

9 Pumpkin Waffles

10 Pumpkin Snickerdoodles

11 Butternut Squash Chili

12 Pumpkin Jar Mix

13 Baked Pumpkin Doughnuts

14 Pumpkin French Toast Casserole

15 Pumpkin Biscuits

16 Easy Pumpkin Cake

17 Pumpkin Dump Cake

18 Baked Pumpkin Oatmeal

19 Pumpkin Mousse

20 Pumpkin Cheesecake

21 Pumpkin Latte

22 Pumpkin Pie Smoothie

23 Pumpkin Breakfast Cookies

24 Maple Pumpkin Butter

25 Stuffed Sugar Baby Pumpkins

26 Pumpkin Pancakes

27 Pumpkin English Muffins

28 Roasted Pumpkin Seeds

29 Pumpkin Biscotti

30 Pumpkin Caramel Monkey Bread

31 Impossible Pumpkin Pie

Pumpkin French Toast Casserole

French Toast Casserole reminds me of Christmas morning or a celebration brunch, but it’s easy enough to have any time.  I love that it can serve a crowd without having to stand over a hot griddle cooking a few slices of bread at a time.  The pumpkin flavor and pecan butterscotch topping, makes this dish especially festive.

You can bake it in a 9×13 casserole dish, muffin tins, a Bundt pan, or even a slow cooker.  It makes a great freezer meal, or a prep the night before dish. I’ll give instructions for each variation at the end.

Pumpkin French Toast Casserole

1 loaf, 20 oz of bread.  We like Saralee Artisan Golden Wheat Bread

Read more