Crocheted Baskets Vs. Target

I’ve been makin’ stuff, because it’s Spring break–and besides cleaning up vomit, I needed a diversion. (Yep, 5 of the 6 kids are down with the flu–and it’s been lasting 4 days for each of them–sigh.)

I purchased 3 huge skeins of natural cotton worsted weight yarn after Christmas (using a gift card :).) I was planning to make 4 baskets to hold piano music for the kids.  Inspired by these cuties from Ravelry:

basket2_small2

I made up my own pattern to get something square and sized for the books and dug in, holding 3 strands together and using a huge size P hook. The thing was slow going and super floppy.  I set it aside, discouraged and still unorganized in the music department.

A few months later, I found these baskets at Target:

13946258_121010024625

They were the perfect size, cost less than crochet, so much faster and already sturdy.

DSC_2746 DSC_2744 DSC_2745 DSC_2743

(Don’t mind the hole in the wall and the cans of paint at the end of the cabinet…I don’t even see them anymore.)

I bought the Target baskets–immediately, but I had the yarn leftover and a guilty conscience about what to do with it.  I had been eyeing these rugs on Etsy for awhile. And really the price isn’t too bad.  But since I had the stuff, I decided to attempt a DIY.  It was easy to unravel the partial basket and recoup the yarn.  It hurt my husband more than it did me who yelled, “What are you doing!?” as he watched me tear out hours of work.

He’s not a big fan of crochet.  It takes my time and he can think of a hundred things more fun to do together (wink.) The last thing he wanted to see was undoing the stuff he thought was a waste of time to begin with.  What was he going to think of this new project?  I’ll show you tomorrow.

It’s happening….

Heather Vision Therapy

I’m sitting in the Vision Therapy office today.  We have two children receiving therapy right now and life is full.  This is the first week I’ve found a wifi signal at the office, and am using some of this hurry up and wait time to write to you.

Brandon and Grant Playing at Vision Therapy

While I am here watching Grant play with the office toys, the plumber is at my house :). He’s installing a kitchen sink, a dishwasher, and a couple of toilets.  I’m beyond excited.  And a little scared.  When I didn’t have anything to work with in the kitchen, I could be less than amazing and have a good excuse.  Now that I’ll have a sink again…it’s time to step up my game.  Maybe I won’t feel like being amazing anyway.  I think I’m ok with that.  If my family gets basic healthy food and the kitchen is mostly clean…that can be it’s own kind of amazing.

RB birthday

Last night we had a tiny birthday party for our friend, who is staying with us for a short time while she makes some transitions in her life.  It was a total blast. Just silly fun around the table with some friends.  And then she came with me to ballet class.  It’s like having a sister for reals, and the kids adore her.  We have the same maiden name, and even though we aren’t technically related….I can pretend.

DSC_2710 DSC_2694DSC_2696 DSC_2697 DSC_2699 DSC_2701

So this kitchen thing is scary.  We dreamed about it for over a year before digging into the process and then 9 months later are finally coming near the end.  I wanted it to be perfect, but really in life what is?  Our new floor is already scratched, some areas pretty badly.  The cabinets already have dings and blemishes from use. I had in my mind that one day I would have a brand new kitchen all finished and in that moment every piece of it would be new and perfect.  The reality is, We’ve been working at it and living in it for 9 months. We have 6 kids.  My family is better than a perfect kitchen any day.  It’s good for me to stop and remember that sometimes, because when I forget I enter freak out mode.

DSC_2705

Freak out mode is when I wail that my floor scratches aren’t repairable because a prefinished floor has a finish that goes an 1/8th inch deep and nothing sticks to it (like stain or repair crayon.) It’s when I complain that the cabinet company went down in quality, so our new cabinets aren’t what we expected or thought we paid for. It’s when I stress because my counters turned out splotchy and I realize that it’s likely that I’ll still have these countertops when I’m a grandma.  In the amount of time it would take me to save up for granite, I’ll need to put a couple of kids through college, plan a wedding, and hope that grandbabies will soon follow.  To be honest, all that stuff is more important to me than a perfect kitchen.

DSC_2702

Rachel told me the counters looked great when I wasn’t sure.  “It’s the perfect color,” she said.  “Maybe try a second coat.” I just needed to hear some validation for my choice to be able to relax inside and go with it.  Sherry and John over at Young House Love did a similar color in their countertop refresh yesterday, but theirs is a concrete overlay.  Which looked like a LOT more work than what we did. I love the look in their kitchen. It made me feel better to see they had a backsplash too.  After I saw Carmella’s backsplashless countertops and undermount sink, I totally wished I had held out for that.  Just the discussion about it turned very LOUD, since DH was convinced both were impossible.   In the end, it was more important to remove some stress from DH’s shoulders than to fight to get exactly what I wanted.

A second coat on the counters made things better, but I’ll have to show you that tomorrow 🙂

Apple Carrot Muffins

This looks like a recipe, but it’s really a lesson in substitutions.  Apples are $1.50 a lb, carrots are $.33 a lb.  Sub part of the carrots for the apples in this recipe and the kids get more vitamins and I get more money for groceries.  Win-win.  Made with fresh ground whole wheat flour, these muffins are rich in wheat germ oil, B vitamins, fiber, and vitamin A.

Muffins make great grab and go breakfasts (for kids), snacks, and additions to brown bag lunches.

Apple Carrot Muffins

Ingredients

  • 2 cups fresh ground whole wheat flour (I use Montana Gold White Wheat)
  • 1/4 cup brown sugar (or stevia)
  • 2 tsp baking soda
  • 1 tsp cinnamon
  • 1/2 tsp salt
  • 1 medium apple, chopped (I left the peelings on, but you can peel if you prefer.)
  • 1 large carrot, grated
  • 1 egg
  • 1 cup milk
  • 3 Tbs oil (coconut or melted butter)

Instructions

  1. Preheat oven to 400 degrees.
  2. In a large bowl combine flour, sugar, baking soda, cinnamon and salt. In a smaller bowl beat together egg, milk and melted oil. Pour the wet ingredients into the dry ingredients and barely mix. Fold in apples and carrot.
  3. Fill greased muffin tins 3/4 full.
  4. Bake for 15 minutes or until golden brown. Makes 12 muffins. Recipe doubles well.
  5. To make it a little fancier, sprinkle the tops with coarse sugar just before baking.
http://www.groceryshrink.com/apple-carrot-muffins/

For best results, eat or freeze within 3 days.


Plywood Countertops

Update:  To see the finished countertops click here.

When we first started planning our kitchen remodel, we did it sitting at this table:

The space was so full of walls, cabinets, stuff–that it made it hard for our big family to function day to day.  We studied the original blueprints, looking for support walls.  Then planned the removal of everything we could to open up the space. We picked out cabinets and dreamed of granite countertops.

After unexpected foundation issues wiped out or cash reserves, we wondered what to do about finishing the space. It was definitely time to think outside the box, since granite wouldn’t be a possibility for several years. We talked about lowering our expectations and buying formica laminated countertops, but the big box stores were surprisingly proud of these options.  The prices still weren’t affordable.

Then we looked at plywood.  First we looked at the $25 a sheet stuff.  Not bad.  Paintable, but not stainable.  Right next to it was gorgeous oak plywood.  It was double the cost, but we only needed 2 sheets (Since we could rip one sheet in half for 16 feet of counter.) Still affordable and this option would be stainable.  If we grabbed some trim for the edge it would look more finished.

We briefly considered buying oak 1×6 boards and fastening them together to make homemade butcher block.It would be prettier, have finished edges, and be possible to use an undermount sink. The extra steps and skill level required scared us.  We are on a deadline now and weren’t confident we could finish that in time.  The city has determined if we aren’t done by the end of the month, they will charge us a permit renewal fee.  This is dragging out so long because we ran out of money….charging us a fee would really help with that, thanks.  Government makes soooo much sense some times.

I settled on an overmount sink, which will be a little more water friendly with the wood.  I prefer undermount sinks with a passion, but Darren reminded me when we buy the granite in a few years, they’ll throw in an undermount for free. We bought 4 of the oak 1×6 boards to use as a backsplash. Since the ripped plywood would only be 2 feet wide (traditional counters are 26 inches wide, we used the backsplash and trim to make up the difference in the length.) We also researched a sealer that would dry to a non-toxic finish (food safe) and make these countertops sturdy enough for a family of six–enter Waterlox Marine Sealer.

Next, I needed to decide on a color.  I wanted to let the wood grain show through whatever we did so that the wood looked intentional.  I already have a lot of contrast built into the room with the light upper cabinets and dark lower ones.  The floor is a shade variation of the lower cabinets and doors in the room.  That’s plenty of that color in the space. I wanted something different without adding so much color we look like a circus.

I loved the color of gray on the folding tables we are using for our temporary countertops. Maybe something similar would be the thing? I grabbed a can of weathered gray stain and did a test board from the piece cut out for the sink hole.


It looked like dirty wood.  The board to the right is the untreated oak.  The lower piece on the left, is the weathered gray stain, one coat.  I really wanted something more gray.  So I headed back to the store and grabbed a $3 sample pot of Olympic Dover Gray.  I added water until it was half water/half paint and used it like a wood stain.  That’s the sample to the back on the left.  Perfect!


This week, we plan to finish cutting the plywood to fit, then install it with the trim and backsplash.   With the goal to have it ready to stain and seal on Saturday.  We will stain and seal it in place after taping off the wall and lower cabinets. We’re hoping the weather is good enough for open windows, since we expect it to smell pretty bad.

Here are some of the inspiration pins I used to convince myself wood countertops would be ok. Click the picture to go to the source:


Buffet Before and After

I’m guesting over at DecorChick today, where we’re talking about cutting grocery budgets.  

A few years ago I ordered this buffet from Home Decorators Collection from their clearance center.  The description read “antique white with a honey oak top.”  When it arrived it was puce green with an orange top.  Whenever I looked at it, or someone said something about it, I would repeat, “But it was cheap.” As if that fixed everything.

Buffet Before

I used it for a few years after crafting a super simple cover for it.

Before and After Bustled Table Cover

I loved the look of the cover, but it made the doors harder to use. Fast forward to our total kitchen remodel.  The buffet has been sitting in my bedroom for 9 months.  It is used as a collector of papers and homeless items. Our board games are in the attic where they never get played with, except when the baby sneaks up there and dumps them all out in a pile and scrambles them up–game soup.   The children gravitate towards Netflix instead of other more stimulating activities and I’m looking for alternatives.  I decided to sacrifice our stuff collector to create a game center in our new dining room.

Low Boy Game holder
Saturday, was a sunny 70 degrees.  Heidi helped me carry the buffet out to the deck.  Darren worked on setting our last few cabinets and cutting the sink hole in our new countertops.  (Ooh, I’m excited to show you those later this week.) I really couldn’t do much to help Darren so instead I started a brand new project that had us working side by side.  It makes him crazy when I start new projects before the old ones are finished, but he was very patient with me.

DSC_2674

I started by using gel stripper to remove the orange top.  I wanted to stain it a dark walnut to match our floors and cabinets (which turned out to be not as red, but it blends ok.) Using what I had on hand (no new money spent), was the most important thing to this project. Turns out the top was oak and stripped beautifully, but the molding was mdf, was a booger to strip, and took stain in a strange way.  I decided to love it, since I was too tired  to fix it.

DSC_2673

Ooh, She’s already looking better.

DSC_2672

I found some Annie Sloan’s Chalk Paint in Paris Gray.  I worried that it was a little too thick from previous use and too blue for my space….. It won out with it’s no sanding or prep work appeal, especially after stripping the top. I added enough water to the paint to fill the can back up and stir, stir, stirred it in.  I think stirring in the water was the longest part of this project. It really didn’t want to mix and I was sure I had ruined it.  Eventually, I ended up with a nice smooth paint.
DSC_2675

Even with thinning the paint back down, it covered that puce in one coat. I painted right over the hinges, but took off the knobs to save the antique bronze patina. The inside of the cabinet is still puce, partly because I’m thinking about using a contrasting color on the inside.  Mostly, because a freak snow storm was blowing in. It went from 70 degrees to 30 degrees in just a few hours! We had to move the party inside.
DSC_2683

We quickly felted the bottom to protect our floors and carried it into place.  I put dark wax on the top and clear wax on the bottom to protect the chalk paint, since it’s not durable at all without a top coat of something.  While the wax was still sticky, the kids started moving their games in.

DSC_2684

Now I can keep an eye on those games.  No more game soup, Grant!
DSC_2682

 Here’s to more family times around the table with some board game fun.

Yesterday I reposted this on Facebook, and was a little shocked to read one comment extolling the virtues of spending a Saturday watching the same movie 5 times, and another woman saying she’d rather her kids watch TV than spend a day outdoors with their dad….Seriously?  I enjoy a good movie as much as the rest, but we were created to build relationships.

Is there anyone out there who values family time over TV?  What are some ways you find a balance and encourage face to face time?


How to blow your budget and end up eating stuff like “Ox Tail” but not starve

For new readers, I’m challenging myself to only spend $400 a month on food–to feed 8.  That’s $1.66 per person per day or about 50% of what we would be given from the government if we qualified for food stamps.  We are doing this because a huge foundation repair on our home devoured our savings in the middle of a complete kitchen gut, unexpected medical bills, and vehicle repairs.  We are squishing our budget as small as we can to dig out of our hole.  We are debt free, except for our home, and fighting to stay that way. If you want to read about the other months in this series you can do that here, here, here, here, and here.

I’ll confess I didn’t write down all my receipts last month. I remember that I made a trip to Dirty Don’s the day I got my food money and stocked up on things like applesauce cups ($.25 for 8) and #10 cans of food (restaurant size.) I can get a #10 can of fruit like mandarin oranges or tropical fruit blend for $2.75. This is significantly cheaper than buying the smaller cans, even at Aldi.  One huge can of fruit will last 2-3 meals.

One of the #10 cans I purchased was a pizza sauce can.  We usually do jarred marinara for homemade pizza, but this cost less and was more authentic.  I divided the sauce into single pizza size baggies and put them in the freezer.

I also made a run to Costco with my coupons in hand and used them to buy some things that are rare treats: chicken nuggets; goldfish crackers; and a big bag of veggie straws. When I got home I divided everything up into snack size baggies for the kids to grab and pack for school lunches.  Their snack baskets hadn’t looked so inviting for awhile.

DSC_2575

To make sure these special purchases lasted all month, I kept back half of them and replenished their baskets at the beginning of week 2. Also, everyone gets their own basket, and no fair stealing from someone else’s basket.  If you eat all your food the first day, you alone will suffer.

DSC_2401 DSC_2399

But by week 2, I was down to $6 in my food budget.  Wow! I was in shock.  How does this happen?  It was the special purchases that did it.  I broke my own rule:  “Necessary food first, rare treats last.” This is not the first time I’ve done this.

I also noticed that I was depleting my pantry more than I thought.  Even though we weren’t spending more than $400 a month, we were eating more, by using up the pantry food I already had on hand.  The deal is, the kids are hungry.  They are growing.  I have a teenager, 2 tweens, and 3 other hungry kids. They are inhaling everything.

I racked my brain, how did I used to do it?  This budget isn’t new to us.  The kids are bigger and food prices are higher, but when Darren was out of work in 2009, our budget for 7 was $200.  It felt as tight as this does now, but we never went hungry.  So how did I do it?  I baked whole grain bread to fill those little bodies up.  I made tortillas, muffins, rolls, loaf bread, cinnamon rolls, cornbread, oat bread, pancakes…all of it.  And for pennies a serving.

DSC_2566

So I dusted off my flour grinder, grabbed a $25 pound sack of wheat berries from the freezer and started working a little harder to make sure we survive.  And while I was in the freezer, I looked around to see what foods I had been avoiding and decided now was the time to use them up.

DSC_2405

I had about a pound of ground turkey–not enough for 8 of us.  So I soaked some old-fashioned oats in milk, until they fluffed up to match the texture of the meat, then kneaded it in with garlic, onion, salt and pepper and a dash of Worcestershire.  Then I made mini meat patties and cooked them on the griddle.

DSC_2412I had 1 sweet potato, and some leftover baked potatoes that I cut up and toasted in the skillet with a small amount of oil.  Yum! We added the last bit of lettuce and veggies from the fridge and chopped them into a salad.

DSC_2404
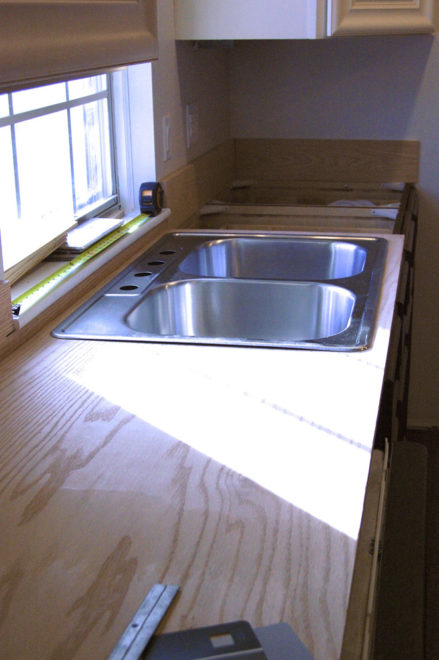
Nobody went hungry that night. (And my mother-in-law brought me a gift of paper plates since we still don’t have a kitchen sink.)

Then I found an old beef roast wrapped in white butcher paper.  I had been avoiding it because the last few roasts we had were tough and gristly and tasted like wild game.  We were desperate though.  I thawed it in the microwave and cut it into bite sized cubes, then sautéed it in a heavy bottomed stock pot with garlic and onion.

DSC_2605

I added half a bag of slightly dried baby carrots (because someone didn’t’ seal the bag in the fridge), a jar of home canned green beans, a can of Italian stewed tomatoes from the fridge, a couple of green potatoes that I peeled to get the green off.  Then I salted everything well and hoped for the best.

DSC_2610

Oh my!  It was so good.

DSC_2606

Then I had the kids go look in the Christmas fruit box from the basement.  I had forgotten it was down there (yes, I realize that was 3 months ago.) They came back with arms full of oranges and grapefruit with dry tough skin. Nobody could have eaten them without a very sharp knife.  I sharpened my paring knife and started slicing and ended up with the most beautiful citrus salad (that lasted 3 days!)

DSC_2607

Just to make sure there was enough stew to go around, I also baked a hearty oat loaf in a 9×13 pan.

DSC_2609Silly Heather served it up with soft butter.

The last meat packages in the freezer were Ox Tail…. what is that even?  Oh look, it’s really the tail. And Sirloin Steaks.  The steaks sounded promising.  I planned to make a stir fry and slice them thin with whatever veggies I can find.  And maybe some packs of ramen noodles or rice with a stir in of homemade peanut sauce.

DSC_2622

But I opened those packages and they were all fat and bones.  Maybe 6 oz of usable meat on the “sirloins.”  I put my face in my hands, and the kids ate peanut butter and jelly sandwiches, twice.  And DH and I warmed up leftover vegetable fried rice and said how good it tasted the second day.  The meat sat on the counter for a few minutes while I gathered my wits.  They looked terrible. I found some garlic salt, some sprouted onions out of the garage pantry, some Bragg’s liquid aminos (that stuff can take the game flavor out of almost anything.) And cooked it overnight on low.

I didn’t take pictures before the kids devoured it, but it was delicious.  The meat fell right off the bones and it was easy to separate from the rest of the stuff.  And the flavor!  Oh the magic of Bragg’s Aminos.

So somehow we made it to the end.  The kids couldn’t wait to taste milk again.  Pancakes were dinner food, as was French toast, and brown rice with leftover veggies and eggs stirred in.  This is the stuff that builds character and memories.  The process somehow doesn’t feel as bad as it could, because we know we could always stop our plan and spend the money we are using to finish our kitchen on food. Nobody wants to do that.

The kids are learning to be grateful, the magic of budgeting (you can only spend money once), and I’m getting my business building tail in gear, because this situation needs to be TEMPORARY.

GSP Button 4

Speaking of which, I just added new services to my menu subscription site:  A dinner only plan and a self-service click and drag menu planner (video tutorials here.) You get it all, including our Everything Meal Plan with breakfast, lunch, dinner, and snacks 7 days a week. For $5 a month, it’s a crazy good deal.


The Character of Money

Trying to stay on a budget without a foundation of good character is like trying to stick to a weight loss plan without addressing the inner reasons why I’m fat to begin with.  I’ll end up sitting on the sofa in 3 days with an open bag of Doritos.

DORITOS_COOL_RANCH_

When I’ve been out of control with money, it’s because something was off in my character.

This list of character qualities was one of those things that came to me while I was sitting in church thinking about my kids.

Financial Character

These are the things I want them to catch along the way while they are under my roof, so it will just be part of them wen they are grown and supporting themselves.

1.  Stewardship:  When I think of my money and things I own as God’s instead of my own, it changes everything.

2.  Patience:  When I’ve committed to never borrowing money, the right time is when I have the money to pay for it.

3. Generosity: We reap what we sow.  If we sow generosity, we will reap abundance.  Since my money is God’s I’m careful that who or what  I give to is something He would want me to give to.

4. Honesty: Means telling the truth even if I’m telling someone the item I’m selling isn’t perfect, or if I wouldn’t personally buy it.

5.  Servant Heart: Serving for the sake of serving, not for what I will get out of it.  Choosing a job where my income is tied to how many people I can help.

6. Depth: Not judging a person by their income or quality of clothing, but knowing their true value comes from being created in the image of God. Similarly not thinking an item is higher quality just because it’s higher priced, or that a gift was not given with as much love, just because it cost less.

7. Gratefulness: When I appreciate what I already have, I’m not looking for the next thing to buy to bring me happiness.

8.  Contentment: This is the opposite of entitlement.  It’s knowing that I deserve nothing, and whatever I receive is more than I deserved.

What do you think?  What would you add to the list?

25 Ways to Raise Happy Kids

A few weeks ago, I was sitting in church with a full heart.  We had been trading illness around our house for a few months and hadn’t been able to attend as a family for that long.  It felt so good to be there!  I had a lot of things on my mind…a special concert, a conference that I was preparing to speak at, and all the things in my business that were laying in a to do pile.  At the heart of it though, was my children.  I’m good at spreading myself thin, so thin that I wondered if they were getting enough of me.

I closed my eyes in prayer and then words started coming.  I grabbed a stub of a pencil and started writing in the margins of all the bulletins I could find.  The kids were passing me scraps of paper so I could keep writing.  I wrote down the notes I needed for the conference and then something new….the things I wanted for my children.

This wasn’t a prophecy, but more a spirit led clarity of thought.  I started listing things and then realized it was “How to Make a Difference in the Life of a Child.”  These are the things my parents and other loved adults did for me.  These are the things that make up the positive parts of who I am today.

Read more

Homemade Silly Sludge aka GAK

Gak rainbow

Happy President’s Day!  We love our founding presidents for sure. We celebrate their day by working on the house and trying to keep the kids from watching movies or playing video games ALL day.   Day time clothes are optional.  Bathrobes and fuzzy pajamas are acceptable for the dress code.  (We talk about patriotism nearly every day, so I imagine it will come up today as well.)

Last night I knew I needed a plan if I wanted this to be a happy day.  Hubs and I each wrote out a “would be nice to accomplish” list.  Knowing that we would probably only get one thing done.  Then I did a quick search for an idea to keep the kids occupied so I could work.  Schedule for the kids: clean rooms; waffles with mom; special activity; play in the snow; board games; electronics after 3pm.

DSC_2501

1/4 cup Elmer’s white glue, 1/4 cup cold water and 2 drops of food coloring.

I found a pin from Sugar Bee Crafts written by guest blogger Love and Laundry on making Silly Sludge or Gak. All the ingredients were on my basement shelf, minimal mess, short time involvement for me.  Long time involvement for kids.  Perfection.

DSC_2505

After they mixed the glue,water and coloring together.  We dissolved 1/2 tsp borax into 1/4 cup hot water.  And poured that into the glue.  It immediately started a chemical reaction creating a smooth polymer.

DSC_2506

Aaak! Mom, I cannot touch this!

Not all of the water absorbed into the Gak right away.  I used a spoon to lift the polymer out of the remaining water and onto a piece of foil. (Wax paper would have worked too, but we were out.) The kids kneaded it and kneaded it until it was smooth ball. Some of the kids opted to work the remaining water into their sludge.  That worked out well.

DSC_2510

Their first reactions were mixed.  Heather didn’t want to touch it at all, but soon was enjoying herself with the rest.

DSC_2504

Dub’s reaction.

DSC_2517

Brandon’s reaction

DSC_2512

Grant’s reaction.

It’s kind of a rule around here, that we don’t laugh when someone else is crying.  (It’s only fun when everyone is having fun.)  I broke the rule.

DSC_2514

Grant didn’t take it well. The picture is fuzzy, because I’m laughing so hard.

Caleb is our sensitive one.  He went after Grant and brought him back to play on his shoulders.

DSC_2525

We’re sorry; want to try again?

DSC_2521

Eventually they all had fun. 2 hours of it.

DSC_2533

DSC_2509 DSC_2508 DSC_2518 DSC_2498 DSC_2500 DSC_2499
DSC_2530

DSC_2527

DSC_2526

The next two pictures show you a sneak peak of how our kitchen project is going :).  There’s my lovely craigslist range in the background and a few of our cabinets in place.  There’s still a lot left to do, but my heart is pretty happy right now.  Darren is working hard today and I may have a kitchen sink in a month or two.
DSC_2537

DSC_2538


Gak rainbow


One of the things I loved about this activity was experimenting with colors.  We used the cheap liquid food colors that come in red, yellow, green and blue.  In order from left to right these are the color combos:

1 drop yellow, 1 drop red (pale orange)

2 drops blue

1 drop blue, 1 drop green (bluegreen)

2 drops green

2 drops red, 1 drop blue (pinky lavender)

1 drop red, 2 drops blue (purple)

For the detailed recipe visit Sugar Bee Crafts.