How We Budgeted Our Remodel

From periodextensions.com.au

From periodextensions.com.au

When we thought about our kitchen and master bedroom remodel, we thought about how much we were willing to spend not how much we “ought” to spend.  We committed to spending cash and not putting anything on credit cards (made easier since we don’t have any :).)

We had to wait a year for our previous home to finally sell and when all was said and done we had about $42,000 to work with.  Typical remodels of this magnitude cost $100,000.  We knew that meant we would be doing more of the work ourselves and bargain shopping for materials.

Here's a drawing of what it will look like after the remodel.

Even though we got it at an amazing price, our home is in an affluent neighborhood. So whatever we did we wanted to be quality.  Real stone counters, real wood floors.  But that didn’t mean we decided to pay high end prices for our high end stuff.

wpid-IMAG1635.jpg

To help make budgeting easier, I opened a clean spreadsheet in excel and brainstormed a list of things that we would have to spend money on.  Then I researched via the internet what average things cost and dropped a number in.

Kitchen budget 2013-06-23_1954

Here’s an example.  The center column with numbers in it is stuff that comes out of the $42,000.  The stuff on the right are things we can do much later as we save up money for it.  The blank lines are for things that we will do ourselves or are budgeted in a lump with another line.  And the negative number for tearing out cabinets means I got someone to pay me for the privilege of tearing them out and taking them home.  (Slick, I know ;).)

This is just a snapshot of the whole project.  We have other rooms included in our $42,000 budget.  The bottom of the middle column is set to automatically sum so I can see if we are on budget or not.  As soon as we spend something, I plug that real number in to make the budget more accurate. As always, my goal is to spend less than budgeted to make some room for extras at the end.

By budgeting this way, I could see right away that either my wood look tile floors or gas range were going to have to go–possibly both. (We found a Cragislist range and traded in the tile for real wood that can go through the whole main floor of the house.) I also saw that things like drapes, area rugs, and furniture might be years into my future, or come out of extra money that I earn by selling stuff or spending less on other budgeted remodel items.

How about you?  Have you planned out a project big or small?  How did you do it?


How We Planned Our Remodel

1.  Filled a pinterest board with all sorts of ideas and dreams for inspiration

This one has the doorway on the opposite side, but the colors and style are more like what I'm hoping for our space.</p><br /><br />
<p>From Traditional Home: http://www.traditionalhome.com/design_decorating/kitchens/kitchen-update-pay-back_ss16.html

2.  Decided on a design and layout.  Hired an architect to draw the plans and an engineer to double check his work to make sure none of the walls that we were taking down were load bearing.  This drawing was made by Cabinet Giant.

Dining Wall After

3.  Gathered price information on our appliances; plumbing; electrical; drywall; flooring; cabinets etc.  Reworked our plan when we figured out our first flooring choice was way too expensive. Our first cabinet bid from Lowe’s was $30,000!  Then we went to CabinetGiant.com and did basically the same design for $7,000.  We had used their cabinets before so knew the quality and weren’t nervous about that.  Also, I dreamed of an $8,000 6 burner viking range.  I almost scrapped that dream until I found a used one on Craigslist for a fraction of the price. I <3 Craigslist!

Viking Range

4.  Brainstormed a work list of all the tasks big and small to complete the remodel and then put them in chronological order.  This included calling around for pricing and ordering a dumpster. Then managing all the demolition tasks into the one week we could keep it before being charged extra time fees.

DSC_0590

5.  Assigned a person to each work task.  I was the most available as far as time goes and the least skilled.  While my husband is most skilled but least available (since he works full time; runs our Cub Scout program; is Caleb’s camping buddy; and works on the security force at church.) He taught me some of the skills I lacked (Like how to use a sawzall.) So I could do more things.  But some things I just wasn’t strong enough for. Then we assigned the jobs that we were going to hire out.

DSC_0512

6.  Then I divided my list into weeks.   I put way less into a week than I thought we could get done, so that we would actually get it done, lol.  I found in our previous remodels that if I pack the time too tightly I get discouraged and stop working all together.  Plus, I still needed to keep our family running smoothly with laundry, meals, kid activities, my jobs online, and things relatively clean.  Also, Darren and I are in and out of town some this summer at alternating weeks while we take kids to camp and work there.  Those weeks I left open so the remaining parent could just handle kids without the added stress of working on the remodel.

DSC_0562

7.  Once we knew the dates things were happening, I knew when to order flooring (which was when it goes on sale :).) And when to schedule our hired workers to come.

I still need to order cabinets!  That’s stressing me a little.  I found a mistake in my measurements which means my 24″ home organizing center won’t fit.  It will save us $600 on our cabinets though.  I just need to find a new place to house it and will look for a craigslist armoire to take it’s place.  With so many walls gone I’m just not sure where to put it now.


Here’s a pdf to look at of my plan. I removed some of the dates for our protection.

Work List for Remodel

I was going to talk about budgeting here too, but this is already so long, I’ll save it for the next post.


Kitchen Remodel Update

If you missed reading all the comments on the last post–go do it now.  They have so many good ideas!

I wish I had something gorgeous to show you, but we are taking this remodel slowly.  We are on schedule, but I purposefully made it a long one, so I could still keep up with laundry, the children, and housework (somewhat) while we did quite a bit ourselves.

Here are some photos of before, during and current.

Dining room before and after

The first before and After of my dining room. I can’t believe I tore this room up! And only a few months after I finished it. But the after is going to be so much more functional for us.

Here's a current view of our dining room window.  (The only part of this remodel that makes me sad is I just painted this room and added molding.  This was before we knew that tearing down walls was possible.

Here’s a before view with the hutches in place.

Dining room ceiling down

I used a garden sprayer to spray the popcorn ceiling and then scraped it onto the paper floor. The paper floor never adhered to the vinyl well, so I was able to roll it up in one sheet and carry the mess out.

  DSC_0658

Paper floor all rolled up.  Buh bye!

Paper floor all rolled up. Buh bye! At this point I hollered for Heidi to help me carry it out. She also helped roll it so it wouldn’t tear down the middle.

Laundry Wall Down

When the floor was cleaned up, Darren sawzalled the laundry room down, just cutting through the nails and preserving the wood. We reused all the wood to frame the new wall and arched door.

Arched Door

Here’s the arched door all framed in.

Kitchen before

Here’s a view of our old kitchen before we started tearing it down.

Here's another before from a different angle

Here’s another before from a different angle

Pantry studs

Here’s a view of the pantry studs left in the opening and plumbing sticking up from our old sink area. It was time to call for professionals to move the plumbing and gas lines that were in the walls.

Kitchen Cabinets Out
On the other side of the room, the kitchen cabinets and peninsula are out. And I took the wallpaper down last Saturday.

Pantry studs gone

The plumbing and gas line are gone.  The vinyl floor is gone too. We’ll be taking up the residual glue this week. And to the right you can see stacks of boxes. That’s the new hand scraped wood floor getting used to the climate of the house. We still need to do electrical, plumbing, drywall and paint before it can go down. The bucket in the middle is to catch the drips from the second floor air conditioner.  The plumber will reroute that when he comes back.

Just for fun here’s a before and current of the view from the formal living room.

DSC_0239DSC_0758
This is a HUGE project.  We are moving walls, relocating pluming and electrical.  We thought about it and planned for months before digging in.  I’ll share how we planned it a little later this week.  And how we know if we are on schedule–and how we stay on budget, which is the hardest part of all.

Big Question

I’m posting every day over at my other blog Centsably Fit and have a yummy healthy waffle recipe over there:

DSC_0709

Your plate will look like this:

DSC_0719

Please don’t look too hard at the paper plate.  I know it’s not frugal at all, but sometimes being sane is the most frugal thing, lol.  Hospital bills are crazy expensive….ok, so enough excuses….

Our remodel project is on schedule.  Wahoo!  The plumber came yesterday and the electrician is due later this week.  I still have some wallpaper and ceilings to scrape down, but there will be plenty of time for that later.

Anyhoo, I have pictures and stuff to show you another day, but for now here’s a burning question:

In the comments below tell me one thing you have been doing without for frugality sake and how you have coped.  Have you decided to do without forever or is there a date on the horizon when you will have it again?


Kitchen Update

My kitchen currently looks like this.  This is the new wall brought into the space two feet further than before.  There is an arched doorway framed across from the washing machine.  I plan to hang a cute curtain behind the opening for times when guests are around.  But I do so much laundry it will be a blessing to have that doorway open and instantly accessible most of the time.

I have more photos on my good camera (this one is a cellphone pic) but I won’t be able to get to it for a week.  So for now this is it.  Except for some sneak peaks from where we are right now :).
image

I don’t know why I’m always amazed at how easy it is to keep a space clean when there’s not much in it.  Makes a person think…
image

image

image

Ooh and we had new front doors installed with…..WINDOWS!
image

P.S. I woke up my blog over at Centsably Fit in time for Holly’s Summer Transformation Challenge.  Who’s joining that with me? I’ll be posting measurements and starting pics tomorrow if I can find a scale around here somewhere…


3 Ingredient Slow Cooker Biscuits and Gravy

This recipe is a man pleaser.  It’s not Fit Yummy Mummy approved or Trim Healthy Mama approved.  It’s not gluten free or dairy free–it’s just yummy.  It’s easy–so easy a child could make it and get tons of compliments.  And if you are hosting an early morning breakfast rehearsal for High School men, definitely bring it.  Even if the center biscuits are not quite done, they will eat it all and one of them will lick the pan and then ask you to bring a double batch next time.

3 ingredient Slow Cooked Biscuits and Gravy


3 Ingredient Slow Cooker Biscuits and Gravy

Ingredients

  • 1 lb breakfast sausage (in a bulk log)
  • 2 cans refrigerator biscuits (I used the small ones that come 10 to a can)
  • 2 cans cream of mushroom soup

Instructions

  1. Brown and drain the sausage
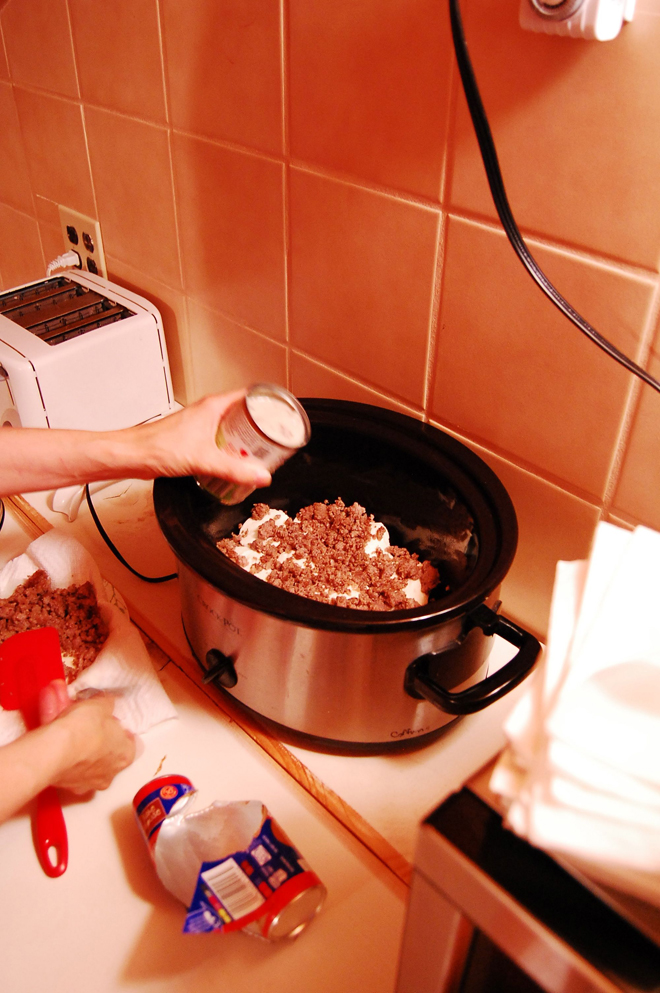
  2. Layer 1 can of biscuits in the bottom of a greased slow cooker.
  3. Top with half the sausage and then 1 can of cream of mushroom soup.
  4. Repeat the layers once more.
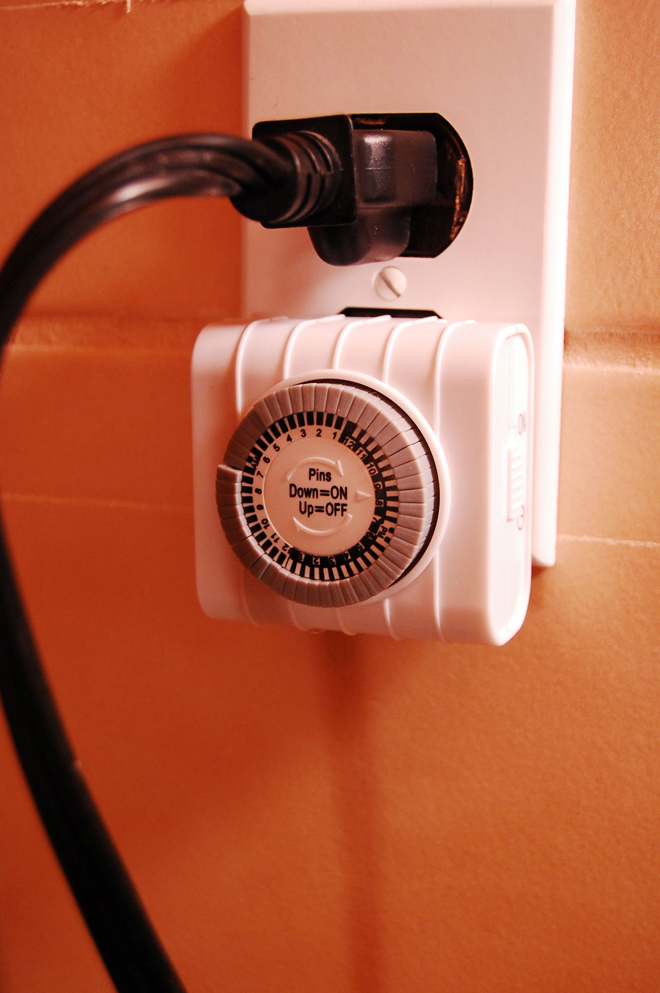
  5. Set on time delay to cook on high for 2 hours just before time to serve breakfast.
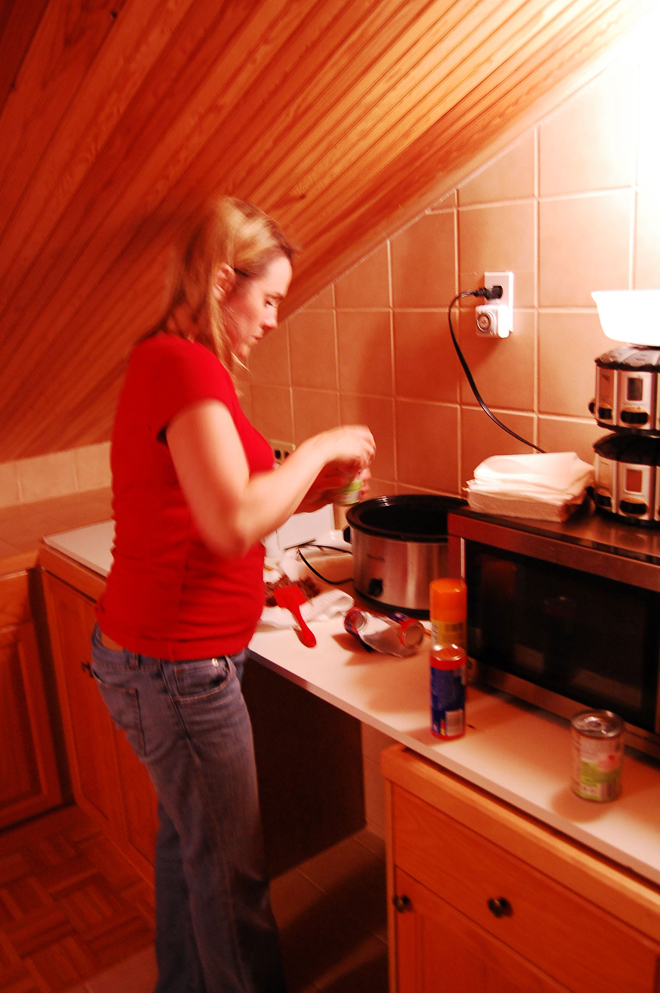
  6. Or 4 hours on low. (An outlet timer works great for this.)
http://www.groceryshrink.com/3-ingredient-slow-cooker-biscuits-and-gravy/

I anticipate the most frequent question asked will be, Is it safe to leave a slow cooker out on the counter this long before cooking?  I’m not sure. We did it–twice.  And no one got sick.  I think it would be more dangerous if it sat a long time AFTER cooking since the cooking process will kill any bacteria.

If the thought bothers you, you can keep it in the fridge and get up a few hours early to turn on the cooker and go back to bed.  (Allow an extra hour for a cold crock.)  Or you can bake this in the oven at 350 for 45 minutes or until golden.

The first time I made this, I used homemade biscuit dough and homemade gravy made with milk and flour and baked it in the oven.  It was wonderful too.  I haven’t tried the slow cooker method with homemade gravy.  With the 2 hour cooking time, it might make it through without curdling.  If you try it, let me know.  And now some photos my hubby took of the process.

3 ingredient biscutis and gravy 7
3 ingredient biscuits and gravy 8 3 ingredient biscuits and gravy 10

3 ingredient biscuits and gravy outlet timer

Attic Kitchen

The most important part of a kitchen remodel (if you are living in the home during the renovations) is to find a place for a temporary kitchen. We were super blessed to have a kitchen in our attic ready for us!

Attic Kitchen

It was wired for an electric range, sort of.  The wires were just hanging free outside the box.  So we decided to forgo the expense of the wiring and buying an appliance.  Instead, Darren put a few  boards across the gap tot extend my counter space.  Perfect!

The kids carried up the appliances and dishes assembly line style. Heidi stayed up in the kitchen to put everything away and organize the space while I stayed two flights down in the main kitchen packing up what we could live without and what should go up.  I love how she lined up the canisters under the eaves. She did a great job organizing it all.

Attic Kitchen 2

The other side has a double stainless steel sing WITH garbage disposal!  After this picture was taken we purchased a white counter height (mini) fridge to go next to the sink.  We found out quickly that running two stories to get food and then 2 stories to bring it back was no good.  Now we can have milk and a few common things up there.  AND the top of the fridge is the perfect place for a drying mat to lay dishes on after hand washing.

Working in this kitchen is worlds easier than my old kitchen.  I’m really learning to love it.  The biggest challenge is the low ceiling.  I wear platform sandals almost every day and have to take them off to work in here or I will bump my head.  Even without them I can’t stand up fully one step to the right of the sink.  But on the other hand the sky light makes it cheerful all day.

I love too that I’ve given myself a break from cooking EVERYTHING from scratch.  A few cans of cream of chicken soup won’t kill us, but stressing to the point of damaging our relationships would be tragic.

I’m saying all this to prepare you for tomorrow’s recipe: 3 ingredient Slow Cooker biscuits and gravy.   It’s yummy and easy for those stressful mornings. But it’s not from scratch and not my usual whole food nutrition. Betcha can’t wait :).

Small homes can be Beautiful too

Please read all the way to the end to see how to vote for Carmella in the Small Cool Contest.  There aren’t very many families in the running with 3 boys!  I’d love to see her win.

********************************************

I’m so excited about this post!  I get to introduce you to my friend Carmella.  I thought I was queen of crazy when it came to drastic moves to get out of debt, but Carmella is a notch above.  She took her family (husband and 3 sons), sold it all and built the best house they could debt free. That turned out to be a 665 square foot cabin!

6a00e54f92631888330192aa779b94970d

Not only is she amazing, but her prose is poetry and her poetry is so beautiful it has flavor.  Everything Carmella touches is beautiful, but not extravagant. This is one blog post you’ll want to grab a cup of tea for and absorb every word:

6a00e54f9263188833017ee8913122970d-150wi

Q. Carmella, Your home is amazing and I can’t wait for my readers to meet you. But even more inspiring than your home is the story behind your choice to build it. Will you introduce yourself and your family and the reason why you decided to live in 665 square feet?

A. We are just us, a husband and wife, with an assortment of boys (9, 11, & 13), living our days in the largeness of small at the foothills of Wyoming’s mountains.

We didn’t set out to live this small, unusual way. We set out for steady jobs and progressive careers, for even keel and sound decisions, for work hard and buy a good house. We set out for normal. Our life wasn’t frivolous or fancy or over-the-top; it was normal and mortgage notes and furniture and fun, that’s how you work this American Dream. But then the keel went akimbo, the market crashed, the steady jobs weren’t, and suddenly, shockingly, our normal was not, and nearly everything worth anything was totally gone.

Stricken and vacant, we wondered how, and we wondered when, and we wondered where we could go from here.

Then, right there in the middle of the mess of it all, a new inclination appeared, training our vision toward a different view. Simplicity called.

6a00e54f926318883301901c1fe850970b

Instead of another house and a mortgage and a saddle of debt, the idea of a cabin settled itself into our sights. A cabin that we could live in and pay for now, that would become the guest house further on. With cautious excitement, we began to explore this big idea of small.

Six hundred sixty-five square feet small.

It wasn’t a magic amount, plucked from thin air. The size of the cabin encompassed a comfortable minimum of space for our family of five. Small was the goal; cramped and tiny were not.

We considered how we lived, what we loved, and what we’d need to get along, and I began to sketch: a kitchen here, bookcases there, a sofa tucked below this window, a dining nook below that one; a bathroom for five, a master bedroom for two, and a ship’s ladder stair to lead three to the loft. After a man who builds worked our vision into an unfinished shell, we took over from there. In each month of these past twelve, we brought this cabin closer to done, closer to home. And here we are now, living in what was only a vision just a short time ago.

6a00e54f9263188833017eeb1d52cc970d

Q. Who made the initial decision to build a tiny house and how did the rest of the family react?

A. I guess you could say that, even though we considered other options, the idea of designing and building a little house had a very strong pull for me. I’ve always had an affinity for small. There’s something about the feeling of enclosure that cradles the soul. There’s also something personally appealing to me about the challenge of making a small space work comfortably. This natural leaning toward small, along with my interior design and architecture inclination has lead me to be an informal student of small space design for a long time now. The more my husband and I considered and explored the idea, the more we knew this was something we could fully embrace, and when we presented it to the boys, explaining the goals in  front of it and the reasons behind, they were fully on board. The idea of living in a little wooden house? Totally cool.

Q. What are the hardest things you let go in preparation to move into a tiny house?

A. This change truly felt like walking from bondage into freedom for us. When we considered the magnitude of stress that we had endured over a seven year period, it wasn’t hard to leave hell behind. We had gained a new understanding that, comparatively, there were only a few things that were truly important to us, and the rest was just hollow stuff. Neither of us can remember anything that was hard to let go of.

Q. What did you think about that made this decision an adventure instead of a punishment?

A.  This decision was an adventure. A life-filled adventure. Punishment is what we left behind.

6a00e54f9263188833017eeb324838970d

Q. Looking back is there anything you would do differently? What financial advice would you give to a young family just starting out?

A. Honestly, if I could advise our newly-wed selves, I would say to begin where we are now. I would say that, certainly, this living with less is not a perfect prescription for all of humanity, but I would offer a counterpoint to the widely-seeded assumption that more is better, that bigger is best, and that life is all about striving to attain some lofty material goal which could, in the end, be more empty than full.

Q. What influences and elements form your design style?

A. My design style is informed by a serene palette and natural elements. I respond to things that are time-worn and story-bound. I’m drawn to the interplay between the rugged and the refined. I admire the timeless quality of good design and careful craftsmanship, and I don’t believe any of this has to cost a fortune. Constantly reading and learning, I am a perpetual student of design, gleaning from the greats who have laid down their talent in photos and words.

6a00e54f926318883301901c34de7a970b

Q. What is your money saving advice in furnishing a home?

A. If you train your eye in good design, you’ll soon begin to recognize it – in furniture, in art, in accessories, in architecture – and you’ll be able to find treasures in places other than glossy catalog pages or fancy showrooms. When you walk through a thrift shop or visit a flea market, you will be able to spot the good stuff and skim over the bad. The sofa in our home was a $50 thrift store find. An exchange of euro pillows for the existing back cushions, and a slipcover made from painter’s drop cloths turned an ugly blue couch into something that’s both fresh and timeless.

And from Carmella:

Friends, I’ve got some very exciting news!! Our little home has made it into Apartment Therapy’s Small Cool contest!

This means that we need your vote to get to the finals (my, my, there’s some great competition this year)!

If you’d like to cast your vote our way,  you may go to our entry here and click on the red heart. If you’d like to give us even more of a boost, you can retweet this post, feature it, facebook it, hold a banner on a street corner, shout it from your rooftop, whatever. The polls will remain open until May 31.

You can also read more of Carmella’s beautiful writing on her blog.


Our Relaxing Memorial Day Weekend

DSC_0565

Saturday morning I took Heidi to the store to buy a gift for a Birthday party and when I got home my dining room wall was gone!  And I didn’t have to do any of it :). We sold our beautiful chandelier on Craigslist and the lady came to get it in between photos.  Our new design is more casual.

DSC_0568

DSC_0570

Here’s the other side of the room and the back side of the pantry.  With Darren making such fast work of the drywall (He made it look so easy!) I started taking down the popcorn textured ceiling.
DSC_0585

The entire family helped.  And it was a BIG help to have many hands taking trips to the dumpster.  By evening, Dub said, “I’m tired of taking shamrock to the dumpster.”

“You mean Sheetrock?”

“Whatever.”  It still makes me giggle.

DSC_0590
DSC_0594

Darren wrestled down our old range hood. Whew, we thought we’d never get that down. And unfortunately the back side of that wall holds the gas line to the upstairs heater.   It will be an extra expense to move it out of the way so we can open the room up.  You never know what you will find inside walls.DSC_0597

Behind the range hood was this strip of wallpaper original to when the house was built in 1971.  It almost looks like grass cloth.
DSC_0615

I listed the old cabinets on Craigslist for $100 and had a ready buyer within the hour.  They drove out and took everything apart and hauled it away.  Whoop! (except for the desk and island which really isn’t reusable anyway.  We still are mustering up the energy to remove that stuff and for now the sink is still handy.)DSC_0606

Caleb carried all our books to the basement and then Darren and I hauled the bookcases down for the kid’s to organize.
DSC_0613

This wall is leaving too.  We plan to paint all that brick a nice light color and wrap it all the way around the backside into the dining room too.  If I don’t like the house THIS open, I plan to buy a couple of IKEA bookcases and put them back to back so one side faces the dining room and the other side the family room then put in crown molding and trims so they looks built in.  Our Ikea won’t open until October 2014, so I have some time to think about it.DSC_0598

In the midst of this we moved all our pantry food to the garage and our dishes to the attic kitchen.  I’ll show you that later this week.  We’ve found it’s not too handy to have our food and cooking space 2 floors apart.  So we bought a mini fridge for upstairs and are gradually carrying our most used items up.

DSC_0575\

Now the pantry can come down too.

DSC_0603

Whew time to take a break.

DSC_0610

And pay the kids in popsicles for all their help.

I spent today on the attic bed working on menus and reading books.  I guess all that work wiped me out more than I thought.  It sure felt good not to run kids to school and all around town for their activities.  Summer is the BEST.


Homemade Push Pop Review

Last Fall we bought these:

And finally got around to trying them.  They are sturdy silicone and flexible.  The lids go on and off easily.  We filled ours with Great Value brand strawberry yogurt, the kind that comes in a 32 oz container at Walmart.  We laid them on their side in the freezer and since it was thick stuff, nothing leaked. If I were using juice, I’d prop them up in a glass or vase just to be safe.
DSC_0551

DSC_0553

The lids came off easily.  My 5 year old could do it without help.

DSC_0556

The pops were hard to push up until the heat from our hands softened the outside a little.DSC_0555 DSC_0554

Yummy.  Mess free.  And I know what’s in them.DSC_0562

“Do I get one too, Mommy?”


Cosmos ® 10-Piece Pink/Light Blue/Violet/Green/Orange Food Safe Silicone Ice Pop Maker Molds Set with Cosmos Fastening Strap