Slow Cooked Beef Topped Bean Enchiladas

We had an unexpected death in the family last week. Darren’s Grandma was 92, but still living alone in her own home with her mind, sight and hearing sharp as a tack.  He lived with her during the summers after his family moved to Texas and again when he graduated from High School so he could farm. They were very close. I lived with her part of the time when I was student teaching and she taught me a lot of things about frugality, being a homemaker, wild edibles and frying mountain oysters.

Lest you think she was all sugar and spice, she was a person who told things as she saw them.  Every time she saw me she complained about my long hair, big earrings and tall heels. When I got pregnant with our 4th baby, she offered to teach me about birth control. I learned to smile and roll with it. If she didn’t care about me, she wouldn’t say a word.  It was her way of saying, “I love you.”

She had a deep faith and prayed poetically. When Darren and I had been married 2 years, her son died in a tragic car accent.  It was a serious time of grief for all of us.  She told me death was beautiful and not to be sad.  She had already buried her husband and oldest son.  She KNEW they were in the arms of Jesus.  During her service I kept hearing her voice say those words, “Death is beautiful.”  But I still miss her.

My oldest son was acting up in the car during the funeral procession to the gravesite, poking his siblings and making them scream. I told him, “Your grandmother is in a hearse 10 cars ahead of us.  Remember what we are doing here and what your frame of mind should be.”

My oldest, Heidi, chimed in, “Yeah if grandma were here right now, she’d whack you with her cane.”

He said, “If she were here right now, I wouldn’t dare.”

After the funeral Saturday we went to her house with all her children, grandchildren, great-grandchildren (28!) and a few extended family.  The church brought over the funeral meal leftovers and we ate and visited just like we would have on Christmas day.  The only thing missing was her and we all felt it. It was a lovely day until it was time to leave and I realized it was probably the last gathering like that in her home.  The last time there would be fig Newtons in the jar put there by her own hands.  The memories flooded in as tears running down my face.  My first date with Darren was there, a whole day of learning to farm. Not long after she decided Darren was taking too long and offered me her wedding ring set so we could just go get married.  She didn’t see any point of big weddings or long engagements.  If you love each other, go make a life together. What’s so hard about that?

I had plans to finish Kids and Money month strong with some posts about Kids and Christmas spending, but it was just more important to be with family.  I’ll come back and visit the topic again in a few weeks, but first I want to get some recipes out there.  Too many times I’ve searched my own site for a favorite recipe to refresh my memory on some of the details and find it wasn’t there.

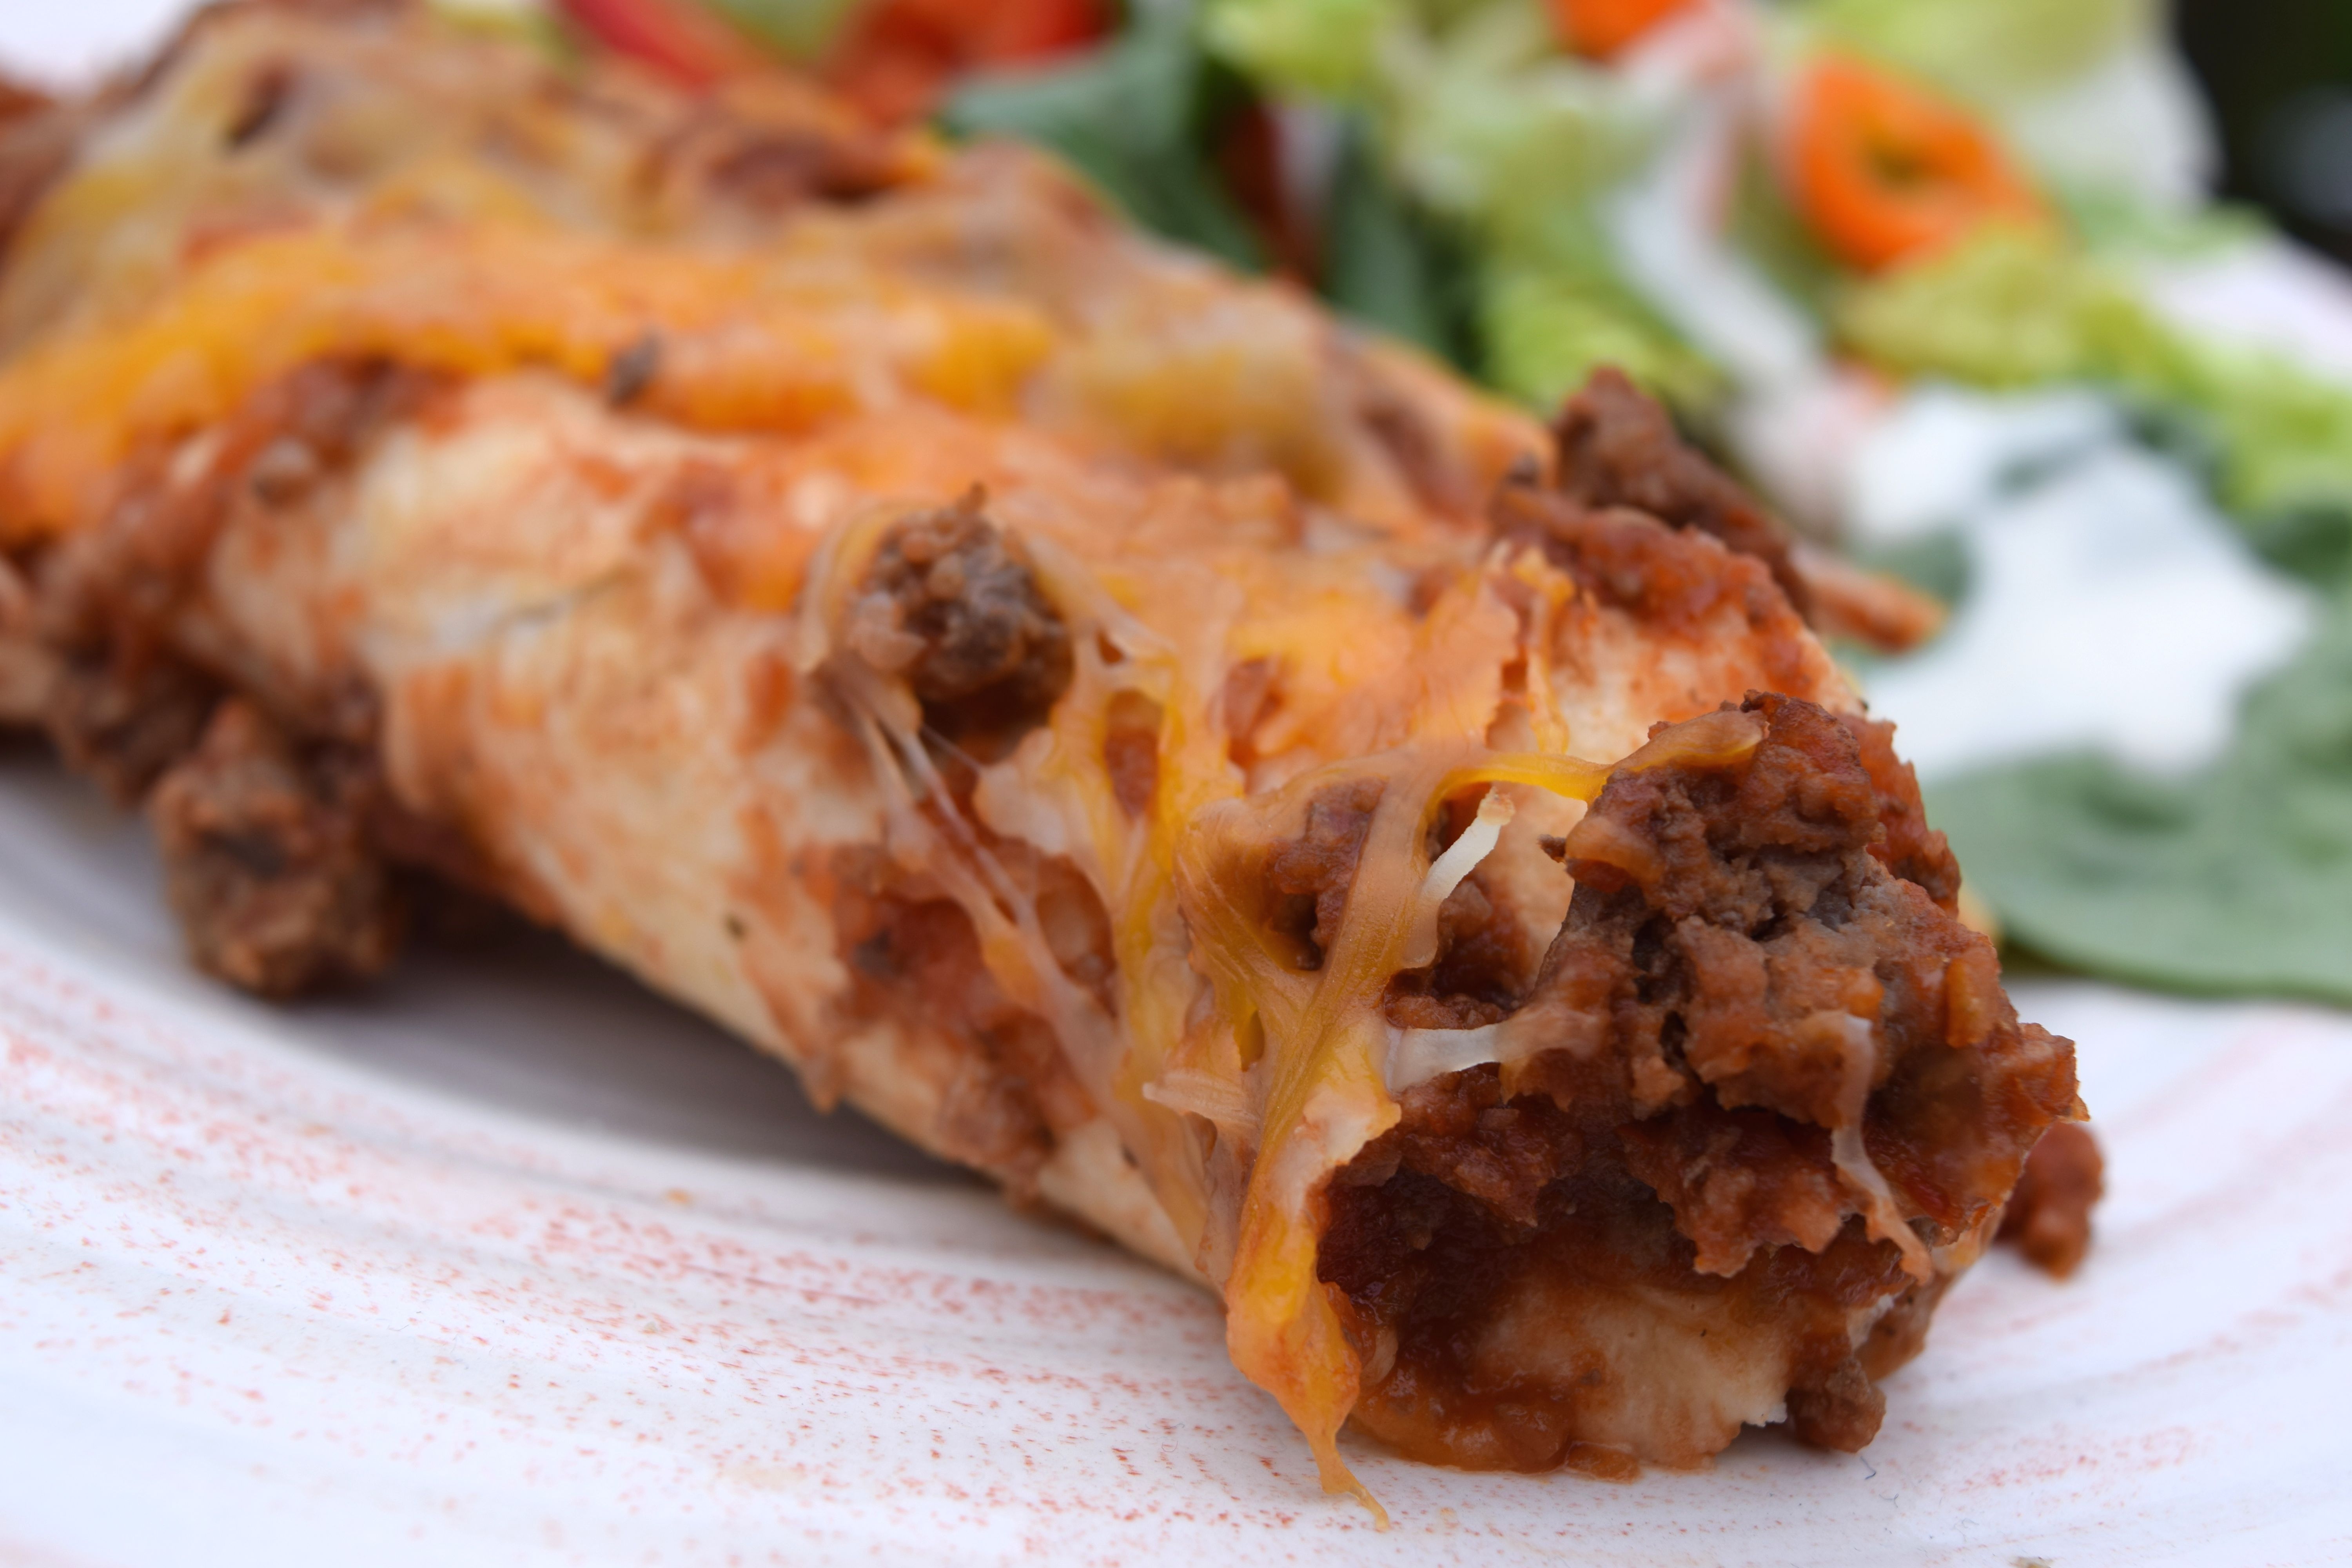
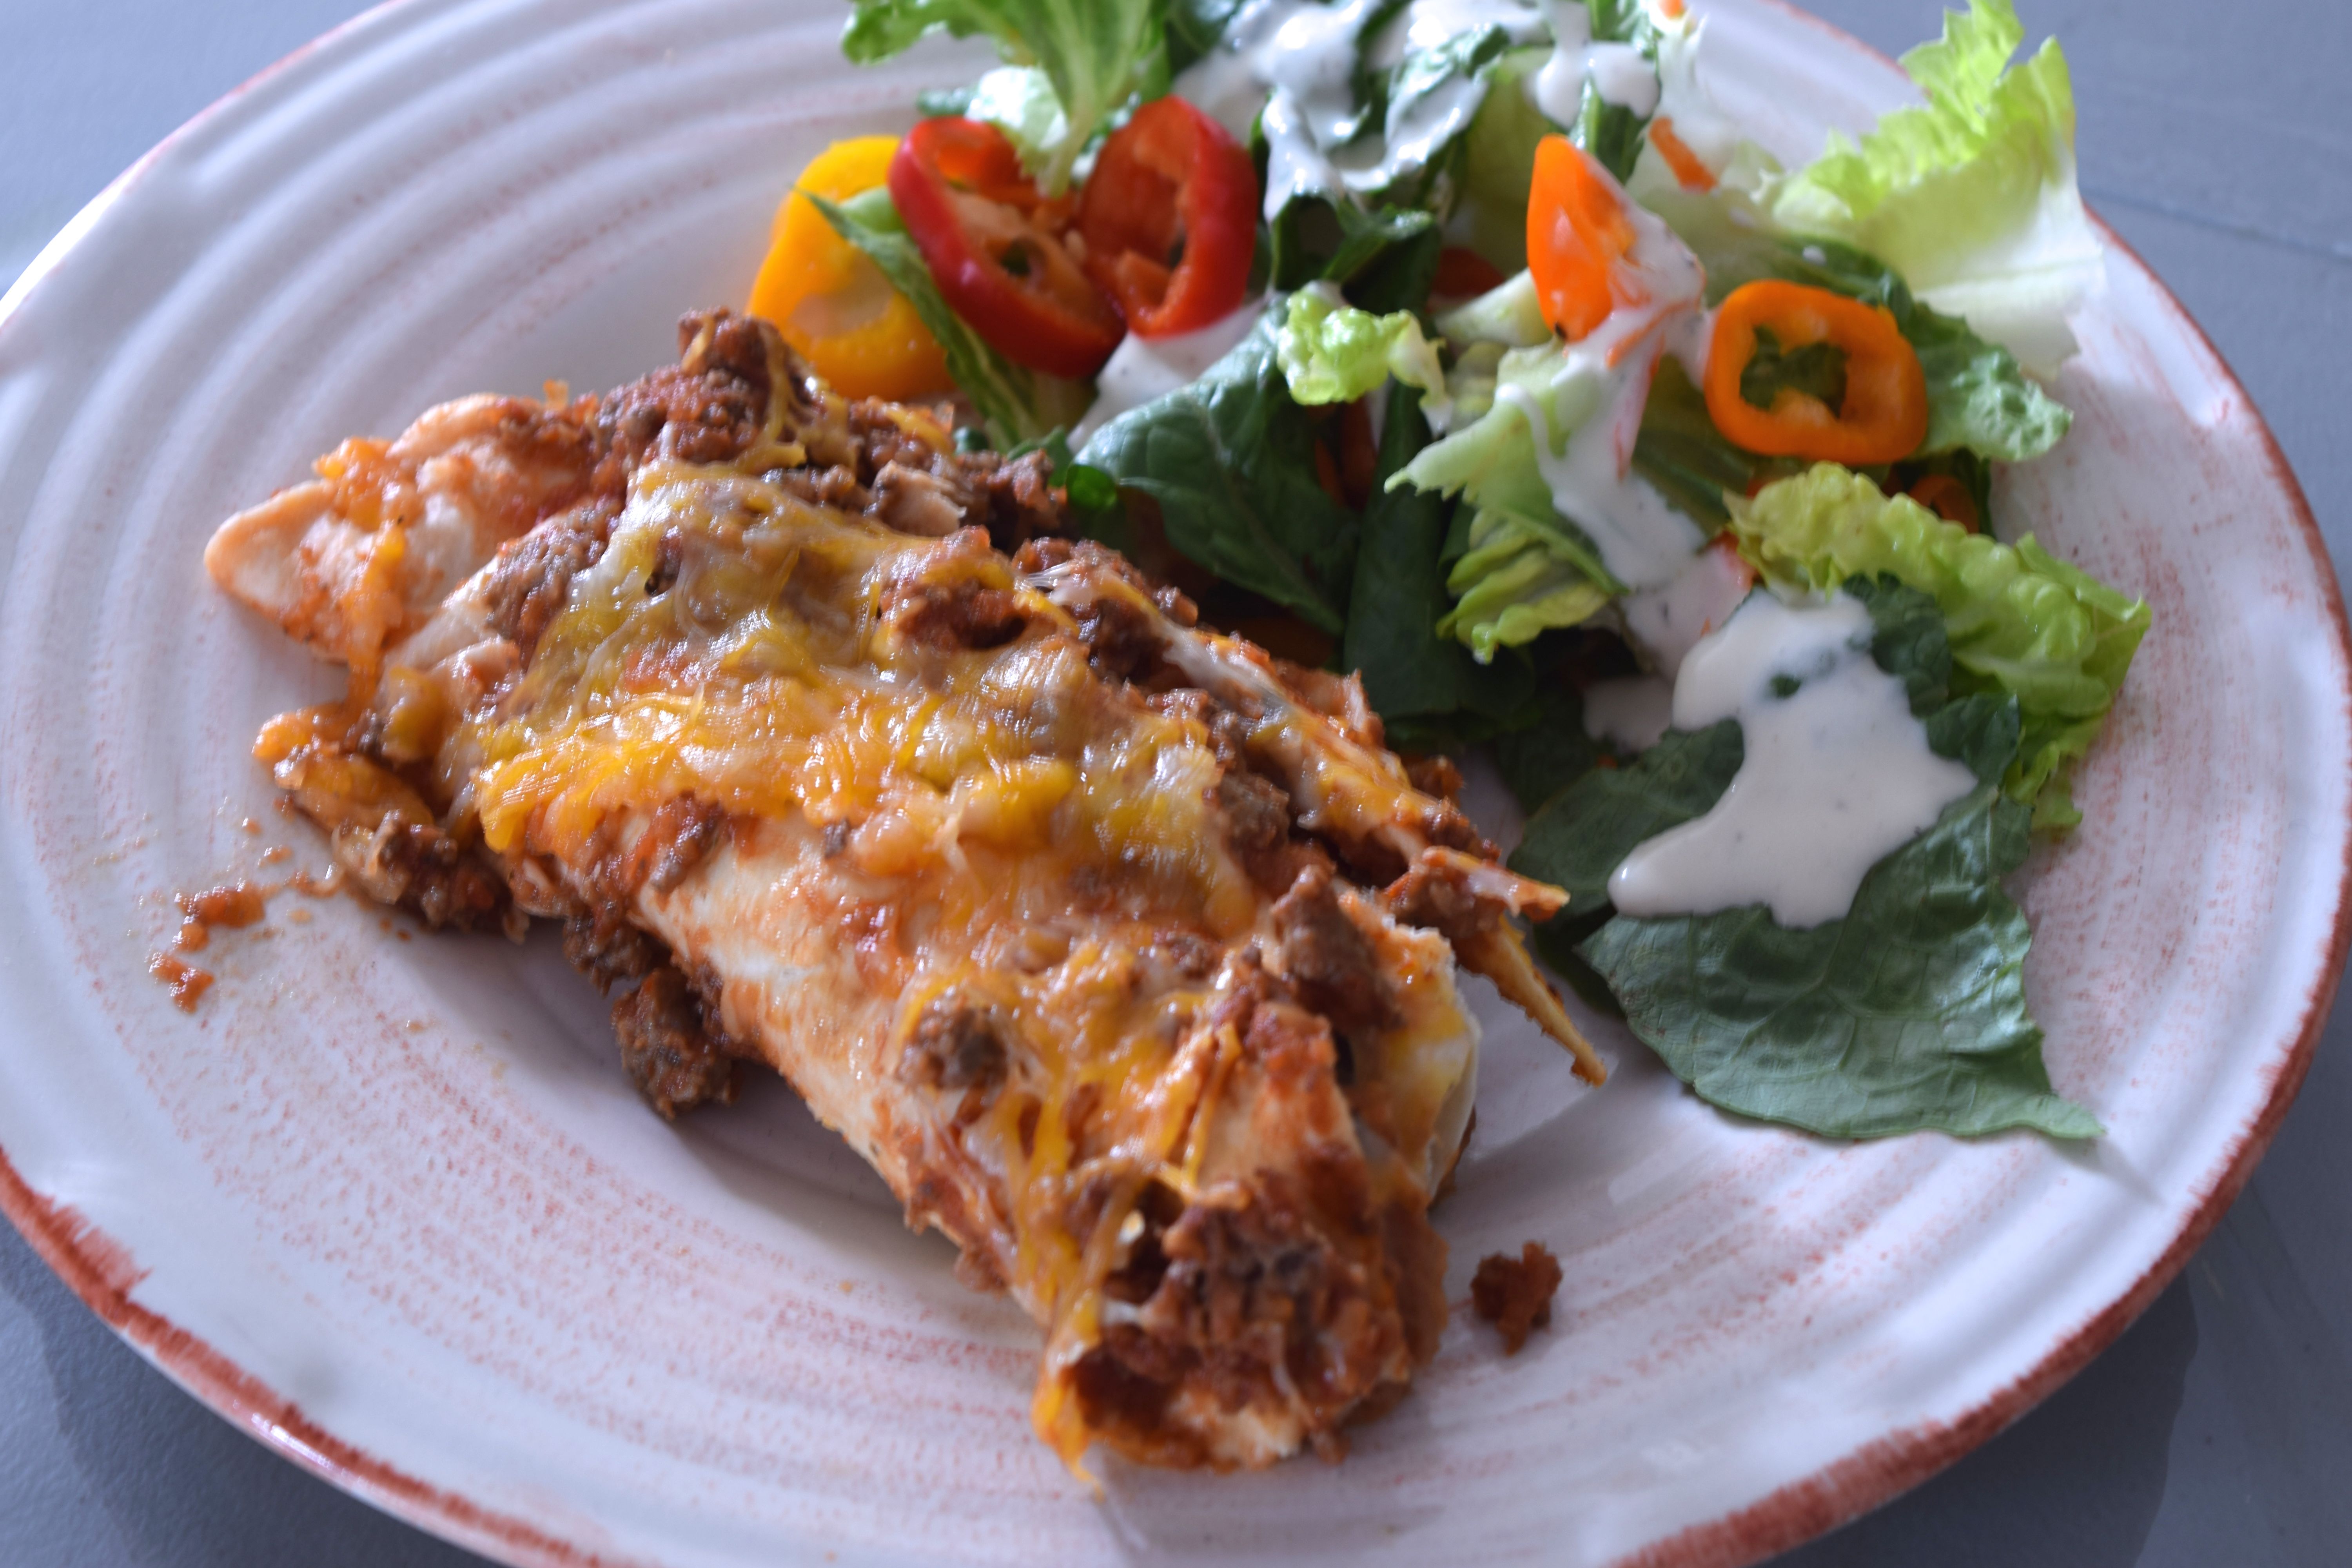
This recipe is my go to when life gets really busy.  It throws together in 15 minutes and then just has to heat through in the oven.  Every ingredient is available at Aldi making a very frugal main dish. Add a tossed salad for a complete meal or make it bigger with sides of Spanish rice, corn, and fruit.  If you are gluten free, grab some gluten free tortillas.  Low carb tortillas work great here too, for a THM S Meal (You can have up to 3 Tbs of refried beans in an S setting.)  You can also assemble the whole thing in a slow cooker and cook on low for 3-4 hours.

Beef Topped Bean Enchiladas

Ingredients

  • 1 jar, 24 oz salsa
  • 1 lb ground beef or turkey
  • 1 onion, chopped
  • 1 tsp minced garlic
  • 10-8" flour tortillas
  • 1 can, 15 oz refried beans
  • 1 can, 15 oz black olives, drained
  • 2 cups shredded Cheddar, Colby, or Monterey Jack

Instructions

  1. Preheat oven to 350 degrees.
  2. Brown ground beef with onion and garlic, drain.
  3. Stir salsa into ground beef mixture. (If you have picky kids, puree the salsa in a blender first, and use onion powder instead of chopped onion.)
  4. Chop the olives and reserve 1/3 for topping.
  5. Divide refried beans, olives and 1/2 of the cheese cheese among tortillas and roll up. Place seam side down in a 9x13 casserole dish.
  6. Top with beef mixture and spread to cover the edges.
  7. Top with remaining olives and cheese.
  8. Bake for 15 minutes or until heated through.
http://www.groceryshrink.com/beef-topped-bean-enchiladas/


Nerf War Party

You know the mom that calls to invite you to the party happening in 2 days because she forgot to send out invitations? That’s me.  This year I decided I was going to plan ahead, and have invitations printed a couple of months in advance.   Then I set a google reminder to mail them a few weeks ahead. It worked!

Dub's Brithday Invitations 10th nerf war redacted

It might have been more frugal to make the invitations by hand, but for $.09 each and a lot less time I had them printed as photographs and then mailed out in photo envelopes.  (I designed them in powerpoint, my go to graphic arts program.  I can picture all real graphic artists cringing.) The only catch….the invitations came with the wrong date and time, and I didn’t notice it.  My son came home from school telling me that kids thought the party was a week early, so I went to the photo site and looked up the picture I uploaded. It was correct.  I was so confused.

After I heard from a few other families who had the wrong date, I started calling everyone to confirm the date—2 days ahead, just like usual.  One of them texted me a photo of the invitation I mailed out—wrong date and time.  Forehead smack.  I’m still not sure how it happened.

They were all very nice about it, but 3 of the boys could no longer come :(.  I still feel badly about that.

DSC_0075

My mom is protective of my health and stress levels, so she came over to help out.  We made 4 target practice games for the first half of the party.  All of these ideas came from Frugal Fun 4 Boys.  I LOVE her site.  The one above is made from a tri-fold board (like what you’d get for the science fair.) I used a package of Dollar Tree Star Cut Outs for all the games.  The inner circles are cut down from the cardboard that was cut out of the window. They are taped to Ikea Smoothie Straws (they are fatter straws) which just happened to slide over the leftover balloon sticks.  You can get more details instructions here.

DSC_0087

I used 2 packages of Dollar Tree River Rocks to weight down the bottles.  Then my mom wrapped them in orange paper and taped them with Black Duct Tape.  We stuck on more of the Dollar Tree Stars to give them point values.  The goal was to shoot off the ping pong balls off the top.  This game was easier than it looks and the boys really liked it.  Also, the package of stars is so big that we used one package for all the games and still have more.

Nerf Target Practice Games

The PVC pipe is our ballet barre, which we just happened to have already for the girls. I just taped jute twine to the top of the cup and stuck more stars on them with point values.  The fun is when the cups start swinging and to try to hit them anyway.

DSC_0078

The 4th game is made out of file folders.  We stuck them down to a foam core board ($.88 a Wal-mart) so it could be put away and used again easily. Our only regret is not making the cuts in the base deeper so they would stand up on their own.

DSC_0076

Decorations were super simple.  I just used the leftover balloon sticks from our Lego Party and made colorful balloon bouquets. Then let the cupcakes, gift packages, and targets be the rest of the decorations.

Nerf Gun Decorations DSC_0072

Target cupcakes.  It wouldn’t be hard to do better.  Darren suggested red and white might have looked more authentic. (I was using up leftover frosting from the fridge.)

Nerf Gun Table

Before the guests arrived, we filled each gift bag with 30 extra darts (from ebay, similar here.) I took the time to write each boys initial on the tip of their bullet so we could make sense of things when the bullets started to fly.  I’m glad I did!  Each boy also got a gun and took it home as a party favor.  We let them have the fun of opening the package and then put their names on their guns too.

DSC_0096

I invited all the boys to come and sit at the table and get instruction on how to aim their gun.  We talked about front sights and how to line it up, then did a demo and had them try it out. (Not all nerf guns have front sights, I’m so glad these did.) Then, I divided the them  into partners and sent each group to a station.

Nerf party

They took turns doing target practice and spotting each other to help add up points.  (The points meant nothing, but it was fun to keep track.)

nerf party 2

Nerf party 3

We spent about 30 minutes with target practice, then went to cake and ice cream and gifts.

Then we moved the party outside.  At this point I was done in.  One of the guests came an hour before the rest–the correct time, (because of the invitaiton snafu) and I thought no one else was going to come.  Then when the rest of the guests came an hour later (to our relief), there was a bit of chaos since I didn’t have a quiet sit down gathering activity, (like the coloring pages at the lego party.)

So, Darren took over the out door portion of the party and I rested.  We cut plastic table cloths into strips and tied them around on of each boy’s arms to create teams.  There was an orange team and a blue team and each had a matching bandana for their flag($1.29 at Hobby Lobby.)  They took their ammo and their guns out back to the school yard/city park that backs up to our back yard.

Nerf Gun Capture the Flag

We modified the rules to capture the flag to incorporate the Nerf guns.  Here were our rules.

  1. No head shots
  2. If you get shot below the neck you have to go back to your base and sing Happy Birthday to Dub at the top of your lungs before re-entering the game.
  3. If you get tagged with hands, you go to the opposing team’s jail and wait for someone to rescue you (your own team member to tag you back in.)
  4. You can’t shoot from jail.
  5. The goal is to find and capture the other team’s flag and take it back to your base.

A boy we had never met was playing all alone at the school while his mother, one of the kindergarten teachers, worked inside.  I grabbed one of the extra nerf guns and they invited him to play in their game.   They played the game for an hour mixing up teams each time they started a new round.  When the boys finally came inside, they were THIRSTY.  If I had thought ahead about that, I would have had some sport drink ready to go.

P.S.  Those little nerf guns go up and down in price all the time.  They were $5.50 each when I ordered mine and at the time of the article are $2 more.  You can watch the prices at camelcamelcamel and have them email you when the price reaches your target.

This is day 29 of our series 31 Days of Kids and Money

Lego Birthday Party

DSC_0022

2 weeks ago my 5th child turned 8.  That’s a significant birthday in our family and calls for a big party.  The point of this post isn’t to show off gorgeous photos. (I’m terrible at photography.)  It’s just to show that a lot of fun can be had with a budget.  The guests talked about this party for days even though it’s not Pinterest worthy.

Brandon couldn’t decide what kind of cake he wanted so I used 2 boxes of cake mix, 1 each of chocolate and white for the cupcakes.  I dropped both kinds of batter into each cup and swirled it a bit with a tongue depressor.  The leftover batter went into a loaf pan.  DSC_0021

I used Dollar Tree cupcake liners and flags.  We decorated them with chocolate melts (from Hobby Lobby) done in these lego molds.  I still have plenty of melts leftover for Christmas baking.
DSC_0026

Regular sized marshmallows cut in half with scissors were the perfect size for lego bumps on top of the loaf pan cake.  Then I microwaved canned red frosting and poured it over the top for a smooth looking frosting.  It didn’t turn out as pretty as the tutorial, but it was really tasty. My Mom had the lego shaped birthday candles in her stash.

DSC_0017

We bought a food coloring pen from Hobby Lobby (with a 40% off coupon) to draw the faces on these lego head marshmallow pops. I used this video for instructions:

Lego Head Marshmallow Popsicles

The pen kept getting junky and didn’t want to write smoothly.   We were going to use the same pens on the cake plates (yellow square plates from dollar tree) to turn them into lego faces.   It just beaded up and wiped off.  Then we noticed that our Sharpies were labeled non-toxic.  We used them on the plates instead of the food coloring.  It looked really good.  I was afraid some of it would come off on the ice cream after it melted into the plate.  It didn’t.

Lego party table

We decorated with a package of yellow balloons and a Dollar Tree Balloon marker–those work really well and don’t smear. Dollar Tree sells packages of single color balloons 15 for $1.  Wal-mart has much better quality balloons 12 for $.97.  The boys made vases out of legos to hide the floral foam we stuck the balloon picks into.  I purchased these balloon picks to save a bundle on helium.  They are reusable and can be cut into scissors to whatever length you need. We now have a lifetime supply.

Printable lego man art

I set up the table with yellow (Dollar Tree) cups decorated with lego faces and filled with crayons, and printable mini-fig pages.  The box in the middle holds a pile of legos waiting for the next game.

DSC_0042

As the kids came in they decorated their page while they waited for the other guests to arrive.  Then we hung them on the wall with painter’s tape.

lego man Art on the wall

To set up our next game, we had bowls full of random lego pieces.  We dumped the crayons out of the yellow cups back into our crayon box and gave each guest a straw.  They had 30 seconds to see how many lego pieces they could move from their bowl to their cup with just their straw and breath.  We played several rounds.

Brandon's 8th birthday 1

Time to get the partiers up and moving.  I passed out a blank sheet of paper and had them number it from 1-13.  Earlier that day, Mom and I hid 13 paper lego men around the house.  (We used this template)

DSC_0035 hidden lego man

Each man had a word or two written on him. The kids had to find the men, write down the word and leave him there for someone else to find.

Finding the lego man

When they were done they unscrambled the words to find the scripture:  “This is the Day that the Lord has made.  I will rejoice and be glad in it.”  It was harder for them than we thought it would be.  Next time we’d number the men so they didn’t have to unscramble.

After that we played “Create That.”  We unzipped the big box of legos in the center of the table and then gave them a couple of minutes to build their interpretation of:  a duck, a car, a plane, a spaceship, a robot, and a boat.  At the end of each time limit we showed each person’s creation, said something encouraging and took a picture of him with it (on my mom’s camera.)

Then it was time for cake and ice cream.

Brandon 8th birthday blowing out candles

And then presents

Brandon Opens presents

Then we handed each guest his own gift, wrapped in a Dollar Tree gift bag (3 for $1) with cardstock circles glued on to make it look like a lego.  DSC_0010

I printed the circles on the computer so I didn’t have to trace a template hundreds of time.  It went pretty quickly.

Each bag had a small 3 in 1 lego kit and a small bag of lego shaped candy.  I just put it in snack sized baggies without a fancy label or anything.  The kids loved it anyway. They spread out and built their lego kit while waiting for the parents to come.

DSC_0013

There were a few times the kids got crazy, trying to sit on the table or running across the back of the furniture, but for the most part it went really smoothly.   Here’s the breakdown of our budget–the printing costs on the invitations included shipping and invites for his brother’s party two weeks later.  I made up a .jpg and had it printed as a photo at Wal-mart.com.  Then we mailed them in photo envelopes.  It was easy and they were very expensive looking.

The most expensive part of the party was the lego set party favors.  We ordered them directly from lego.com.  At the time they had the best price between Target, Amazon, and Ebay.

•Lego sets for party favors x 10 = $56.85 56.85
•Lego Candy $16.56 16.56
•Lego Molds $4.99 4.99
•Postage for invitations $4.50 4.5
•Printing for Invitations 5
•Yellow Cups: $1 1.08
•Yellow Plates: $1 1.08
•Blue Napkins $1 1.08
•Edible Marker $4.99 4.99
•Balloons: 5 5
•Cake Mix $1 1.04
•Chocolate melting Discs $5 5.2
Ice Cream 3
110.37

This is day 28 of our series 31 Days of Kids and Money

Saving Money on Kid Birthday Parties Part 2

Save Money on Birthday Parties Part 2

One of the lowest stress parties our kids were invited to was at the school district pool.  The mama didn’t have to clean her house.  She brought cupcakes for a swimming break and sent home movie boxes of candy for party favors. Genius.

The other low stress party we attended was at the roller rink.  Let the kids skate, throw them a cupcake (some rinks include drinks and a snack with the party package too) then send them home exhausted. No cleaning, no clean up.  That’s my kind of party.

Grant's 4th birthday cake

The highest stress destination party I’ve seen is at Chucky Cheese.  If you like strobe lights, deafening noise, trying to keep eyes on kids going in all directions at once, helping with ticket exchanges with multiple kids simultaneously, and strangers eating your pizza while you try to manage it all…you’d like it.

I’ve been determined to have a low stress destination party the last few times our kids rolled around to a significant age.  I researched locations and prices and when it came time to book it, I just couldn’t spend the money.  Most of the parties I researched were about $300 and I still had to get my own cake and party favors.   In the moment that was more stressful to me than cleaning my house.  If your budget doesn’t sweat over a $300 party you might feel differently.  Either way is ok.  Don’t apologize if you have a destination birthday party, and don’t apologize for having one at home.

Heidi's 15th birthday

The trend for at home birthday parties has been going OVER THE TOP.  I’m all for taking it down a notch or 200.  The kids don’t care if it belongs in a magazine.  They care if you care about them.  If magazine parties are low stress for you, go for it.  For some people it’s a gift and comes naturally.  There’s nothing wrong with using your gifts to create an incredible event.

Caleb's 13th birthday

My gift is not decorating or crafts or anything like that.  My gift is encouraging words.  The best way I can throw a party is to greet each guest at the door by name, be completely overjoyed to see them, and then stay and hang out and play along with the kids.

Caleb's 13th birthday gifts

This month, we found ourselves in the unusual position of having 2 birthday parties within a week of each other.  With our “significant” age party rule, that has never happened before and it won’t again.  It was super fun and exciting and also potentially rough on the budget.  I tried to talk the brothers into having a joint birthday part at the archery shop.  Our friends own it and if I’m going to spend a wad on a party I’d feel great about giving it to them.  The boys would have had to cut their guest list to just 3 friends each (or ban brothers and sisters from coming along.) One brother was all for it, the other was not at all.  He had his heart set on a lego party with friends, cousins and family. The idea of giving that up brought him to tears.

Lego Head Marshmallow Popsicles

So I invited each son to come and cuddle up with Pinterest and help me gather ideas for their parties.  To keep things low stress I limited the parties to 2 hours each, and scheduled them for in between meal times. I set a budget of $150 per party, which was the same if they had shared a party at the archery shop.  We ended up spending much less than that, saving around $90 overall.

Here’s how we broke it down for the lego party:

•Lego sets for party favors $5 each x 10 = $56.85 56.85
•Lego Sweet Tart Candy 16.56
•Lego Candy Molds 4.99
•Postage for invitations 4.5
•Printing for Invitations 5
•Yellow Cups: 1.08
•Yellow Plates: 1.08
•Blue Napkins 1.08
•Edible Marker 4.99
•Balloons: Yellow 1.00
•Cake Mix x 2 2.08
•Chocolate melting Discs 5.2
Ice Cream 3
 Frosting  $2
112.37

Nerf War Party Target Practice

and the Nerf War Party

•Nerf Gun Party Favors:  $5.49 x 10 = $55 55
•400 extra bullets $18.64 18.64
•Plates, cups, napkins $3.24 3.24
•Postage for invitations $4.50 4.5
•Balloons: 5
•Cake Mix $1 1
•Ice Cream $3 3
Game supplies:  poster board etc $8
98.38

I decided instead of buying a bunch of little trinkets and candy for party favors that we would buy the kids a small gift for around $5 each and send something home that they would treasure for awhile.  I purchased the lego sets directly from lego.com (they had the best price and selection after I searched all around.) And I bought the 3 shooter nerf guns from Amazon. We used them for target practice, in the epic capture the flag nerf gun party, and then they took them home. I’ll give details on the lego party tomorrow and the Nerf gun party after that.

This is Day 27 of our series 31 Days of Kids and Money

Saving Money on Kid Birthday Parties Part 1

Saving Money on Birthday Parties Part 1

Birthdays were a big deal when I was growing up.  My mom was frugal but super creative.  I had a friend party every other year with traditional games like pinata and pop the balloon that’s tied to your friend’s ankle.  One year we turned the whole house into a giant spider web with colored yarn.  Each guest had to wind up their own string and at the end was a small prize.  This game not only decorated the house for the party, but it naturally cleaned itself up as we played :).  Mom always baked the cake and decorated it at home.  Since computers weren’t a household item and the guy who invented Pinterest was probably still eating paste, we got our inspiration from library books.

DSC_0049

The years I didn’t have a friend party, we invited over grandparents for dinner, cake and presents.  Mom did her best to make those times special too.  One year she put a clue inside each balloon.  I had to pop the balloons, read the clues and use them to find my presents.   As fun as these parties were they were a far cry from the super stylized Pinterest parties of today.  I thought they were pretty special anyway.

Brandon 8th birthday blowing out candles

When I became a mom I wanted my kids to have special birthdays too.  Life for me was a little more overwhelming since I’ve been pregnant, nursing or chasing toddlers (or all of the above) for the last 16 years.  We decided that with the size of our family we would limit friend parties to monumental ages:  5 (starting school), 8 (age for baptism), 10 (double digits!), 13 (now you’re a teenager), and 16 (Driving a car).  We would still celebrate the other years, but as a family in stress free ways.

Tomorrow I’m going to show you how I budget for birthdays and some ways we save on games, decorations and party favors.  Today, I want the takeaway to be:  Plan the party for the kids and don’t worry about impressing adults or making it Pinterest perfect.
DSC_0007Keep it low stress and try to let the kids help with stuff even if it won’t be perfect.  I know letting the kids help and keeping it low stress can be opposites.  Take a deep breath and try to go with it.

DSC_0002

It’s all about the memories, building their sense of worth, and showing them that you’re GLAD you get to celebrate with them.  You don’t want to loose the child in all of the preparations and end up making them feel like a burden instead of a blessing.

DSC_0074

Here are my less than perfect cupcakes from our Nerf party this past Saturday.  I was embarrased about how ugly they turned out.  Not one child even blinked.  I jokingly said, “What do you think the cupcakes are supposed to be?”  They didn’t laugh or make fun of my poor decorating job, several matter-of-factly said, “Targets.”  Delicious targets that they devoured in 5 seconds and asked for more.  I’m so glad I went with green—they almost look like something else, but no sweet little boy mind even went there.  The funny thing is, I did them myself.  Brandon asked to help and I didn’t let him.  He couldn’t have made them worse; I should have let him help.

Brandon's 8th birthday heather helps

If things turn out badly, everyone will assume you let the kids help.   So let them help–it’s a great reason for things to be wonky. Sometimes it turns out pretty good and the kids feel ownership about the party.

I love Pinterest and use it heavily for inspiration but I no longer try to recreate a magazine spread all by myself for kids who just want to eat sugar and play games.   That means my kids get a calm and happy mama to host their birthday party.  Who doesn’t want that?

This is Day 26 of our series 31 Days of Kids and Money


Affordable Cell Phones for Kids

There are strong feelings on both sides of the issue of whether kids should have cell phones or not.  At this point only our oldest has a true cellphone.  She’s had it since her 13th birthday (almost 3 years ago.)

At the time all the kids were going to school together and were in the musical staying after school for a different length of time each day.  We found ourselves often wishing that they were easier to get ahold of.  For her big birthday gift, we bought her the cheapest phone we could find and added her to our monthly bill for $5 a month.  Life was instantly better for us.   The best part was the texting.  All of a sudden the teenage awkwardness between us was gone and we could communicate.  She texted me from her friend’s house just to say, “I love you.”  And I dropped her notes throughout the day just to say, “God made you special and I’m glad you’re in our family.”

Now that she’s older we realized it would be handy for her to have a smartphone where we could share the family calendar and she could access Facebook messages from her choir and youth group.  A friend told us about Swappa, a reliable website for buying used phones.  The phones are guaranteed to work and to not be stolen. She saved up her money from mowing lawns and babysitting and bought the exact same phone I have for 50% less.  We didn’t activate her 4G network with our cellphone company (we use T-mobile because they are the best value for our area) but she can use those features anywhere there’s wifi: home, school, most restaurants and her friends’ houses.

The other kids have been eyeing Heidi’s phone since the day she got it.  It was easy to tell them no when they were little, but they are getting older and going in different directions.  We decided it would be nice to communicate with all the teens when they are working or at school activities and need rides. (Plus it’s a motivating thing to take away if they’re naughty, lol.)

When Heather and Caleb started their businesses and saved up their money to buy an ipod, we looked into cheap ways to get them phone access.  Turns out there’s a magic jack app for iPods.  iPods are about $100 less than iPhones, but can be turned into phones with wifi access with the Magic Jack app.  The app itself is free, and it only costs $15 a YEAR to get them their own phone number with unlimited calling and texting capabilities.  We went that route for those two kiddoes.

We looked at other options such as prepaid cell phones, but since the kids usually aren’t places where there isn’t wifi the Magic Jack was the best option for us.  There’s one more option, Ting, that I haven’t tried yet. My friend Kristen from Frugal Girl says it’s great.  It’s might be a way for you to turn your entire family phone bill into $21 a month.

What do you think about kids and cellphones?  Do you know of another way to save?

This is Day 22 of our series 31 Days of Kids and Money


Help! My Child is a Clothing Snob

But first, I want you to know that I’m visiting at Stacy Makes Cents today.  Come along and find out the secrets behind my crazy low grocery budget. After you leave a comment on this post of course :).

A child might be a clothing snob if:

  1. They reject second hand clothing
  2. They determine the quality of an item by it’s name brand
  3. They determine the quality of an item by it’s price
  4. They beg for clothing the family can’t afford
  5. They have a closet full of clothes (that fit) and nothing to wear
  6. They think sales are embarrassing
  7. They think once a style is sold at insert any store here, it’s outdated
  8. They would never shop at insert any store here
  9. They judge another person’s value by what they wear

The thing about clothing snobs is they have low self worth.  They don’t believe they are anyone special apart from their clothing and that’s the main issue to combat.  Making them feel guilty about the naked kids in Africa won’t do it, though that can be a project once self-worth is restored. They might have caught the wrong message of worth from a bully, an advertisement, or a TV show.  However it happened doesn’t matter, the important thing is to make sure they recognize their own value (and also the value of others.)

They are of worth because God made them in His image.  He loved them so much that he gave  them their free will.  Then left his throne to die in their place in hopes that they might use their free will to choose Him.  No piece of clothing can change their worth.

As you are building a proper view of self, there are other things you can do.

  1.  Try giving them their own clothing envelope and let them use it to buy their own clothes.   For this to work, you can NOT bail them out.  If they spend it all, they’ll need to earn the money on their own to meet their clothing needs.
  2. Donate their excess clothing to a good cause.  Such as the dress project or a local ministry.
  3. Sew dresses for little dresses for Africa. Or for babies born sleeping.  Or knit hats and scarves for the homeless and here.

There’s something about volunteering and serving that heals the soul.

This is day 21 of our series 31 Days of Kids and Money

Affording Kids Clothing

My mom sewed my clothes when I growing up.  Most of the time it was good.  There were moments when I wished I looked like everyone else, but it was pretty cool to get to design my own stuff.  AND I learned to sew a bit along the way.

I sewed my own kids’ clothes for years…it was a tradition I liked carrying on.  I did it on the cheap, recutting cast off clothing and using clearance bin fabric.  At some point while homeschooling, having 6 babies and working 3-4 jobs at a time on the side, I ran out of time.  Some of the kids were getting old enough that they had opinions about what they wore.  I might spend hours on an outfit, only to have it rejected during the final fitting. Sewing lost it’s charm for me.

Now we shop more at thrift stores, where the girls can try on stuff.  ThredUP gives us the convenience of thrift store shopping at home. We love that Old Navy clearance has prices to rival thrift stores and online sales around holidays that make their whole stock accessible.  Forever 21 has some of the trends the teens crave (after you sort through the WEIRD they also carry) at bargain prices. Discount shops like Ross, TJ Max, Burlington, and Marshalls fill in the gaps.

I tried shopping at a huge consignment sale once.  I was pregnant and tired and the crowd was overwhelming.  I thought the prices were high.  I could do better on clearance racks and I was so under impressed that I never went back.  That was 8 years ago. I have several friends who still go every season and score great deals.  Every thrifty method isn’t for everybody, and that’s ok.

There are times in my life where sewing exactly what we need still feels easier than running all over town looking for something specific, but if we are looking for general items for a particular season, it’s really fun to bargain shop.

My two girls have different shaped bodies and different personalities and style preferences.  We don’t hand down as many clothes as we used to between them.  Since we get their clothes so inexpensively, we sell what they can’t use anymore at yard sales and use the money to replace the clothing.

When you sell at yard sales and buy at yard sales, you can dress for free.

One of the best ways I like to save on clothing is to host a HUGE garage sale twice a year and invite friends to bring stuff.  Then I can shop from what they bring.  I have some stylish friends who price their stuff cheap.  This August was a huge win that way.  (I scored 2 Vera Bradley purses for $.50 and $1.00 each and they hardly look used!)

We pass clothes down through the boys as much as possible.  I have purchased more for the toddler than usual since 3 boys have worn the clothes over a period of 10 years and they are worn out.  Crumbling elastic, pilly fabric, ripped knees–worn out. I also shop for the oldest–who has no one to hand down to him.

Clothing is the hardest budget for me to stick to.  We do cash in an envelope but I only get $10 a month per person, which is also supposed to cover shoes.  That really doesn’t cut it, so I supplement that budget with garage sale income, and online sales. My ideal budget is $200 per year season for the ones that don’t get passed to, and $50 a season for the others. We’ve never quite had that much, but a girl can dream.  If I finish a month with money left in the envelope, I remove it from my purse and put it in a clothing envelope in the safe. That way we can save up for bigger purchases later in the year.

It’s possible to be thrifty whether you sew it, buy it new, or buy it used.  How do you prefer to save money on your kid’s clothes?

This is day 20 of our series 31 Days of Kids and Money


Affording School Lunches

When I was a kid, my mom gave me enough cash at the beginning of the week to buy my lunch every day.  Then if I chose to make my lunch instead, I could keep the money.  It was a bonus to our allowance and taught us to be thrifty.  It worked out well since there were only 2 kids in the family.

With 6 kids in our family, it would cost us $300 a month to let the kids buy lunch every day. Our schools average $2.50 for lunch (older kids are slightly more, younger ones slightly less.) We can pack a lunch for around $.75 with a basic sandwich, some veggie sticks, and a self-packaged snack like cheese crackers.  Sometimes the kids pack ramen noodles in a thermos (cringe–I know.)  Heidi, the Sophomore, will often grill a chicken breast on the single serving grill and slice it over a chef’s salad.

Packing 6 lunches every morning (before I leave for work at 6:45 am) would push me over the edge of sanity. I delegated that to the kids and they’ve done well.  I try to keep their snack baskets filled with healthy-ish things, so they can make a sandwich and grab a few items to go with it.

We buy family size items from Aldi and sometimes Costco (when they have a coupon that makes it a good enough deal.) Then we repackage them with a measuring cup into snack size baggies.  Sometimes the kids help with that part and it saves me a lot of time.  It costs less per serving to take a few minutes to repackage than to buy single serving packs.

The kids only drink water*, both at home and at school.  That might be the single most budget saving thing we do around here! *Occasionally with snacks they get milk or homemade kombucha or Melaleuca’s Sustain Sport–like Gatorade but healthier and less expensive–but we don’t pack those for school.

How do you make lunches fit into your budget?

This is Day 19 of our series 31 Days of Kids and Money

Teaching Kids to Grocery Shop

Yesterday I had so much fun with my kids that I completely forgot about the 31 day challenge.  We cleaned house, went to a birthday party, had a friend over for dinner and games and then hosted the church youth group for a movie night and snacks.  It’s the kind of day that you wish every day was like, and the best part—my house is still clean <3.

I may write an extra post at the end, but I’m not going to stress about it.  Instead, I’ll jump right into this week’s theme — “Teaching kids to understand what things cost” starting with food.

Teaching Kids to Grocery Shop

This whole parenting thing is about getting the kids ready to do life without us.  One of the most important money things we can teach them is how to not spend a WAD at the grocery store every time they go, but still get healthy foods.  That starts with teaching them how to not make US spend a wad every time we go to the store.  (We do not negotiate with terrorists–or screaming toddlers.)

Basic healthy foods aren’t that expensive.  It’s the fun stuff that adds up quickly.  Our kids have learned that we buy a little bit of the fun stuff, but it’s a rare treat.  The best part is when a treat is rare, it’s more exciting than when you get to eat it all the time.

To teach my kids what things cost, I have them look at the grocery ads with me to get an idea of what sale prices are at the various stores in our area. We plan our trip based on the best sales that week. Then I take them shopping 1 or 2 at a time and have them help me decide which items are the best value.

We divide the price by the number of ounces or servings to figure out the cost per unit.  Then can compare and decide whether it saves money to buy bigger packages.  Often it doesn’t–especially at Wal-mart. One of the keys to saving money is to never assume somethings a better buy…take a second to do the math.

Once they are old enough and trustworthy enough (which totally varies from child to child,) I send them into the store to grab a short list of items while I wait outside.  These solo flying sessions teach them the most.  It’s like how we remember how to get places when we drive there ourselves, but not so much if we were just the passenger.  The first time I let them do this I was terrified that something would go wrong, even though we were at our small neighborhood Aldi and I was right there.  It was fine (even though my daughter thought the cabbage was head lettuce–we just adjusted our recipe :).) The youngest child I’ve sent in this way was 11, but sometimes I’ll let a younger sibling go with their 15yo sister.

It’s much easier to learn thrifty shopping as a kid than to try to change your way of thinking as an adult.  It’s something I learned at my mama’s side and passing on to the next generation.

This is day 18 of our series 31 Days of Kids and Money