Fill Your Freezer in 7 Days

I have a love/hate relationship with freezer cooking.  I love the idea of healthy, budget friendly, ready to warm up and serve food at my fingertips.  This run through the field of blooming tulips vision of freezer cooking has left me falling on my face in a surprise pile of cow dung every time.  There are some definite tripping hazards that I’d like to prevent before we get started.

#1: Cooking sessions that take ALL DAY, completely wear you out, and destroy your kitchen.    Honestly my freezer cooking sessions (all 2 of them) have been so draining that the pain did not outweigh the benefits.  It took years before I was willing to try it again.

#2 Meals that are so thick and so frozen solid that if you do not remember to thaw them out ahead of time (overnight in the fridge is NOT long enough) that it will take 3 hours to heat them through.  At that point the edges will be burned and the middle will be sort of warm.  Bon Appetit!   I use freezer meals for emergencies and I don’t always think to thaw in advance.

#3 Picky Eaters! It’s a big letdown when you’re standing in your perfectly clean kitchen, feeling like Martha Stewart with your freezer meal fresh out of the oven, and then have your family decide they don’t like it.

To make this viable a few things have to happen:

  1.  We need healthy recipes our families already love or are sure to love.
  2. We need the meals to thaw quickly or cook quickly without thawing.
  3. We need the cooking session to be SHORT!  Ideally less than 3 hours.
  4. We need minimal mess when we get done
  5. Plus we need not to tie up our good pans in the freezer, have room to store these meals in our freezer, and not pack them in containers that will leach toxic substances into our foods.

Here are a few Suggestions to make this go better:

  1. Skip the foil pans.  Aluminum will leach into the food and it does it at an accelerated rate as it’s heated.  If you can’t avoid the aluminum pan or foil, place a parchment paper (preferably unbleached) barrier between the aluminum and your food first.
  2. While plastics can also leach hormone disrupting chemicals into your food, they are less likely to do it at super cold temperatures.  Even BPA free plastics are harmful.  When public outcry demanded the removal of BPA, the plastic industry had to find a substitute to keep plastics from getting brittle.  They chose BPS which has the same hormone disrupting properties as BPA.  I still choose gallon freezer bags for my freezer cooking, I just make sure my food is cooled completely before I bag it and remove food from the bag before reheating. For heating, glass; stainless steel; and silicone pans are your safest bet.
  3. To make freezer cooking sessions short, I focus on dump recipes in the following categories:

Sheet Pan Suppers

Slow Cooker Meals

Instant Pot Meals

& One Skillet Meals

These meals all fit into freezer bags and take up the least amount of freezer room as possible, thaw easily, and require a minimum of prep time.  They are almost all meals-in-one needing no side dishes or just a tossed salad or bread and butter to round them out.

Tomorrow, I’ll be back with our first dump and go freezer recipe: Sheet Pan Pepper Cheese-Steak.

Does your family have favorite recipes that are sheet pan suppers, slow cooker meals, instant pot meals, or one skillet meals?  Have you had any experience with freezer cooking?  How did it go?  Send us your tips!


Makeover Strawberry Pretzel Salad

Strawberry Pretzel Salad is more dessert than salad, and it’s one of my favorites.

The original recipe is packed full of sugar, excess butter, artificial coloring, and hydrogenated fats.

I saw some opportunities for nutritional improvement without sacrificing much flavor.  I started by reducing the amount of butter by half…and honestly it still was plenty.  I also cut the sweetener amounts way down and then substituted Truvia or Erythritol for the sugar.  I got rid of the hydrogenated fats by swapping out the whipped topping for protein rich Greek yogurt. And ditched a pile of sugar and artificial food coloring by using homemade gelatin from light cranberry juice that was colored with vegetable powder instead of box gelatin colored with food dye. This healthier version is worthy of potluck suppers.

Healthier Strawberry Pretzel Salad

2 cups (about 5 oz) roughly chopped pretzels (gluten free work too)

6 Tbs butter, melted

3 Tbs Erythritol or Truvia

8 oz Neufchatel Cream Cheese

8 oz Unsweetened Greek Yogurt

1/2 cup Erythritol or Truvia

1 lb fresh strawberries, hulled and sliced

2 cups Low Calorie Cranberry Juice, look for an aspartame free variety.  I got mine from Aldi and it has 5 calories per cup.

1 Tbs plain Gelatin

  1.  Sprinkle gelatin over 1 cup of cranberry juice.  Let stand for 1 minute.  Microwave on high for 1 minute or until dissolved.  Stir in the remaining cup of cold juice and chill until thickened.  (About 30 minutes to an hour.)
  2. Meanwhile, preheat oven to 350 degrees. Stir together pretzels, melted butter and 3 Tbs sweetener. Press evenly into the bottom of a glass 9×13 pan.  Bake for 12-15 minutes or until golden.  Cool to room temperature.
  3. Beat together cream cheese, Greek Yogurt and sweetener until smooth.  Spread over cooled crust.
  4. Top cream layer with sliced strawberries, then pour thickened gelatin over all.  Chill for 3 hours or until set.Note: If you don’t let the gelatin thicken before pouring, it will sink to the bottom and make your crust soggy. I learned from experience

It makes 8 generous servings each with 262 calories; 16g fat; 20g net carbs and 8g protein.  I enjoy a piece for breakfast, or a snack, or both.

For the same size serving, the original recipe has 510 calories; 29g fat; 57g net carbs and 4g protein.

Have you given a favorite recipe a healthier makeover?  I’d love to hear about it.

This post contains amazon affiliate links.  Linking to the products that I personally use in my home. If you choose to purchase anything through one of these links, I will receive a small commission.

Grab and Go Muesli Breakfast Cookies

I’m constantly on the lookout for ways to simplify our lives, and if it makes us healthier too, it’s a double win.  Breakfast cookies are one of those double wins and are easy to grab and eat for a healthy breakfast on the go or an after school snack on the way to music lessons or sports practice.

I made these Muesli breakfast cookies last week for the Fit Mama meal plan and it was instant love. I had three the first day, one at breakfast and at each of my snack times. Inspiration for the recipe came from Sweet as Honey and I tweaked it to simplify the number of ingredients and to fit into the macro nutrition profile I needed for the Fit Mama plan.
I can imagine all sorts of different variations just by changing the type of dried fruit and seeds or nuts added.  Different fruit options include: dried blueberries, golden raisins, apricots, cherries, strawberries, apples, dates, bananas, mango, papaya, pineapple, prunes. Prunes are shockingly delicious despite their old person stereotype and taste sweeter than dates without as many active carbs . Nuts and seeds might also include macadamia nuts, almonds, pecans, walnuts, pistachios, cashews, filberts, or cacao nibs.

I love dried fruits and nuts so much that it’s easy for me to overdo it and gain weight on them even though they are healthy foods.  By baking them into these cookies, there’s instant portion control.

After dropping the dough onto the sheets, you’ll want to use a silicone spatula to flatten and shape them into cookies.

Something you need to know about these is that they are HEALTHY and they taste like it.  They aren’t super sweet, just sweet enough to be pleasant.  More the sweetness of a piece of honey wheat bread instead of the sweetness of a chocolate chip cookie.

For that reason, I’m going to share the small recipe first.  It makes 4 large single serving cookies, enough for your family to taste them before you waste large amounts of ingredients.

I found everything except the unsweetened coconut at Aldi.  I also chose to use Great Value Sugar Free Syrup from Wal-mart instead of honey to keep the macros in fat burning zone. If I were making these for kids, I would use honey or real maple syrup as listed.

Muesli Breakfast Cookies, Small Recipe

3/4 cup Old Fashioned Rolled Oats

1/4 cup Unsweetened Coconut Flakes

1/4 cup Whole Wheat Flour or Almond Meal

1/4 cup Craisins

2 Tbs Pepitas (Shelled pumpkin seeds)

2 Tbs Sunflower Seeds

2 Tbs Fresh Ground Flax Meal

1 Egg

1/4 cup honey or real maple syrup

2 tbs melted coconut oil

Preheat oven to 350 degrees and line a baking sheet with parchment paper. Combine all ingredients in the order given and shape by 1/3 cupfuls into 4 large cookies onto prepared baking sheets. Bake for 20 minutes, or until golden brown. Cool completely before moving so they don’t fall apart. Enjoy with your favorite warm beverage.

They are also really good frosted with Natural Peanut Butter.

Muesli Breakfast Cookies, Family Size Recipe

3 cups Old Fashioned Oats

1 cup Unsweetened Coconut Flakes

1 cup Whole Wheat Flour or Almond Meal

1 cup Craisins

1/2 cup Pepitas

1/2 cup Sunflower Seeds

1/2 cup Ground Flax Meal

4 eggs

1 cup Honey or Maple Syrup

1/2 cup Coconut Oil, melted

Preheat oven to 350 degrees and line a baking sheet with parchment paper. Combine all ingredients in the order given and shape by 1/3 cupfuls into 16 large cookies onto prepared baking sheets. Bake for 20 minutes, or until golden brown. Cool completely before moving so they don’t fall apart. Enjoy with your favorite warm beverage.

Made with Sugar Free Syrup instead of honey, each cookie contains: 270 calories; 16g fat; 24g net carbs; 7g protein.

The batter is moist enough that I think I could stir in some vanilla protein powder for extra sweetness plus protein.  If I try it out, I’ll update with the results.

Do you ever have call for grab and go breakfasts? What’s your favorite?


Makeover Monday: Angela’s Kitchen

It feels a little silly writing a kitchen makeover post for myself, when we just gutted and redid our home about 4 years ago.  My mom is having a hard time imagining that I would consider painting 4 year old cabinets, when she wouldn’t dream of painting her 40 year old cabinets.  I can see her point, though I don’t share the guilt over painting good wood that she feels.

The kitchen in 2012 when we bought our house.  The door you see straight ahead is the old pantry, which I loved but removed anyway.  The blue top and gray bottom is the old dining room, which became the new kitchen.  Right through the doorway on the left, we cut an arched doorway in the dining room wall to create the entrance to the new laundry room and pantry. 

The kitchen in 2014 with the camera standing about 10 feet to the right, but pointing the same direction.  We removed several walls, and pushed the kitchen to the old dining room area making a large open space. Since this photo was taken, we’ve added the fridge cabinets, and crown molding.  Both tables are folding tables being useful while we save up for real furniture. 

A good friend told me, “Don’t ever feel guilty about painting something you hate.”  And while I definitely don’t hate my cabinets, I don’t love them either.  We ordered from CabinetGiant.com, because of their amazing prices and great quality and because we didn’t have an IKEA at the time or any hope of one coming soon.  (So glad to be wrong about that one.)  The doors, when they arrived, didn’t match the sample. They were much more yellow based in tone when we were expecting a brighter white with some glazing depth.   At the time, I had been without a kitchen for a solid year, cooking on an electric skillet and in a crock pot for a family of 8, and never eating out.  I also had a couple of toddlers, while trying to homeschool a struggling fourth grader, and teaching part time at a private school.  I was undone. Yellow cabinets were the least of my worries, so we put them in.

The kitchen today, quieted and the folding table island removed.  The thing that glares at me most about it, is the overwhelming amount of brown wood.  When we designed this kitchen, I thought the floors would be enough lighter than the cabinet lowers that it would be ok, but it’s not my favorite. 

It took me 2 years to even notice the cabinets clashed with my wall color.  At first glance it would be easier to repaint the walls than the cabinets.  The challenge is, the entire 5,000 square foot house is painted Behr Silver Drop and it’s all open concept, which means I’d have to paint the whole house to change the kitchen color. Painting cabinets started to sound easier.  Add the fact that I’ve never liked the cabinet color, and it’s a no brainer.

The whole kitchen was a compromise.  We live in the midwest, where decorating trends are a good 5-10 years behind the coastal states. So we were still enjoying the end of the Tuscan Beige era. I craved a bright white kitchen, but my husband had been dreaming of finally being able to afford a rich Tuscan Beige kitchen like we had seen in the nicer parts of town.  I didn’t hate that look, while he definitely seemed to dislike the white shaker style I preferred, so I compromised.

Then a blessing hit us, that I couldn’t see at the time.  We lost our life savings to a foundation repair which meant we couldn’t finish the kitchen. If that hadn’t happened, I definitely would have selected granite countertops that I would have hated in just a couple of years, and been stuck for decades because of the huge investment.  Instead we spent about $200 on hardwood plywood that we painted and sealed with marine poly.  They have served us for 4 years, though the seams split early on and the marine finish wore off after a few months of daily washing and they are now stained and showing signs of water damage.

I painted the plywood countertops a medium gray, hoping to bring the kitchen into the current decade, but instead it just drew attention to the fact that it didn’t harmonize.  It was a good lesson to me that if I can’t afford to fix the glaring problem, it’s better to work WITH it, then to ignore it or fight against it.

It’s finally time for us to finish the kitchen!  (Our bedroom comes first on the project list, but I like to decide on finishes far in advance so I have time to research prices and wait for sales.) Here’s our to do list:

  1. Break up all the dark wood
  2. Replace my double sink, with a huge single apron front sink.
  3. Install Countertops
  4. Install a backsplash
  5. Install a range hood
  6. Build an island with a sink.
  7. Choose counter-stools for the island
  8. To paint or not paint the contrasting crown molding.

I also may need to change the island pendant lights, but didn’t focus on that with this photoshop plan.

First, I tried navy paint on the lower cabinets and white crown, which I LOVE.  It broke up all the wood, but when I installed a white island, it gave the same affect without the need to paint all the lowers.  I’m all for less work, lol.

Here’s the same look with brown cabinets and brown crown.  I like this ok, but the stools (which I love the shape of) fight against the other wood tones and don’t relate to anything in the room. As much as I like the wood lowers better with the new whiter uppers, I still loved the navy more.  The original navy view felt a little too white, too sterile.  So I tried switching out the range hood for reclaimed wood.

I like how the reclaimed wood had parts of the dark wood color from the floors, but brought in lighter wood tones too.  Then I thought I’d switch out these expensive stools that didn’t quite blend with the floors, with some low profile stools for 1/3 of the cost.

They are ok, but I’m going to look for a third option in a color that’s a perfect blend of the two, a lighter wood like the hood, that plays nicely with the redder floor tones.

The last thing I wanted to try was painting the crown navy to match the lowers instead of white to match the uppers.  The risk is making the room feel short again. It’s 18 feet wide, so short ceilings are a minor issue.

While I like this, I think I like the open airy feeling of crown that matches the upper cabinets better.

This exercise has me itching to paint right now.  I’ve had the upper cabinet paint on hand for over a year already. But I promised myself I’d finish some of the other projects I started and didn’t finish, like painting the foyer, first.

If this were your kitchen, what finishes would you pick?

Sources:

Navy Paint Color: Behr Starless Night

White Cabinet Color: Behr White Pepper

Island turned legs: Etsy Design59Furniture

Backsplash: 3×6 Mohawk gloss white subway tile

Countertop: Not sure on our final choice, but we are looking at Marble look quartz options.  I’m afraid the cost will be impossible.  I haven’t eliminated the possibility of a good laminate.


How to Save Money on Printer Ink

I bought something in November that has changed my life.  It sounds dramatic, but I mean it.  I no longer have anxiety about printing things…in full color…as much as I want. Printable art for my walls?  Yes please!  Full color planners?  Yay!  Color meal plans and crochet patterns?  Yes and yes.

I used to hold myself back and if I had to print, I’d do 4 pages in one so that the print was so tiny I could barely read it.  And of course it was grayscale, draft quality.  We had previously purchased a printer from Costco, and made sure that it used the Costco refillable ink cartridges to try to save on printing costs.  Even then, with my crazy miserly printing habits, we were spending about $30 a month on ink.

Then in November, I bought a new printer.  My old one was working just fine. In fact, I sold it yesterday, from a Facebook Marketplace ad, to a grateful woman who had just bought a new pack of ink and opened it before her printer quit.  It was a win-win.

My new printer qualifies for instant ink. For $10 a month, I can print up to 300 FULL COLOR or black and white pages.  The printer is connected to wifi and tells HP when I’m running low on ink and they just send me a new cartridge at no additional charge.   I’m saving $20 a month, plus I never have to go on an emergency ink run and pay full price because the refill place can’t get it done in time.

If I go over my 300 pages (which I did last month) They will give me another 25 pages for just $1. Any unused pages will roll-over to the next month, so there’s no worry of waste.  They also send an envelope to mail back the used cartridges for recycling.

I can log in any time I’m curious about how many pages I’ve used, and check it out.  I haven’t even gotten to the best part yet.  If you use my link, you can try it for free!  PLUS if you buy a new printer that comes with a free trial of the instant ink, the offer is stackable with my free month link for you.  I started in November and won’t pay for ink until MAY!

You might already have a printer that qualifies, look for it here.  If not, these two printers are my favorites:

This one is an all in one printer with fax, scan, copy, and a top load document feeder.  It’s the one I bought and it makes very good quality prints.

This one is a little less expensive, without the automatic top feed option.

I hope this serves you!  I’m off to go print my planner pages and fit mama meal plans for next week (in full color!)

Disclaimer: This post contains amazon affiliate links.  If you choose to purchase anything through one of those links, I will earn a small commission.

I also have an affiliate with instant ink, so if you sign up for a free month with my link, I get a free month too.  As an instant ink customer, you will get an affiliate link to share with your friends as well.


Our Most Popular Posts from 2017

I was shocked when I looked up our most popular posts from 2017.  I still get the most comments on our 3 ingredient Biscuits and Gravy recipe than on any other post.  Which kind of makes me cringe, because it’s the unhealthiest recipe on the site–eeek!  It has been in the top 10 since I wrote it and still holds strong at the #2 favorite post.  What’s #1?  It’s a post for homemade eggrolls (totally delicious) that lost it’s photos a year ago, and yet people still come and get the recipe.  I just added taking new photos to the top of my to do list to improve the user experience on this most loved post.  I also want to buy an air fryer and try them out in that.  Here’s the full top 10.

#1  With 6 you Get….Eggrolls
#2  3 Ingredient Slow Cooker Biscuits and Gravy

#3  5 Favorite Chicken Marinades

#4  Plywood Countertops (We still have these!  Though they are looking really rough.  I’m totally paralyzed in picking out real counters and designing the island that needs to go in first.)

#5 Homemade Wallpaper Paste

#6 Simple Green vs Mean Green (Comparing the dollar store brand with the name brand)

#7 Getting Stains out of Stored Clothes

#8 First Steps to reducing your grocery costs

#9 When My Life Changed in 4 Weeks My master bedroom makeover that went from Hoarders Monthly to BHG worthy in 4 weeks

#10 How to Make Homemade Fortified Almond Milk 

#11 Feeding 8 on a 4 Person Budget (This post only missed 10th place by 20 readers, so I thought it should make the cut too.)

I’ve been working behind the scenes on several projects, like reformatting the Fit Mama Meal plans to make them easier to use (I’m really proud of the new look!) I’m applying some of those principles to a new Family meal plan template, yet to be released.  Plus researching and testing freezer meals for a challenge we’re about to do together.  (Who wants to fill their freezer?!!!)

It all takes a ton of time, but makes me really look lazy to my friends who only get glimpses of what I do through the public blog.   I’m only half lazy, lol.  I definitely still waste too much time getting sucked into facebook or online window shopping.

Also, we’ve had a parenting crisis that reinforced my goals to get offline in the afternoons and evenings so that I could be present with my teenagers in a greater way.  It’s not my place to make the specific details about our issues public right now, but I wanted to be upfront that we are having them and if you are too, to help you not feel alone.  In my limited and flawed parenting experience I’m still convinced that the secret to raising happy, mentally healthy kids, is a close relationship with them. That relationship can only be built with TIME spent together, when they feel safe to express themselves in a respectful way without fear of ridicule.  So that’s what we’re doing, and praying A LOT.

While I finish prepping for our freezer meal challenge, take a few minutes and help me serve you better.  What type of freezer meal recipes are you most interested in?  Also, could you leave a comment and tell me your experience with freezer cooking, what you liked, and what didn’t work for you?


How to get ready for 2018

I’m taking this week to get ready for a new year.  Everything that I’d like to improve is overwhelming, so I’m reminding myself that it doesn’t have to happen all at once.  A gentle plan is more my speed.  If I can only change 1 thing, but do it well and feel really good about it, then that sure beats trying to do it all, falling flat on my face, and feeling like a failure.

I’m basing my plan around the parts of life that bring the most stress and fixing that.   What am I running around wasting time looking for?  What sets off a stress response? What keeps me awake at night? What makes me nervous when I hear the door bell ring with unexpected company? Some of those are:

  1. My desk drawers full of things I don’t use and not being able to find things I do use.
    • Solution: purge and oragnize
  2. Bathrooms not company ready for unexpected drop ins.
    • Create a regular cleaning schedule. Train and delegate to the kids.
  3. Not being able to find my keys.
    • A key rack
  4. No spot for my coat, hat and gloves.
    • Install a hook in the garage
  5. Getting double booked because I don’t have everything on the family calendar.
    • Add things instantly when I find out about them, and don’t worry what people will think if I’m on my phone (especially in church) while I’m doing it.
  6. Not being ready for music at church when my turn comes up
    • Create a notebook of songs in order ready for prelude, set aside daily practice time, and music pre-selected for solos.
  7. Having Freezer Meals/Slow Cooker meals ready for busy nights
    • Put together a dump and go slow cooker freezer meal plan
  8. The attic storage area needing more organization
    • Schedule a work day
  9. Light blaring in through the front windows while I’m teaching music lessons
    • Order and hang light filtering blinds.
  10. The stack of papers on the kitchen counter.
    • Create a system, admit the old one didn’t work
  11. My weight
    • This isn’t an easy fix, but I’m so much further along than I was this time last year and I’m excited to keep going with my Fit Mama meal plans and our accountability group.

This past year, I’ve been slowly putting systems in place like this that help me to live the life I want to live instead of getting tossed about by all the demands on our time.   It has helped a lot and I’m excited to keep going. The beauty is once the plans are in place, that problem is solved until something big changes.  It’s part of my overall plan to nourish my adrenal system by reducing daily stress.

I’m also re-evaluating some of my systems that didn’t work as well as I had hoped and changing them up.  For example, I bought a cute file box for my kitchen counter to tame the papers, but it’s full and now there’s a stack of papers in front of it.  It’s not working for me, so I’m setting aside time to figure out why and how I can improve.

The main theme behind the goals on my list are size.  They are all tiny little accomplishable things.  I want goals that lead to action, so I broke stuff down.  Instead of writing “get organized” I identified a few areas to organize that I can solve easily, then I assigned a date to them and scheduled the time to make it happen.

To make goal setting more fun, I created this free printable for us. If you are already subscribed to the blog, you’ve got the download link in your inbox.  If not, you can get it here:[wd_hustle id=”blog-subscriber”]

My other task this week is making a business budget.  It’s embarrassing to admit that I haven’t had a decent business budget EVER.  If I wanted to buy an ad or a course, I’d look in the account and if I had money I’d buy it, without a thought to my longtime plans.   I want to be more purposeful than that, so not only am I writing down my monthly business expenses, I’m also looking at the income side of things and how much I need to make our goals happen.  Darren’s income covers our basic needs like housing, gasoline, food, clothing etc.  My income covers the fun stuff like vacations, remodel expenses, and home decor and not so fun stuff like Irlen glasses and specialist appointments.   If I want to take my kids on a cruise or to see the Grand Canyon….It’s up to me to make it happen.

What about you?  Are there parts of your life that are driving you crazy?  What can you do about it?  Leave a comment and tell me about it.

Easy No Bake Eggnog Pie 2-Ways

Easy Eggnog Pie 2 Ways---delicious and creamy with weight loss versions too

This light creamy pie is perfect for last minute desserts.  It’s fancy enough for company or basket dinners or even a neighbor Christmas gift, but so fast even a stressed out Mama can whip it up.  Graham cracker pie crusts are easy to make but for $.69 each at Aldi, I just buy them and keep several on hand at all times.

The first version uses instant pudding mix and sugar free works just fine.  If you want to replace the Eggnog with a non-dairy version, you’ll need to add additional thickener like 1/2 tsp of Xanthan gum or Glucomannan powder.  There’s something about the dairy milk protein that is essential to thickening up instant pudding mix properly.

Eggnog Pudding Pie

1 Graham Cracker Crust

1 box, Instant Vanilla Pudding

1 cup Milk

1 cup Prepared Eggnog

4 oz Whipped topping

Beat the milk, eggnog and pudding mix together.  Pour into the crust.  Let chill for at least 30 minutes then top with whipped topping.  Alternately the whipped topping can be folded into the pudding mixture and spread into the crust.  Sprinkle with a little nutmeg.


This second pie is a no-bake cheesecake that is easy to make fitness friendly.  For the most diet friendly, skip the crust and use a homemade sugar free eggnog, recipe coming soon.

Eggnog No-Bake Cheesecake Pie

1 Graham Cracker Crust

8 oz Neufchatel Cream Cheese

8 oz Plain Greek Yogurt

1/3 cup Sugar or Erythritol

1 cup Prepared Eggnog (Regular or Dairy Free)

1/4 cup water

1 Tbs or 1 Packet Unflavored Gelatin

4 oz Whipped Topping

Sprinkle gelatin over 1/4 cup water in a medium sized microwaveable bowl.  Let stand for 1 minute or until gelatin is dissolved.  (It will be clear and no longer yellow in color.)  Microwave for 1 minute or until melted, clear and smooth.  The gelatin will bloom and spill over if your bowl is too small.

Meanwhile beat together cream cheese, yogurt, sweetener, and eggnog. Beat in gelatin mixture.  Pour into crust and chill until firm (about 3 hours.)  Spread with whipped topping.


So what’s your favorite easy Christmas dessert?  I’m looking to expand my repertoire!

The Busy Mom’s Dinner Survival Guide

I wrote this post 3 years ago, and as I re-read it over the weekend, everything was still true. The busy season of parenting can last a long time–eek! It’s a little easier now having a teenage driver (who paid cash for her own car,) plus more kids old enough to help with food prep, but I still rely on all of these tips to keep affordable food on our table.

Today we have basketball practice for 2 teams, 2 ballet classes, Boy Scouts, Handmaidens, Lamplighters, and Trailblazers, plus practice time for 2 violin and 4 piano students.  Those are just our after school activities.  We’ve talked about limiting kid activities more, but when it’s time to choose the thing to drop, we freeze up.  Each child only plays one sport at a time and the club activities are part of our church—it’s just when you multiply it times 6, it gets a little nutty.

I was fixing a quick supper tonight in between my taxi duties and thought how my meal standards were lower on nights like these. It’s not that what I was fixing wasn’t healthy, it was just simpler–not as many dishes.  I threw some turkey burgers on the indoor grill and serve them with Whole Wheat bagel thins and a condiment bar.  Done.

When I grew up, my mom had an elaborate meal almost every night with at least 3 veggie side dishes and often fresh baked muffins too.  We sat down together and had an electronic free dinner in the dining room with good conversation.  It was awesome! On our quieter nights, I try to make meals like my mom did, but today I’m giving myself grace for the busy.

When we order at a fast food restaurant, we never order drinks and rarely order fries.  It’s more affordable that way, and realistically there are enough calories in the sandwich without the extras.  So I decided that less side dishes at home was ok too–only better.  It costs less and has whole food ingredients.  win-win!

Here are the ways I survive on busy nights:

1.  Crock Pot it–When I remember, I put something in the crock the night before (then chill in the fridge to start in the morning) or in the morning.  Especially a dump and go soup like this one or this.

2.  Breakfast for dinner–pancakes, French toast, or bacon and eggs are fast to make and everyone likes them around here.

3. One pot it–Making an all in one meal in the skillet (like Skillet Lasagna, or Stir-Fry) is not only fast, but makes clean-up easier too. Just searching “one pot” on Pinterest brings up a whole bunch of yummy ideas.

4.  Cold Cuts–If I can’t do anything else, I can throw out a sandwich bar.

5.  Baked Potato Bar–Potatoes cook really well in the slow cooker.  You don’t even need foil.  Just scrub them and toss them in.  And if you forget, 8 minutes in the microwave will save dinner. Perfect toppings:  armed up chili (out of a can or leftovers); steamed broccoli cuts; cheese, bacon bits, green onion, sour cream, ranch dressing. Baked sweet potatoes work great too.

6.  Taco Bar–I put 2 lbs of ground meat (beef or turkey) in the slow cooker (still frozen!) and 4 tablespoons of taco seasoning.   Then cook on high for 3-4 hours or on low all day.  When it’s dinner time I just break up the meat with a potato masher and set out the condiments for taco night.

7.  Rotisserie Chicken:  Costco sells these for $5 each.  They say they are all 3 lbs, but that’s just the minimum weight.  I look around for the biggest ones and have scored a 4 pounder before. The price is the same.  We eat these with warmed up canned or frozen veggies and a tossed salad from the fridge.  I throw the leftovers in the fridge to boil up for soup on a calmer day.

8.  Get a child to cook.  I’m blessed to have older kids (Aged 14, 12, 11, 9, 7, and 3.)  Tuesday is kid’s cook night.  I just print off the Tuesday dinner recipe from the GSP menu plans and hand it to the kids.  Then I work nearby in case they have questions.

9.  Have a FULL pantry.  Cooking on the fly only works if you have plenty of ingredients on hand.  If you’ve been stocking your pantry with the Grocery Shrink method, you’ll be good to go.

How do YOU manage dinner when life gets a little too busy? I’d love to hear your tips.

8 EASY steps you can take right now to CUT your grocery bills! (I bet you’re NOT doing #1 or #5!)

In October, I did something crazy and drove by myself to Dallas, TX where I had rented an apartment for a week with a complete stranger, Nicole Rule.  She turned out to be my life line and kept me from getting lost in the big city.  Nicole is a Mom of 4 adorable kids and writes at Greatest Worth about living intentionally, starting with money.

Today she’s going to share with us how she keeps her grocery budget down.

Here’s Nicole:

Hello!

I’m so grateful to Angela for giving me the opportunity to share how my family has managed our budget – namely our grocery budget – over the past 8 years.

First, a little context (after all, back-story is always fun): we paid off $100,000 in debt in 26 months and learned to live with purpose and from our values in the process. Of course, during that time we had to figure out how to cut spending so that we could put more money towards what we wanted. And, what we wanted most at that time, was to pay off our debt!

Fast forward to today and our household consists of four (growing) children ranging in age from three to nine years old and two active adults. This translates into needing a LOT of groceries to satisfy everyone. We needed to find some good strategies to cut our grocery bill. And fast.

According to USDA Cost of Food Plans our family of six should be able to survive on a monthly budget of $853.60. This is their “thrifty” plan.

I calculated this by taking their value for “Family of 4 with children ages 2-3 & 4-5” and adding it to the value for “Individual Child 6-8” and “Individual Child “9-11.”

They also provide numbers for “low cost,” “moderate cost” and “liberal” plans.

Our personal “low cost” monthly budget, according to USDA charts would be: $1114.20

Since we’re going for shrinking our grocery bills, I’m not going to go over the moderate and liberal plans.

Read the USDA fine print and you’ll see that these plans include all the food needed to prepare ALL snacks and ALL meals at home. While it isn’t likely that you’ll never go out to eat, I will say that our family rarely did during the time of our debt payoff. We had a mission, and that mission was more important to us than a trip to Chick-Fil-A or sushi!

You’ll have to decide what works for you and your family. If you’re convinced that you can’t go without a restaurant trip here or there, make another line item in your budget separate from your “Groceries” line item. Awareness is key to tackling debt, and awareness is built on honesty.

Our actual budget comes closest to the “low cost” monthly suggestion put out by the USDA. Right now, we hover around $1100 per month for our family of six. And, especially these past few months when we’ve been actively trying to spend less (since I started a new business and have a much lower income), we’ve actually stuck to it!

Here are some tips to help you do the same!

  • What is your WHY?

First and foremost, what is your “why” for wanting to cut your grocery bills? Do you want to work less hours and stay home with your kids so you’re trying to figure out ways to cut your budget? Do you want to make space in your finances so you can take a dream vacation? Are you trying to put some money into college funds for your kids?

Figure out your why and the rest of this will feel like a fun game instead of a horrible chore.

1. Shop through your freezer and fridge first.

I like to take a look at what I currently have in the fridge and freezer BEFORE I make a menu.

According to the EPA, a typical family of four in the US wastes about $1600 annually on produce alone! That’s a significant cut in your grocery budget right there! If you could save $1600 on groceries that would give you $1600 more for debt reduction, college savings or for that dream vacation you’re drooling over.

Seriously, look in your fridge and base some meals off of produce and protein that’s ready to be used.

Also, I buy meat in bulk (often directly from a farmer which is cheaper for much higher quality) and then freeze it. This step is crucial to me cutting down on my monthly budget. If I check the freezer and base all of my meals off of meat that I have on hand, my costs are cut dramatically. I’m sure I save hundreds, maybe a thousand or two a year on this trick alone.

2. Create a menu. (Or purchase Angela’s monthly menu plans – it’s a steal and the work is done for you!)

This is the part that usually trips people up.

Make a menu? I don’t have time for that.

So, if time is an issue you have a couple of choices.

1) purchase Angela’s ready made menu plans. It’s a giant value for what you get and there are even options for specific diets, such as gluten free. OR,

2) after the kids are in bed, make a glass of tea and DON’T scroll through your Facebook feed, and DON’T turn on “This is Us” (OH how I love that show!).

Instead get settled in for menu creation! You’re going to use this next hour to search Pinterest, or your favorite cookbook for some inspiration on what you’d like to make that week!

The first step in menu creation, is to be realistic about your week. If your kids have after school activities on Tuesday and Thursday next week, don’t plan on making a roast chicken dinner. Find a couple crock pot meals that set you up for success and have dinner done for you by the time everyone gets home! Or, use your Instant Pot to get meals done in an hour. We’ll sometimes cook something the night before in our Instant Pot and just reheat when it comes to dinner time!

Next, look at that list of meat and produce that you already have in your fridge – because you did step 3, right?! Base a couple of meals off of what you have on hand.

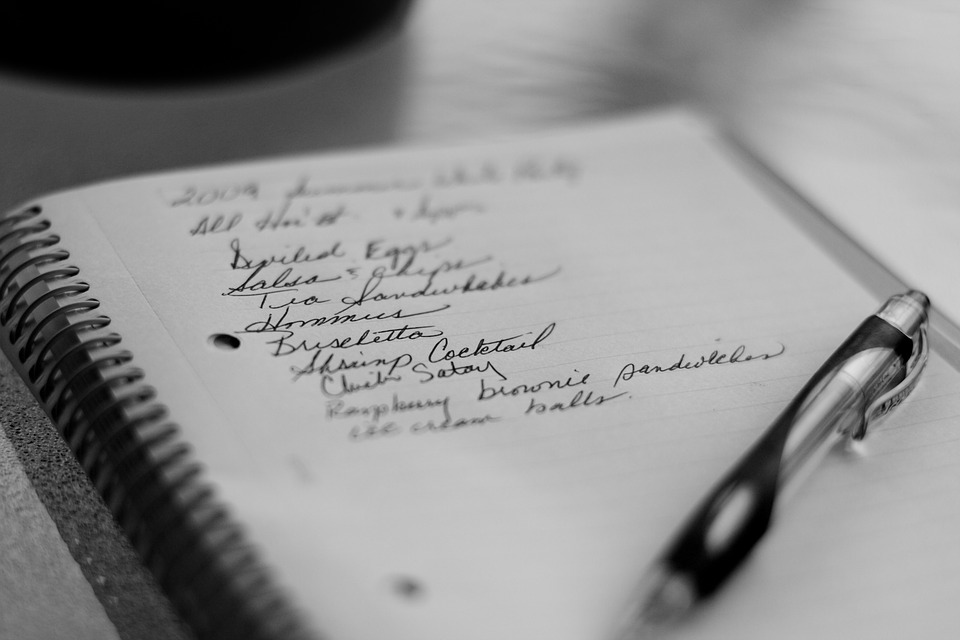
  1. Create a grocery list based on that menu.

As you’re going through and creating a menu, write down the ingredients you’ll need for each meal to make it a success. (We’re trying to only go to the grocery store once per week. It’s crucial to stay out of that store to avoid impulse buying – here’s an article on how grocery stores are designed to get us all to impulse buy!)

Write down everything that’s in the recipe and then move on to the next recipe. Don’t worry about whether you have the stuff needed or not right now. There’s nothing worse than getting up and down twenty times while you’re trying to plan out a menu! We’ll address that in the next step!

Side note: We really only plan our dinners so strictly, but remember you’ve got kids’ lunches to pack (maybe even lunches for you and your partner) and breakfasts to make. Think if there’s anything specific that you want to make for those meals and add it to your grocery list.

We have a “staples” grocery list. Things that we always need on hand to make breakfast and lunch go smoothly. Take the time to create one of those lists and you’ll never be caught saying, “shoot, I forgot the milk!” again!

  1. Shop at home first.

This goes back to number two, but instead of just focusing on perishables, rummage through your shelves and cabinets and closets. Take your grocery list with you and check off what you find.

You know that feeling when you get home from the grocery and you’re putting stuff away and then you see it. Dang. You already had cottage cheese and mustard and milk and onions. You overspent and you’re likely to have some of this go bad. Double dang.

This step has revolutionized my shopping budget. I am one of those, “I’ll just get another jar so we’ll always have mayo on hand” kind of girls. It can be ridiculous when I put the third jar of mayo up on the shelf. Let’s do it differently together.

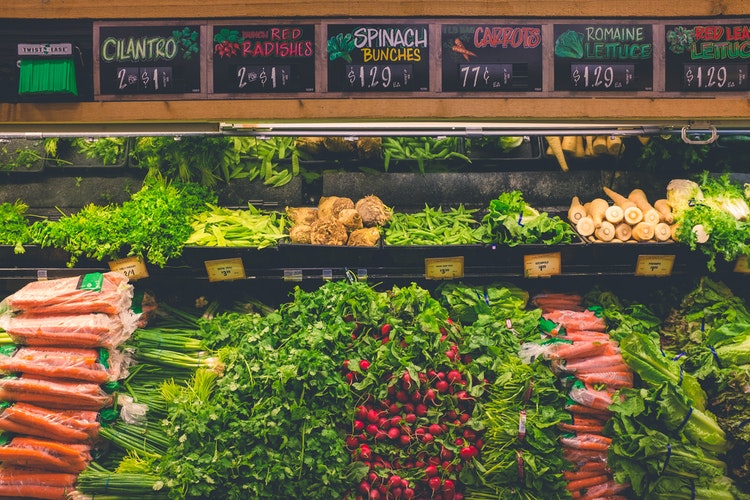
  1. ALDI or Lidl or Anything from this List

Find the store in your area that is offering groceries at a deep discount. It will be a time and money saver. I used to shop at FOUR different grocery stores just to get the best prices. I wasn’t taking into account my time and what that’s worth.

For us that store is ALDI. I’ve started going to ALDI first, and cutting about 1.5 hours off my grocery shopping time! The trick is being willing to go to more than one store. Often ALDI does not carry everything on my list. But, for the discounts, I’m willing to manage that!

Their selection of fresh produce has gotten so much bigger and better. And their organic selection is also growing. I found organic cage free eggs there last time I went. Awesome sauce.

So, I shop at ALDI first!

  1. Shop your local farmer’s market.

I also make a little separate list for those items that I know my farmers will have. This produce is SO much tastier, fresher and healthier than the store’s counterpart. It’s also equally, if not more affordable – when compared to Whole Foods, or, even our regional chain’s produce.

Even if ALDI has organic carrots available, but I know my farmer will have organic carrots – I buy them from the farmer. The food is SO. Much. Better. So much better, in fact, my children ask for the carrots regularly as a snack!

They do NOT do this with ALDI carrots.

Enough said.


  1. Have potluck dinner parties.

Especially if community is one of your family values. These dinners are a great way to build community while on a budget.

Since hosting dinner parties can get a bit pricy, potlucks are an easy way to share the burden. Especially if you’re trying to build this into your weekly grocery budget.

Invite friends over. Make a big soup – an ancient, economical way to feed a large group of people. Have your friends bring salad and bread. Dinner is served and you’re not out double your dinner budget!

That’s it! Those are my tips for how to cut your grocery bill right now. I know some may feel a bit time consuming (creating a menu, anyone?) and I know that it never seems easy to start something new. But, you have a choice.

You can see this moment in your life, with this calling to change your relationship to money, as an opportunity to find creative, inspiring new strategies, or as a burden and chore. It’s that simple – a choice.  

If you haven’t done so already, spend some time exploring and working through my “Defining Your Values Workbook.” What is important in your life? What action steps are going to get you closer to your long term goals?

It may seem like I’m being dramatic. How can defining my values and goals lead me to creating a menu? And how will all of this get me moving towards my long term goals?

I’m living proof that it can.

I believe it’s all the little things we do throughout the day that make up our lives. And those little things, if strategic and moving us towards what we want more of in life, will lead to a more authentic and fulfilling life.

I wanted to pay off my debt so that I could have freedom to follow creativity and inspiration. So that I could be home with my kids during their little people stage.

So I could have the freedom to choose the life I wanted, not resent the life I was given!

Defining my “Why,” creating a weekly menu, cutting my grocery spending have ALL played into my realization of those goals.

What is your big picture reason for cutting your grocery bills?

Write it down, and put it on your fridge. Keep this dream active and alive so you can feel it in your bones. Keep that bigger picture in your mind so that when you’re tempted to throw the menu out the window because you just don’t have time this week, you’ll remember. And you’ll MAKE time to create the menu one. More. Time.

Because that’s all we can do friends. Take it one day at a time.

Thanks for letting me share with you all today. If you’re interested in “Defining Your Values” or learning more about me and my mission to guide women to live intentionally, starting with their finances you can visit me at greatestworth.com! Come by and say hi. I can’t wait to meet you!
Also, click here if you’re interested in my FREE Budgeting Tips Printable that has even more tips on how we’ve saved thousands on groceries over the past 8 years!
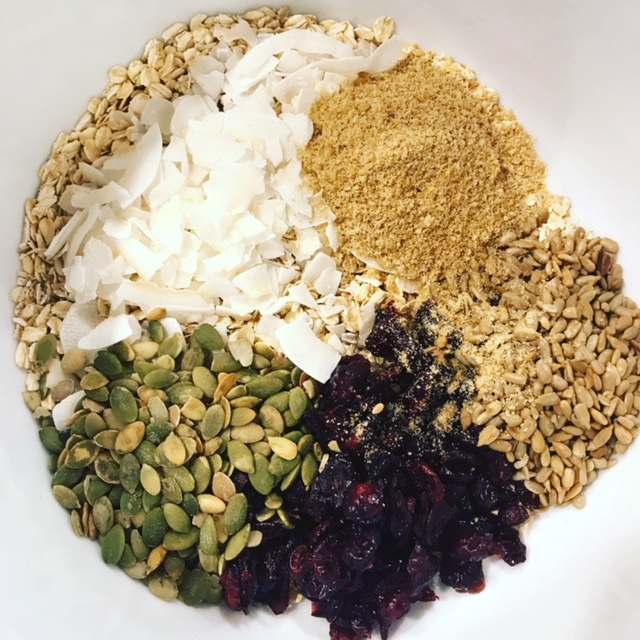