Welcome Fall

Thank you for all your encouraging comments after my last post.  I’m not feeling nearly so overwhelmed right now and I think gratitude and the support of good friends has a lot to do with it.  I’ve found myself running to the journal to jot down things when I think of them–like the song “I need thee every hour,” especially the new arrangement by John Hudson.  Also warm and pleasant jogging weather, and my husband who has known exactly what I’ve needed to hear the past couple of days.

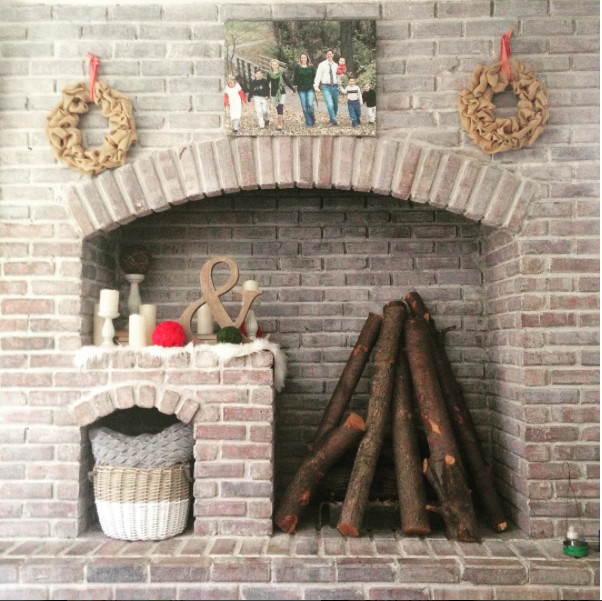
I made some updates to my home for fall, just using some stuff I already had on hand.  If you missed it on instagram, here are a few more photos.  If I were designing a hearth from scratch, I would have done it differently and all the possibilities would have stressed me out and frozen me. Since my rule was to use what I have, it was much simpler (I even used the screws the previous homeowner left in the brick–so yes, the wreaths are slightly uneven.)   I love how limitations FREE us to make the best decisions we can.
screen-shot-2016-09-22-at-10-40-01-am

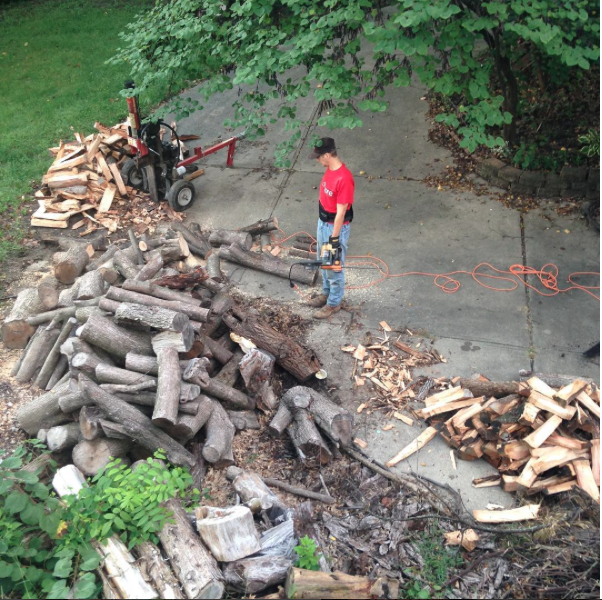
The canvas on the hearth was our family picture from 2012. The dipped basket is from hobby Lobby (as is the ampersand) and the pillow from Ikea.  I made the wreaths using this tutorial. The wood logs were dropped off by a tree cutting crew working for my neighbor.  To get these logs I had to take all 4 trees and the wood chips.  My husband was not nearly as excited about it as I was.  He has been chopping it into firewood for weeks already and is still not done.  We have a wood burning fireplace in our basement, but this one is gas.  It’s not very efficient and way too expensive to burn, so it’s we just use it for decoration.  We talked about ripping it out several times….but it’s kind of holding up the whole center of the house–and has historical significance, being made from the bricks of the old Kanas City stockyards when they were torn down.
screen-shot-2016-09-22-at-10-43-29-am

I did go and help him after I took the photo :D. (Mostly so I could protect the bigger stumps that would make nice side tables or stools for a someday outdoor seating area.)

If you’d like to know how we painted our brick, you can read about that here, and also see what the endcap looked like before we put a chalkboard up over it.
screen-shot-2016-09-22-at-10-40-18-am

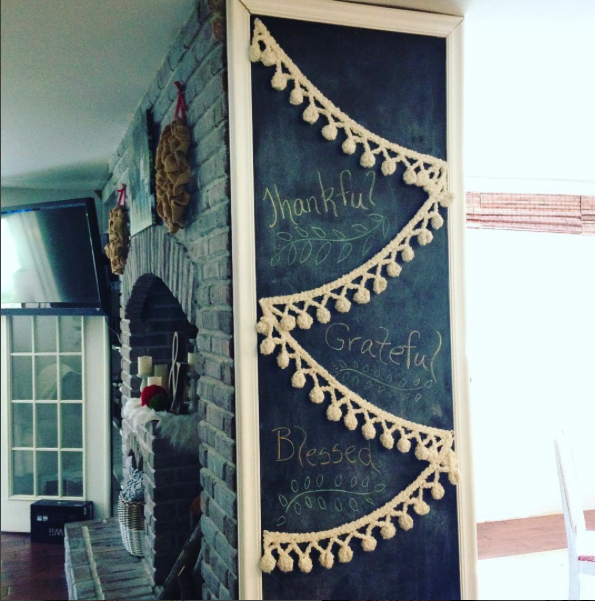
I LOVE the versatility of having a huge chalkboard here. It’s not nearly as dusty as I thought it would be.  It’s visible from the entry so we can put any personal message to guests we want on there, like “Welcome Yeoman Family!” I let the kids design it most of the time, but while they were at school yesterday I added the crocheted pompom garland (with thumbtacks) and words to remind me of my new mindset.  We skip Halloween at our house and go right into Thanksgiving.  
img_3602

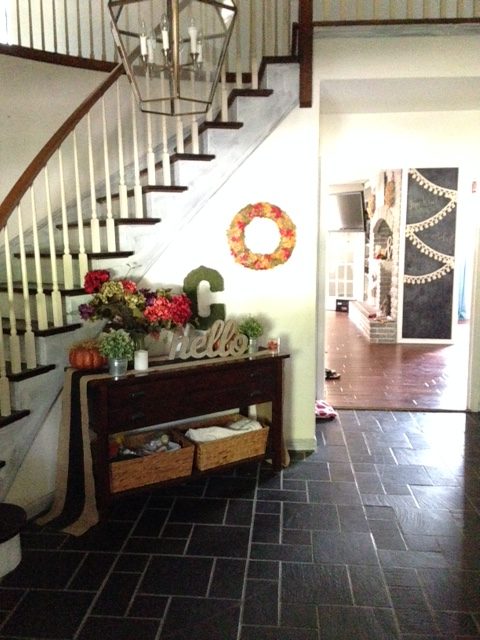
Here’s the view from the front door.  ( I primed the woodwork in here months ago and never painted it. I plan to paint the spindles and woodwork bright white, the walls a light greige, and to restain the wood tones espresso.  I’ve been half started on the woodwork for years….  Ha ha, that’s how you know this is NOT a decorating blog.) I usually keep the baskets under the table full of white blankets for looks, but with young people here, we ended up filling the left one with bubbles and sidewalk chalk since it’s convenient to the front door.

img_3599

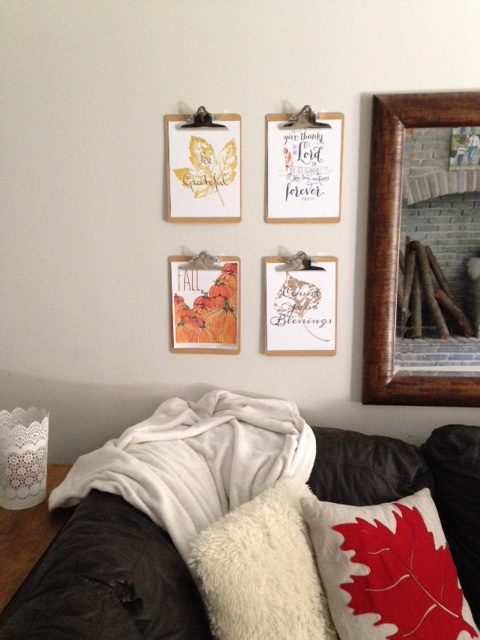
Across from the hearth is a little sitting area.  I bought the white lacy candle holders for Christmas (at Ikea) and loved them so much I never put them away.  I added a few fur throws and pillows, a couple of DIY leaf pillows, and fall themed printables for the clipboards.
img_3600

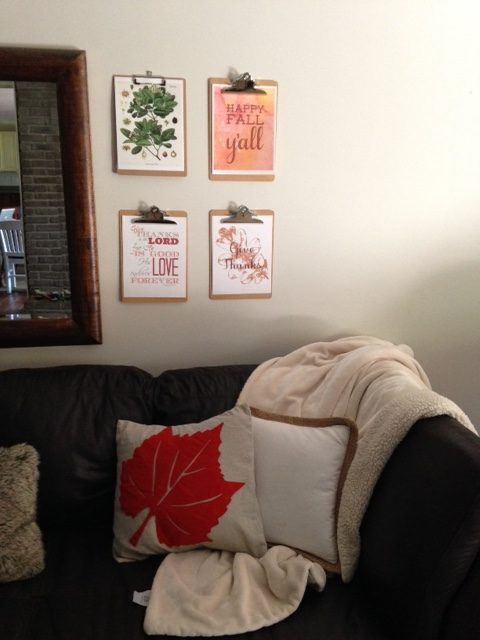
(If I had it to do over again, I wouldn’t buy a sectional this dark–BUT it fits our family, is super comfy, and the leather is exactly what I need for my allergies.  For the time being, I’m thankful to have it. When we knock some of the more important projects off our list, like a basement office for Darren, I’ll see what I can do about lighter furniture in here.) The cupboard behind the sectional holds all our board games. The coffee table is from Ikea and was only $40.  It has already taken a beating on the top.  I plan to add a stained wood top using this tutorial.  Then after a bit will move it to the basement family room (yet to be built) and build something more expensive looking, like this or this.
img_3601

This is the first year I’ve been able to pull together a collection of fall items from what I had on hand.  Every year for a LONG time, I would buy just 1 or 2 items that I thought I would hold it’s charm for me. Some were originally meant for Christmas or Spring. I prefer to keep things fairly low key, so it’s as easy to put away as it is to put out. Does fall decorating excite you or overwhelm you?

P.S.  I just saw the nester is opening her self-study cozy minimalist course.  This is the course I took spring of 2015 that CHANGED my life.  She’s opening the facebook group up to students which is what made ALL the difference for me.  I’m participating this year as I finish up my music room and foyer.
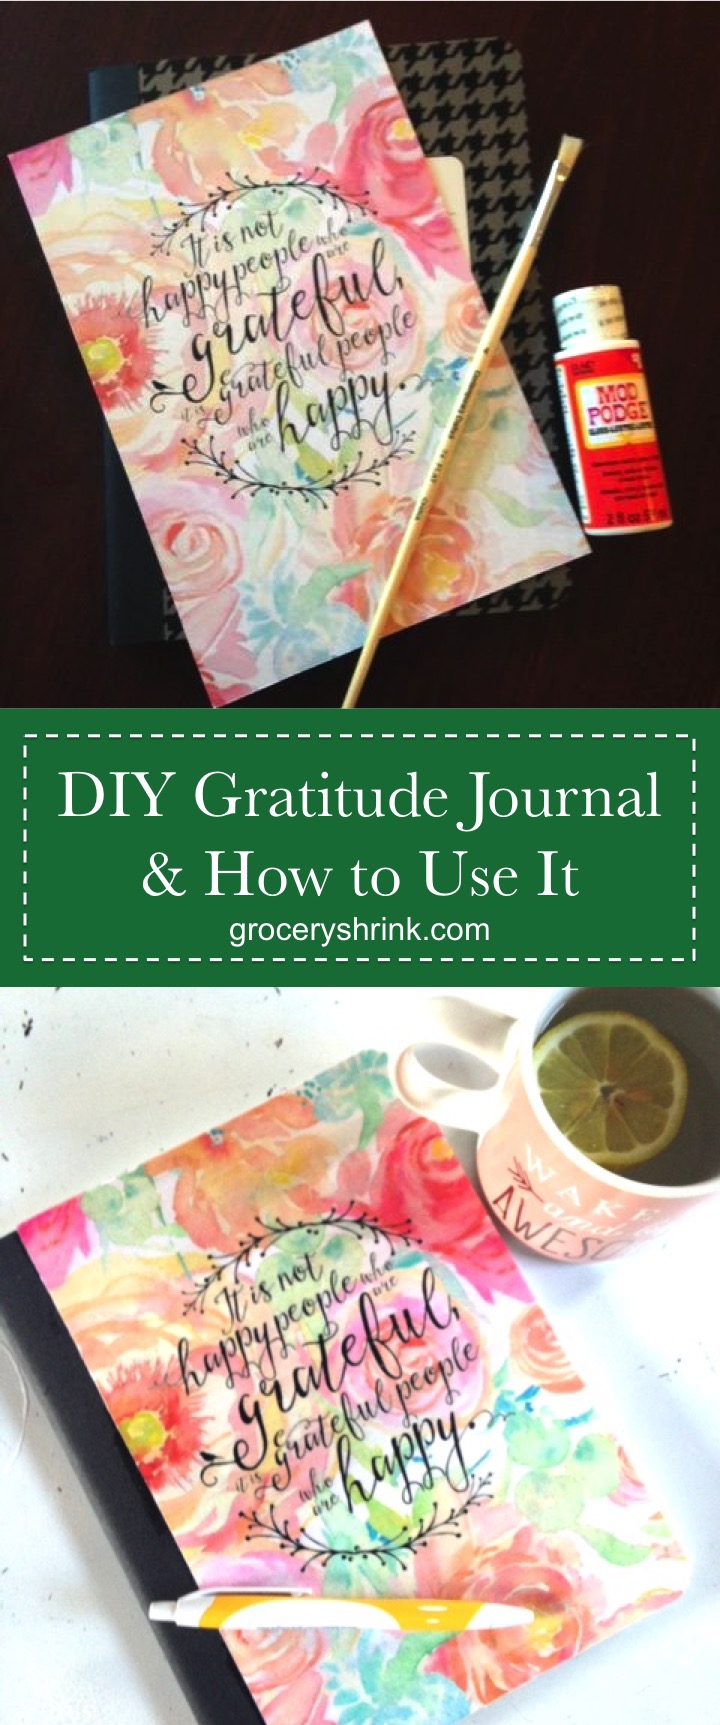
My Gratitude Journal

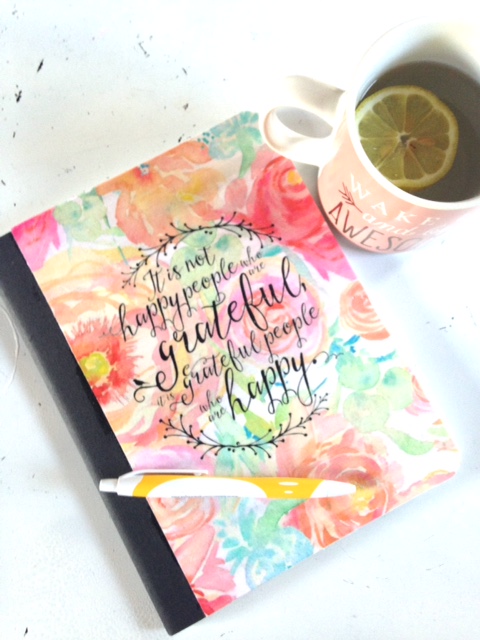
I’m excited about this easy little crafty post, because it has so much meaning to me. Along the journey of life a few years back, we chose to seek out help from a psychologist who said something very interesting: “The thoughts you think, control the chemicals your body releases.  If you are able to change your thoughts, you can change your chemical balance. If you can’t change your thinking, then medication can help make it easier.”

gratitude-journal

Stress is my enemy.  A little spurt of stress can put me in bed for a few days, too weak to even walk unassisted.  I can’t control all my stress, like when someone cuts me off in traffic and nearly causes an accident; when a bat gets in my house and flaps around my bedroom; or when someone I love gets sick or dies. But there is a lot I can control.

This past week, a lot of stressful things were going on in my life.  Here’s what I wrote in my Fit Yummy Mummy journal: Oh Girls, Life has kicked my tail… My grandma is on hospice and they don’t think she will live through the night. She is 90 and forgot who I was long ago, but I remember who she is. Her daughter, my Auntie, was on death watch for a short time last week, but miraculously recovered for a little while longer and has been moved to a rehab facility. …my mama hurt her leg mysteriously and can’t walk very well…. I tangled with some poison ivy last weekend and am COVERED. Plus the school district has denied to test Heather for learning disabilities even with all the private testing records I sent them and doctor reports. They said they don’t accept any outside of the district assessments and they haven’t observed her long enough to decide what to do about her. I’m so sad realizing that they are waiting for her to fail again before they intervene even though her records transferred from her old school show a clear pattern and need. I’m taking her to another clinic the next state over on Saturday to test her eye/brain connection. It’s so expensive, but if there’s a chance it will help her we’ll find a way to earn the money. I’m trying not to stress about everything, but I’m feeling all the feels anyway and it has zapped my strength. So that’s where I am. Not sure how to pick up the pieces from here while my body has checked out. 
That wasn’t even all of it, but it started to feel ridiculous writing so much complaining down. What if instead of that, I had written down all the things that were going RIGHT?  I can tell you THIS, I spend way more time thinking about the things going wrong than I do the things I have to be thankful for.  I’m sure that has a lot to do with my health struggles.

It’s hard to admit that I am a negative person.  Yuck.  Just admitting that makes me not like myself very much, so I’m making steps to change.  4o years of consistent negative thinking isn’t going to change easy, but I’m choosing my hard.

gratitude journal 2

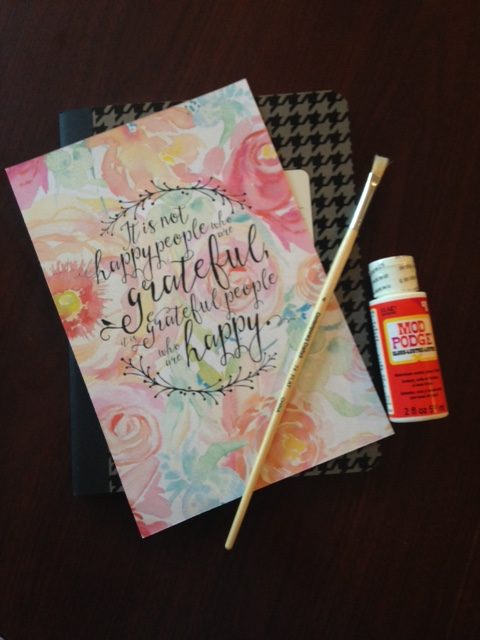
I’m starting with this fifty cent notebook. It’s just a composition notebook from Wal-mart.  I made a little cover for it by merging this and this.  I printed it on regular paper, then trimmed it down slightly to fit the cover.

gratitude journal wax paper

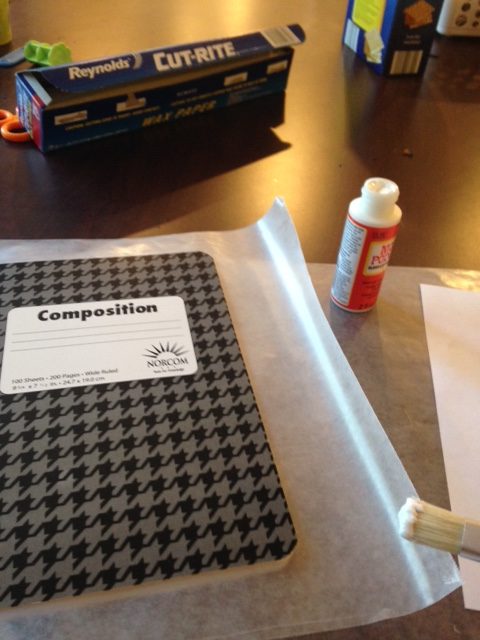
I placed a piece of wax paper inside the notebook, so I wouldn’t get modge podge all over the pages and stick them together.

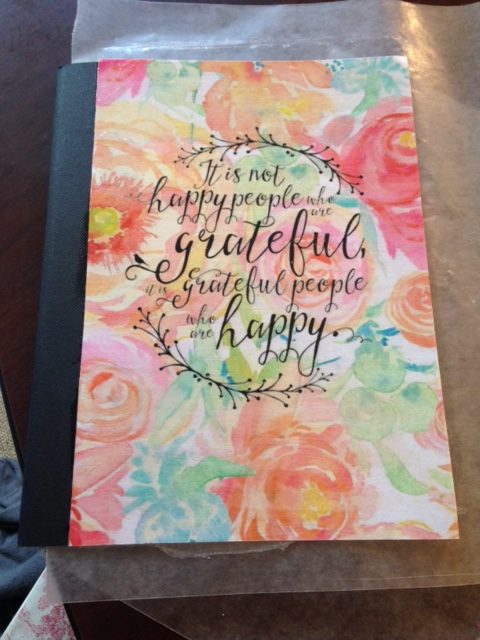
Then I put a thin layer of modge podge ($1 in the Target spot bins) over the back of the picture, and stuck it to the cover, starting on one edge and smoothing it over to prevent air bubbles.  Then I took my brush and put a thin layer of glossy modge podge over the top for durability.

img_3580

Here’s the best part, the brush strokes in modge podge are visible after it dries, giving printed art a hand-painted affect. To take full advantage of this, I went back once more and added brush strokes to the water color flowers, following the natural curve so each flower would look hand-painted.

img_3578

You GUYS! I’m feeling so clever right now.  When it dried I trimmed the corners and added a matching cover to the back.

gratitude journal drying

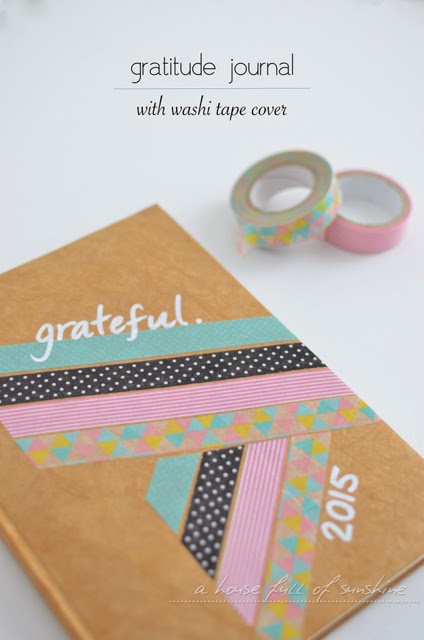
Before I thought of this little project, I looked on Amazon for a gratitude journal I could buy.  There were several good ones like this, this, and this. They were each less than $10, but the DIY one was the more affordable option for sure.  Karen at A House Full of Sunshine has a different idea for a DIY journal cover that is darling for all you washi tape lovers.  She also had some good thoughts about gratefulness that are worth clicking over to read.

gratitudejournalpinsmall

Here’s what I’ll write tonight:

  1. Heather’s new Irlen filters that are helping her read better
  2. Family cooperating for Grandma’s Funeral
  3. A chance to sing with my daughter and my sister-in-law
  4. Free flute lessons for Heather that make her so happy
  5. Our cars are both repaired and running well
  6. A supportive church family

I’m all about reducing stress, not adding to it, so I’m not writing in complete sentences, telling stories (unless I want to), or giving myself a quota.  If I’m too stressed to think, I might just copy down a scripture verse or hymn that I’m grateful for, or tape in a coloring page. And if I need to skip a day, that’s A-OK, since none of the pages are pre-dated.

P.S.  If you want to hear more about gratitude journals, Sherry talks about hers in the “We’re Digging Section” on episode #11 of the Young House Love Podcast.


Making the Most of Your Christmas Budget

making-the-most-of-your-christmas-budget

It’s technically still summer and autumn colors aren’t even here, but I want to talk about Christmas just a smidge.  Even though we only give 2 gifts to our kids,  Christmas stresses me out if I don’t plan ahead.  Far AHEAD.  Truthfully, sometimes I still freak out—but this helps.  It’s what I’m doing today, so I thought I’d screen capture a summary of my movements and thoughts as I plan.

I made a little video for you showing how I budget for Christmas and how I buy each item at the lowest price possible.  I hope it helps take some stress off of you this holiday season!

Here are the video notes plus some extra stuff that the video missed:

  1.  Plan to set aside money every month for Christmas Gifts, and know what your total budget will be by the end of the year.

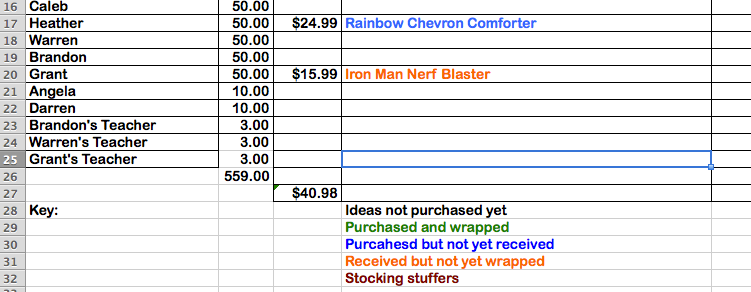
2.  Make a list of all the people you need to buy for and put a dollar amount by each name.  This list total should equal the amount you’ve budgeted for the year.  You might want to add some extra lines for Hostess Gifts or other unexpected exchanges.

3.  Next to each name, brainstorm gift ideas.  I use color codes to tell me if it’s just an idea, or if I’ve placed the order etc.  I also write in the actual amount spent so I can track my spending and not just the budget.  If I buy more than 1 item, I add a line so each item and actual price is on it’s own line.

2016-09-14_10-30-07

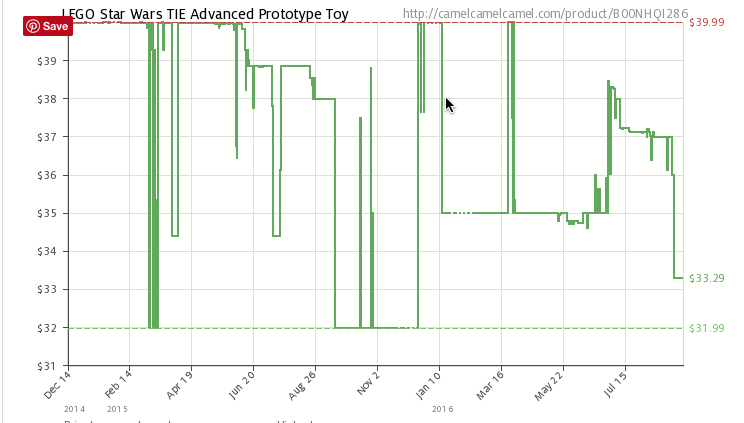
4.  When shopping on Amazon, first make an account at camelcamelcamel.com.  Then copy the item URL  to camel and ask for an email alert when the price drops to your target zone.  Since you’re planning NOW you can afford to wait for a better price.  This is important because Amazon no longer offers partial refunds if the item drops in price after you purchase it.

2016-09-14_10-44-17

5.  I also belong to a discount health and wellness club that as a side benefit has a unique shopping portal.  In addition to providing more than 500 toxin free products for my home and body at great prices, they’ve partnered with hundreds of stores like Old Navy, Target, Home Depot etc.  When shopping through this portal I have access to extra coupon codes and discounts to use in the online shopping cart PLUS I get a cash back rebate in the mail, on every purchase!  It’s only $19 a year for me to be a member, but right now they are offering a $1 special for the first year.  I can’t give all the details in this post, but if you want to know more about it, you can request info here. (Your contact info goes straight to me and no one else will se it, so be sure your best email address is included.)

A Family Friendly Yard on a Budget

Our house has so many projects! My foyer has been primed but not pained for several months now and I’m still not done with my built in bookcases or trim in the living room.  Already my heart is turning outside.  We have a couple of gorgeous months ahead of us and I would LOVE to add a firepit and some swings to our yard and just hang out there with my people.

back-yard-before

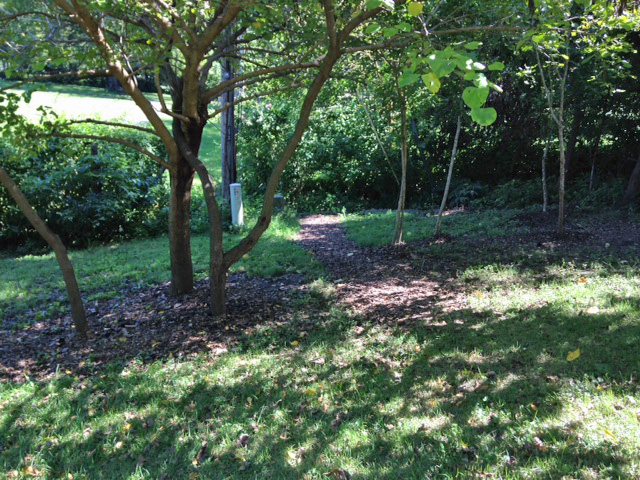
Two weekends ago we piled our driveway full of brush and yard trimmings, revealed our raised beds and split enough wood for two winters. Then last weekend we built 4 more raised garden beds, and mulched around trees and pathways.


pathway to school

Here’s a close up of the bushy area to the right after cleaning up. The yard is looking almost pretty.  The two days working together as a family was really fun and bonding, except for the poison ivy that I found. It’s the city’s job to keep the fence clean 😛 We can work on our side, but the other side remains a jungle.  I suppose there’s more privacy that way.

under the deck

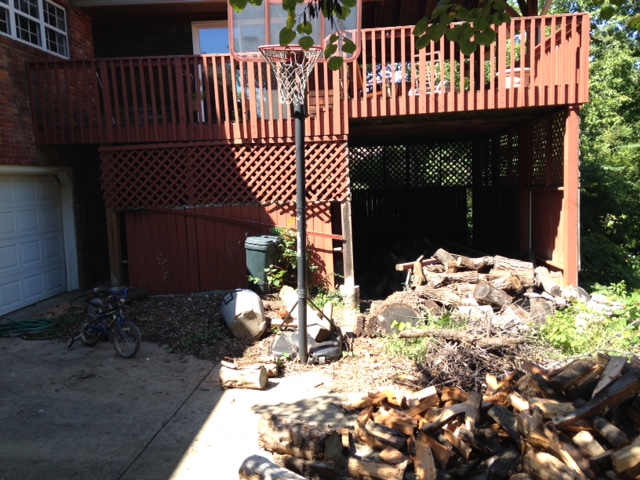
Darren is talking out loud about building a seating area under the deck.  I’ve been talking about it for years and he would respond with all the reasons why it was a bad idea.  Now, it appears it is HIS idea and I’m all for it. Above is what it looks like today, sigh.  There’s a LOT of work to be done.  But I’m envisioning removing the wall covering on the side facing this, and the side facing the yard to the right.  We’d like to leave the covering on the back wall, because that is the north side and blocks the worst weather for us.

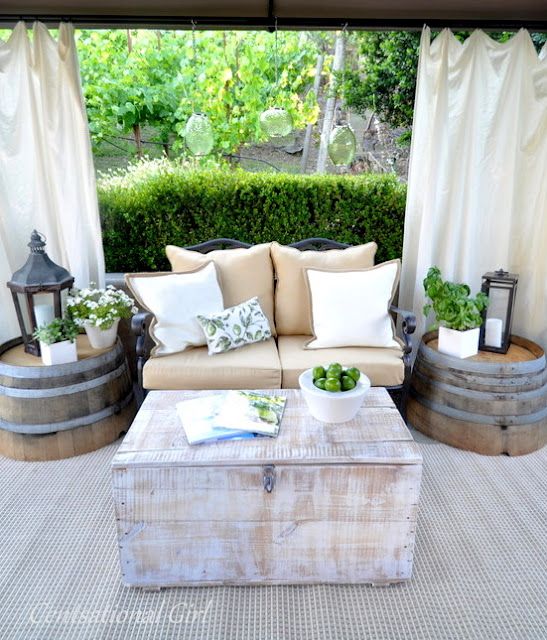
Then I’d like a slew of comfy seating and eating areas where our huge family can gather.  (Just my husband’s immediate family is 28 people.)  Something with the feel Centsational Girl created here:

901fd840058babb0f75307a4df689358

This will be the most expensive backyard project on our list because we’ll need to jackhammer some extra footings that aren’t being used anymore, and bring in several yards of gravel to create a temporary floor.  Concrete would be ideal, but it would be around $10,000 to pour a spot this big.

c472ce7d082360464e48225a33f02e20

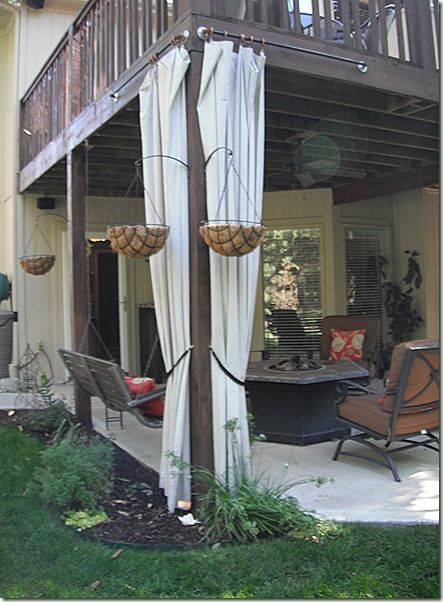
Here’s another inspiration photo from Redoingit.blogspot.com. They have a fabulous tutorial there on making outdoor curtains from canvas drop cloth and plumbing fittings.

how-to-build-a-diy-firepit-for-60

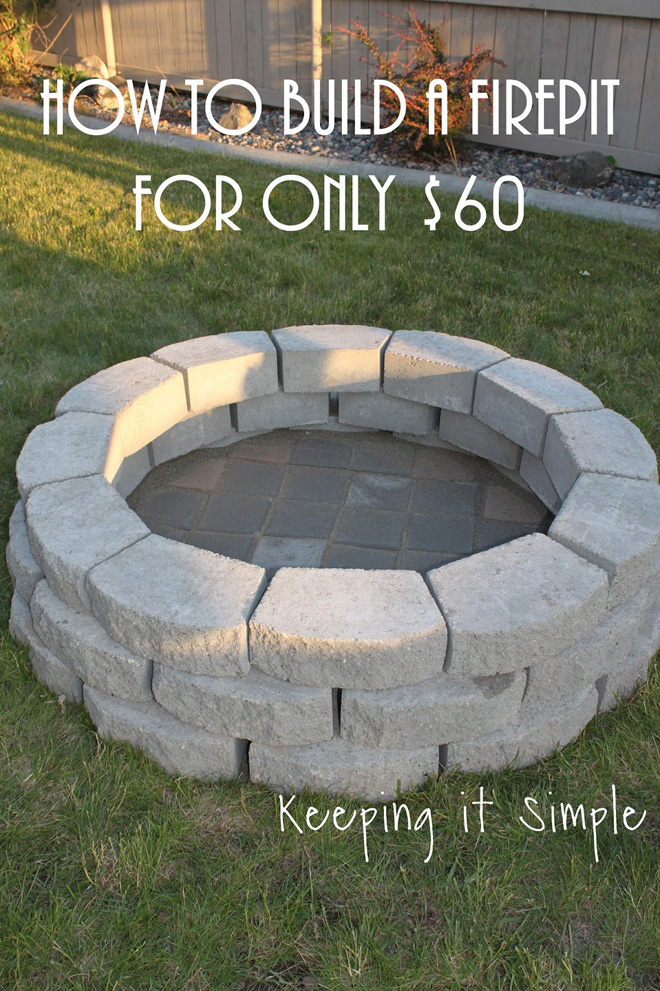
While we save up the cash for the gravel floor, I’d like to build a fire pit like this.  I go back and forth on the kind of bottom to put in the pit. The flat stones as shown here would make shoveling out ashes a snap, but we have a couple of bags of sand that the previous homeowners left and it would make a free floor that drains well.  The stone blocks are a lot more expensive in my area than described in this tutorial (more than double) but I have seen them on Craigslist recently (I was just too slow to text and they were already sold, sob.)  While we do the necessary clean up work, I’m going to keep watching for another good deal.

with-swingset

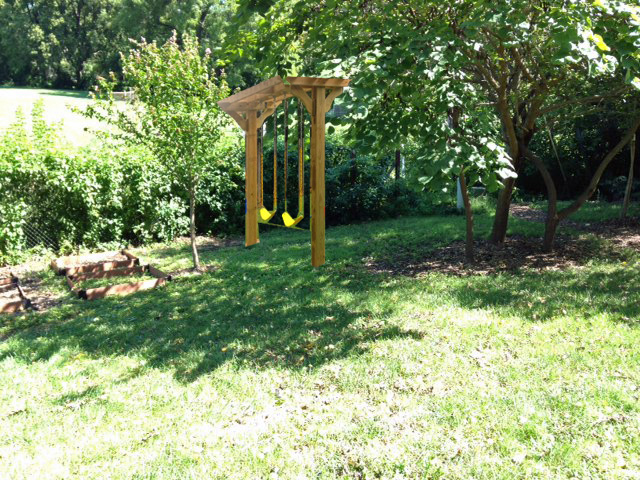
This simple swingset can be built for less than $100, even after modifying the plans to make it taller and wide enough for 3 swings.  We had a hard time figuring out where to put the swings with all the trees and tall back fence.  Darren finally had the idea of turning it sideways (we already plan to take out the tree right by the garden beds) so the kids would have more room to swing without hitting the fence.  It’s not as aesthetically pleasing to me as one turned the other direction, but I’ll be able to see it from the house which was really important to me.


Creamy Pumpkin Mousse: A Weight Loss Recipe

I’m so excited about the flavors of autumn! Apples, cinnamon, maple, pumpkin, acorn squash….Yes please!  All of it.

Here’s a super simple recipe that is sure to please your fall cravings, but is still cool and refreshing for those warm afternoons.  It takes less than 10 minutes to prepare and is low carb.  If you’re following Trim Healthy Mama, this would be an S. The few carbs that are in it are naturally present in the Greek Yogurt and Pumpkin.

Pumpkin Mousse

Creamy Pumpkin Mousse

1 cup pumpkin puree (not pumpkin pie filling)

1 cup plain Greek Yogurt (I used fat free but any fat content is fine.)

1 cup heavy whipping cream

1 1/2 tsp pumpkin pie spice

1 tsp liquid vanilla stevia

4 packets Truvia

(If you aren’t counting carbs and just want to use sugar, I recommend 1/4 cup real maple syrup or honey to replace the stevia and Truvia.)

Put everything in an electric mixer with the whip attachment and whip until soft peaks form.  You’ll be able to see the trace of the beater through the mousse and the lines will stay when it is ready.

Transfer to 6 serving dishes and chill until ready to serve.  I’ve found my stevia sweetened things taste better when chilled for a couple of hours.  It helps the flavors blend and makes the stevia less bitter. My kids gave this 2 thumbs up even before chilling.

For a new prep-ahead weight loss meal plan every week, click here.

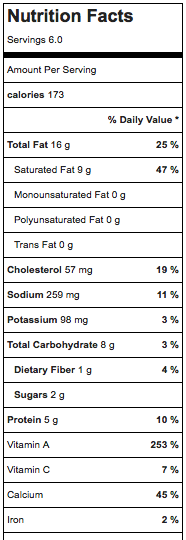
screen-shot-2016-09-12-at-11-21-19-am

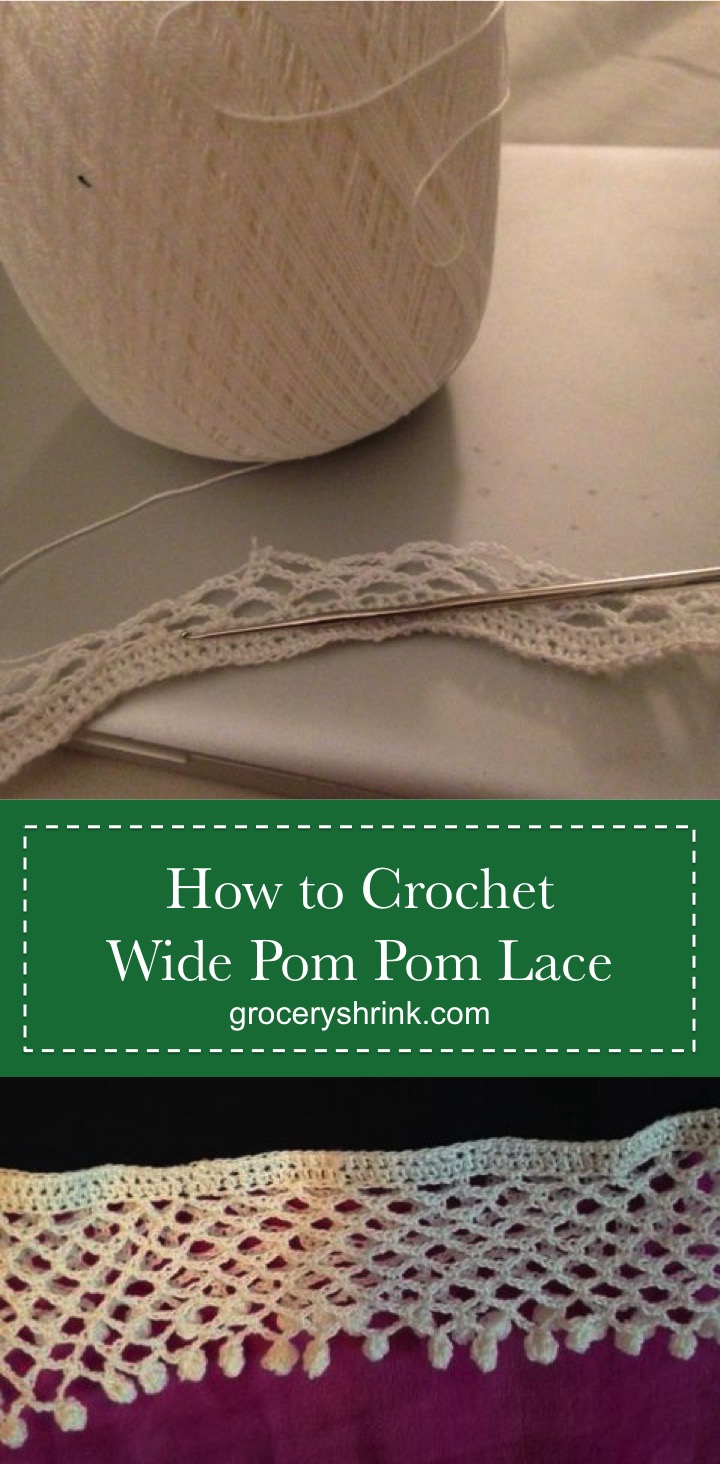
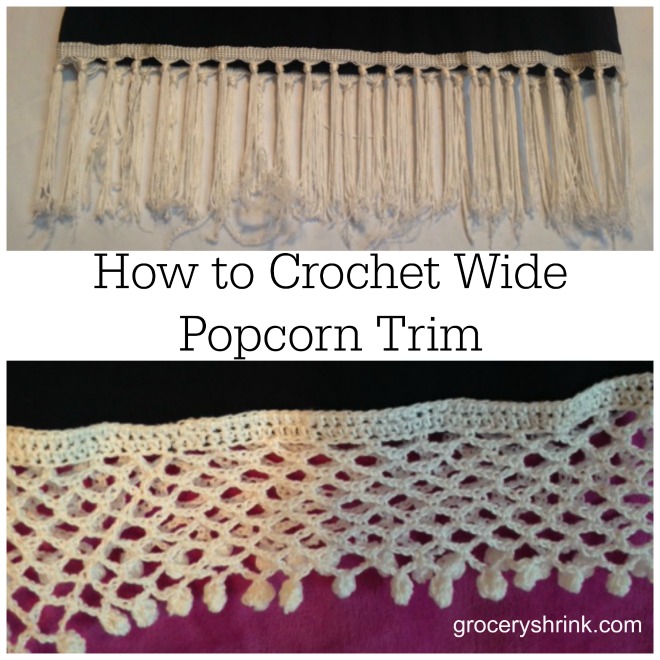
How to Crochet Wide Pompom Trim

How to crochet wide popcorn trim

The second adorable shirt Heather bought had fringe on it and the phrase, “Life is Beautiful.”  When we were shopping, I loved how she walked right by the snarky shirts and reached for the ones with encouraging messages.

Fringe shirt 1

The swingy fringe fit her playful personality perfectly.  But the first time we washed it, it unraveled and tangled.  Boo. (The screen print looks worn but it was made this way on purpose, so it’s still smooth and soft.)  Read more

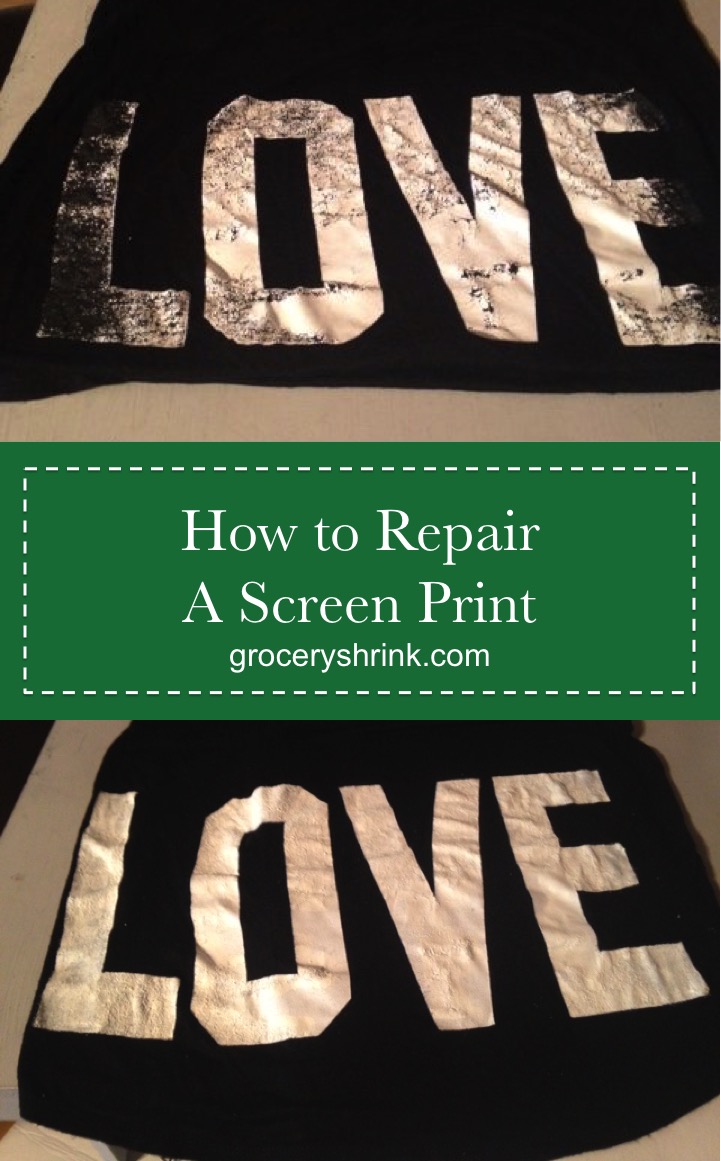
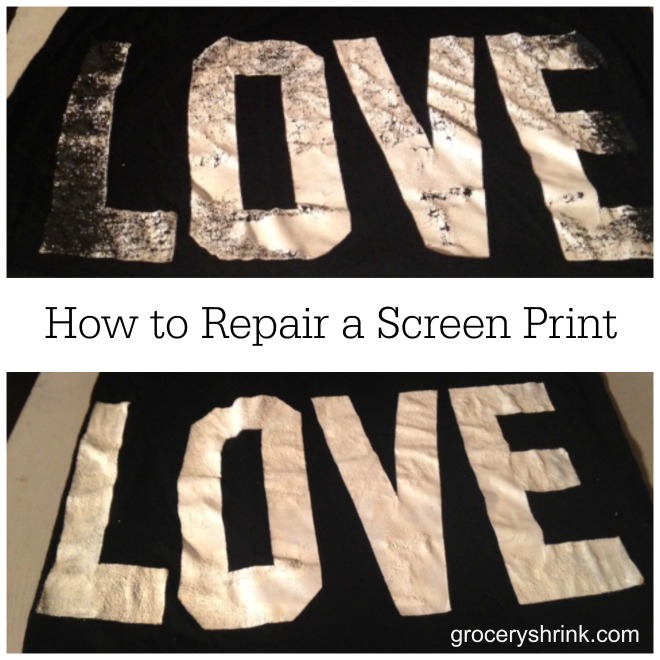
How to Repair a Screen Print

how to repair a screen print

Before school started, I took my middle school daughter shopping for a few cute shirts that would help her feel confident at her new school.  She had previously been homeschooled, then attended a small Christian school for 5 years before moving to a large public school this year.  She was going to have enough things to be nervous about, and I didn’t want clothing to be one of them.

how to repair a screen print 1

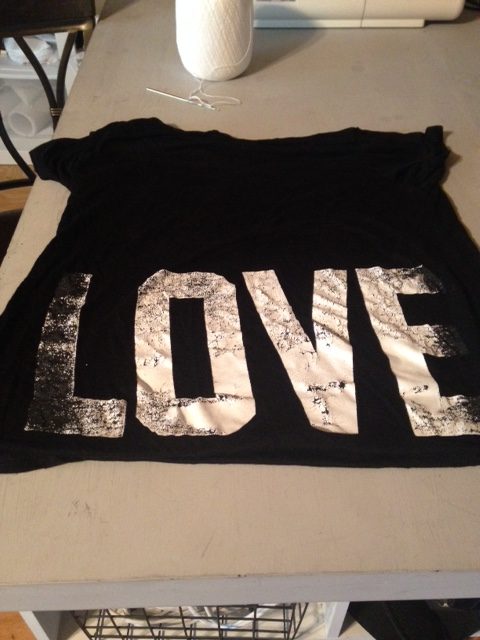
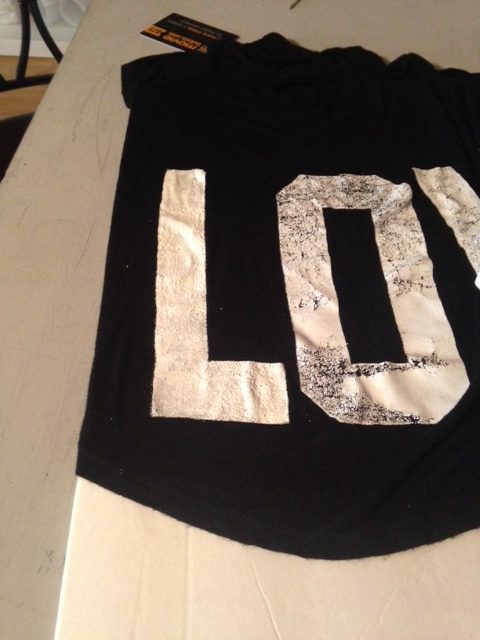
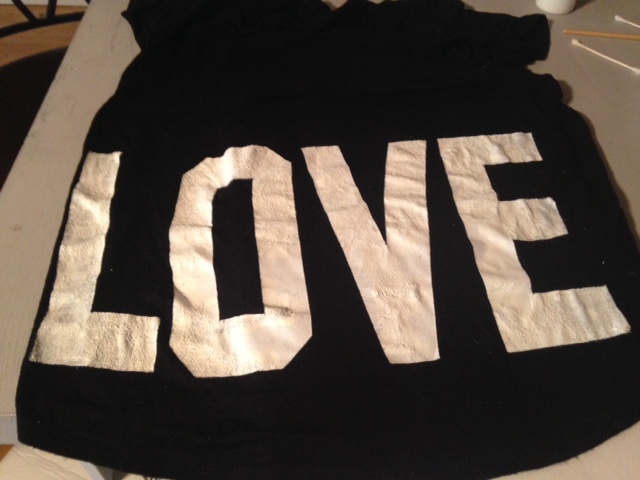
The first shirt had a large screen print on the lower back that said “love” with a smaller matching print on the front pocket.  After the first washing it looked like this, sigh.  I didn’t keep my receipt or the tags, or it would have gone straight back to the store. (The front pocket still looked perfect.)  I tried to convince Heather that the worn look was “cool” but she didn’t agree and pronounced the shirt unwearable.

How to repair a screen print 2

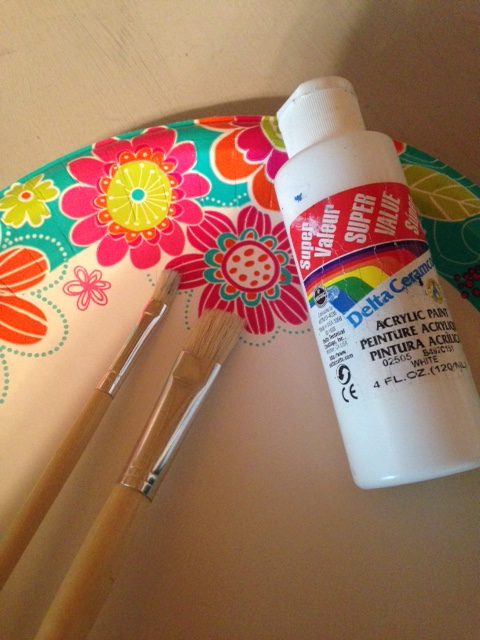
I had some white acrylic craft paint in my stash, so decided to try painting the words back on with a brush by hand.  I could have taped it off first, but I have a really steady hand and didn’t want to take the time.

How to fix a screen print 3

Before painting, I slid a scrap piece of foam board (cardboard would have worked too) inside to keep the paint from seeping through to the front of the shirt.  It would have been a disaster if I had skipped that part. Then started painting.  I got a few drips of white paint on the navy blue shirt, but had rubbing alcohol and cotton swabs on hand to quickly clean up any accidents.

How to fix a screen print 4

It looks almost like new, especially from a distance.  The painted texture is a little stiffer, and the flakiness of the screen print is still there under the paint roughing up the texture.  I’m a little nervous about how it will wash with the screen print the way it is.  I’ll update you as soon as we give it a try.

I’ve used this paint for stenciling on clothing before and it washes well after it’s cured.  I will cure it by letting it dry for 24 hours, then ironing it with a steam cloth before washing.  When Heather came home from school and saw it, she was really happy!


What are you interested in?

Hello there!  I’ve missed you! I really thought when August came around I’d be back to blogging every day, but it didn’t happen. I’ve been doing some work behind the scenes and it has taken all my brain power.  Things like building the cabinets for my music room, filming for a mini-class and restoring the pictures in my most popular blog posts.  If you remember, I had a major website crash last February that erased more than 2,000 pictures….a very sad day for me.  It will take me years to get all the pictures back, and I’m prioritizing the most read posts.  If your favorite post is still missing pictures, message me and I’ll put it on the priority list.

In my non-business personal life, I’ve been spending a lot of brain power on fitness.  As I’m finding the proper balance for my adrenal insufficiency, I’ve decided to start working out regularly and eating right–hopefully to lose the 35 lbs I’ve put on over the last few years while fighting the illness.  I’ve learned that I enjoy strength training a little more than cardio (as a FYM cardio = 15 minutes of high intensity interval training), bwa ha ha. strength-training-vs-cardio

I’ve been a 5 year fan of Holly Rigsby and member of the Fit Yummy Mummy Lifestyle.  It doesn’t take a lot of time to live the FYM life (20 minutes a day!), but it’s something I’ve been doing deep soul searching with while I walk the walk.  Why do I make bad food choices and when?  Can I predict it and head it off before it happens? How can I change my attitude and reframe my emotions about food?  How can I affordably treat myself without using food? I’ve been writing in my journal every day at clubFYM and getting good support from Holly and the other ladies walking the same path.  That interaction has fulfilled a lot of my need to write.

Screen-Shot-2016-08-15-at-9.20.52-AM-750x184

I can see the changes in my face!

My writing in a private journal doesn’t help you, I know.  So I’m committing to show up here and write more often.    I’ve had some topics floating around my head, but would love to know what you’re interested in. If you can spare a minute, select all the topics you would like to hear about and if you have an idea of your own, you can leave it in the comments :).

Why I Still Use Disposable Baggies

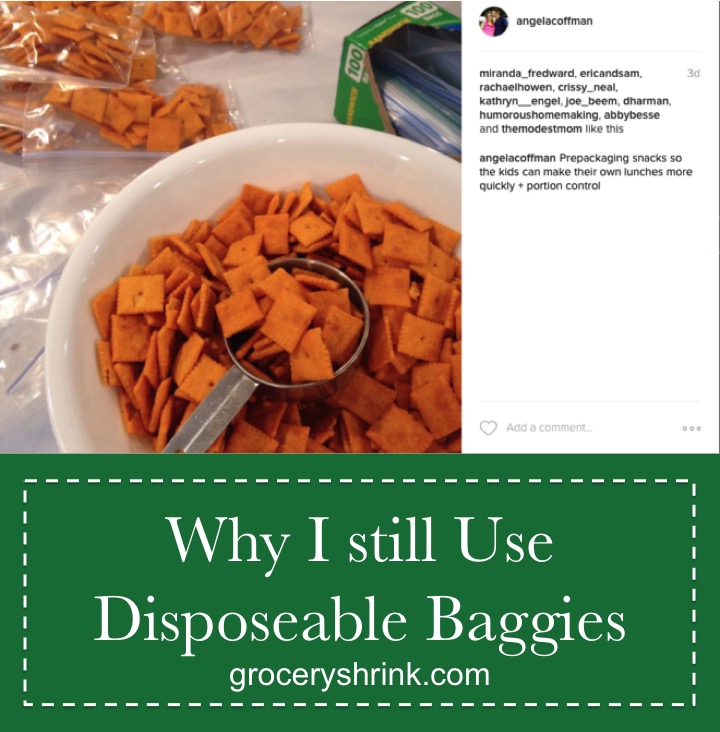
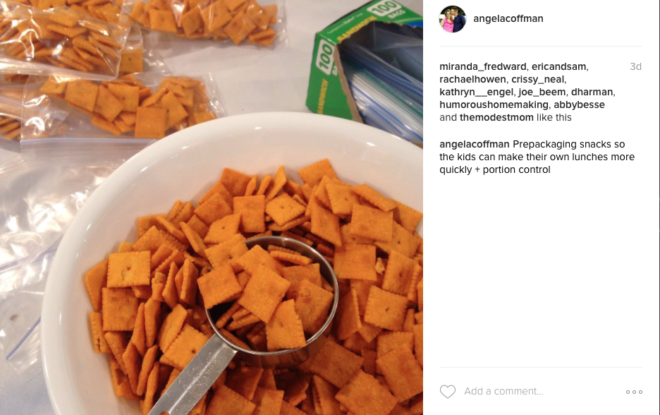
I posted this photo last week on instagram of a moment during my snack packing session for the week.  I like to buy food in bulk when it saves money, then package it up myself for the kids to grab and put in their lunches.  It only takes a few minutes and helps with portion control and limits waste.

instagram prepackaged snacks

I almost didn’t post the photo, because I was afraid of the backlash of the plastic baggies.  There’s a movement out there away from baggies and I jumped on for about a month (6 years ago) then abandoned ship and never looked back.  Here’s why: Read more

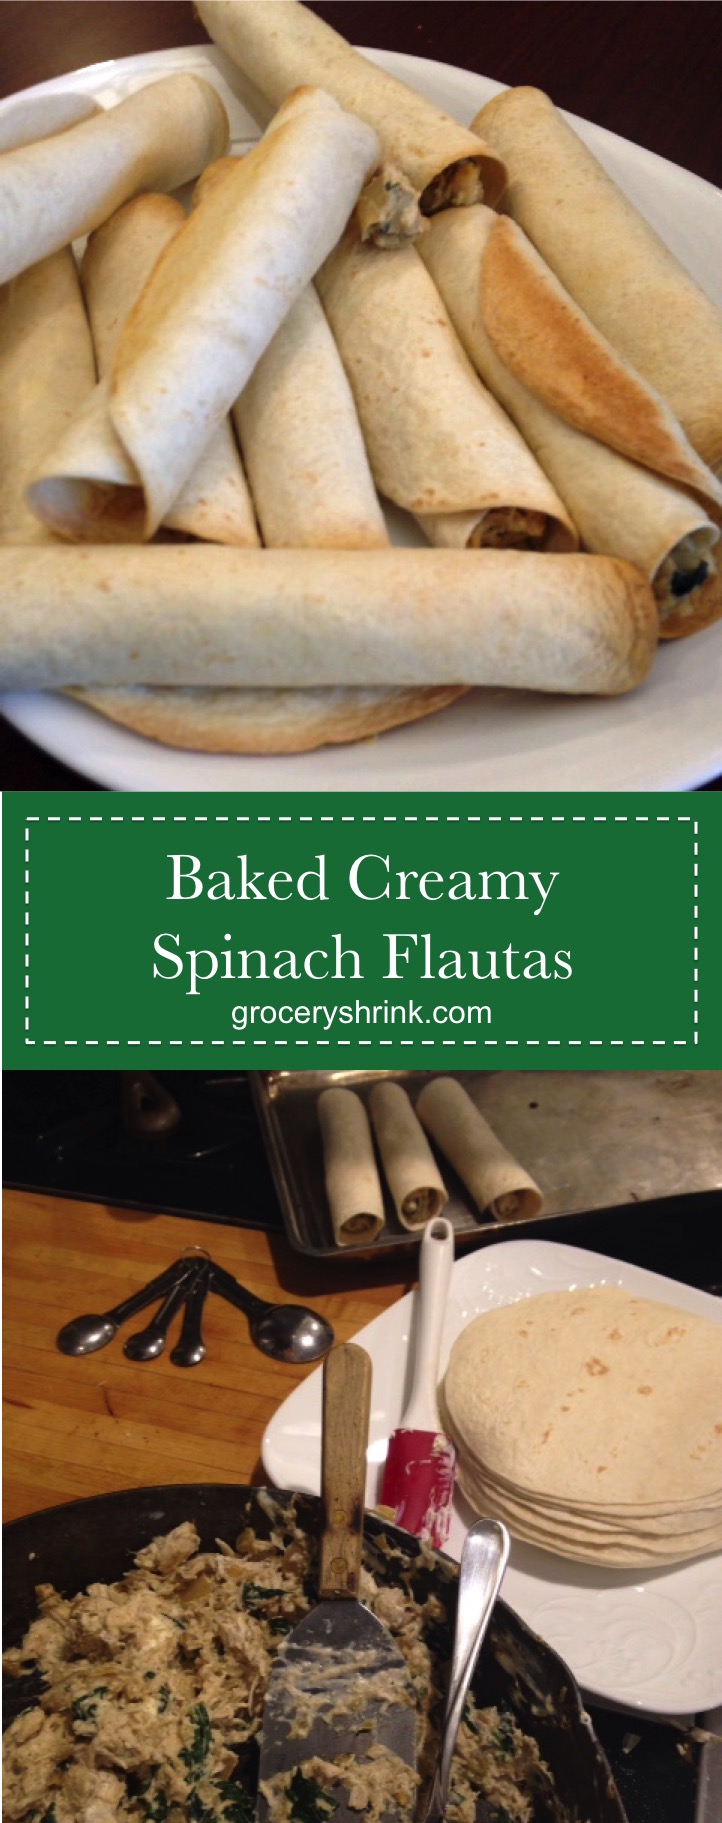
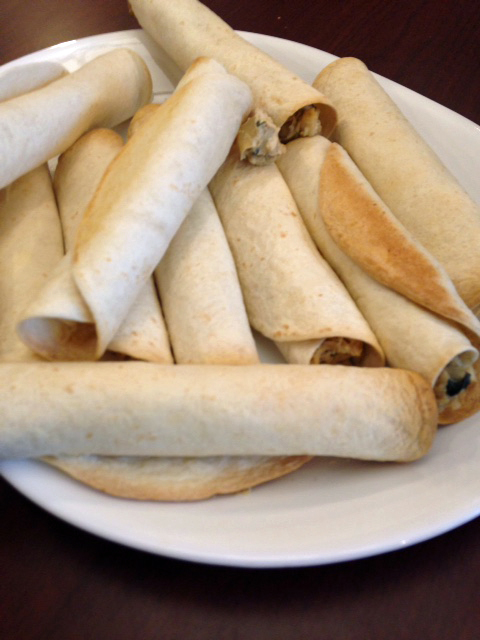
Baked Creamy Spinach Chicken Flautas

When you need an easy dinner idea, a packable lunch, or a substantial snack, I’ve got your back.  Here’s what I love about these little cuties:  everything is hidden inside.  Onions…check.  Spinach…check. My kids didn’t even notice.  Just bit right down and gobbled them up.   Sometimes you have to be stealthy with the veggies.

chicken spinach flautas 4

Baked Creamy Spinach Chicken Flautas

1 chopped onion

1 tsp minced garlic (or garlic powder)

2 cups fresh, chopped spinach

1 can, 4 oz green chilies

1 tsp ground cumin

2 cups cooked shredded chicken*

1 brick, 8 oz neufchâtel cheese

20-6 inch tortillas (I used flour, but corn works if you want to call them taquitos)

  1. Preheat oven to 400 degrees.
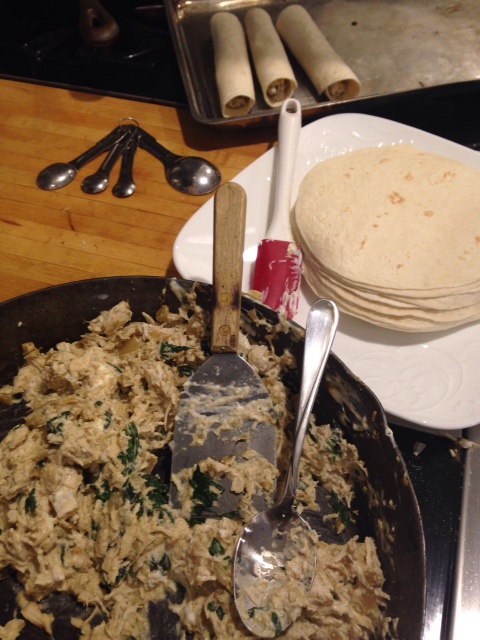
  2. In a large skillet saute onion and garlic until very soft.  Stir in spinach and cook until wilted. Add green chilies, cumin, and chicken.  Heat through.
  3. Push everything in the skillet to the outsides, making a whole in the center.  Put the neufchâtel cheese right there and stir it around until it softens and melts into a creamy liquidy pool. Then stir it into the chicken mixture.
  4. Place 2 Tbs of the mixture onto the edge of a tortilla and roll up tightly.  Place seam side down on a baking sheet.
  5. Bake for 15 minutes or until golden brown and crisp.

Serve with dipping sauces like: salsa, ranch dressing, sour cream, or guacamole.  For dinner add side dishes of tossed salad and cut fruit.

chicken spinach flautas 1