How to Freeze Sweet Corn

It’s sweet corn season!  Here’s a handy tutorial for when you have corn coming out your ears.  (Get it?  Ears.) Freezing sweet corn is fast and easy and preserves it’s fresh home-grown taste. The corn I will be showing is sugar and cream corn grown by my dad in his city garden.  They were blessed this year with very healthy corn that gave 4 ears per stalk.  That’s pretty rare in these parts.

freezing corn 1

1.  Shuck the corn outside (because it’s messy).  The shucks are a nice addition to a compost pile.

6a00e5549125f78833011572509fb6970b

2.  Wash the silky hairs off the corn.  I like to use cool running water and a terry wash cloth.  Microfiber cloths work well too.  I like a cloth better than a corn brush.  It covers more of the corn at once, so is faster and grabs the silk really well.  I use about the same amount of pressure when washing corn as when I wash my baby’s face.  Enough to clean without doing any damage.

6a00e5549125f788330115715c504f970c

The front ear is freshly shucked.  The back ear has been gently washed with a terry cloth.

6a00e5549125f788330115715c514f970c

3.  Cut any bad spots off the corn.  This corn was raised without chemicals except for what came on the seed already and has a few worm spots.  Most of it was spotless though.  If you miss a bad spot, it will turn brown when it cooks and you can cut it out later.

6a00e5549125f788330115715c528c970c

4.  Submerge several ears of corn in a large pot of boiling water. If you are freezing whole ears of corn, boil them for 8 minutes.  If you are cutting the corn off the cob, boil for 6 minutes.

6a00e5549125f7883301157250a813970b

5.  Use tongs to remove corn from the boiling water.  Run it under cold water to cool or submerge it into a bowl of ice water for 6 minutes.

6a00e5549125f7883301157250a957970b

6.  Use a sharp knife to cut the kernels off the corn.  I like to take my knife and scrape the cob to get all the milk and ends out.  We call that “cream style” on the farm.  I cut as many cobs as I can fit into a large bowl before stopping to fill bags.

6a00e5549125f788330115715c5916970c

7.  I package my corn in quart size freezer bags, and use a permanent marker to label the bags with the date and contents before filling.  A one cup measuring cup is perfect for scooping the corn into the bags.  Four full scoops is a quart.  When the bags are full, press out all the air and seal them tight.  I smoosh the corn around until the bag is nice and flat and stack them in a plastic dish tub for freezing.  This freezes the corn in nice little stacks that fit well in my freezer.
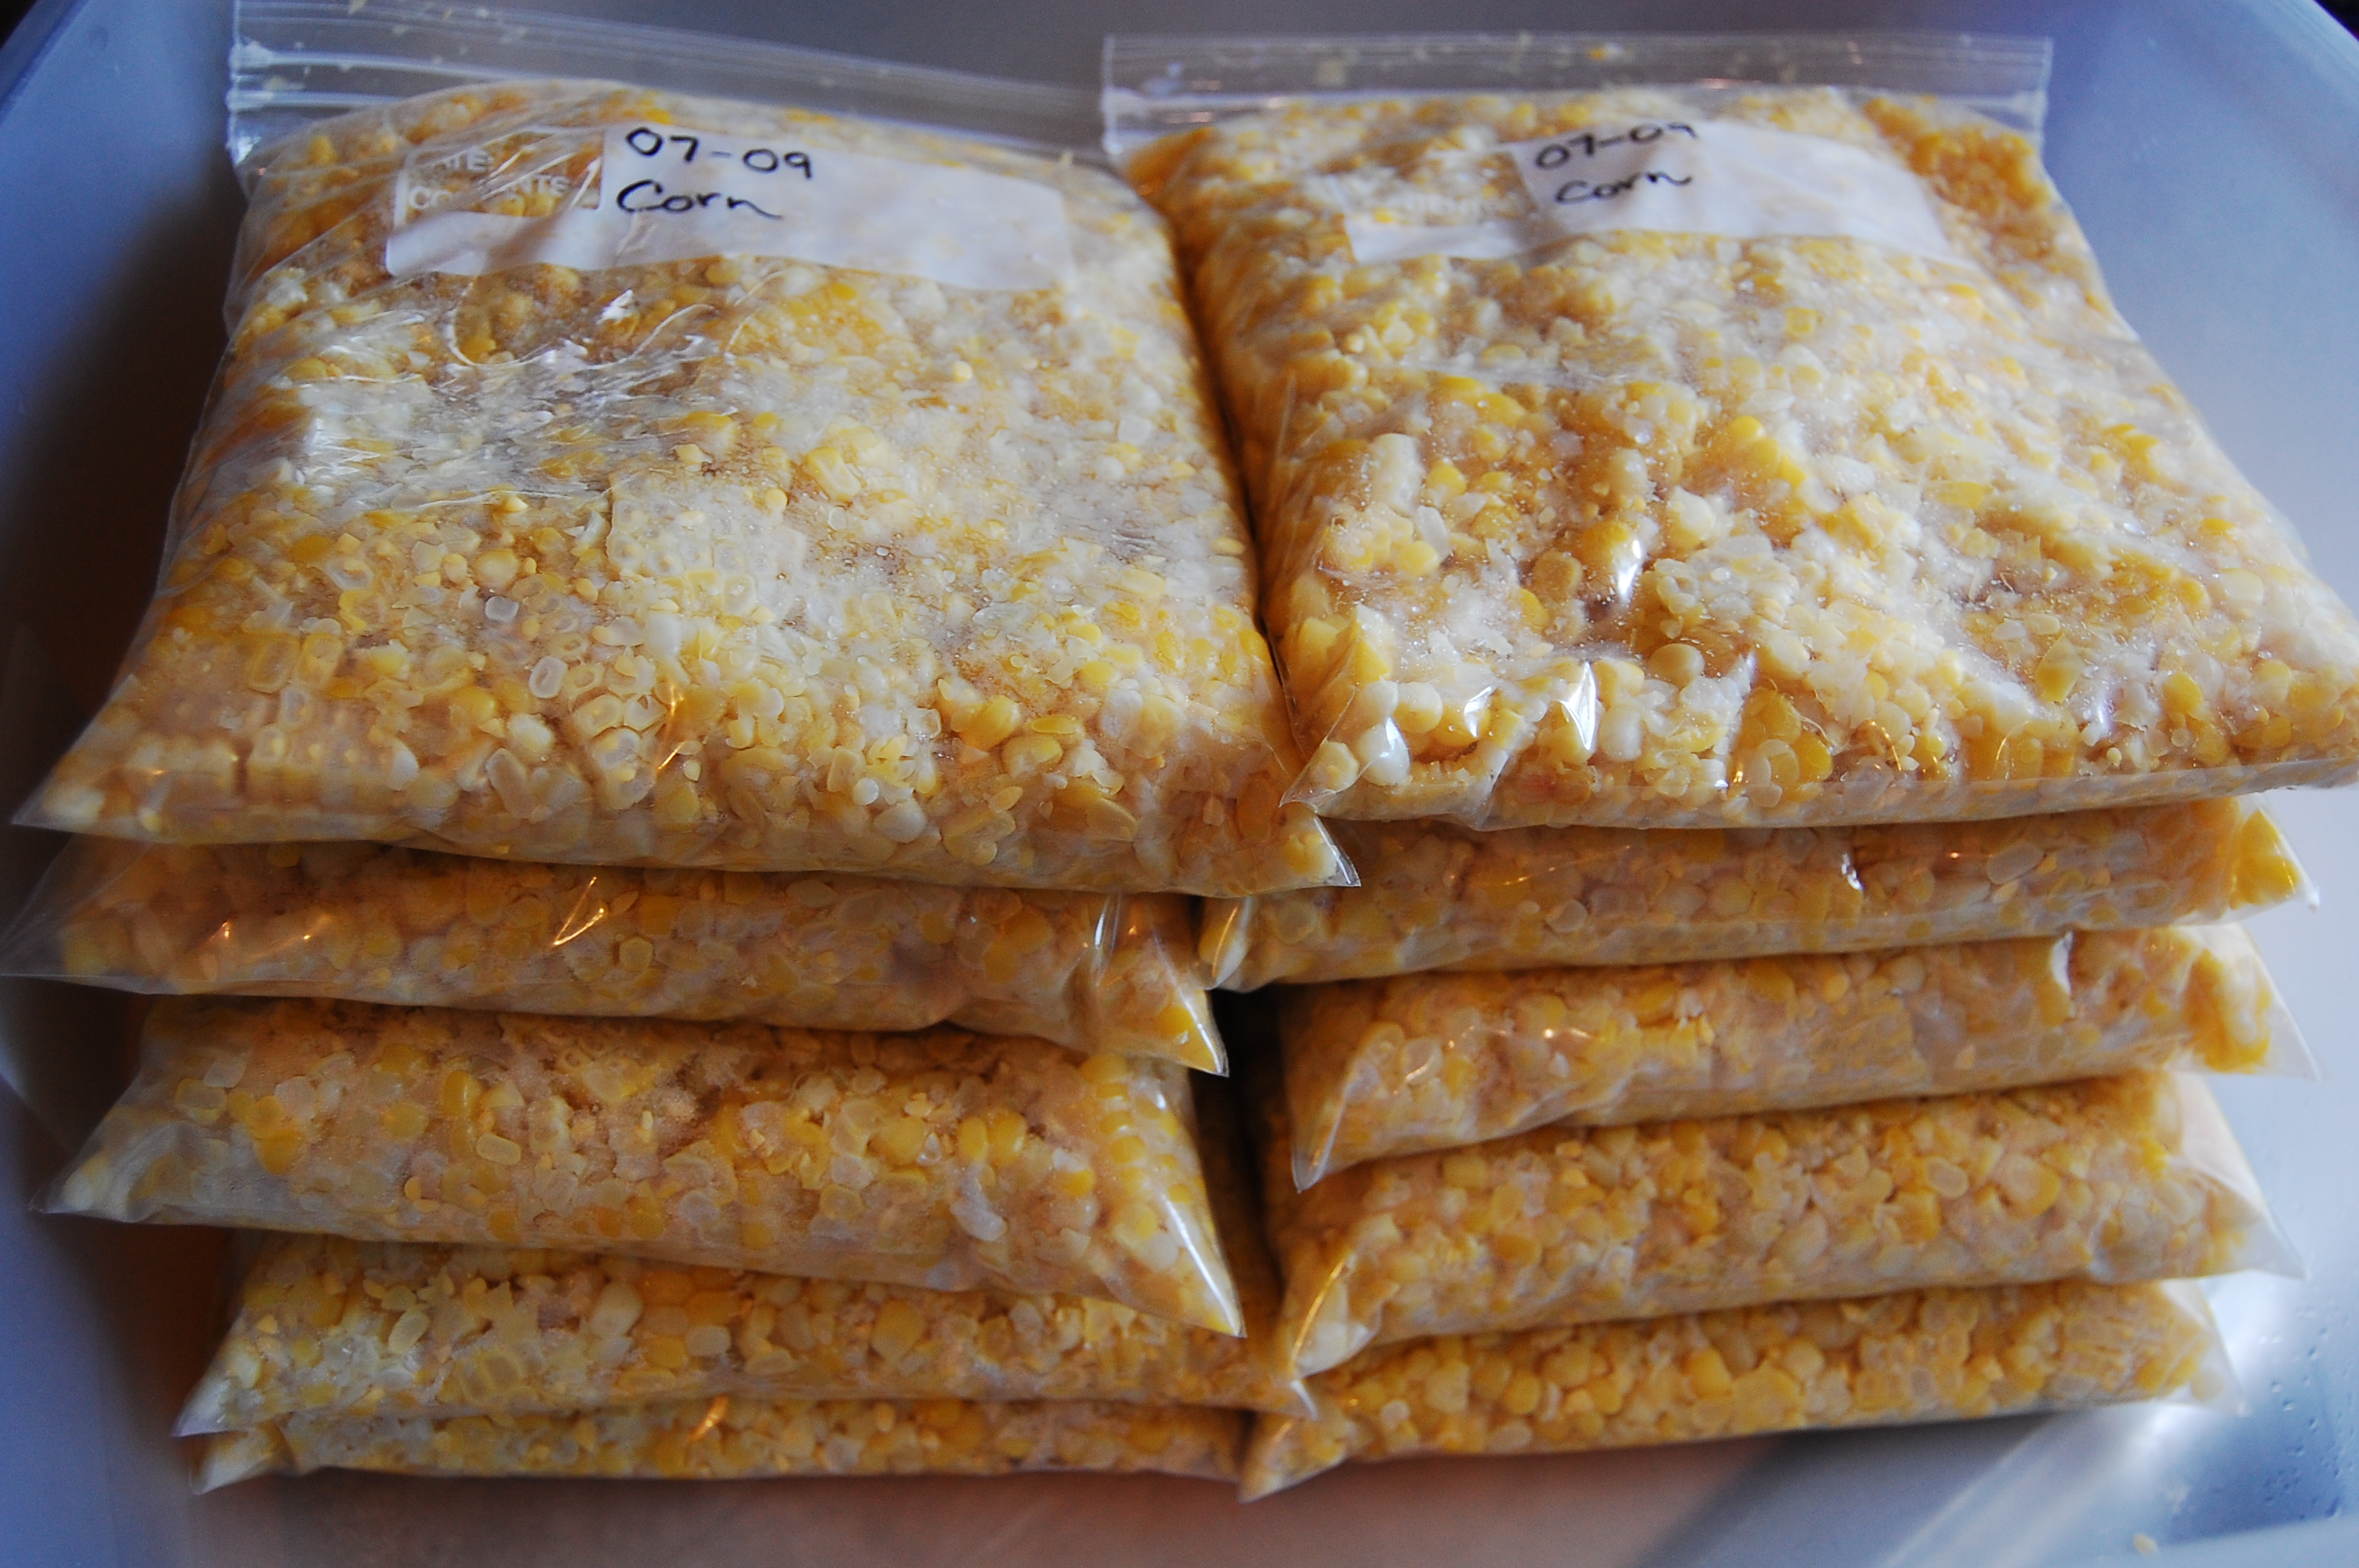
home frozen corn

8.  Even though you will be tired, be sure to clean up right away when you are finished.  Corn juice is sticky and starchy and dries hard.  It’s much easier to clean up when it’s fresh.

Thanks to my mom for picking and shucking the corn.  And thanks to my Mother-in-love for showing me how to freeze it step by step.  Remember the year my entire kitchen floor was covered a foot deep in corn?  We had 3 years worth plus plenty to share after that.

 This post originally appeared August 1st, 2009

The Other Budget Categories

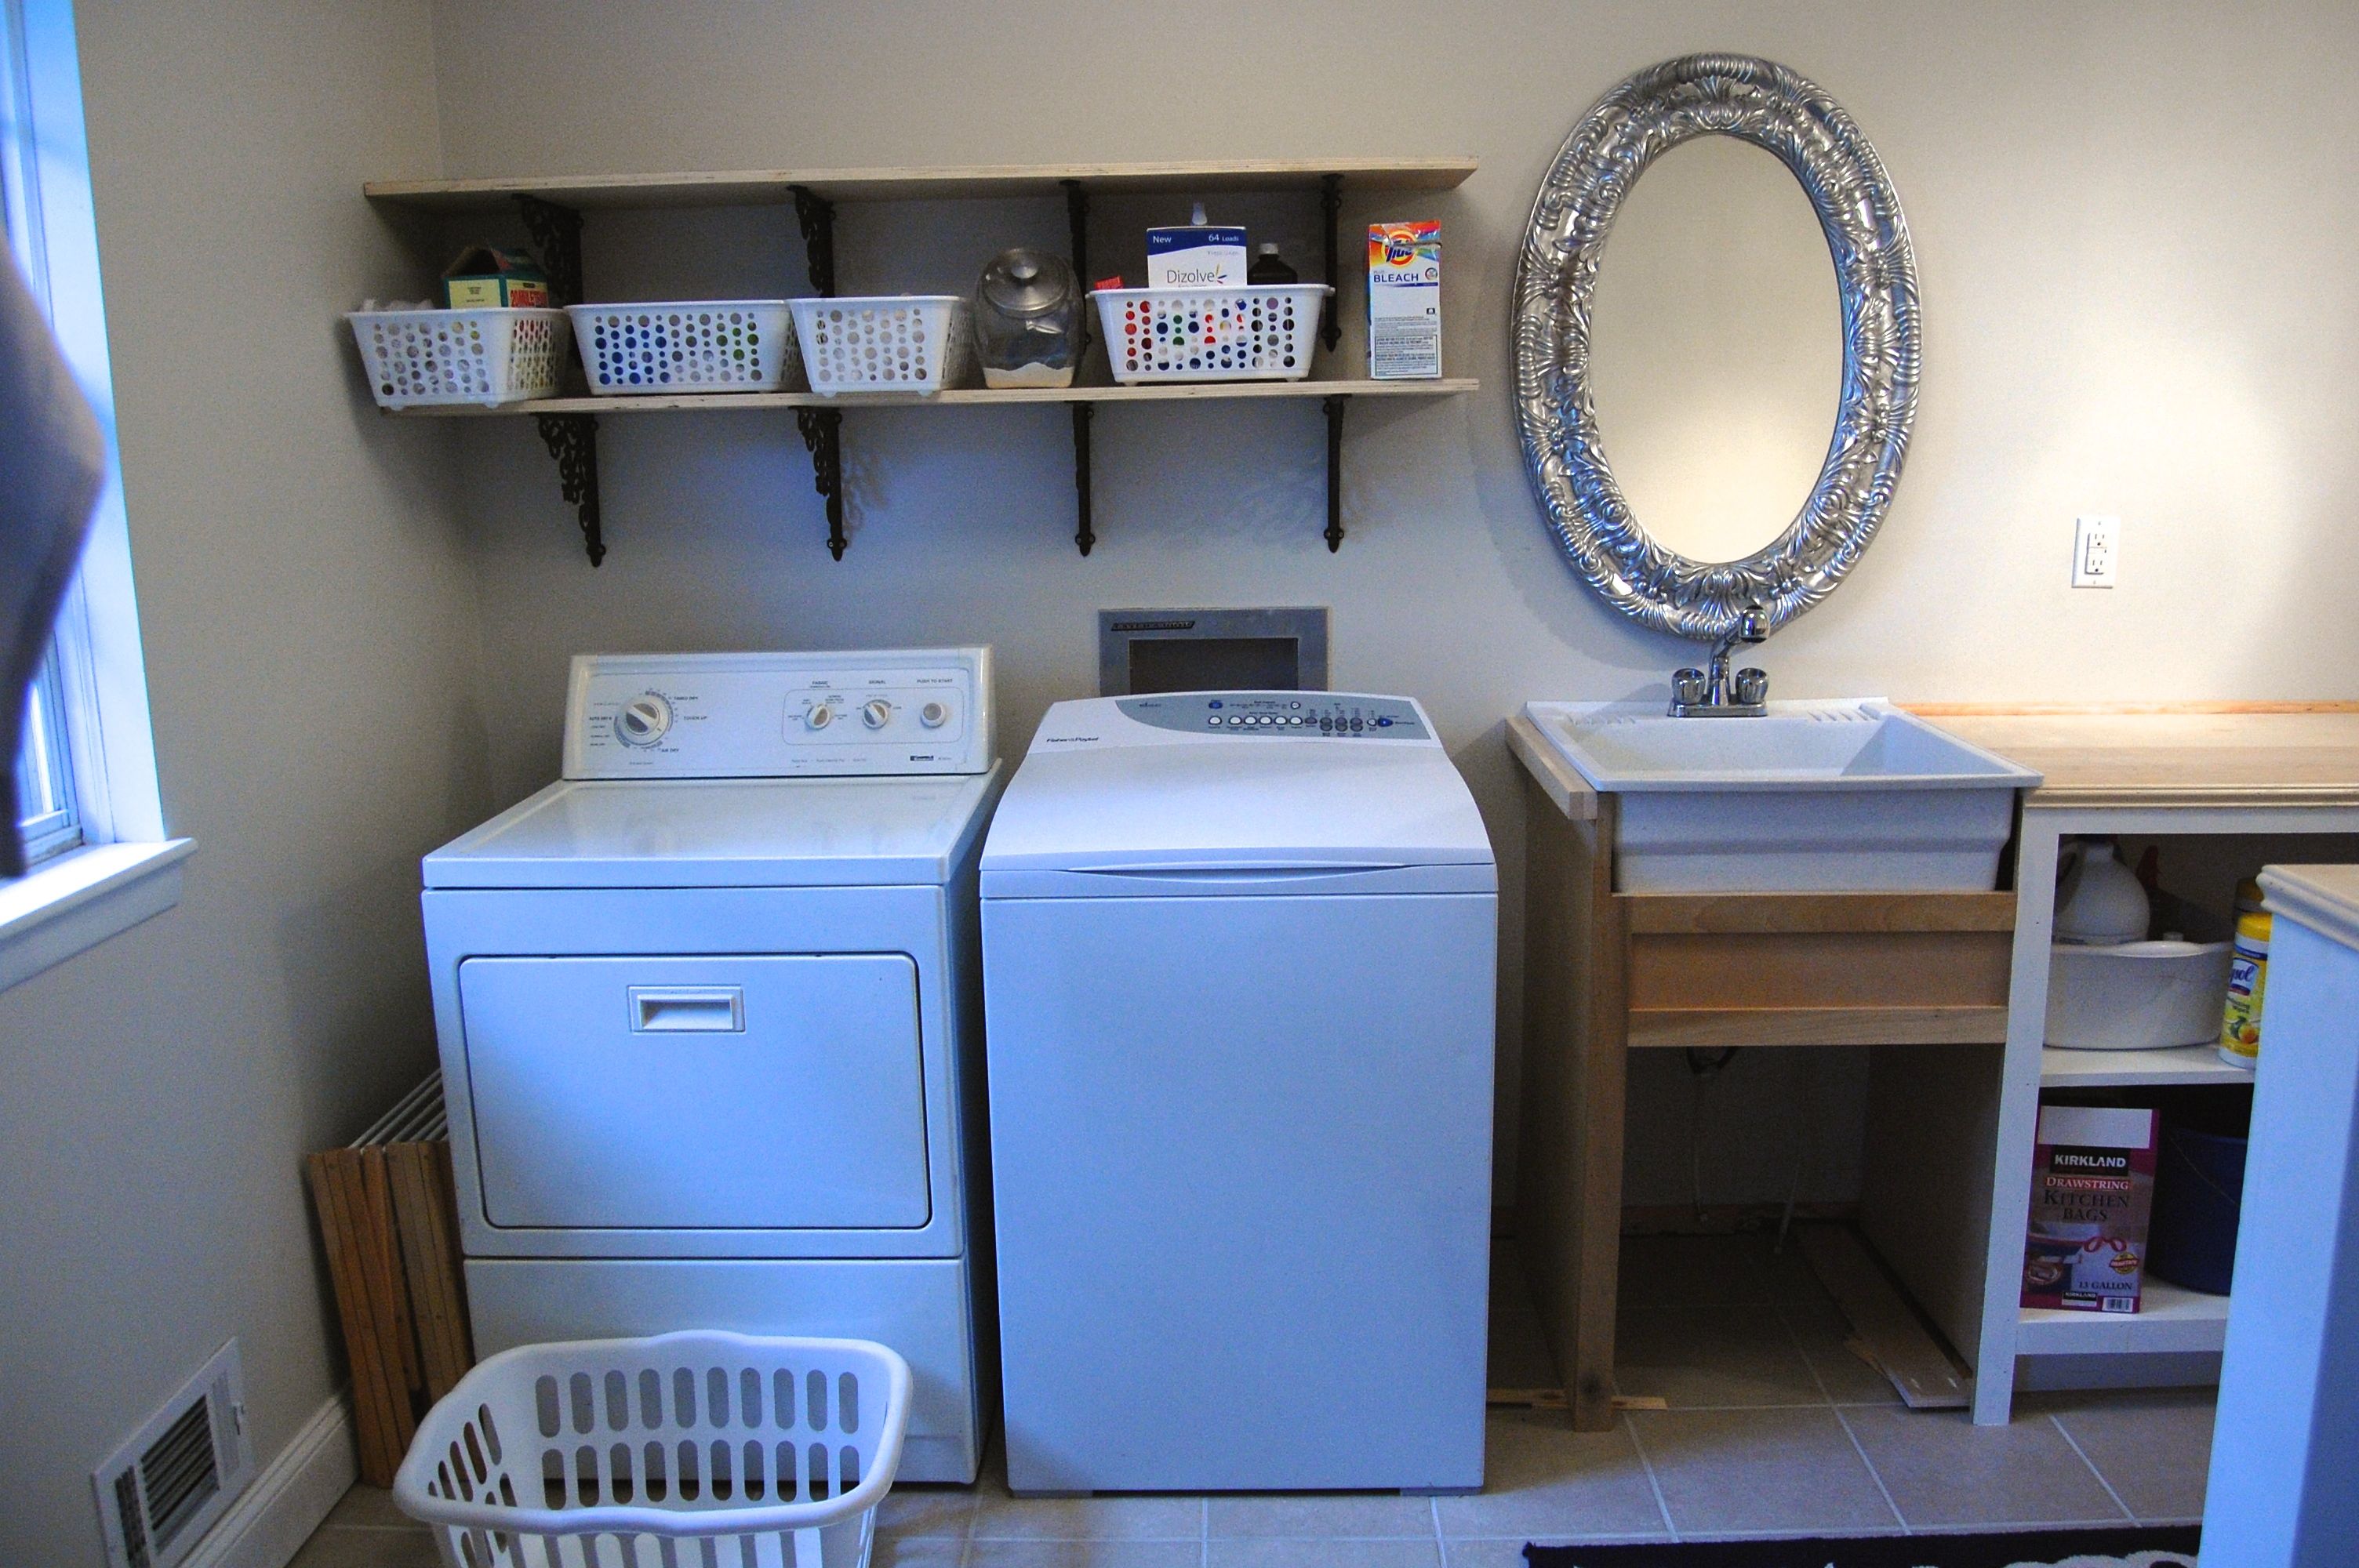
laundry area

Our washing machine died yesterday and it isn’t an emergency.  The Fisher and Paykel washer was 11 years old and after 3 loads a day (roughly 12,000 loads), we knew it’s days were numbered.  Planning for this didn’t start last week, or even a few years ago.  It started the day we bought it. After we became debt free with a fully funded emergency fund, we added some other budget categories to prepare for days like today.  Every month, we set aside $10-30 in an “appliance fund” and since we know ourselves and needed extra accountability, the cash went into a real envelope and tucked into a combination safe (not into the bank account where we pay for other bills.) We also fund other bonus budget categories including a car replacement fund and furniture replacement fund.  We set aside small amounts each month into these envelopes so that over the period of 10-15 years we can replace our items that wear out.

craigslist washer

If I hadn’t had an appliance replacement fund, my day yesterday would have looked very different.  I would have searched our local Craigslist for a working washing machine to limp by with until we could raise the money we needed.  They had used machines about the age of ours ranging from $50-$150.  I would have used part of our emergency fund or my home repair fund, to pay cash for the appliance.  It’s not a bad plan really and if there hadn’t have been any good sales on, I might have done that anyway so we could wait for a better deal.

Instead, I had the cash to shop for the best rated machines I could afford.  I looked at reviews online, drove to the scratch and dent outlet store to see their choices, and thanked my lucky stars that Independence Day sales were still going strong.

When it came time to make my final decision, I almost went with my less favorite, just to save a few hundred dollars.  Then Darren reminded me that this machine should last us 15 years or more and that since we had the cash saved up, I should buy the set of machines that I wanted to use for the next 15 years.

Even though our dryer is still working, it is almost 18 years old.  We decided to buy a matched set since the machines are visible from most of the main floor.  I should be able to sell the working dryer on Craigslist to offset our costs a little.

spin_prod_914554512

I chose the Whirlpool Cabrio set because of it’s huge capacity, low resource use, and good reviews.  I loved the idea of a front loader and would love to be able to build a counter over the top of my machines, but the whole mildew thing and needing to leave the door open discouraged me.

After searching the prices online of all the stores that carry this model of machine, We called Sears to order over the phone.  I needed the dryer door reversed and that couldn’t be specified online.  While I was on the phone the operator asked me if I had a coupon code I would like to use.  I said, “oh! Is there one?”  He put me on hold and we both searched for any available coupon codes.  I was unable to find a coupon code that would work in their system, but his manager approved an additional 5% discount for us. The cool thing about this, is the 5% discount is the same we would have earned by using a sears credit card.  As a rule, we don’t use credit cards and I was feeling kind of bad about missing the discount.  Turns out, I didn’t have to miss it after all.

It may seem like a lot of extra little categories, but most people won’t miss the extra $10-$30 a month and over 15 years that fund will grow to be $1800-$5400.


Homemade Granola

This video first appeard May 7th, 2009.  It’s so easy to make granola that I thought it is worth bringing to the front. It is a great topper for oatmeal, yogurt, or other cereals.

Watch the video to see how easy it is to make homemade granola.  With the choice of the right ingredients, it’s inexpensive and nutritious.  I added mine to an inexpensive box of cornflakes for a multigrain “honey bunches of oats” type cereal.


Here’s the ingredient list:  Syrup:  3 T oil, 1/3 C honey, 1 T water, 1 t real maple extract


Grain:  2 C oats, 1 C rice crispies, 1/2 C cracked wheat, 1/2 C wheat germ, 2 T brown sugar, 1/4 t salt

(Next time I’d replace the cracked wheat with sunflower seeds.)

Here’s the video. I apologize it is so dark at the beginning, it gets better.

Do you have a favorite granola recipe?

Sunday Picnic

This post was originally published May 6th 2009, but it’s a topic worth revisiting! With just a few minutes planning, a lot of food cost can be saved. I don’t usually have time to make 8 sandwiches with all the fixings, but with a change in thought process a large family picnic can be made in record time.  I’ll show you how. 

picnic lunch

Last Sunday Darren preached as a guest minister in Macon, Missouri–3 hours from our home.  Usually, the church there shuts down immediately after the service and we head home.  We have 2 choices for lunch: stop at a restaurant or bring our own food.  We are usually running late in the morning, but in the video below I will show you how I pack a picnic in record time and save expensive restaurant costs.  This plan works for long shopping days too!

Our day ended up going a lot different than planned.  On the way out of the church, Charles, whom we had never met before, offered to take us to lunch.  We were excited for the opportunity to get to know him better and he is an exceptional person.  When we stepped outside, Charles noticed that we had a flat tire!  I’m so grateful that it went flat during the service and not while I was driving.  The repair garage said it was bulged on the side and a blow out risk!  Charles not only took us to lunch, but invited us to his home to rest while he bought us new front tires for our van!  I almost cried.  We’ve needed tires for awhile but kept hoping that they would last until our situation was different.

So the eating you see in the movie was for supper not lunch. Even though our day was far different than we expected, our picnic sill came in handy.

Update:  I forgot to give you the price breakdown on lunch.  Keep in mind too that we had enough leftovers for another meal the next day.  Bread-free, strawberries-$1, carrots-$1, crackers-$1, Cheesesticks-$1, 3 sliced apples-$1, Peanut Butter and Honey–$.25–cost for 5 people (a couple of our kids were with Grandma) $5.25  For the same price we could have stopped and gotten everyone one double cheeseburger from McDonalds.  It wouldn’t have been as filling or nutritious.

Washing Plastic Bags

washing plastic baggies

Plastic bags are handy, but when used and tossed they are expensive.  It doesn’t take long to wash out a bag and hang it to dry.  They can be used over and over this way.  If there was just lettuce in them, I rinse them out with water.  For pasta or something with a little oil, I use clean soapy dish water. When the weather is good I hang them outside on the line.  When it’s not, I use clothespins to clip them to a hanger in our laundry room.

The bags dry best wrong side out.  When that side is dry, I turn them right side out to finish drying, then fold them and put them in a baggie box saved for washed baggies.  Then we have a choice in the drawer to grab a new bag or a washed one, depending on the purpose.  If it’s for us, I reuse them.  If I’m packing something for a guest to take home, I grab new.

If your baggie has been used to store raw meat, toss it–don’t even think about washing it.  Otherwise, enjoy reusing your disposeable bags!

If you are going to wash and reuse your baggies, spend a few cents more for the thicker freezer bags.  They will last longer and withstand washing beter.

This post was originally published July 2009

Trying on Area Rugs with Photoshop

Trying on area rugs with photoshop

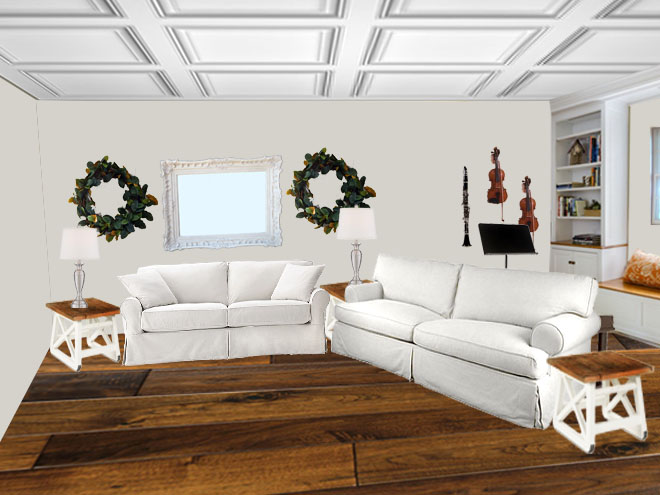
The electrician will be here in just a few hours.  While we wait, my living room is in the virtual fitting room of internet rugs. For the before picture, I used a wide angle lens clipped onto my iphone to try to capture more of the space.  It worked, but the lines are off, curved and wonky, giving the room a lopsided, tipsy appearance.

The room is 20 feet long AFTER the built ins are in place so there will be more enpty space to the left than the pictures show (I blame the angle of the sofa.) I’m not aiming for perfection though, just a hint of reality so I can choose a rug with confidence.  It reminds me a bit of trying on clothes when I didn’t take time to put on my makeup, fix my hair, or wear enough spanx.  It takes more imgaination :).

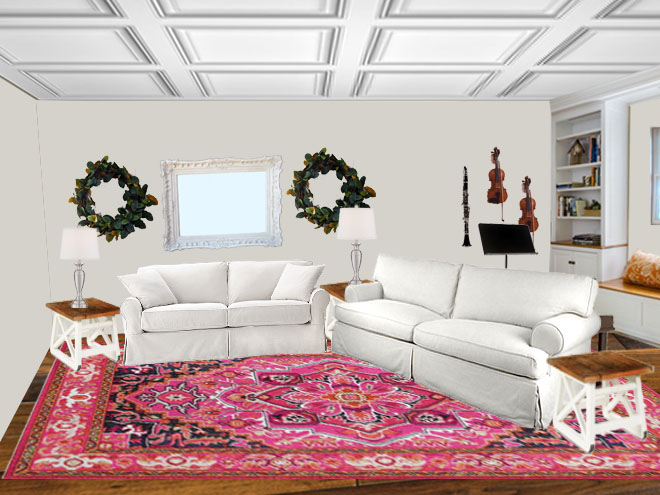
The room doesn’t have proper pillows or art and feels rather stark.  I mounted some of our instruments on the wall to fill in blank space.  I think we would play more often if they were easy to just pick up and play, and amazon offers wall mounts for almost any type of musician. While I wait inspiration to strike on the cozy details, I’m going to ignore the mess and see if a rug strikes my fancy.  First no rug.  This view works best with my budget, ha ha.

Living Room Rug View no rug

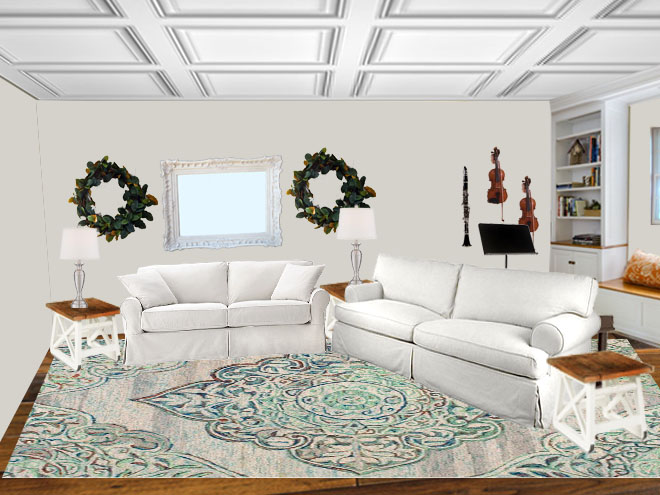
Then the blue rug that was overwhelmingly the favorite in the last poll.

Living Room Rug View blue rug

And the colorful one that I find so energizing:

Living Room Rug View colorful rug

Here’s a new one that missed my search before because it’s WOOL.  It’s loops instead of tufts which sheds a little less, but still stains with food coloring.

Living Room Rug View irridescent medalion

Or a similar medalion print in deep rich blue.

Living Room Rug View blue medalion

Here’s a different blue rug that I like better, but it’s not on sale and REALLY pricey ($1649)

Living Room Rug View blue rug 2

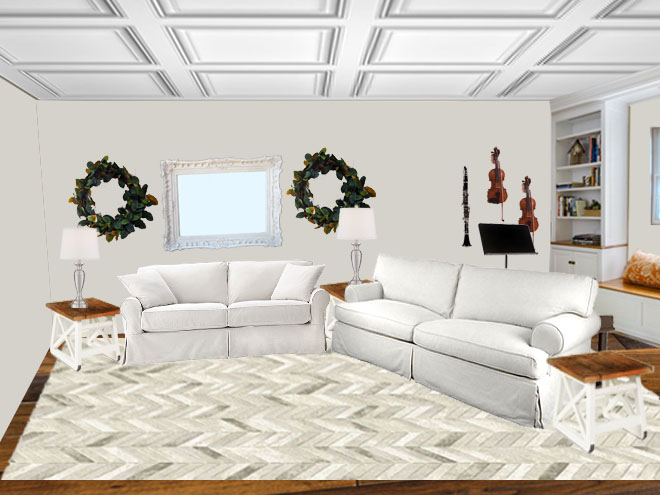
Just for fun another pricey one ($800) in a herringbone greige.

Living Room Rug View herringbone gray

And while I’m pulling crazy dresses off the rack, that I would never buy, but secretly wish I would…. HOT PINK 😉

Living Room Rug View pink rug

and Terracotta floral

Living Room Rug View terracotta flower

When I see the right area rug, it grabs me and I know.  Sometimes it’s the 10th time I look at it, and sometimes it happens AFTER I’ve seen all the other options to be sure.  While the expense of an area rug isn’t a trifle to us, I know if I make a big mistake, I can sell it on Craigslist, or trade it with a rug ina different room.  I’m still waiting for that feeling to come. The Memorial Day sale is a really good one, but there will be a good one on the 4th of July too.  I don’t mind waiting if that means I’ll make a better choice.

I made a little video for you, showing all the rugs in succession.  Sometimes looking it at it like that makes it easier for me to choose!

Giant Feather Canvas

Feather Art 4A gigantic white canvas scares me.  It is full of possiblities but begs me to choose just one.
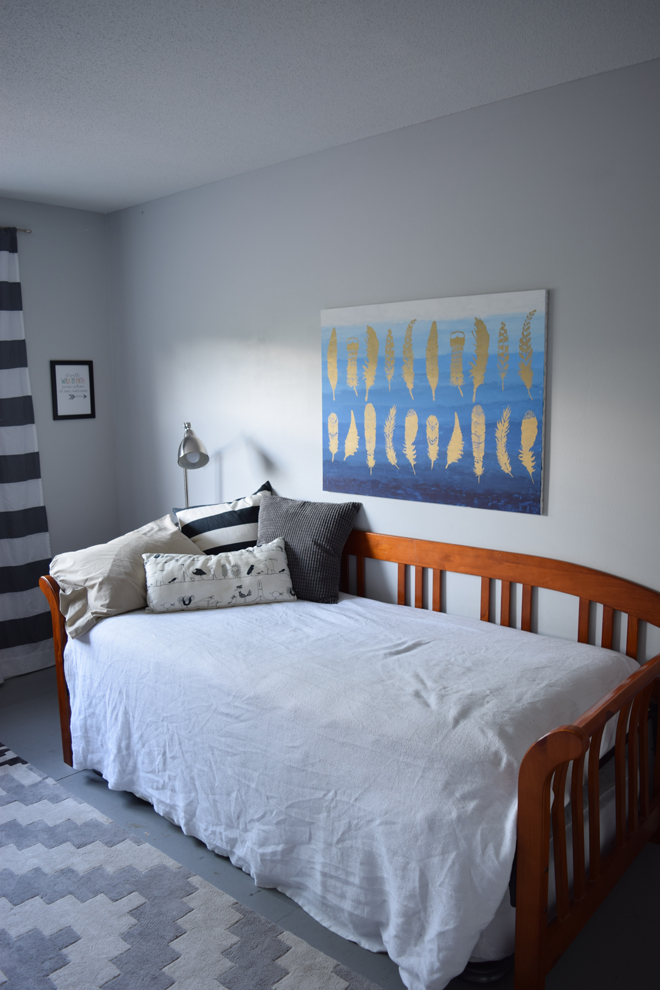
I’ve been dreaming for years of what I would do when I got the nerve to buy a big blank canvas.  I have a pinboard full of ideas simply for a big blank canvas, but I didn’t have the courage to act on any of them.  Then my neighbor put a 30×40 canvas out at his garage sale.  For just $10 I could own it, still in shrink wrap.  So I bought it.  Step one, Dream.  Here I come.
Feather art 3

I leaned it against the wall in my room and refused to hear it mocking me. I wouldn’t make eye contact. I wouldn’t let it see my fear. Dust came.

Feathers-Stencil-Pattern-Allover-Feather-Wall-Pattern-1234

Cutting Edge Stencils invited me to look through their website and pick something to share with you.  I chose the Feathers All Over pattern.  Step two, Dream.  Here I come.

stencil-essentials-kit-stenciling_4

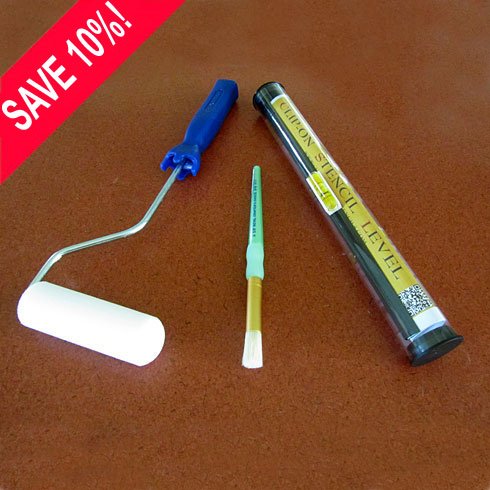
I set a deadline.  I told myself that if I hated it I could paint over it as many times as I wanted.  The stencil arrived gently rolled in a triangle tube. The stencil was huge and sturdy.   The packaged also included a high quality stencil level, brush and foam roller.  I  had everything I needed to begin.  1…2….3…jump….maybe tomorrow.

The deadline loomed and so did a fever.  I took to my bed and slept amid sweat.  My oldest daughter asked if there were anything she could do.  I offered her the canvas.  She and her friend mixed and striped the base with just one blue. Black made it darker and white took it the other way. I didn’t watch, I just let them do.  “Don’t worry, Kids,” I reassured.  “It wasn’t expensive.  It’s just paint.  If it’s awful we can paint over it.”  I gave them the courage I didn’t have.

They laughed and chatted while they painted and timidly invited me to inspect their work.  I ignored the splotches of paint on the sheet draped carpet.  It was perfect.  No longer white, the canvas didn’t mock.  It invited and encouraged.  I taped up the stencil and poured shimmery gold paint into a tray.  It was runny and old and separated.  I stirred it with the end of the foam roller until it looked uniform in the pan.  Then I paused.  This was too easy.  I took down the stencil and measured and centered.  I had it right the first time.  With new confidence, I filled the roller, then matted it off on a clean part of the tray.  Rolling over the stencil, the paint refused to cover the rich blue ombre.  I rolled again, covered again.  It twinkled and winked.  I overlapped the stencil beside the pattern and rolled again.

Then it was done.  A few minutes of labor and the dream stood before me in it’s flawed glory.  The too thin paint, gone over too many times, stood in the gaps where blue should have been.  My 8 year old son stood beside me and breathed, “It’s beautiful.” I pointed out the ooze and he said, “That’s why it’s beautiful.  The flaws tell you a human being did this.  It adds value.”

Big Feather Canvas

While my teenage son was away at Scouts,  I snuck in his room to make ready the surprise.  Armfuls of smelly socks and dirty dishes moved to appropriate wash stations. New sheets, fluffed up feather pillows, dusting spray and a vacuum cleaner, removed the stress of the school year.  Two nails, measured with one eye, made a resting place for original human art.  The canvas asked for one thing more, a ribbon or strip of wood to hide it’s stapled edge. I promised I would, but not yet.  The boy would be home too soon….and then he was behind me, gasping his delight and approval.  100 plans came to his mind to tidy up more and decorate more.

The painting teens made a little video of the ombre backdrop.  I tried to film the stencil rolling, but apparantly I turned off the camera when I thought I was turning it on.  It really was just like rolling paint on a wall.  I only wish I had used less paint, or thicker paint and let it dry between coats.


Nailing Down Some Living Room Details

I have a really special art project for you tomorrow, that anyone can do, even without artistic flair. I’m partnering with Cutting Edge Stencils for the project and my kids helped make it.  It’s not perfect, but we love it and can’t wait to show you…tomorrow ;).

2016-05-23_14-51-39

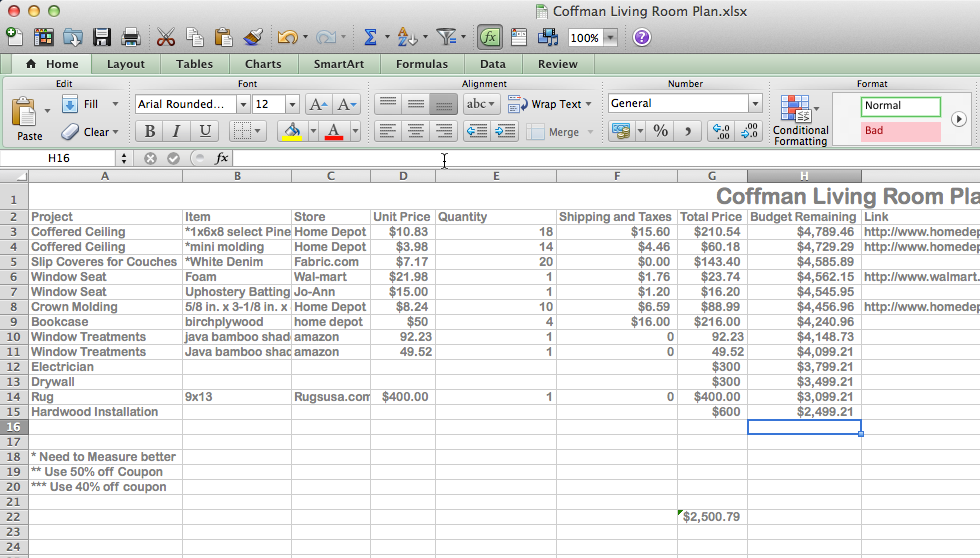
Over the weekend I started using Excel to write up a source list and budget for my living room project and reality hit me full in the face.  I have enough money saved right now to pay my workmen, and not much more.  That means the coffered ceiling and my rug will have to wait. I’m listing some stuff on ebay and craigslist to see if I can earn enough for the wood for the built-ins.

I made a little video for you to show my process of setting a budget for a room:

The lack of cash doesn’t stop me from dreaming though!  I like to have the ideas decided on, so when the cash comes available and the DEALS roll in, I’m prepared to take advantage of them.  There’s nothing worse than a panic of “It’s on sale, but I don’t know which one I want!”  I don’t like to be pressured into a too quick decision on something I might have to live with for years.

I’m looking for a new area rug for the living room since the old one has found a new home in my office. My first area rug was 100% wool.  I chose wool, because it was natural and thick and plush.  Plus my husband’s grandmother bought wool carpet for her home 60 years ago and it still doesn’t have paths worn in it like synthetic carpeting would.  What I didn’t count on, was the SHEDDING.  It’s like we have 5 cats and the fibers make dust bunnies all over the house.  On top of that food coloring is permanent wool dye.  So when the toddler came wandering in the room with an orange popsicle dripping behind him, there wasn’t anything I could do about the stain it left behind.

200ECCR04AI’m shopping for a syntheic rug this time.  I love the bold colors in the Albina Ritzy Retro Rug, but am not sure how long I will love it.  I tend to get tired of bold patterns really quickly, but this one is tempting. It’s on sale for Memoral Day for just $245 for a 9×13.  That’s a really great price for a huge rug.
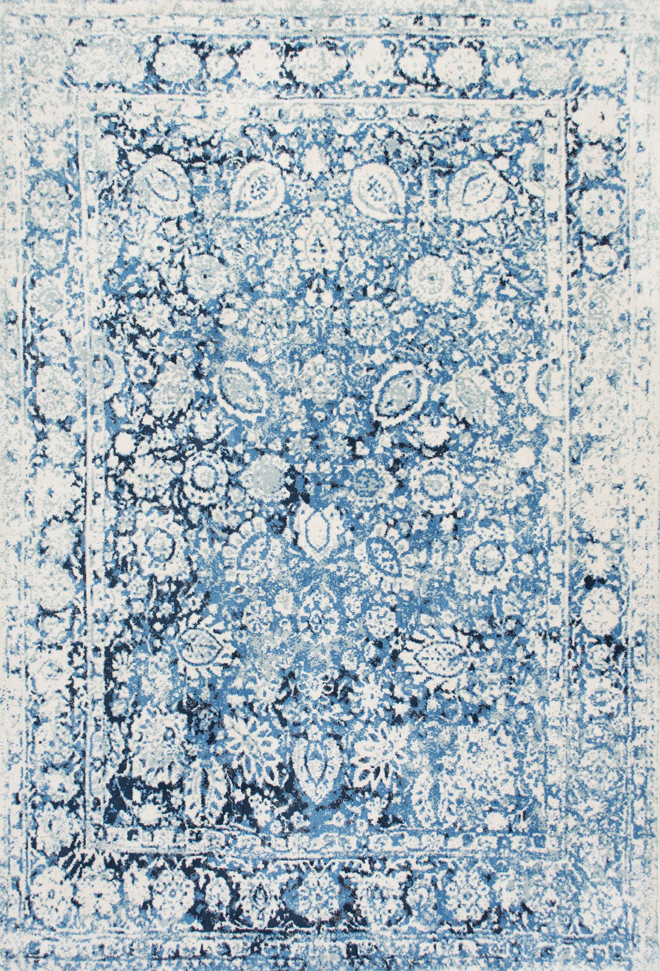
200GLAR05A

My other favorite is the Aerial Decorative Plumes Rug.  It’s a little pricier at $320 for a 9×12. But the more subdued color pattern might be a longer lasting favorite for me.  There’s not much rug to show in this view of the living room, but here it is with the blue rug:

Living Room with Rug_edited-1

and with the colorful one:

Living Room Battens_colorful rug

I’ll see about making a different view of the room where more of the rug shows.  I don’t think there’s enough here to make a decision about.  BUT I love how the multi-colors work with the books on the shelves.  And I equally love how calm the blue rug is in the room.

shanty sideboard

I found a tutorial at ana-white.com for bulding my built-ins!  The original is 73 inches wide, and I need each of my units to be 48″ wide. I’ll only need to adjust the lengths of the horizonal boards and will use 2 doors instead of 4.  Also, I’ll construct the cabinets as stand alone furniture like the plans suggest, but I’ll wait to add any trim or crown molding until it’s in place in the room.  That way the baseboards and crown for the room can continue seamless around.

shanty sideboard in white

Here’s another version painted white with gray glaze.  I plan to do mine crisp white.

Do you have a preference for which rug I choose?  Is there another Rug that you think might work even better?

A Living Room Plan…Maybe

This week’s frugal Friday has been pre-empted by the need to finalize a room plan before the electrician comes next week!

I need to commit to a design so I know where to place the lights, and I’m hoping you’ll look at this and help me see the flaws before it is too late.

Here’s a 36 second video showing the changes.

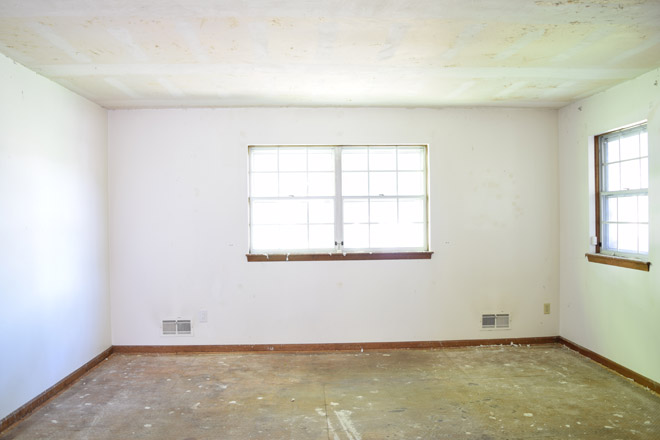
For those who don’t like video, here’s the before photo again.  You’ll notice there are vents and electrical to work with. I plan to use this tutorial.

Living Room Before 3 compressed

and here’s what it would look like with the flooring paint, coffered ceiling and built ins:

Living Room after

For those who prefer video, I made a little longer one with verbal explanations. The piece behind the sofa is our little piano .  It’s about 3 feet in front of the window seat to soak up all the light from the window and make a little sitting area on that side of the room. That should center the larger seating area across from the wide entrance into the room from the foyer.  The few here is as if we were standing in the dining room/kitchen looking in.

Darren said if I go with the built ins, I need to make them so they will be removeable with minimal damage and be useful as furniture in another area.  My research told me to place recessed lights 3 feet from the corners and then 4-5 feet apart after that…..so would that be from the room corner so if I remove the built ins it still looks ok, or from the corner of the built ins after they are finished?  What would you do with the lights?