What if we just did it? The story of our Outdoor Fire Pit

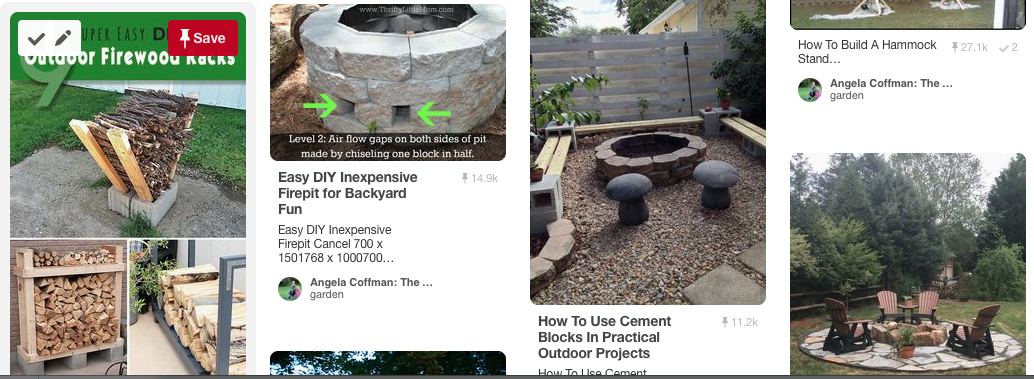
Last fall, I decided I wanted an outdoor fire pit to help burn up the yard waste and give us a place to gather in the evenings and rest.  I pinned pictures of fire pits.

I scanned craigslist for building materials, studied the yard to find the best spot, and researched how to make a level seating area.  To do it right was a little more work than I could invest and required me doing some other projects first, like cleaning up the storage area under the deck, jack-hammering out some excess concrete, digging out some established bushes, hauling in gravel and redoing part of the deck supports.   So the season came and went and we still didn’t have a fire pit.

Then this weekend, I looked at our yard and all the fallen sticks from the spring storms and the passion for a DIY fire pit hit me again.  What if it wasn’t perfect?  What if it wasn’t in the right spot?  What if it didn’t have a pebble sitting area?  We’d still have fires. We could still make s’mores and sing songs and be together.

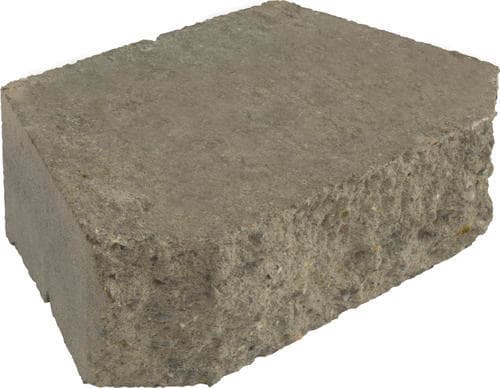
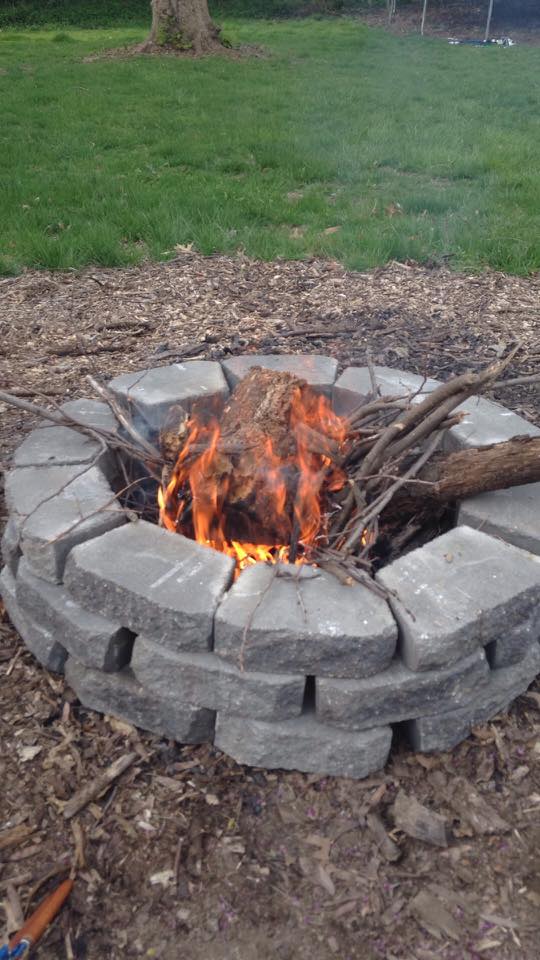
So last Saturday, after our 4th soccer game and a wedding shower, we went to Aldi and bought marshmallows, chocolate bars and hot dogs.  Then we went to Menards and bought 30 of these stones.

It took me 15 minutes to unload the stones from the car and stack them into a fire ring.  We chose a spot at the corner of our driveway where we have been splitting wood for the last 3 years.  It has a nice base of wood chips that really should be cleaned up, but we sat our lawn chairs on it instead.   The beauty of this is the stones can be moved at any time.  There’s no mortar or concrete involved.  It doesn’t matter that nothing about the project was “right” because it can be as permanent or as temporary as we want it to be.

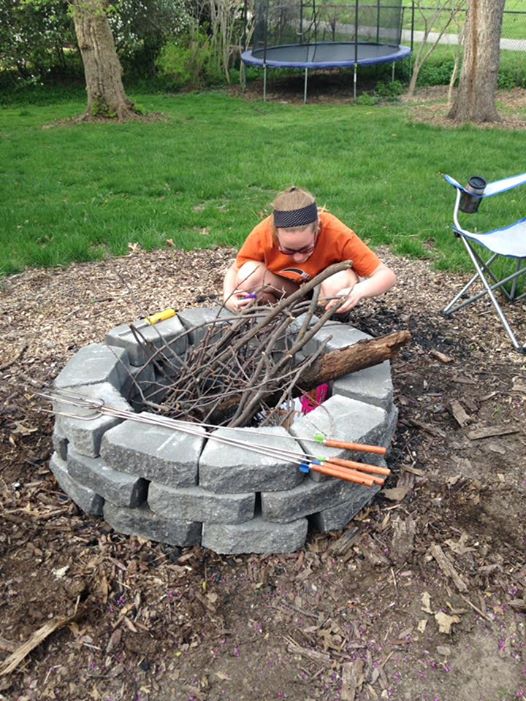
It didn’t even matter that we made our fire wrong.  We eventually got it to light, though the wind made that a challenge.

The s’mores on our imperfect fire tasted just as good.

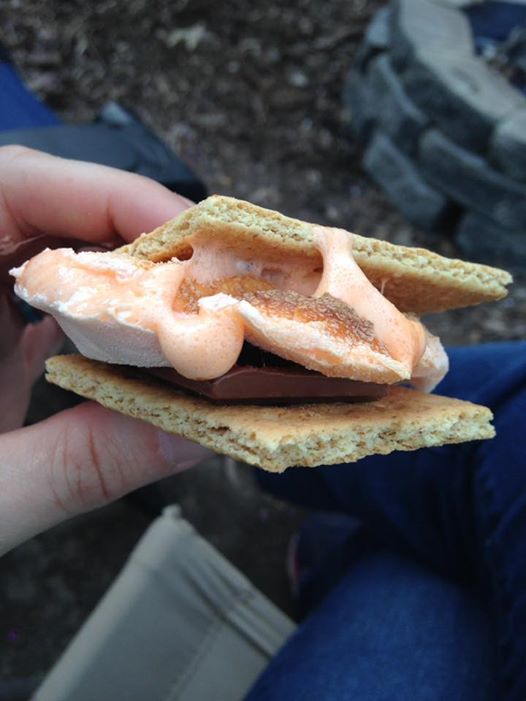
This one was made from an orange marshmallow from Aldi’s Easter line. It tasted just like a wack an orange.

The kids rode their bikes on the driveway, played a game of basketball, and jumped on the trampoline.  It was so much fun that we did it again the next night.

It made me stop and think.  What if I didn’t worry about perfect and just did more things?


How to Freeze Sweet Corn

It’s sweet corn season!  Here’s a handy tutorial for when you have corn coming out your ears.  (Get it?  Ears.) Freezing sweet corn is fast and easy and preserves it’s fresh home-grown taste. The corn I will be showing is sugar and cream corn grown by my dad in his city garden.  They were blessed this year with very healthy corn that gave 4 ears per stalk.  That’s pretty rare in these parts.

freezing corn 1

1.  Shuck the corn outside (because it’s messy).  The shucks are a nice addition to a compost pile.

6a00e5549125f78833011572509fb6970b

2.  Wash the silky hairs off the corn.  I like to use cool running water and a terry wash cloth.  Microfiber cloths work well too.  I like a cloth better than a corn brush.  It covers more of the corn at once, so is faster and grabs the silk really well.  I use about the same amount of pressure when washing corn as when I wash my baby’s face.  Enough to clean without doing any damage.

6a00e5549125f788330115715c504f970c

The front ear is freshly shucked.  The back ear has been gently washed with a terry cloth.

6a00e5549125f788330115715c514f970c

3.  Cut any bad spots off the corn.  This corn was raised without chemicals except for what came on the seed already and has a few worm spots.  Most of it was spotless though.  If you miss a bad spot, it will turn brown when it cooks and you can cut it out later.

6a00e5549125f788330115715c528c970c

4.  Submerge several ears of corn in a large pot of boiling water. If you are freezing whole ears of corn, boil them for 8 minutes.  If you are cutting the corn off the cob, boil for 6 minutes.

6a00e5549125f7883301157250a813970b

5.  Use tongs to remove corn from the boiling water.  Run it under cold water to cool or submerge it into a bowl of ice water for 6 minutes.

6a00e5549125f7883301157250a957970b

6.  Use a sharp knife to cut the kernels off the corn.  I like to take my knife and scrape the cob to get all the milk and ends out.  We call that “cream style” on the farm.  I cut as many cobs as I can fit into a large bowl before stopping to fill bags.

6a00e5549125f788330115715c5916970c

7.  I package my corn in quart size freezer bags, and use a permanent marker to label the bags with the date and contents before filling.  A one cup measuring cup is perfect for scooping the corn into the bags.  Four full scoops is a quart.  When the bags are full, press out all the air and seal them tight.  I smoosh the corn around until the bag is nice and flat and stack them in a plastic dish tub for freezing.  This freezes the corn in nice little stacks that fit well in my freezer.

home frozen corn

8.  Even though you will be tired, be sure to clean up right away when you are finished.  Corn juice is sticky and starchy and dries hard.  It’s much easier to clean up when it’s fresh.

Thanks to my mom for picking and shucking the corn.  And thanks to my Mother-in-love for showing me how to freeze it step by step.  Remember the year my entire kitchen floor was covered a foot deep in corn?  We had 3 years worth plus plenty to share after that.

 This post originally appeared August 1st, 2009

Pins I Love 4-5-14

 Click the photos to go to the source and find out more:

carrot play doughSugar Free Easter Basket Gift Idea

clean a glue gun

DIY Rainbarrell

We are getting new gutters. It would be a great time to set something like this up!

Crochet Alphabet letters

These would be great in the diaper bag for times we have to wait (like at vision therapy.)  Maybe make 2 sets for matching games.

Easter Toad in Hole

Use a daisy cookie cutter for a Spring theme “toad in the hole”

Blessings bags

Keep these bags in your car for giving to the homeless.

How to pack mini-cupcakesHow to pack mini cupcakes for the road 🙂

Weekend Garden Links

If you are starting seeds at home, it’s time!  I’m not, just so you don’t think I’m super awesome or anything.  I’m going to happily plunk down my money at the greenhouse for real plants–only after I get my rabbit fence up.

I had a very expensive garden fail last year when the cute little fluffies razed everything to the ground in the night.  So you can be sure not one seed will hit the ground until my rabbit fence is built.

I decided instead of fencing each bed individually, I’d like a fence around it all so once I’m inside the perimeter I can work freely.The plan is to buy 100 feet of 4 foot tall galvanized chicken wire.  Then bend the bottom foot of wire in an L shape like a foot for the fence to stand on.  We’ll bury that a few inches underground to discourage digging and then fasten the wire to fence posts every 3 feet.  Of course, there will need to be a gate.  I’m not sure how that will work out, but my farmer husband says not to worry.  He’s built many a fence, so I’ll let him take the lead here.

Below are some of the garden ideas I’ve loved from pinterest :).


A fun blogpost on how to involve kids in the process.

Source: daddystractor.com via Angela on Pinterest


Grow potatoes in a chicken wire frame.

Source: urbanfarmerseward.posterous.com via Angela on Pinterest

Concrete stained and stamped to look like wood.

Source: thelilhousethatcould.com via Angela on Pinterest

Garden Bed Ideas

Source: overthebigmoon.com via Angela on Pinterest

Stack pots for a cute  container garden.  I think this would be perfect for my front porch.  Maybe two?  And with plants that are shade friendly.

Source: joybx.com via Angela on Pinterest

Pop bottle self waterer

Source: curbly.com via Angela on Pinterest

How to grow ginger.

Source: dreamstateinspiration.blogspot.com via Angela on Pinterest

Long term root vegetable storage.

Source: Uploaded by user via Angela on Pinterest

Using cinnamon instead of root hormone.

Square foot seed planting guides (Darren will you make me a set –pretty pleas?)

Source: chiotsrun.com via Angela on Pinterest

Making a compost bin from chicken wire.  I think I’ll have some left from my rabbit fence!

Source: sunset.com via Ƹ̵̡Ӝ̵̨̄Ʒ Belle on Pinterest

Sweet Potatoes!

Grandpa Coffman grew some giant sweet potatoes this year!  And he shared with us.  So I have been scouring the web for some new recipes to use the bounty.  Here are some in my must try file.

Betty Crocker's Mashed Sweet Potatoes with Bacon

Betty Crocker's Slow Cooker Sweet Potatoes with Applesauce

 Sweet Potato Hash Browns

Sweet Potato Pancakes

Sweet Potato Waffles

And since we love potato and eggs for breakfast, I’m going to try some breakfast favorites  like:  Egg Burritos and Frittata.


My Newest Student and a Tip

image

I have the flu :(. It started when I was at the emergency clinic with Dub Saturday having a two week old toothpick removed from his foot. By the time I got home I had a high fever, chills, and couldn’t stand without the room spinning. I called my mommy :). It seems like no matter how old I am when I’m sick I want Mommy. So when Dub insisted that I drive him to the ER instead of Darren, I totally understood.

image

As painful as the experience was for him, he loved the wheelchair.

Today Darren is super excited about getting the patches on Caleb’s new scout shirt. He kept asking me if I felt better as the day went on, and when I didn’t have an instant recovery from his great care, he carried my sewing machine down from my studio and set it up inches from my bed. That way HE could do the work and ask questions if he needed. What an amazing guy!

image

Changing the subject… Here’s a money saving tip. I saw on pinterest that if you put the roots of purchased green onions in water they will grow. You’ll always have fresh onion tops to use as needed. I tried it and it works! The outer edges don’t grow so I plan to peel those off and see what happens. This is great for my Plus menu subscribers since they can eliminate green onions from their shopping list!

Green and Growing

I planted my garden a few days ago and little green shoots are coming up. The garden is more shaded than it appeared to be in winter before the tree leaves appeared. So it is a great experiment if anything will grow.

image

This bed has sprouts of green beans and okra popping up their heads. In the center is a spaghetti squash plant that I plan to train to a tomato cage.

image

The left side of this bed is red chili peppers and sweet bell peppers on the right. In the center I have 6 squares of lettuce and spinach, one eggplant, one cilantro, and one rosemary.

image

This bed has 4 tomato plants and a zucchini right in the middle of it all.  I hinted to the children that tomato cages would make a great mother’s day gift.

image

The fourth and final bed is all sweet potatoes–one start in each square. I love sweet potatoes!

image

When I got home yesterday my good friend, Janelle had left these marigolds as a surprise. I plan to put them in the bed with the lettuce and peppers for a pretty pop of color.

Mulberries

The kiddoes are picking mulberries off our tree in the back garden. They got about a quart with more to ripen soon. I’m trying to post a photo from my phone. Crossing my fingers that the wordpress app will work this time.

image

Garden Update :)

Here’s a reminder of what my old garden spot looked like:

Two weeks ago we had a garage sale and while I sat in the garage helping customers, Darren cleared my garden spot!  What a relief.  I didn’t know how I was going to find time to do that.

Then he built the beds for me too!  (I bought kits from Aldi and totally expected to do it myself..so what a great surprise!)

I drove to a local greenhouse and filled my minivan with bags of stuff.

Part 1: Compost

To save money I used the modified Mel’s mix talked about here. It uses twice as much compost since that is the least expensive and most nutritive part of the mix.  If I had my own compost, it would have saved $13 a box or $52 total.  I had to buy it and it was unusal.  More like fine mulch.  They called it cotton something compost.  I had never heard of it before.  I want to start a compost bin now to get the cost of filling the next year’s bins down. We will need to clear some land to build them…it feels a little overwhelming.

Part 2: Vermiculite

Each bed ended up with 2 cubic feet each of compost and 1 cubic feet each of vermiculite and peat moss.

Part 3: Peat Moss

 It cost $35 to fill each bed, which sounds decent until you multiply that by 4.  And I have 4 more beds that we didn’t build this year!  I hope to clear more land for them next year, but went ahead and bought them now so they would all match.  When they told me the total for all the stuff, I couldn’t help but think about all the FOOD I could buy for that much money.  But I reminded myself that this was an investment that I wouldn’t have to redo for 10+ years.  Plus, I like the idea of having a garden :).

Mixing by hand

My plan was to mix everything in the bins with a shovel.  But that was tricky to mix it well and not spill it out everywhere.  That dirt was like gold gravel to me and I didn’t want to lose a speck of it.  I resorted to just digging in with my arms and stirring it up by hand.  It was fun in a “I hope my Mama doesn’t catch me doing this” kind of way.   And then I remembered, I am the mama :).

Ready to Plant

I finished the bins just before dark.  Planting will have to wait for another day.


Why I Have Poison Ivy…

Before

After

Our new home has a jungle for a front yard (and back yard.)  So much of it is beautiful flowering plants gone wild.  Most of the front yard is a lovely shade loving ground cover that blooms all over in purple flowers.  The beauty is spoiled by all sorts of volunteer trees etc. popping up through.  So late last week, while Darren was at work, I grabbed my trimmers and went to work.

One of the weeds spoiling the yard was a very long, healthy vine.  I grabbed it and pulled it out, but I’m not positive I got the root.  I was busy congratulating myself when I saw the tell-tale 3 leaf pattern on the vine.  One of the leaves looked suscpiciously like a mitten.  Oh, dear.  “Leaves of 3, leave them be.”  I ran in the house and scrubbed my hands all the way to the elbow.  I thought about washing my face…but here’s the stupid part.  I had just put on a lovely smokey eye with charcoal gray and gold and I wanted DH to see it.  So I didn’t wash my face.  So now, I have poison ivy all over my face and not anywhere else.  Oh vanity!

I have much work left to do in the yard, but it’s fun satisfying work. I’m planning to remove the rest of the feeble evergreen bushes and replace them with shade loving varities.  Then I’d like to paint my shutters and front door dark gray while repainting the trim white to freshen it up.

I have lots of plans for the back too!  Hopefuly within the next 2 weeks that will mean clearing this spot:

For these:

I was so excited when Aldi had them on sale for $30 each!  Since I’m wood challenged, this was a great deal for me :).

P.S.  I’m thinking about taking the fake railing thing down off the top of the front porch.  What do you think?