Our Thanksgiving Table, On letting children help, and Easy Roast Turkey

We hosted Thanksgiving this year, for our first time ever.  I roasted a 26 lb turkey, which didn’t go well the last couple of times I tried it.  It made me nervous, but it came out beautifully.  I’ll share my super easy recipe at the end.

We had 19 guests, but thought planned for 22. I set up two 6 foot round folding tables and pushed 2 rectangular folding tables together in the middle for a circle, square, circle configuration.  My goal was to feel like we were all sitting at 1 table, but be able to still walk around the room as needed.  It worked!

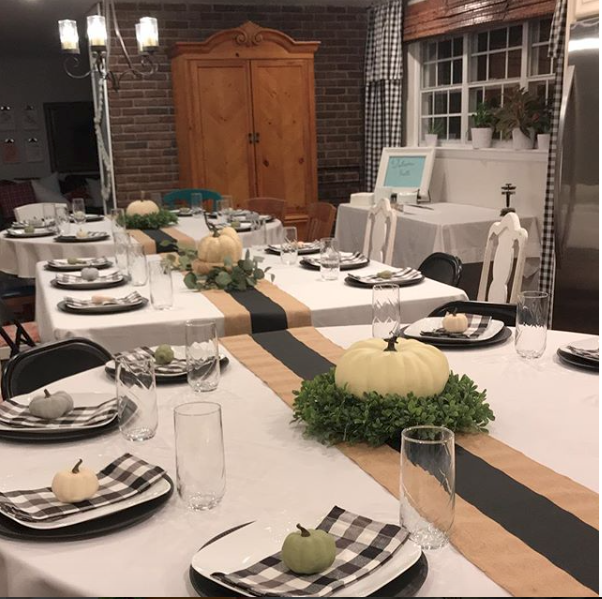
We’ve still never gotten a real table for this room. I keep thinking I’m going to build one and have several pinned in my “wood” pinterest board.  Other things take priority, so it will probably be a few years before I actually build something.  With a table cloth, we mostly forget our every day table is a portable fold up tables.   I used 2 of these and 2 of these tablecloths for this setting and love that they come in a ton of color options for a great price.  I also grabbed 3 of these runners to dress it up.  I had planned to write scriptures down the middle layer with chalk, but in the end, we liked the simple cleanliness of it all.

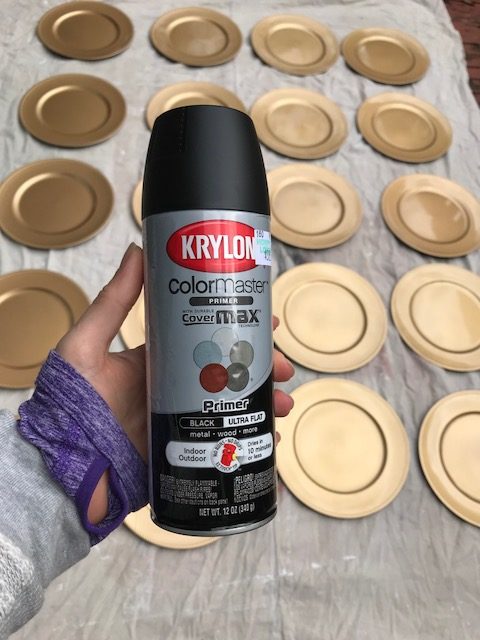
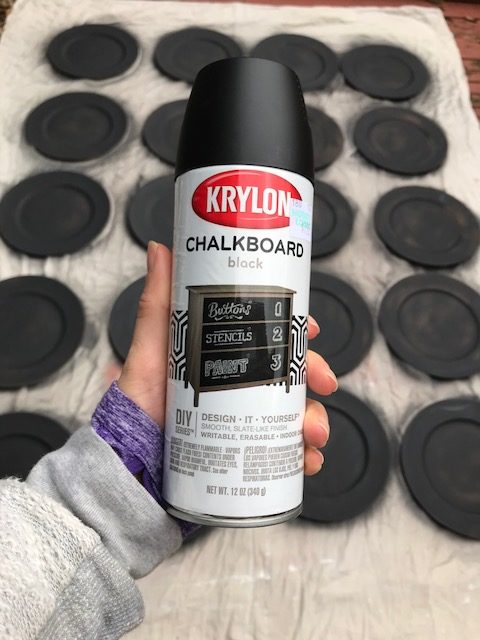
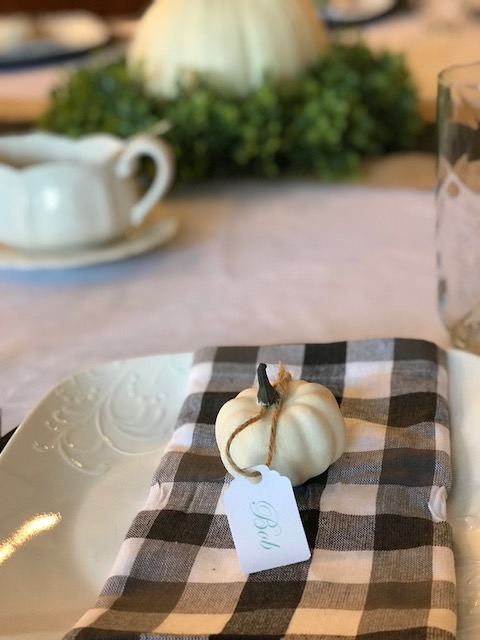
The black chargers are Dollar Tree gold chargers that I spray painted with chalk paint.  One can of paint and one can of primer did all 22 chargers.  I topped the chargers with my every day white Corelle plates.

I grabbed buffalo check napkins which match my curtains (ahem tablecloths with a rod pocket sewed in the top.)  I saved the napkins to use the first time for the Thanksgiving table, but they will be our new everyday napkins since the old ones are worn thin.

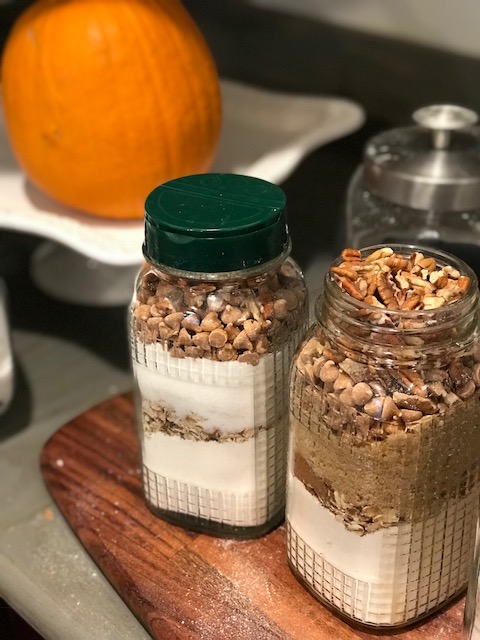
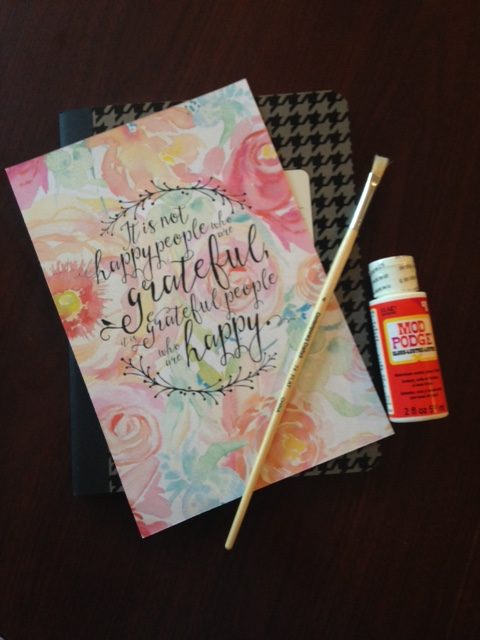
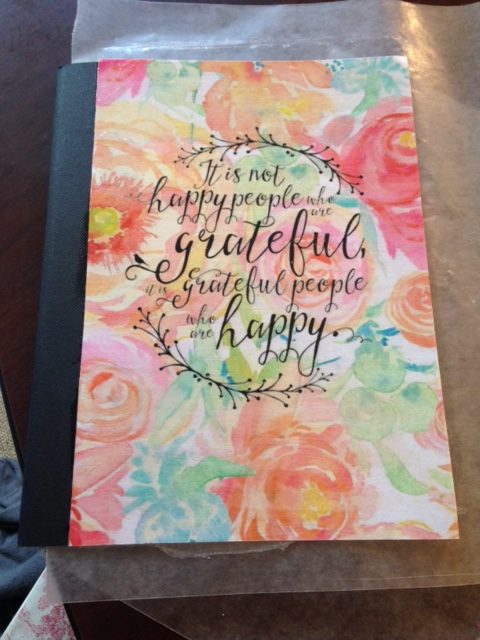
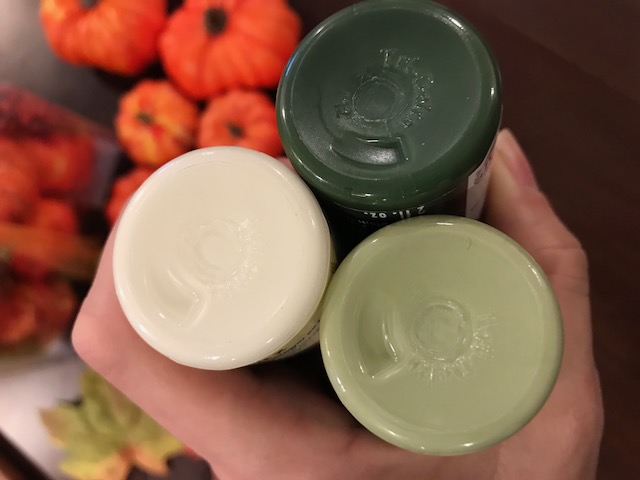
The day after Halloween I bought a couple of boxes of foam craft pumpkins on clearance at Hobby Lobby.  They were glow in the dark orange, so the kids and I painted them to look like heirloom pumpkins.  Walmart is the best price for craft paint even with sales and coupons if you ever wondered.

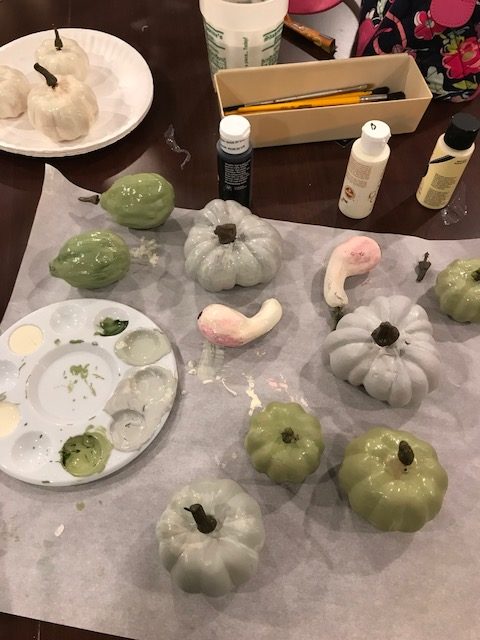
Then we printed up some name tags and tied them to the stems with jute twine from the Misc. drawer.

While the clearance sale was on, I also grabbed 2 large heirloom pumpkins.  They cost about the same as buying real pumpkins, but won’t rot and I can use them year after year.

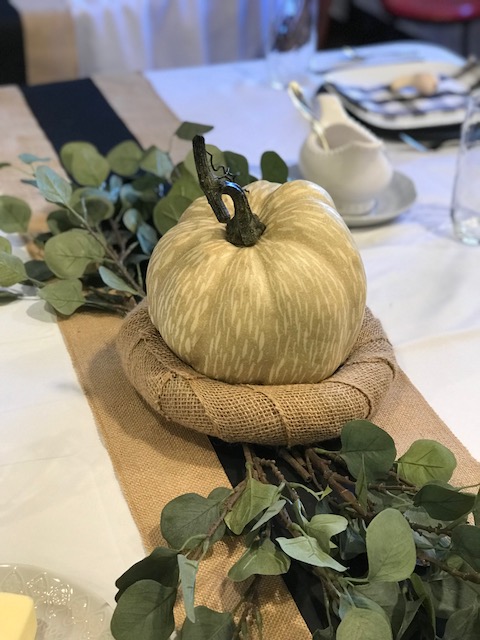
This is a fake one on a burlap wrapped Dollar Tree Foam Wreath and Ikea Eucalyptus branches.  I had the branches on hand and just pulled them out of the arrangement they were in to try to beef up the table.

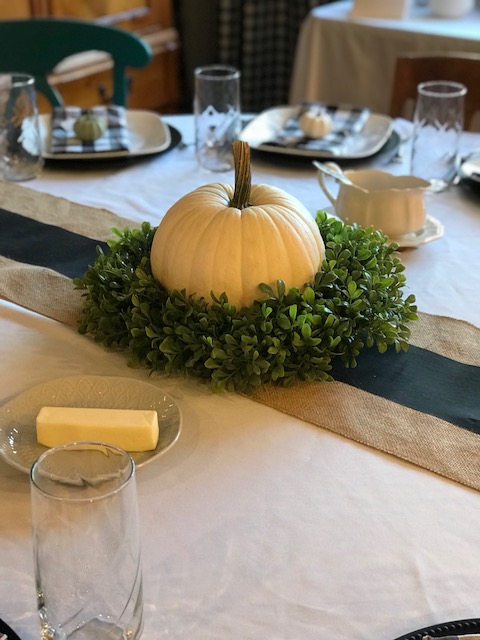
This pumpkin is real.  My guests thought they were all real until they touched them.  The faux boxwood wreaths are from Ikea and were on my front doors just the day before I set the table.  It was all clever and fun until a spider walked out from the wreath and ran across the table during dinner.  EEEEK!

We placed a butter dish, salt and pepper shaker, roll basket, and gravy boat on every table.  (I asked some of the guests to bring theirs so we’d have enough without buying extra things.) All the other food was served buffet style.

My oldest daughter helped me arrange the table settings and place cards the morning of Thanksgiving, and I watched her running around in a frenzy, shooing the younger children out of the room because they weren’t doing things perfectly and being completely frazzled.  In that moment I saw a perfect reflection of myself during her younger years.  I felt convicted and grateful simultaneously.  Sorry that she was only living what she had seen, and glad that she was still in my home and mine to teach.  So I apologized to her for her crazy holiday mother from her childhood, and we had a talk about the value of little hands and how their imperfections make life that much more sweet.

Two things made our holiday especially less stressful.

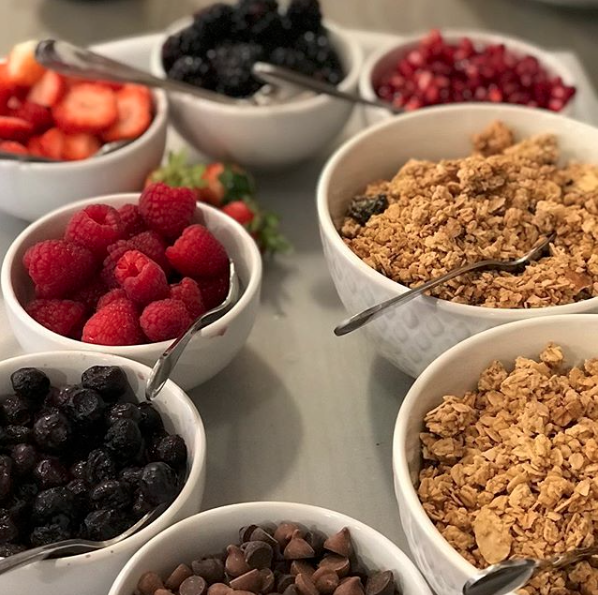
A.  I set out a yogurt buffet for breakfast, so I didn’t have to cook and they could come in and grab something when they were ready.  I even let them eat at the coffee tables since the kitchen tables were already set for lunch.  Everything was from Aldi and I was so excited that they offered fresh raspberries and blackberries for $1 a clamshell the day before

B.  I roasted the turkey the day before and carved it up into 9×13 pans.  Then I poured the broth back over the meat to keep it moist.  Then Thanksgiving morning, I reheated the meat in the broth.  After we transferred the meat to a serving platter, I could still make gravy out of the broth.   So here’s my super easy Turkey Roasting Instructions:

Super Easy Turkey Roasting Instructions:

  1.  Thaw the bird in the refrigerator ahead of time. Here’s a handy chart.
  2. Preheat the oven to 400 degrees.
  3. Don’t wash it, but do pull out the neck and the bag of giblets.  (Or leave it in, it really doesn’t matter.)
  4. Place a wire rack in a large, deep roasting pan.  Place the turkey breast side DOWN on the pan and rub it all over with melted coconut oil (about 2 Tbs) and sprinkle with salt.
  5. Roast at 400 for 1 hour (this seals in the juices), then without opening the door turn the temperature down to 350.  Cook for 1 hour longer.
  6. After the bird has been in the oven for 2 hours.  Take it out and flip it over so it’s breast side up. Rub it all over with coconut oil (2 more Tbs) and salt again.  Then stick the probe of an oven proof digital thermometer with alarm in the thickest part of the thigh.  (The thigh is right inside the leg.) Put it back in the oven and shut the door with the alarm part of the thermometer outside the oven.  You’ll close the door on the cord.
  7. Then leave it be until the alarm goes off.  If you want an estimate for how much time you’ll need, here’s a handy chart.
  8. When the alarm goes off, set the turkey and pan out of the oven and let it rest for 1 hour.  This allows the juices to reabsorb into the meat, but if you carve it right away it will all run out and be dry.

We still haven’t put up any Christmas decorations, because we have 6 of these until next Wednesday.  It’s worth the wait.

How was your Thanksgiving?  Is your Christmas tree up?


Pumpkin French Toast Casserole

French Toast Casserole reminds me of Christmas morning or a celebration brunch, but it’s easy enough to have any time.  I love that it can serve a crowd without having to stand over a hot griddle cooking a few slices of bread at a time.  The pumpkin flavor and pecan butterscotch topping, makes this dish especially festive.

You can bake it in a 9×13 casserole dish, muffin tins, a Bundt pan, or even a slow cooker.  It makes a great freezer meal, or a prep the night before dish. I’ll give instructions for each variation at the end.

Pumpkin French Toast Casserole

1 loaf, 20 oz of bread.  We like Saralee Artisan Golden Wheat Bread

Read more

Baked Pumpkin Doughnuts, No Special Pan Needed

These sweet and tender Baked Pumpkin Doughnuts are as easy to make as biscuits.  Brandon helped make our first batch at 2 years old.  He’s 10 now–eeek!  When I look back on these old pictures I wish I had taken a lot more.

We like this recipe because it doesn’t take any special pans or a donut maker which makes it accessible to every kitchen.  It’s easily made dairy free. Just sub coconut oil for the butter and almond milk for the dairy milk.  And dust with powdered sugar instead of yogurt glaze. We’re still perfecting a gluten free recipe so you have that to look forward to that later.

Read more

Pumpkin Muffin or Cookies Jar Mix

This mix contains the epitome of autumn flavors with the butterscotch chips, pumpkin spice and pecans.  It has has been a family favorite for years and fits prettily in a quart jar and makes a nice appreciation gift or a welcome to the neighborhood gift.  This is another original recipe you won’t find anywhere else.

Pumpkin Jar Mix

1 1/2 cups All-purpose Flour

1 tsp Baking Soda

1/2 tsp Salt

1 1/2 tsp Pumpkin Spice

1/2 cup Rolled Oats

3/4 cup Sugar*

1/2 cup Butterscotch Chips

1/2 cup Chopped Pecans

Layer in a quart jar

*If you are baking right away, brown sugar tastes better.  If it is a mix for storage then white sugar is best.  Brown sugar will dry out next to the flour and get hard and impossible to mix into the recipe.  Sucanat or coconut sugar would work in either situation.

For cookies: Mix 1/2 cup softened butter, 1/2 t maple flavoring, 1 cup of pumpkin puree and 1 egg. Add pumpkin mix, and mix just until combined. Drop by spoonful onto greased cookie sheets.  Optional, decorate before baking by pressing a pecan half into the top. Bake at 350 for 12-15 minutes. Makes 2 dozen cookies.

For muffins:

Mix together 1/4 C butter or yogurt, 2 eggs, 1/2 t maple flavoring, and 1 cup of pumpkin puree. Add pumpkin mix alternating with 1 C milk. Fill greased muffin cups nearly full and bake at 400 for 15-20 minutes. Or until a toothpick inserted in the middle comes out clean. Makes 15-18 muffins.

P.S.  Did you know that parmesan jar lids fit quart jars?

This is day 12 of 31 Days of Pumpkin Recipes

1 Pumpkin spice mix

2 Homemade pumpkin puree

3 Pumpkin Sugar Cookies

4 Pumpkin Dinner Rolls

5 Pumpkin Cinnamon Rolls

6 Pumpkin Bagels

7 Butternut Chicken Stew

8 Healthy Pumpkin Pecan Scones

9 Pumpkin Waffles

10 Pumpkin Snickerdoodles

11 Butternut Squash Chili

12 Pumpkin Jar Mix

13 Pumpkin French Toast Casserole

14 Easy Pumpkin Cake

15 Pumpkin Dump Cake

16 Baked Pumpkin Oatmeal

17 Pumpkin Mousse

18 Pumpkin Cheesecake

19 Pumpkin Latte

20 Pumpkin Pie Smoothie

21 Pumpkin Breakfast Cookies

22 Pumpkin Biscuits

23 Maple Pumpkin Butter

24 Stuffed Sugar Baby Pumpkins

25 Pumpkin Pancakes

26 Pumpkin English Muffins

27 Roasted Pumpkin Seeds

28 Baked Pumpkin Doughnuts

29 Pumpkin Biscotti

30 Pumpkin Caramel Monkey Bread

31 Impossible Pumpkin Pie

Pumpkin Snickerdoodles

These Pumpkin Snickerdoodles have a thin crispy outside with a soft inside.  Not too cake-like and just enough spice.  I ate 4 just to make sure they were perfect and could have gone for another if I weren’t on a diet.  Self-control has to begin somewhere, bwa ha ha ha.

Read more

Homemade Pumpkin Bagels Video Tutorial

This isn’t a new recipe to this blog, but it’s still one of my favorites. The soft inside and chewy outside make a lovely grab and go breakfast. I originally wrote this post in 2015. Grant is now in 1st grade! I don’t regret spending that last year with him, and even though the kids are all in school now, we decided my time is still best spent at home helping things run smoothly for everyone.

Tee hee.  This video makes me giggle.  When I watch the replay and Grant (4) dumps the pumpkin on the counter, I roll on the floor laughing and then back it up and watch it again.  Maybe because I was there for the original moment, trying to balance a camera and helping Grant with the cooking at the same time.  How the pumpkin on the counter shocked us both and I got the giggles, which I tried to hold in making a weird background noise.  Grant, relieved that I wasn’t upset said, “We better clean that up.”   Which made me giggle all the more.

After we made quite a mess but got most of the stuff in the bowl, I said “What should we do now?”  I thought Grant would say, “Let’s clean up!”  but he said “SMILE.”  Which made me giggle all over again.

This boy is the joy of my days.  The sleepless nights, messes, tantrums, and battles are all worth it.  I had the option to spend this year in a classroom blessing other people’s children, while I earned money that my family needed.  I would have had to let someone else be with Grant during the day, and I just couldn’t.  It’s his last full year at home and I fought for my chance to be the one to clean up his messes and talk him down from the ledge of toddler insanity. It was selfish and selfless at the same time.  He needs me as much as I need him and there’s something priceless about that.

For those who prefer a written recipe here you go:

Pumpkin Bagels

  • 2/3 cup warm water
  • 1/2 cup canned pumpkin
  • 1/3 cup packed brown sugar
  • 1 teaspoon salt
  • 2 teaspoons ground cinnamon
  • 1/2 teaspoon ground nutmeg
  • 1 teaspoon ground ginger
  • 1/2 teaspoon ground cloves
  • 2 cups all purpose flour
  • 1 cup whole wheat flour
  • 1 Tablespoon active dry yeast

Put all ingredients in the order listed in your bread machine.  Set for the dough cycle.  When the cycle is ended, divide the dough into 10 balls.  Poke your finger through the center and make a large hole.  Let the bagels rise for an hour or until doubled. Pour 8 cups of water into a stock pot, boil bagels for 1 1/2 minutes, turning once.  Remove to a dish towel to drain.  Place bagels on a greased baking sheet.  Brush with egg white and sprinkle with a little sugar.  Bake at 400 degrees for 20 minutes or until golden on the top.  Cool on a wire rack.

This is day 6 of 31 Days of Pumpkin Recipes

1 Pumpkin spice mix

2 Homemade pumpkin puree

3 Pumpkin Sugar Cookies

4 Pumpkin Dinner Rolls

5 Pumpkin Cinnamon Rolls

6 Pumpkin Bagels

7 Butternut Chicken Stew

8 Pumpkin French Toast Casserole

9 Healthy Pumpkin Pecan Scones

10 Pumpkin Snickerdoodles

11 Pumpkin Muffin/Drop Cookie Mix

12 Easy Pumpkin Cake

13 Pumpkin Dump Cake

14 Baked Pumpkin Oatmeal

15 Pumpkin Mousse

16 Pumpkin Cheesecake

17 Pumpkin Latte

18 Pumpkin Pie Smoothie

19 Pumpkin Chili

20 Pumpkin Breakfast Cookies

21 Pumpkin Biscuits

22 Maple Pumpkin Butter

23 Stuffed Sugar Baby Pumpkins

24 Pumpkin Pancakes

25 Pumpkin Waffles

26 Pumpkin English Muffins

27 Roasted Pumpkin Seeds

28 Baked Pumpkin Doughnuts

29 Pumpkin Biscotti

30 Pumpkin Caramel Monkey Bread

31 Impossible Pumpkin Pie


How to make pumpkin puree


Photo credit: Tim Mossholder

While canned pumpkin is really delicious, it’s super easy to make homemade pumpkin puree to use in all your fantastic recipes.  Homemade puree freezes really well for year long stockpiling. Even though pumpkin pie, bread, doughnuts, pancakes, cookies, muffins…..dot our winter menus long after October, especially around Thanksgiving and Christmas, the time to grab your pumpkins is now. Tourism pumpkin patches will till their pumpkins under the day after Halloween and it will be terribly hard to find one anywhere.  If you buy them now, stored properly, they will keep long into the winter.

Any pumpkins will work, but the tiny ones have the sweetest most pumpkiny flavor. And the gray pumpkins have the darkest flesh.  This one even had a sweet melon smell.  And it doesn’t have to be pumpkin, butternut squash is in the same family and makes an even thicker, rosier puree.

Read more

My Gratitude Journal

I’m excited about this easy little crafty post, because it has so much meaning to me. Along the journey of life a few years back, we chose to seek out help from a psychologist who said something very interesting: “The thoughts you think, control the chemicals your body releases.  If you are able to change your thoughts, you can change your chemical balance. If you can’t change your thinking, then medication can help make it easier.”

gratitude-journal

Stress is my enemy.  A little spurt of stress can put me in bed for a few days, too weak to even walk unassisted.  I can’t control all my stress, like when someone cuts me off in traffic and nearly causes an accident; when a bat gets in my house and flaps around my bedroom; or when someone I love gets sick or dies. But there is a lot I can control.

This past week, a lot of stressful things were going on in my life.  Here’s what I wrote in my Fit Yummy Mummy journal: Oh Girls, Life has kicked my tail… My grandma is on hospice and they don’t think she will live through the night. She is 90 and forgot who I was long ago, but I remember who she is. Her daughter, my Auntie, was on death watch for a short time last week, but miraculously recovered for a little while longer and has been moved to a rehab facility. …my mama hurt her leg mysteriously and can’t walk very well…. I tangled with some poison ivy last weekend and am COVERED. Plus the school district has denied to test Heather for learning disabilities even with all the private testing records I sent them and doctor reports. They said they don’t accept any outside of the district assessments and they haven’t observed her long enough to decide what to do about her. I’m so sad realizing that they are waiting for her to fail again before they intervene even though her records transferred from her old school show a clear pattern and need. I’m taking her to another clinic the next state over on Saturday to test her eye/brain connection. It’s so expensive, but if there’s a chance it will help her we’ll find a way to earn the money. I’m trying not to stress about everything, but I’m feeling all the feels anyway and it has zapped my strength. So that’s where I am. Not sure how to pick up the pieces from here while my body has checked out. 

That wasn’t even all of it, but it started to feel ridiculous writing so much complaining down. What if instead of that, I had written down all the things that were going RIGHT?  I can tell you THIS, I spend way more time thinking about the things going wrong than I do the things I have to be thankful for.  I’m sure that has a lot to do with my health struggles.

It’s hard to admit that I am a negative person.  Yuck.  Just admitting that makes me not like myself very much, so I’m making steps to change.  4o years of consistent negative thinking isn’t going to change easy, but I’m choosing my hard.

gratitude journal 2

I’m starting with this fifty cent notebook. It’s just a composition notebook from Wal-mart.  I made a little cover for it by merging this and this.  I printed it on regular paper, then trimmed it down slightly to fit the cover.

gratitude journal wax paper

I placed a piece of wax paper inside the notebook, so I wouldn’t get modge podge all over the pages and stick them together.

Then I put a thin layer of modge podge ($1 in the Target spot bins) over the back of the picture, and stuck it to the cover, starting on one edge and smoothing it over to prevent air bubbles.  Then I took my brush and put a thin layer of glossy modge podge over the top for durability.

img_3580

Here’s the best part, the brush strokes in modge podge are visible after it dries, giving printed art a hand-painted affect. To take full advantage of this, I went back once more and added brush strokes to the water color flowers, following the natural curve so each flower would look hand-painted.

img_3578

You GUYS! I’m feeling so clever right now.  When it dried I trimmed the corners and added a matching cover to the back.

gratitude journal drying

Before I thought of this little project, I looked on Amazon for a gratitude journal I could buy.  There were several good ones like this, this, and this. They were each less than $10, but the DIY one was the more affordable option for sure.  Karen at A House Full of Sunshine has a different idea for a DIY journal cover that is darling for all you washi tape lovers.  She also had some good thoughts about gratefulness that are worth clicking over to read.

gratitudejournalpinsmall

Here’s what I’ll write tonight:

  1. Heather’s new Irlen filters that are helping her read better
  2. Family cooperating for Grandma’s Funeral
  3. A chance to sing with my daughter and my sister-in-law
  4. Free flute lessons for Heather that make her so happy
  5. Our cars are both repaired and running well
  6. A supportive church family

I’m all about reducing stress, not adding to it, so I’m not writing in complete sentences, telling stories (unless I want to), or giving myself a quota.  If I’m too stressed to think, I might just copy down a scripture verse or hymn that I’m grateful for, or tape in a coloring page. And if I need to skip a day, that’s A-OK, since none of the pages are pre-dated.

P.S.  If you want to hear more about gratitude journals, Sherry talks about hers in the “We’re Digging Section” on episode #11 of the Young House Love Podcast.