Here’s a tutorial for you for a darling skirt that you can make to fit a girl or woman of any size. It is fast and simple to put together and makes a great last minute birthday gift.
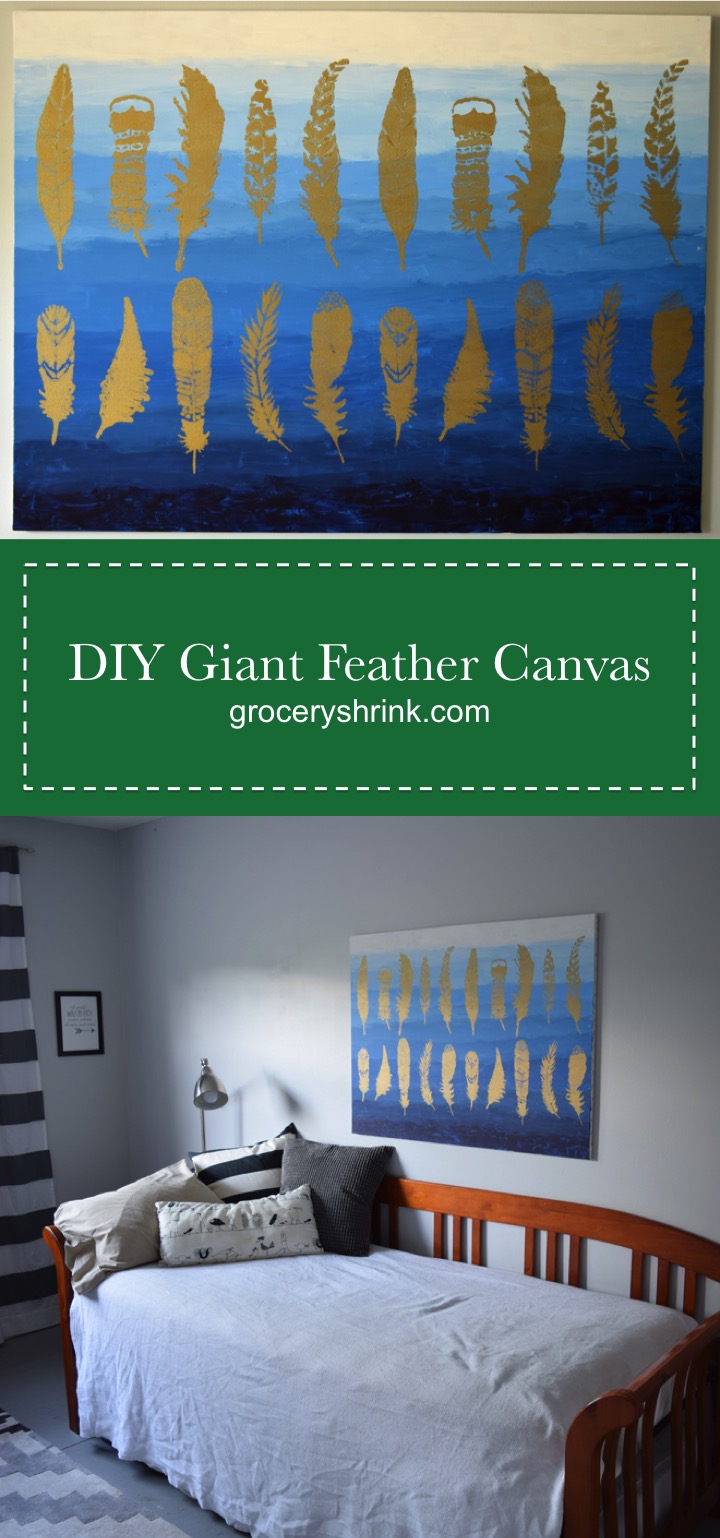
A gigantic white canvas scares me. It is full of possiblities but begs me to choose just one.
I’ve been dreaming for years of what I would do when I got the nerve to buy a big blank canvas. I have a pinboard full of ideas simply for a big blank canvas, but I didn’t have the courage to act on any of them. Then my neighbor put a 30×40 canvas out at his garage sale. For just $10 I could own it, still in shrink wrap. So I bought it. Step one, Dream. Here I come.
I leaned it against the wall in my room and refused to hear it mocking me. I wouldn’t make eye contact. I wouldn’t let it see my fear. Dust came.
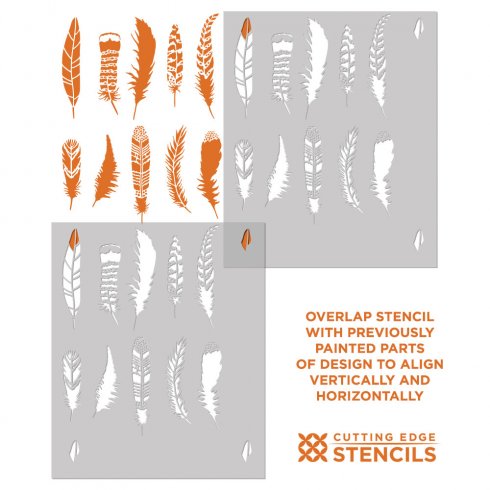
Cutting Edge Stencils invited me to look through their website and pick something to share with you. I chose the Feathers All Over pattern. Step two, Dream. Here I come.
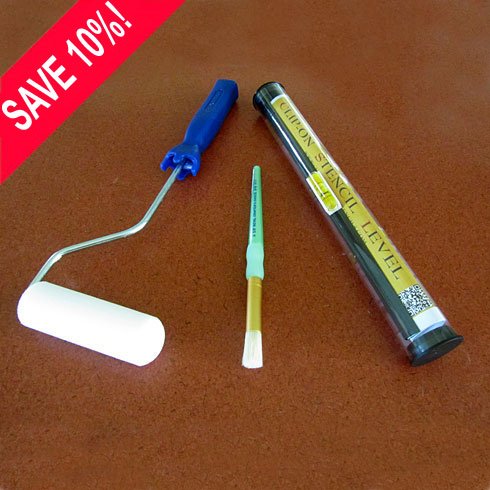
I set a deadline. I told myself that if I hated it I could paint over it as many times as I wanted. The stencil arrived gently rolled in a triangle tube. The stencil was huge and sturdy. The packaged also included a high quality stencil level, brush and foam roller. I had everything I needed to begin. 1…2….3…jump….maybe tomorrow.
The deadline loomed and so did a fever. I took to my bed and slept amid sweat. My oldest daughter asked if there were anything she could do. I offered her the canvas. She and her friend mixed and striped the base with just one blue. Black made it darker and white took it the other way. I didn’t watch, I just let them do. “Don’t worry, Kids,” I reassured. “It wasn’t expensive. It’s just paint. If it’s awful we can paint over it.” I gave them the courage I didn’t have.
They laughed and chatted while they painted and timidly invited me to inspect their work. I ignored the splotches of paint on the sheet draped carpet. It was perfect. No longer white, the canvas didn’t mock. It invited and encouraged. I taped up the stencil and poured shimmery gold paint into a tray. It was runny and old and separated. I stirred it with the end of the foam roller until it looked uniform in the pan. Then I paused. This was too easy. I took down the stencil and measured and centered. I had it right the first time. With new confidence, I filled the roller, then matted it off on a clean part of the tray. Rolling over the stencil, the paint refused to cover the rich blue ombre. I rolled again, covered again. It twinkled and winked. I overlapped the stencil beside the pattern and rolled again.
Then it was done. A few minutes of labor and the dream stood before me in it’s flawed glory. The too thin paint, gone over too many times, stood in the gaps where blue should have been. My 8 year old son stood beside me and breathed, “It’s beautiful.” I pointed out the ooze and he said, “That’s why it’s beautiful. The flaws tell you a human being did this. It adds value.”
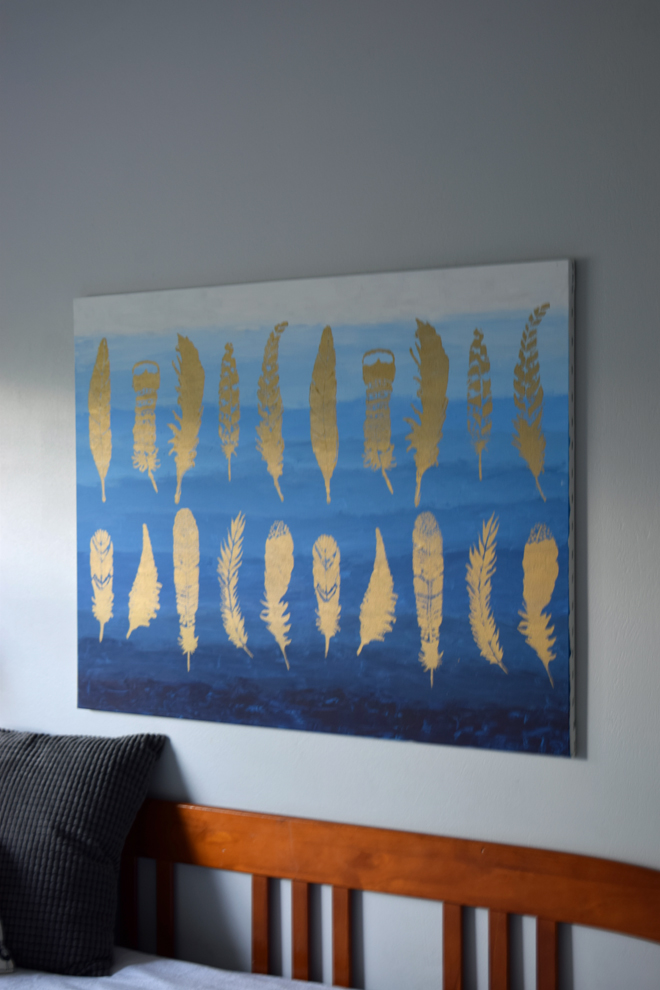
While my teenage son was away at Scouts, I snuck in his room to make ready the surprise. Armfuls of smelly socks and dirty dishes moved to appropriate wash stations. New sheets, fluffed up feather pillows, dusting spray and a vacuum cleaner, removed the stress of the school year. Two nails, measured with one eye, made a resting place for original human art. The canvas asked for one thing more, a ribbon or strip of wood to hide it’s stapled edge. I promised I would, but not yet. The boy would be home too soon….and then he was behind me, gasping his delight and approval. 100 plans came to his mind to tidy up more and decorate more.
The painting teens made a little video of the ombre backdrop. I tried to film the stencil rolling, but apparantly I turned off the camera when I thought I was turning it on. It really was just like rolling paint on a wall. I only wish I had used less paint, or thicker paint and let it dry between coats.
Greek yogurt is a great source of protein and probiotics. It’s thick and creamy even when made with skim milk. The only problem is it can get expensive! A 48 ounce container from Costco is around $6, but I can make 64 ounces at home for the price of a gallon of milk. This week Aldi has milk on sale for $1.65 a gallon! It’s yogurt making time :).
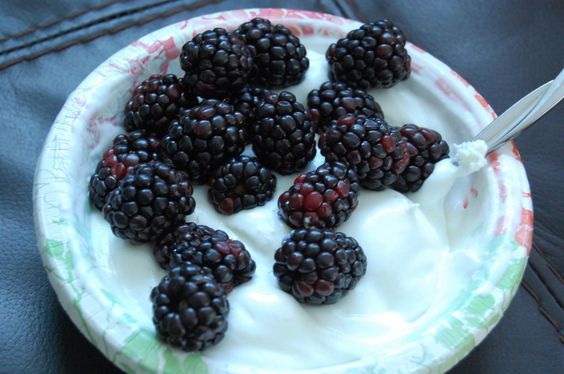
I like to do a whole gallon at once, because I use yogurt for a lot of things–eating with fruit, pancake topping, sour cream substitute, to make dip and salad dressing, as a base for cream sauces etc. It’s a fabulous high protein snack for everyone in the family. If you use less, you can cut everything in half and do just a half gallon if you use less yogurt. So here’s how I make it:
Pour 1 gallon of milk in a 5 quart slow cooker. Place on low for 2-3 hours or until it is 180 degrees. Do not let the milk boil! If you have a digital thermometer with an alarm, you can walk away and forget about it. You can use any kind of milk–skim to whole. I prefer skim for the lower calories and we are used to it. Whole milk yogurt is delightfully creamy though.
Turn off the slow cooker and let the milk sit until it has cooled to 110-120 degrees. (2-3 hours) I know heating the milk feels like an extra step if you are just going to cool it down, but it’s necessary to unravel the proteins and allows the yogurt to thicken. I’ve made raw milk yogurt before and it doesn’t get as thick.
Take 1/2 cup of plain yogurt (reserved from your last batch or purchased) and mix it with 1 cup of the warm milk from your slow cooker. Then stir this mixture into the rest of the warm milk. It would seem like adding more yogurt starter would just make yogurt faster and thicker–but it doesn’t work that way. More is not better. 1/2 cup per gallon is perfection.
Cover with the lid and wrap the whole thing in bath towels to insulate. Keep the slow cooker turned off and allow it to sit overnight. In the morning it will look like this:
You can see the whey separated and floating on the top with the yogurt solids underneath. If you stir all this together, you will have regular plain yogurt.
To make Greek Yogurt: Layer a large bowl with a large colander and line with 3 layers of cheese cloth. Pour your yogurt into this and allow to drain without stirring until half of the volume is reduced. Save the nutritous clear whey for baking and use it like buttermilk in pancakes, biscuits, bread etc.
Take the strained yogurt and put it in your electric mixture with the wisk attachment and whip. If it’s too dry add a little fresh milk (or cream) until it has the moistness and consistency you like.
It should be very thick and creamy when you are done. This recipe yields 1 gallon of plain yogurt or 1/2 gallon of Greek Yogurt for around $3. This is roughly 1/4 the cost of buying the same amounts at Costco and requires very little hands on time.
If your yogurt doesn’t set up, you can leave it another day. I’ve forgotten about it before and left it for 24 hours. The yogurt was perfect and the cultures kept the milk from spoiling. If it doesn’t work at all, it is possible the yogurt cultures weren’t alive. This happens if the milk is too hot when they are added (high heat will kill them.) Or if the starter was too old. It works best if you can make yogurt once a week or every other week and use 1/2 cup from the previous batch to keep the cultures alive and happy.
Meat and Cheese are the two most expensive categories in my grocery budget. I keep costs down by choosing less expensive proteins a few times a week like eggs. While I’m not a fan of vegan protein alternatives like tofu and TVP, I do enjoy fresh or dry roasted edamame.
If someone in my home developed food allergies to all dairy and eggs I’d consider tofutti. Until then…. nope.
Eggs, on the other hand, are little compact nuggets of serious nutrition. 2 large eggs have 140 calories, 12g of protein, and everything necessary to grow a chick = lots of nutrients. Plus at $1.50 a dozen, a serving of 2 eggs is only $.25.
We like to have hard boiled eggs on hand for snacking. They are also great chopped on top of a chef’s salad, in egg salad, potato salad, tuna salad, creamed eggs over biscuits, deviled (stuffed) eggs….you get the idea.
Boiled eggs are easy to cook, but may not be so easy to peel. When eggs are freshly laid, they are slightly acidic which makes the shell stick tightly to the albumin in the egg white and impossible to peel cleanly. The hen covers her eggs with a protective coating as they are laid which keeps this acidic level intact and the egg fresh outside the fridge for 10 days.
Commercial eggs have the protective coating washed off. This allows the natural CO2 trapped in the egg to dissipate through the porous shell reducing the acidity and the stickiness of the shell. Commercial eggs will ripen in the refrigerator to be easy to peel in about 10 days. By the time they reach our homes commercial eggs are typically perfectly ripe.
If you have your own hens, you’ll need to wash the eggs you hope to boil with warm water and a soft cloth before storing in the fridge. Label them so you’ll be able to tell the date they will be ready to boil and peel (10 days ripened.) Oiling the eggs for storage will make it impossible for them to ripen to easy peel stage.
We enjoy steaming our eggs instead of boiling them in water. They don’t crack since they aren’t in the rocking boiling water to knock them around. We think they are easier to peel than boiled eggs and don’t have the grayish green line separating the yolk from the white, unless we forget about them and over do it.
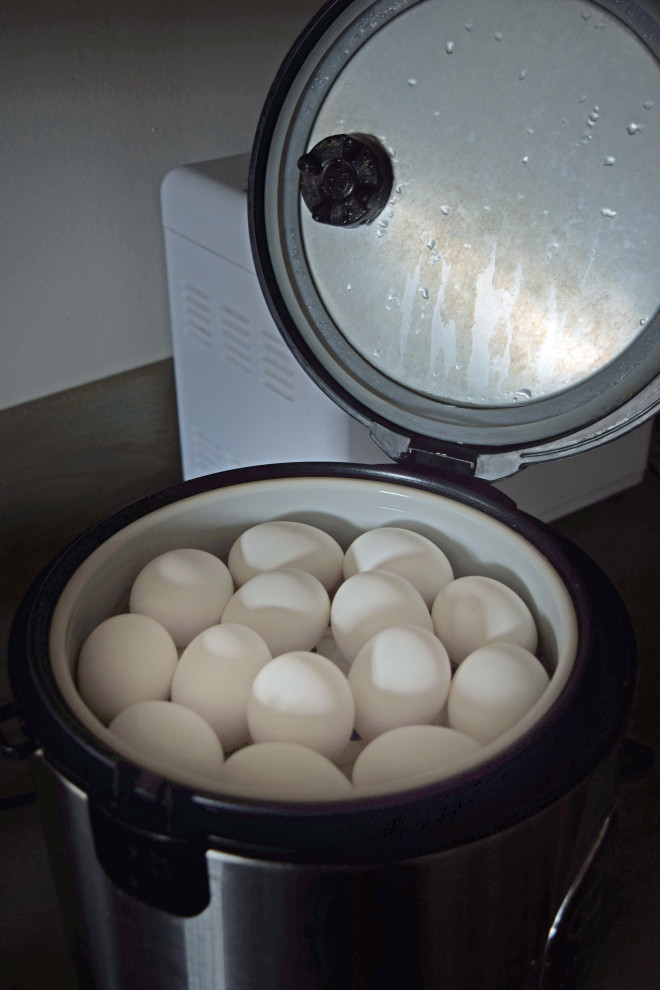
I use our combo steamer/slow cooker/rice cooker to do it, because it automatically starts timing when the water comes to a boil and sets of an alarm when they are done. I simply fill the bottom with 2 inches of water, fill the top basket with eggs, set it to steam for 15minutes and go to something productive.
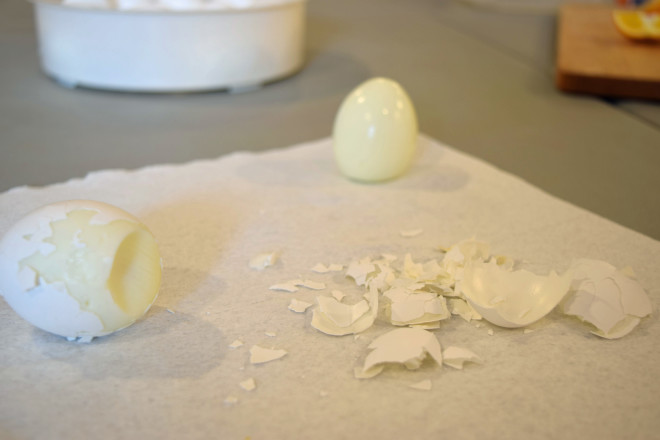
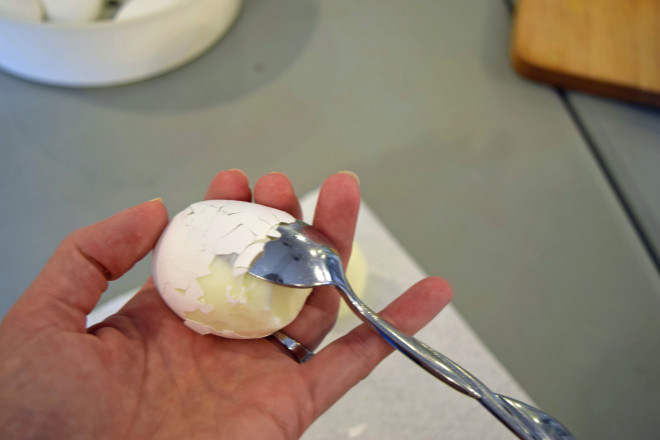
When the alarm sounds , I use oven mitts to lift out the steamer basket and plunge it into a sink of cold water to stop the cooking process. When they are cool enough to handle, I tap and roll the eggs on a paper towel (or cloth towel) to break up the shell, then slip a spoon between the shell and the egg. The spoon curves with the egg keeping it protected and the peel slips off pretty quickly this way. If the spoon doesn’t slide well, I oil the tip with a touch of olive oil.
How about you, does peeling eggs frustrate you? Do you have a family tradition for making eggs easy to peel?
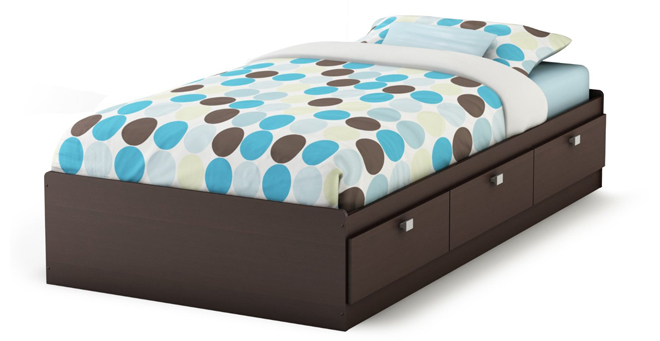
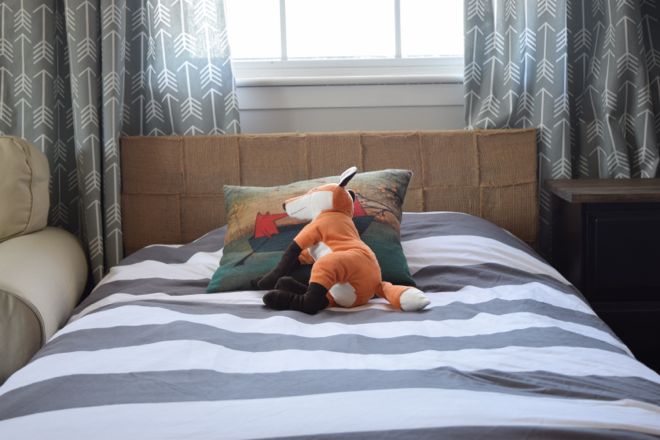
Before we moved, in an effort to squeeze a lot of kids in a tiny space, I bought these beds so we could store their clothes unerneath:
It looks handy to use in the photo with the covers all tucked in. In real life we like our covers to hang over the sides of the bed, which would get caught in the drawers. We now store bedding in the drawers and their clothes in baskets in the closet.
The beds aren’t super high quality, but they’ve survived moving twice and are the perfect height off the floor for young boys. If you consider these beds in your own home, have a plan from the start for replacing the drawer pulls. They are sharp enough to draw blood if you bump it just right.
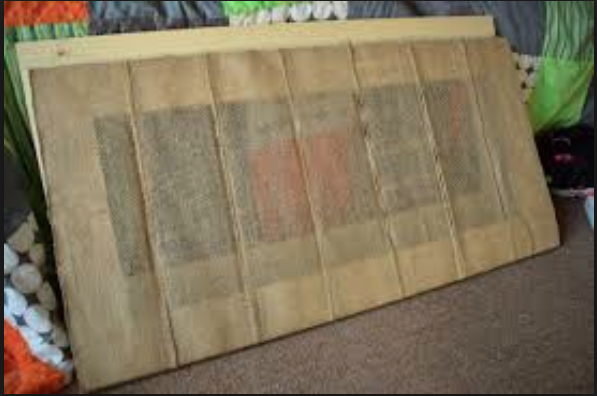
In an effort to use what we already have (to stay within budget) I knew I’d be keeping the beds for the room refresh. I wanted them to have a headboard to ground the bed area, but it had to be inexpensive and short enough to fit below the window.
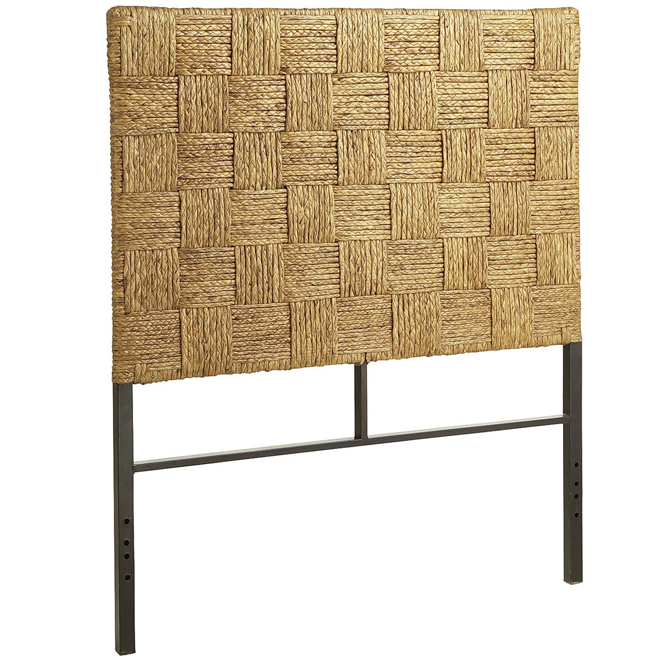
This headboard from Peir 1 Imports was my inspiration. I still love it a little more than my DIY headboards, it was just out of our price range and too tall for this project.
I had originally planned to buy enough jute rope to weave a smaller headboard just like this one, but the cost was prohibitive. Instead I purchased 5″ wide burlap ribbon with finished edges to weave with. It was less than $10 a headboard and still gave the texture I was hoping for.
I used the same 1×4 pine from the picture frame in yesterday’s post to build a simple rectangle for the headboard frame and pocket hole joined it together. It was all going to be hidden, so I didn’t worry about mitering the edges or anything fancy.
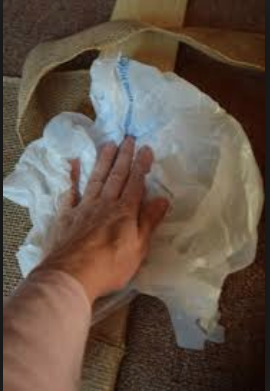
Then I hot glued strips of the burlap ribbon to cover the frame. I had to hold it in place for a few minutes until the glue set to make sure it was stretched tightly. That was HOT!
I figured out I could use a plastic shopping bag to protect my hand from the heat. The bag peeled off pretty well from the glue without leaving a mark.
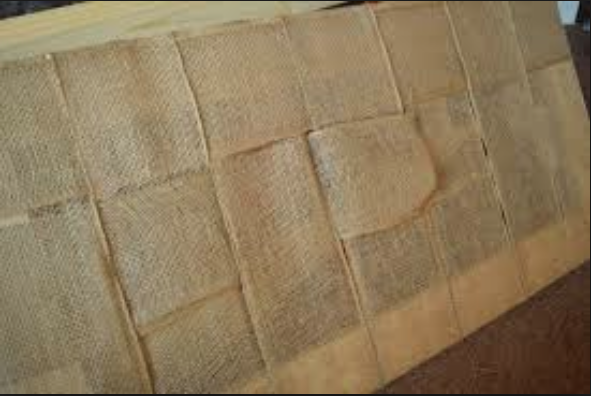
Then I went back the other direct with the ribbon and wove it through, securing the ends on the back side with more hot glue.
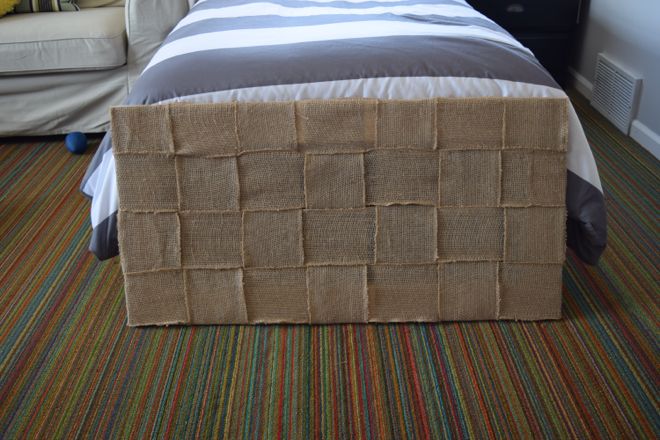
Here it is all finished. They’ve been using it for a couple of months and the burlap has gotten a little stretched out on the edges. If it doesn’t hold up for the long term, the frame will be easy to upholster in a more traditional fashion.
The original plan was to just screw the headboard to the wall, but I prefer how it looks with the curtains flowing behind it. For now I have it propped up inside the bed frame, but am working on a hanging system that will secure it a few inches from the wall and high enough to touch the trim of the window. I’ll update when I figure it out.
Have you ever made a headboard? I’d love to hear how you did it.
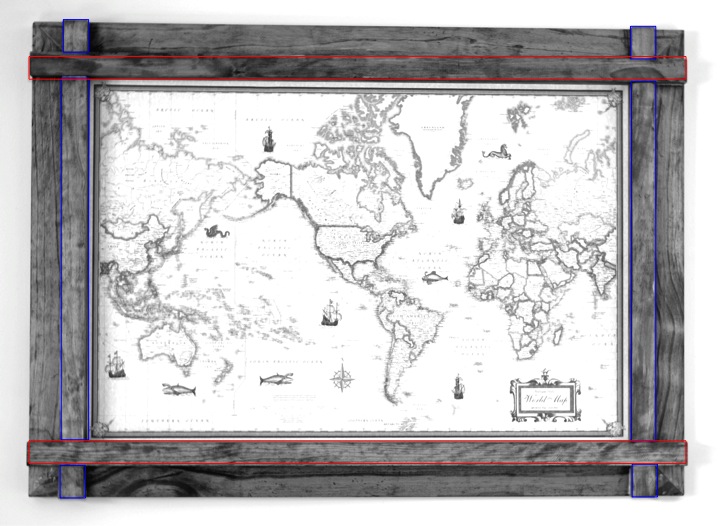
When I was searching for inspiration for our shared boy room, I found a photo of this rustic frame and loved it instantly. I needed a custom size to fit the canvas map I ordered from Amazon.com and to save money, I built it myself. The map price fluctuates, I paid $29.
I had everything but the pine on hand, so this project cost me $13.62
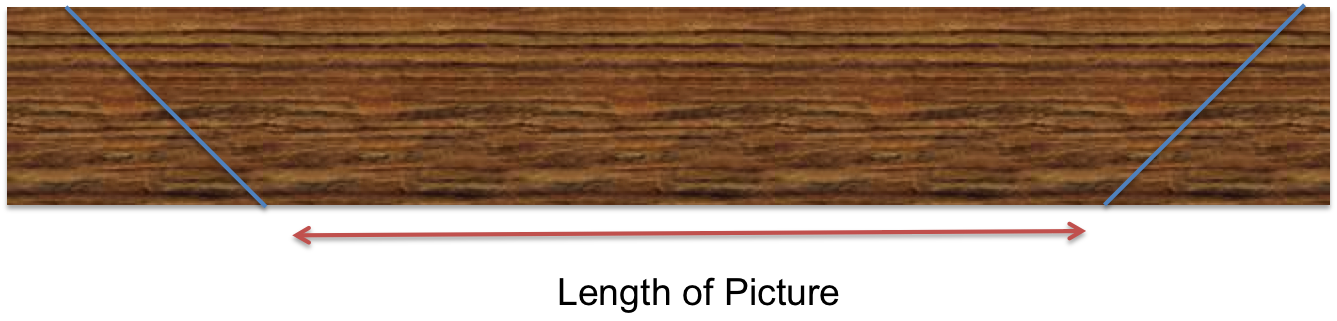
Measure your picture, leaving some room for the picture to overhang the frame on the back and decide in the INSIDE measurements of your frame. Then cut 2 lengths of wood with 45 degree angles like this:
Cut 2 more in a similar fashion to match the measurement of the height of the frame.
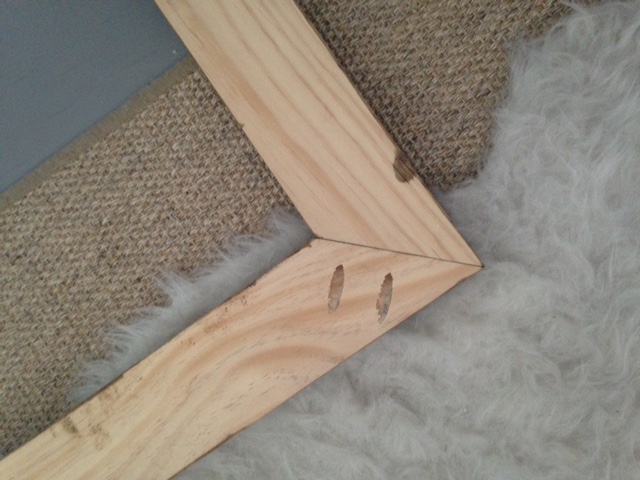
2. Drill pocket holes onto the back side of your wood. Take your time with this. On my last piece I drilled holes on the front of one side and the back of the other. There was no way to fix it without buying new wood. Since it was a rustic frame and I’m cheap, I assembled it with the holes on the front and filled it with a plug. You’ll never see it unless you look for it….but it happened. If you don’t want to use a pocket hole jig, you can glue and staple it together. Tutorial here.
3. Clamp the 45 degree edges together to a piece of scrap board and use your self-tapping screws to assemble the frame. I didn’t use glue here. It’s up to you.
Here’s a video that was helpful to me:
4. The top pieces are going to be glued and clamped into place. Cut 2 pieces of 1×2 the length of your frame (red), then cut 2 pieces the inside width and 2 tiny pieces for the outside corners (blue). I’ve outlined the wood pieces here to make it easier to understand.
5. At this point, I recommend stopping and distressing and staining your wood now. If during the gluing process any glue squeezes out onto the face of the wood (it always does), the wood won’t take stain there. Even if you wipe it off before the glue dries. I didn’t do this and have some naked spots on my frame.
6. Now it’s time to glue your trim wood to the face of the frame. Add a wavy bead of glue then clamp the first trim piece in place. After 30 minutes you can remove the clamps and glue the next section. I only had 2 clamps so this part took the longest. The trim hid one of my mistake pocket holes completely and partially covered the other one. Whew.
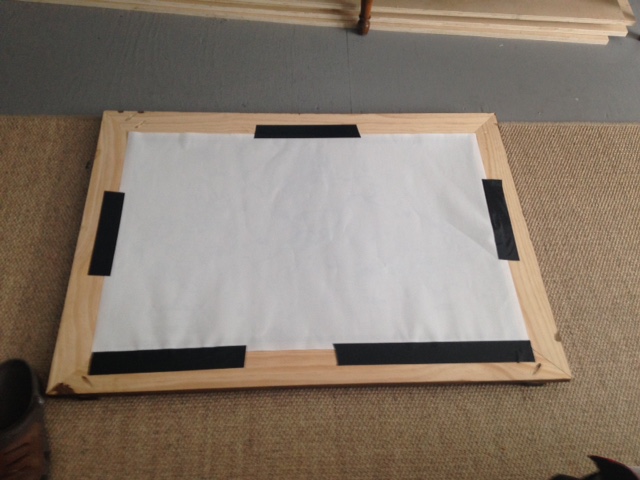
7. Typical frames have a rabbet to give an inset space to hold glass and a backing (instructions here.) Since I wasn’t using glass or a backing, I didn’t mess with a rabbet and just duct taped my picture to the frame.
I used small pieces to get it stretched into place, then taped the rest of the way around for security before hanging.
8. Nail in the picture hangers and hang it up :).
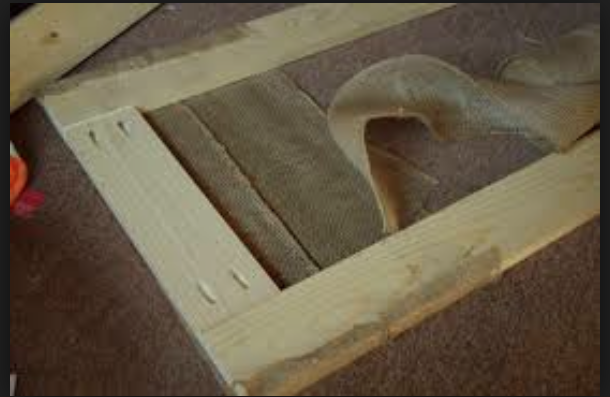
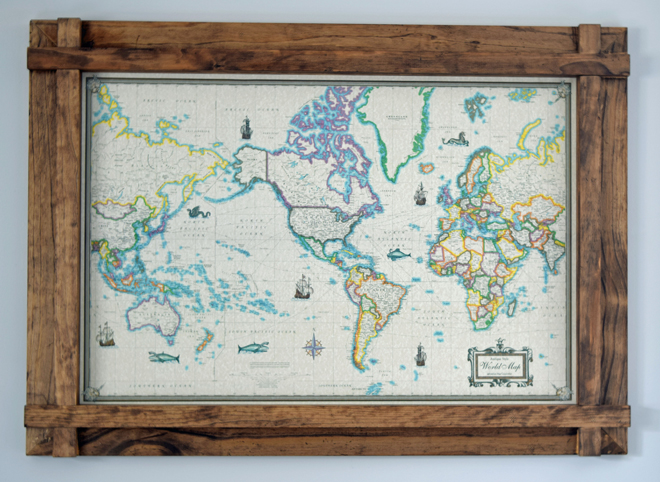
I’m pretty proud of how it turned out, considering my first try at building something turned out like this:
It took me a few years to get the nerve to try building again. I’m so glad I didn’t give up completely. I built 4 more things from wood for the shared boy room and saved a BUNDLE in the process. I’ll show you about them soon.
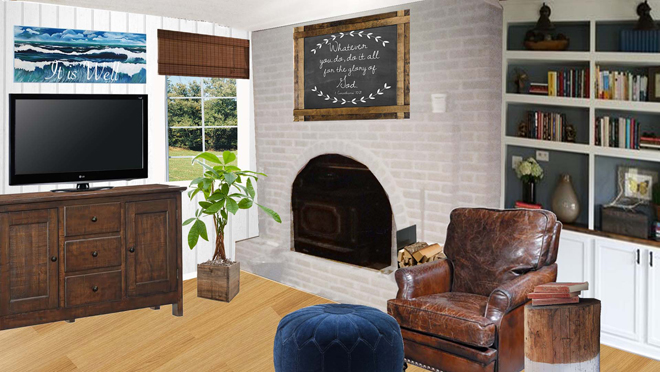
I love the frame so much I’m thinking of other places I could use one. Like over the fireplace in Darren’s new office with a chalkboard and inspirational scripture: “Whatsoever you do, do it all for the glory of God.” I’ll have to figure out rabbets for this one.
How about you? Would you ever consider building a picture frame?
I’m a big fan of Chip and Joanna Gaines. So big that I paid $10 on Amazon to watch Season 2 of Fixer Upper after I saw Season 1 three times. During the third round of season 1 Darren said, “Haven’t we seen this one before?” I just smiled and handed him some popcorn. Season 2 didn’t disappoint. Chip had me screaming, laughing, and cringing and Joanna made me want to appreciate my kids a little bit more.
Greenery breathes life into a room. If I step back in a space and feel like something’s missing, Read more…
Do you know your design style? Are you a little bit modern or country? Do you like lots of decorations or prefer a minimalistic style? White walls, dark walls, neutral or bold? Painted trim, or stained wood? For some of us it’s hard to decide.
I can appreciate any well decorated space, so I made the mistake in our last home of combining too many styles in one room. Read more…
Mix month is still going strong and I have a big line up for you next week! But for the weekend I wanted to show you some progress I’m making in the girl’s bathroom. In July, I’ll have a whole month of house projects and frugal nesting ideas for you–this is just a sneak peek :).
Smart Tiles generously supplied the tiles for this post (after I begged them) and I honestly thought I would have it up and ready for them in April. If you remember, the space looked like this–very green:
I stripped the wallpaper and the popcorn ceiling and was stuck with how to repair this:
…and many areas like it. I finally hired a drywall guy to rescue me. He was amazing and affordable and I wish I had called him months ago.
This week, I primed and painted the space. It is white, white, white…from the ceiling to the floor. To keep it from being boring and cold, I have lots of gold accents and dramatic floor to ceiling curtains planned. Plus texture from faux bamboo shades, terry cloth rugs, and hexagonal tiles. These, to be exact. #onsalenow
I chose these tiles because I want the space done quickly without messing with concrete backer board, wet saws, adhesive or grout. Yet, I needed something to look great, be durable, and create a waterproof area. I was not disappointed.
I first figured out this worked on a desperate day when I didn’t have a kitchen. The no kitchen season of our lives lasted almost a year and I relied on my slow cooker and electric griddle for making almost everything.
Since then, I’ve reused this method changing the seasoning to suit the dish. Taco seasoning for batch taco meat. Italian seasoning for pizza or spaghetti. Read more…

 A gigantic white canvas scares me. It is full of possiblities but begs me to choose just one.
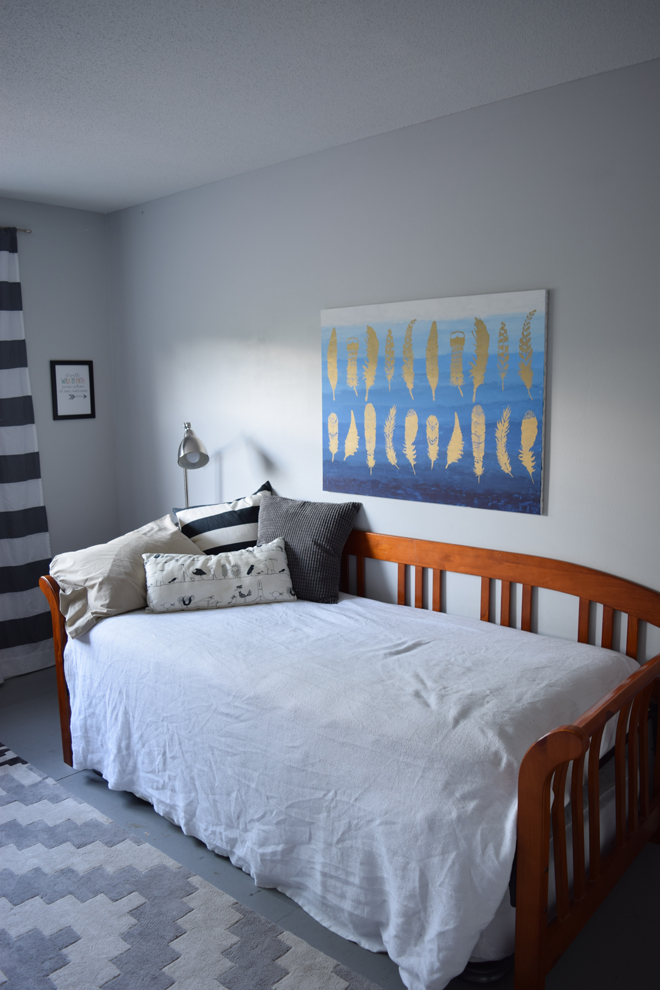


 When I was searching for inspiration for our shared boy room, I found a photo of
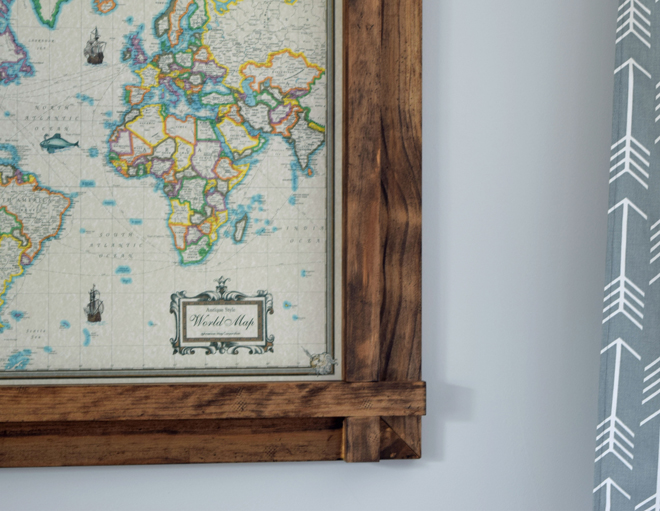

 I’m a big fan of Chip and Joanna Gaines. So big that I paid $10 on Amazon to watch Season 2 of Fixer Upper after I saw Season 1 three times. During the third round of season 1 Darren said, “Haven’t we seen this one before?” I just smiled and handed him some popcorn. Season 2 didn’t disappoint. Chip had me screaming, laughing, and cringing and Joanna made me want to appreciate my kids a little bit more.
 Mix month is still going strong and I have a big line up for you next week! But for the weekend I wanted to show you some progress I’m making in the girl’s bathroom. In July, I’ll have a whole month of house projects and frugal nesting ideas for you–this is just a sneak peek :).