Hello! April and May have been some crazy months at the Coffman house. Today is the official last day of school for the public school Coffmans. Homeschooled Coffman will be done in another week, and private school Coffman has 1 1/2 more weeks. The next day I will lead my choir one last time for Graduation, and then I’ll be a FULL TIME blogger. It’s hard to wrap my mind around. I swing between being ecstatic about the possibilities for the future and crying about the loss in the transition.

Last week, we had a garage sale which raised almost $400 towards our living room project. We have so many projects on the list that I didn’t know which one to do first. Then the grand piano we were babysitting found a forever home, and it the living room it used to live in looked possible! We already have the flooring for that space, so the cost of doing the room will be less than any other space we could tackle. It was an easy choice.

This room is attached to our kitchen/dining area through a short hallway.

This was the original plan for the room 4 years ago, made on the Nebraska Furniture Mart website.

Then filled in with color via powerpoint. I was able to buy the rug and furniture back then and live in the space along with the 1971 avocado green sculpted carpet.

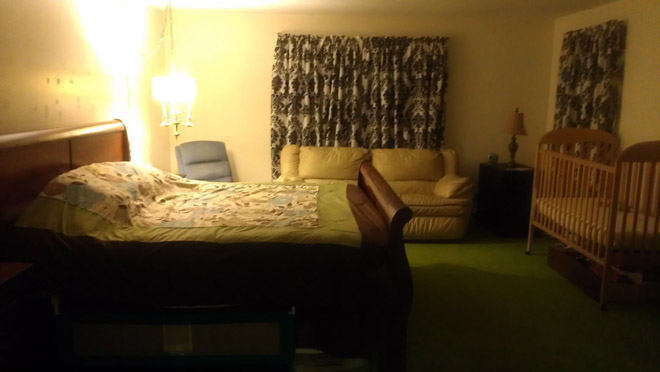
Before that the room was our bedroom! We had no doors for privacy and the front door opened up right beside us. There are no light fixtures in the space. That plus tiny windows and a low ceiling, made it feel very cave like.
I’m making a brand new plan for the space and I hope you’ll share your opinions. Our rug is now in my office and our furniture has scentsy wax on it and is full of nicks and dings. Even the “new” stuff needs some sprucing.
For now it’s demo day!

Our missionary friends came over and helped us remove the popcorn texture. It was REALLY messy! I took photos and texted them to their Moms. They don’t get to call home whenever they want, and I wanted their moms to know what hard workers they are.

Then I fed them a really big lunch. By using the slow cooker to make the southwest chicken, the rice cooker for the brown rice, and the pressure cooker to make the dry beans, I could work beside them the entire time and still give them a home cooked meal for lunch. We had burrito stacks with chips, rice, beans, chicken, lettuce, cheese and condiments. After lunch, they helped me remove the carpet.


The trash service will take the carpet if it’s bagged. So we cut it into small enough pieces that it would fit in trash bags and stacked it in the garage to wait for trash day. I don’t know about them, but I’m exhausted. It’s a good thing I can make design plans from bed :).
This is exciting! So exhausting to make big room changes but oh the pleasure when you get to enjoy the final results!
Sinea ♥
Yes! I have learned to plan a rest day after every work day. It takes me twice as long to do things as I think it should, but forward progress is forward progress!
Way to go! I will soon be removing wallpaper and repainting my daughter’s bedroom. There is popcorn texturing on the ceiling in there to. Do you have any suggestions about removing it? It is very satisfying to see all that has been accomplished when DIY projects are completed! Enjoy the fruits of your labor!
How exciting, Dee! Yes! For removing wallpaper, peel off the top layer with your hands. It usually comes off in a nice sheet. But if it doesn’t just take off what you can. Then use a clean garden sprayer filled with warm water and a drop of dishsoap to soak the wall down. (Dishsoap with enzymes in it like Lemonbrite works really well.) Take a putty knife to peel off the rest. When it’s soaked enough it should come right off. Then wash the remaining glue off the wall with TSP or diluted solumel. If the wallpaper was installed on raw drywall without paint or primer, you’ll have to replace the drywall….I hope that isn’t the case. If it is, you’d be better off painting over it (as long as the wallpaper is stuck down well. That is the ONLY case I recommend painting over wallpaper.)
to go over wallpaper that was applied to unprimed/unpainted drywall you do not have to replace the drywall, but you do have to do some work. We had that problem in our house and to get rid of the wallpaper we did this multi-step process. Prime over the wallpaper, mud the wallpaper joints, roll on a wall texture, prime the walls, paint. It is tedious and takes time for the steps to dry, but I think it is better than replacing the drywall.
I am so excited for you, Angela! I know you have been wanting to do this for a very long time. I hope your plans go well and they turn out as good in real life as they do on paper. Have a blessed summer and don’t over work yourself.