The Best *Free* Baby Gift Tutorials from Around the Web

Best Baby Tutorials

To make the list, the tutorials needed to be useful, adorable, free, super easy, use small amounts of materials, and be fast to make. Like I woke up late Saturday morning, and the shower’s at 2pm and I don’t have a gift yet, fast to make.

Click photos to go to the source and get the info:

IMG_2110

You’ll need a bib to use as a pattern for this one, but it’s a great concept for using up scraps.

Mrs Biddle Bibs

 I didn’t use drool bibs until I found these.  They didn’t cover up a cute outfit, they MADE a cute outfit.

liberty-bibs-all-1

Drool bibs for the little ladies :).00

This scrappy bib tutorial comes with a printable pattern.

a

When Grant was born I made 2 of these out of Minky.  Oh man, everyone was jealous.  He still loves them 3 years later.  We moved him to a toddler bed instead of a twin bed, so he could still have his sheets.

Baby TomsBoth free and paid options at this site.  Such cuties!

MakingHomeBaseSweaterUpcycleValentinesDayLegWarmers_zpsfd3eee36

Baby leg warmers from sweater arms

Baby legs from socks

Baby leg warmers from socks

babytightscoverpage

Baby tights from recycled t-shirts.

Baby tie onesies

Tie onesies! These are fast and easy to make and so cute!  Now little man can get all dressed up for church.

crochet-baby-turban3

Crocheted baby turban.  So cute! So fast!  And just takes a bit of yarn.

liberty-bonnet-600-3Sherpa lined winter bonnet

soft block tutorial

felt lion taggy 3Felt and Ribbon Lion Tag Toy

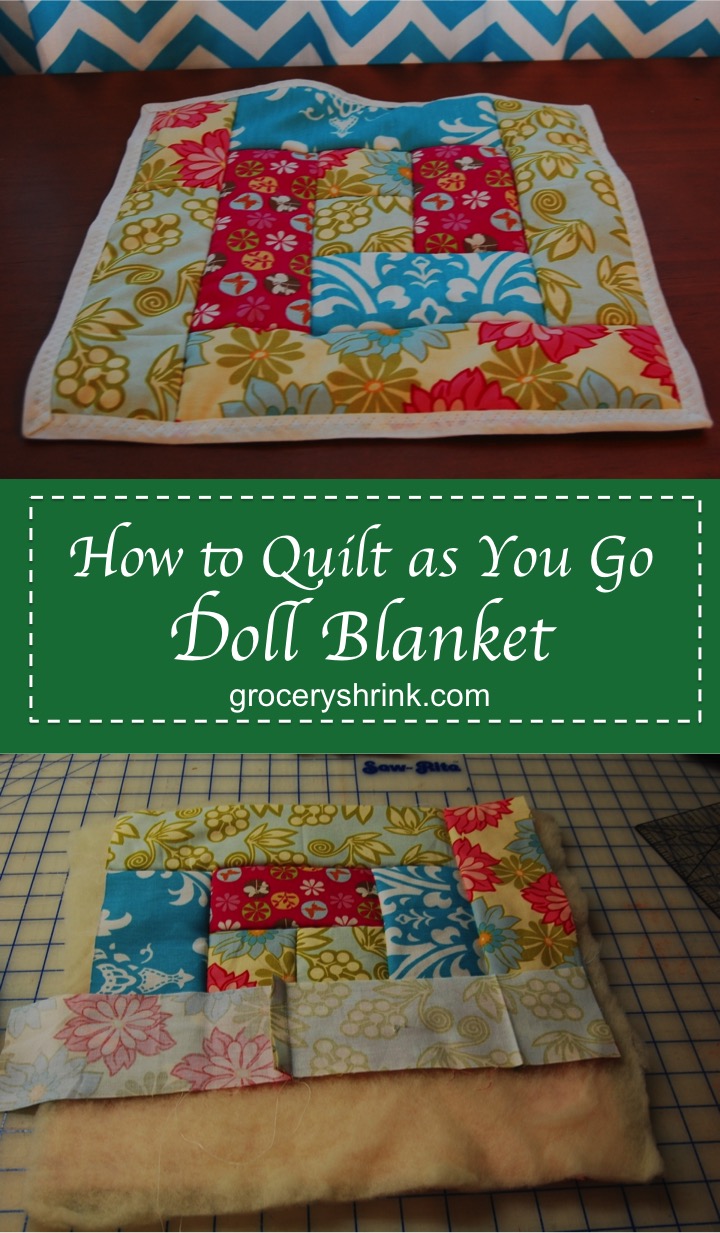
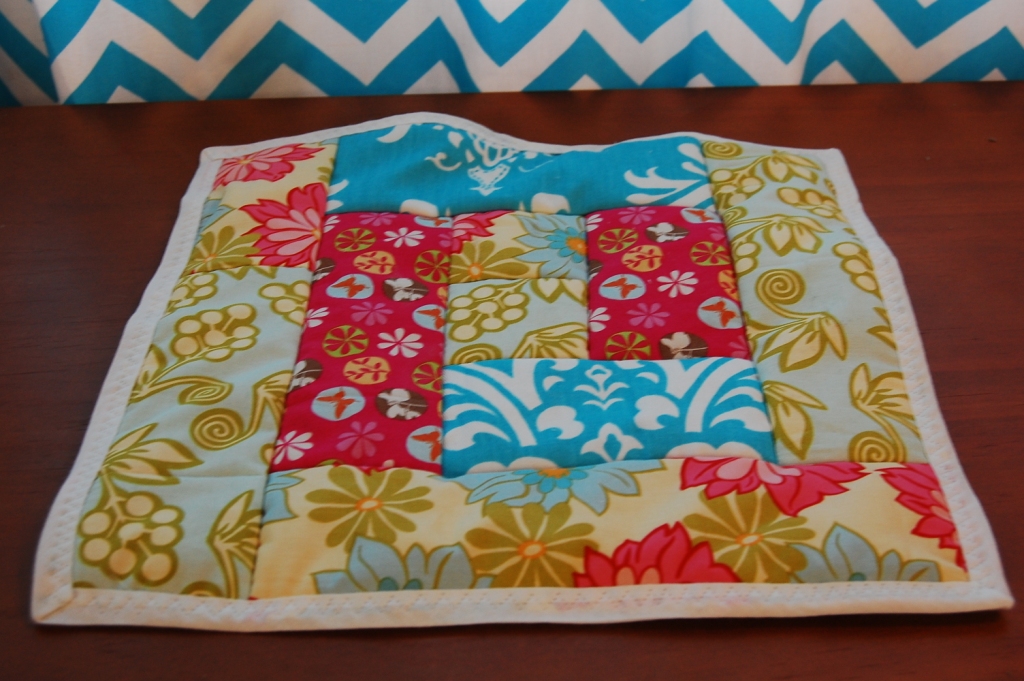
Quilt as you goThis is a doll quilt, but the same principle works for a baby quilt, start with a 45 inch square backing and batting.  You can also, just do strips across instead of a log cabin look. I made one of these for a shower in 2 hours one Saturday morning.  It’s an impressive gift that uses scraps and a short amount of time.

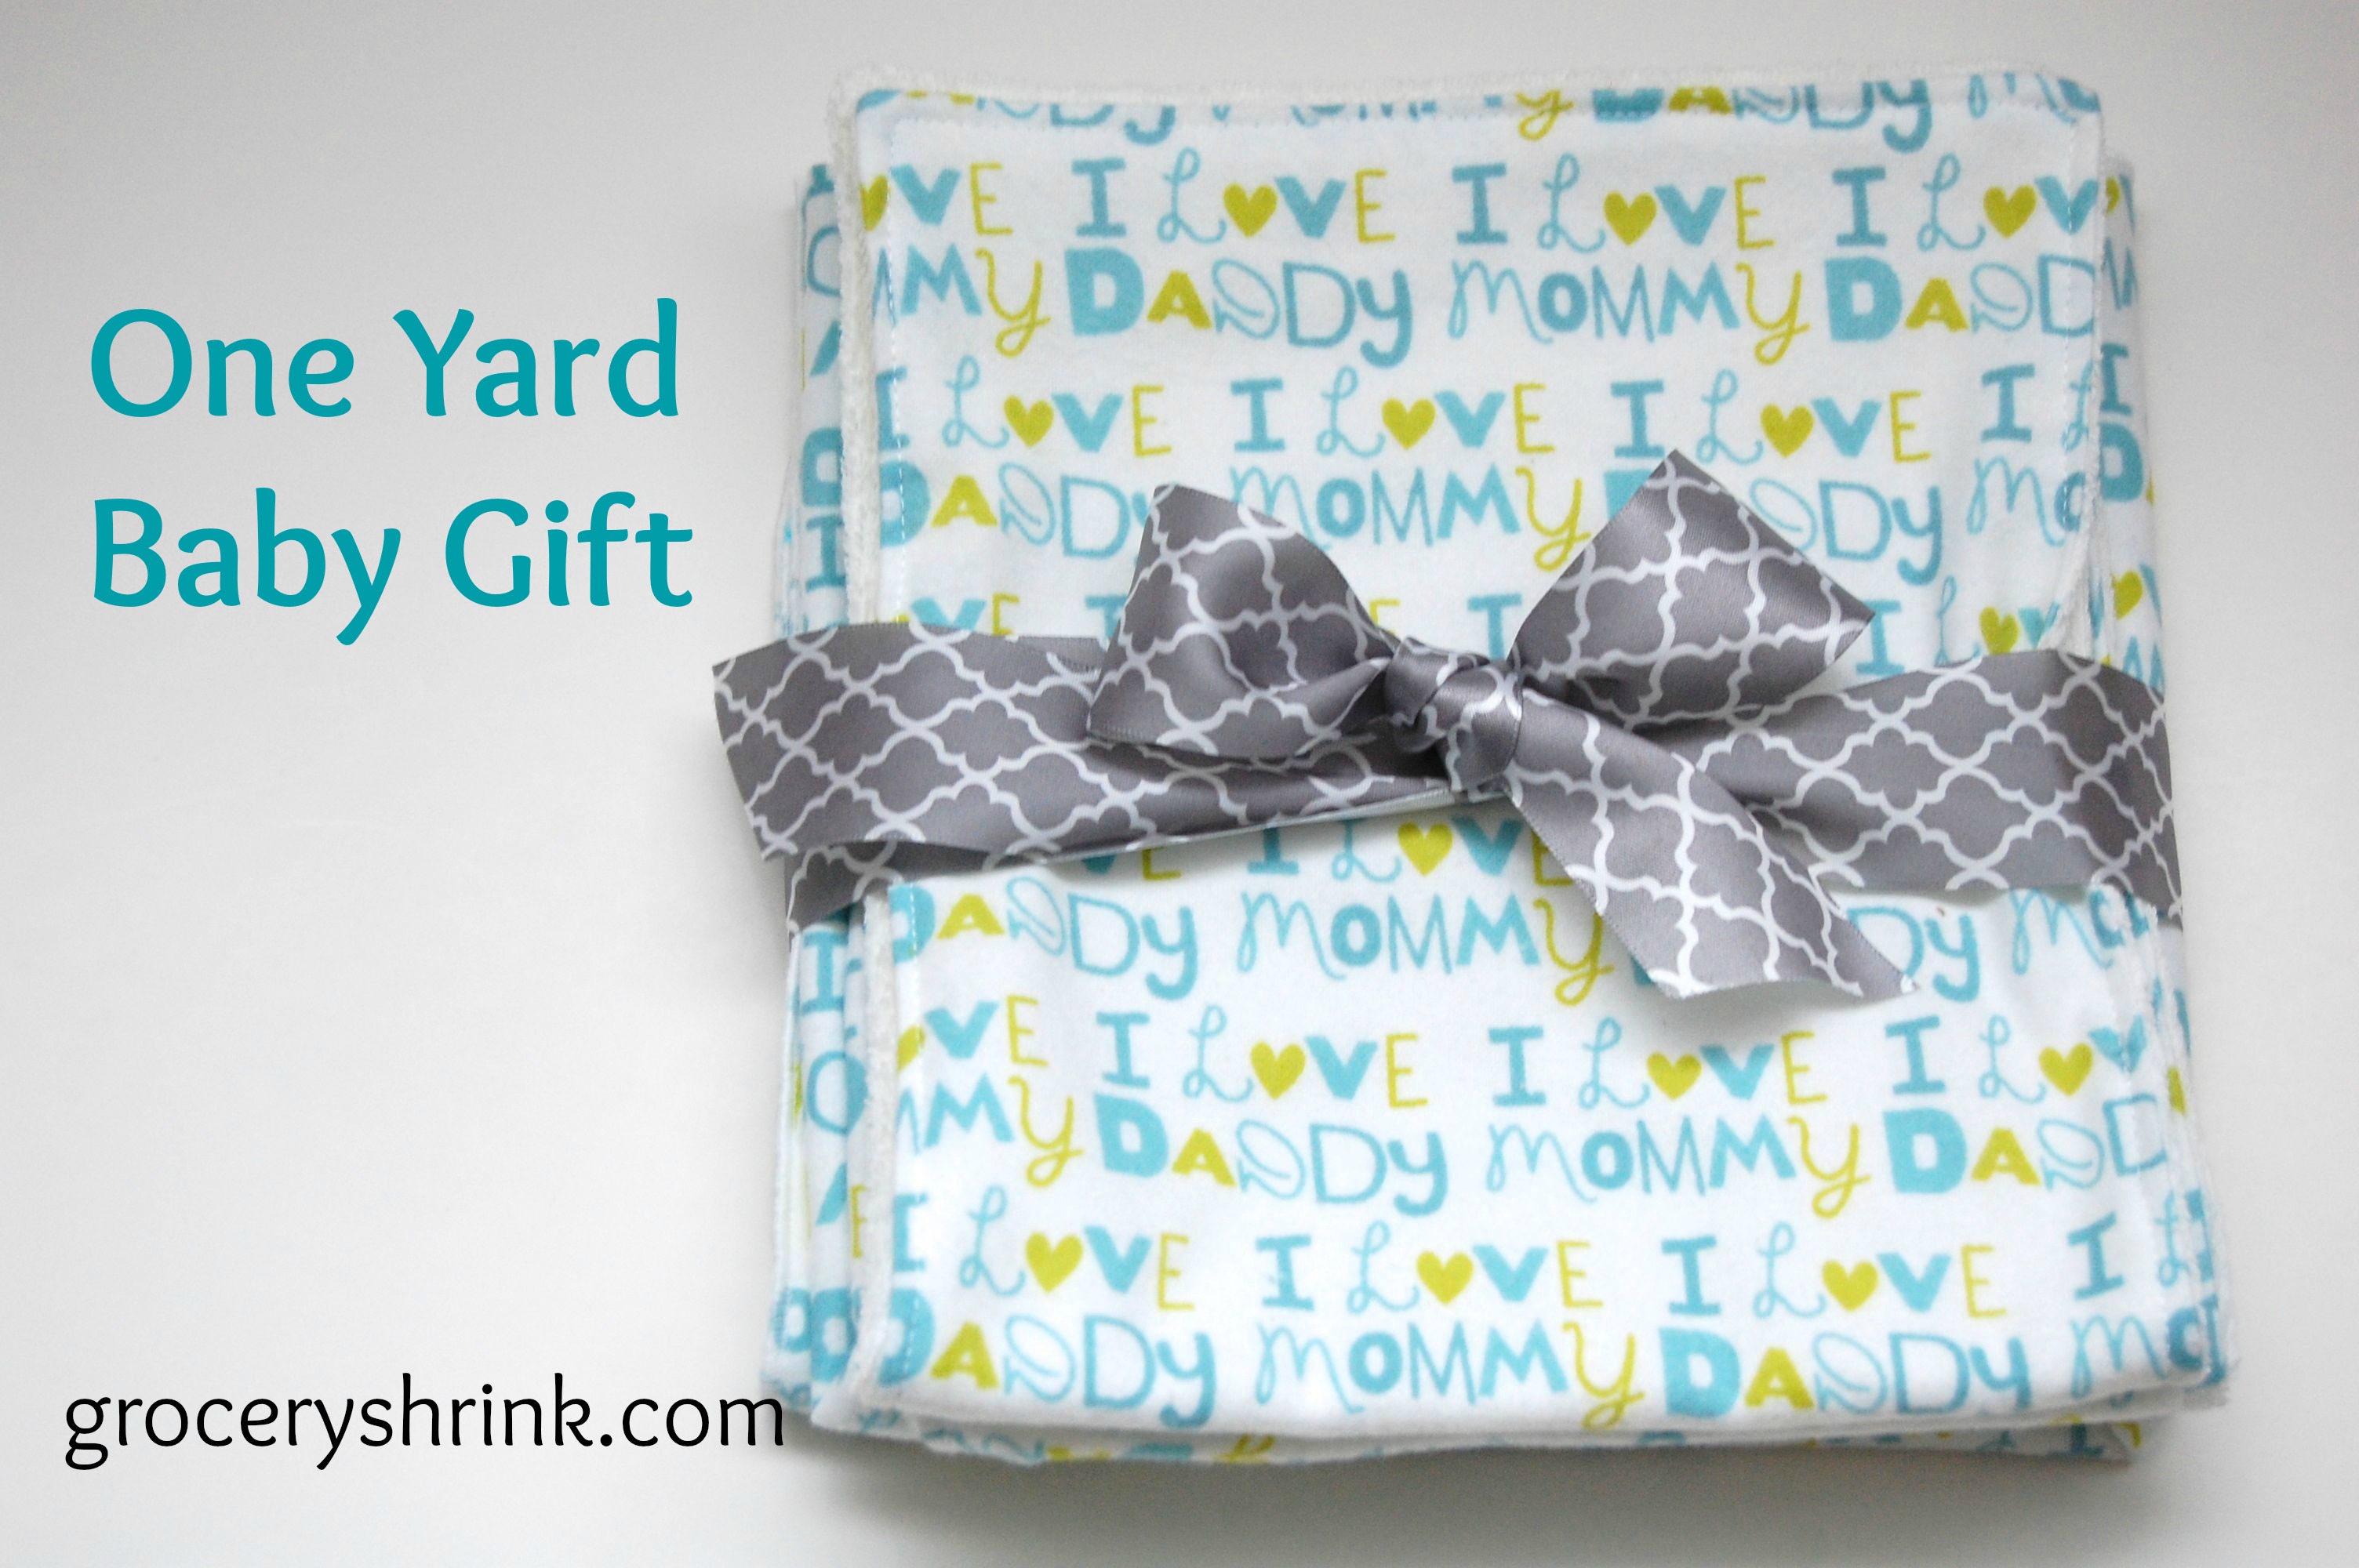
One yard baby gift

Use 1 yard to make a receiving blanket and 2 burp cloths.

IMG_4855

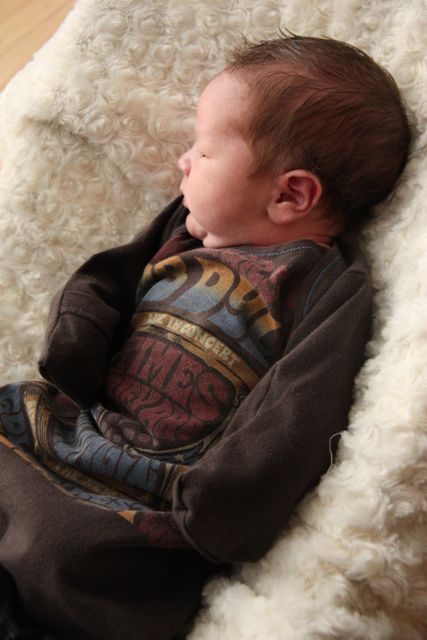
Gown made from a t-shirt, printable pattern.

BrandonandHeidi

Knotted Baby Hat printable pattern

ezragraysCrocheted slippers

david_peacoatCrocheted Peacoat (I made one like this and it turned out darling!)

Crocheted Baby Hoodie

Baby Gown and Hat Set for Free

Baby gift Idea #2. Are you brave?  How brave?

Brave enough to sew with knit?  What if it were free? (Well… free according to the craft hoarders rule book.)

Photo Credit ThisMamaMakesStuff.com

If you have a spare t-shirt, you could make a darling infant gown with it and if it doesn’t work out….you only lost the shirt.   Even better, The pattern is free from This Mama Makes Stuff.  Her tutorial includes how to make the fold over cuffs to protect the babies from their own sharp fingernails.

Here are my sewing with knit tips:  Use a ball point needle to keep from tearing permanent holes in the knit.  Use a longer stitch length.  If you can reduce the pressure on the foot a little to keep the fabric from stretching out of shape.  If you have a walking foot, you could do that instead.  If things do get stretched out of shape, try to steam them back with the iron. Then just relax and enjoy it.  Sewing with knit is my FAVORITE!  No basting to ease in seams, it just goes together like a dream. You are going to love it!

If you have some fabric leftover from the shirt make a matching hat:

Free pattern here:

Preemie hat pattern

and a less ink printable pattern PreemieKnottyHat

If the knit is fairly stretchy it will fit a newborn well too.  It’s on my 9lb 2 ounce bouncing baby boy above.

So Let’s say the shirt was “free” and you got the gown and hat out of it.  And then spent $3.75 on flannel to make a blanket and 2 burp cloths….You could wrap the gown, hat, and burp cloths inside the blanket (using the blanket as “wrapping paper”) and man, what a cute gift you have for less than $5 and about 2 hours worth of sewing.  Aren’t you clever?!


A One Yard Baby Gift

I love giving, but sometimes I get gift anxiety.  What if they don’t like it?  What if they think I’m cheap? What if I spent all that time and it doesn’t come out right?

These feelings could all be avoided if I just went to the store and purchased something and gave them the gift receipt.  Sometimes I do that.  But this year….oh my!  I think everyone and their dog is planning to get married and have a baby this year, then throw a birthday party and invite one of our kids to it.  I’m glad they are, and super glad they invited us.  Sometimes the gift budget doesn’t stretch.

It just gives a reason to be a little more creative, right?

(I once talked to a friend, who admitted to turning down birthday party invitations for her kids because they couldn’t afford a gift.  Hey, y’all.  Don’t do that here, mk?  I’d rather have you sans gift then let you worry one moment about finances.  Our kids have enough stuff and they won’t even notice, I promise.)

So I thought I’d talk about gifting this month a bit and give some ideas for what to do for baby showers, weddings, kid birthdays and such.

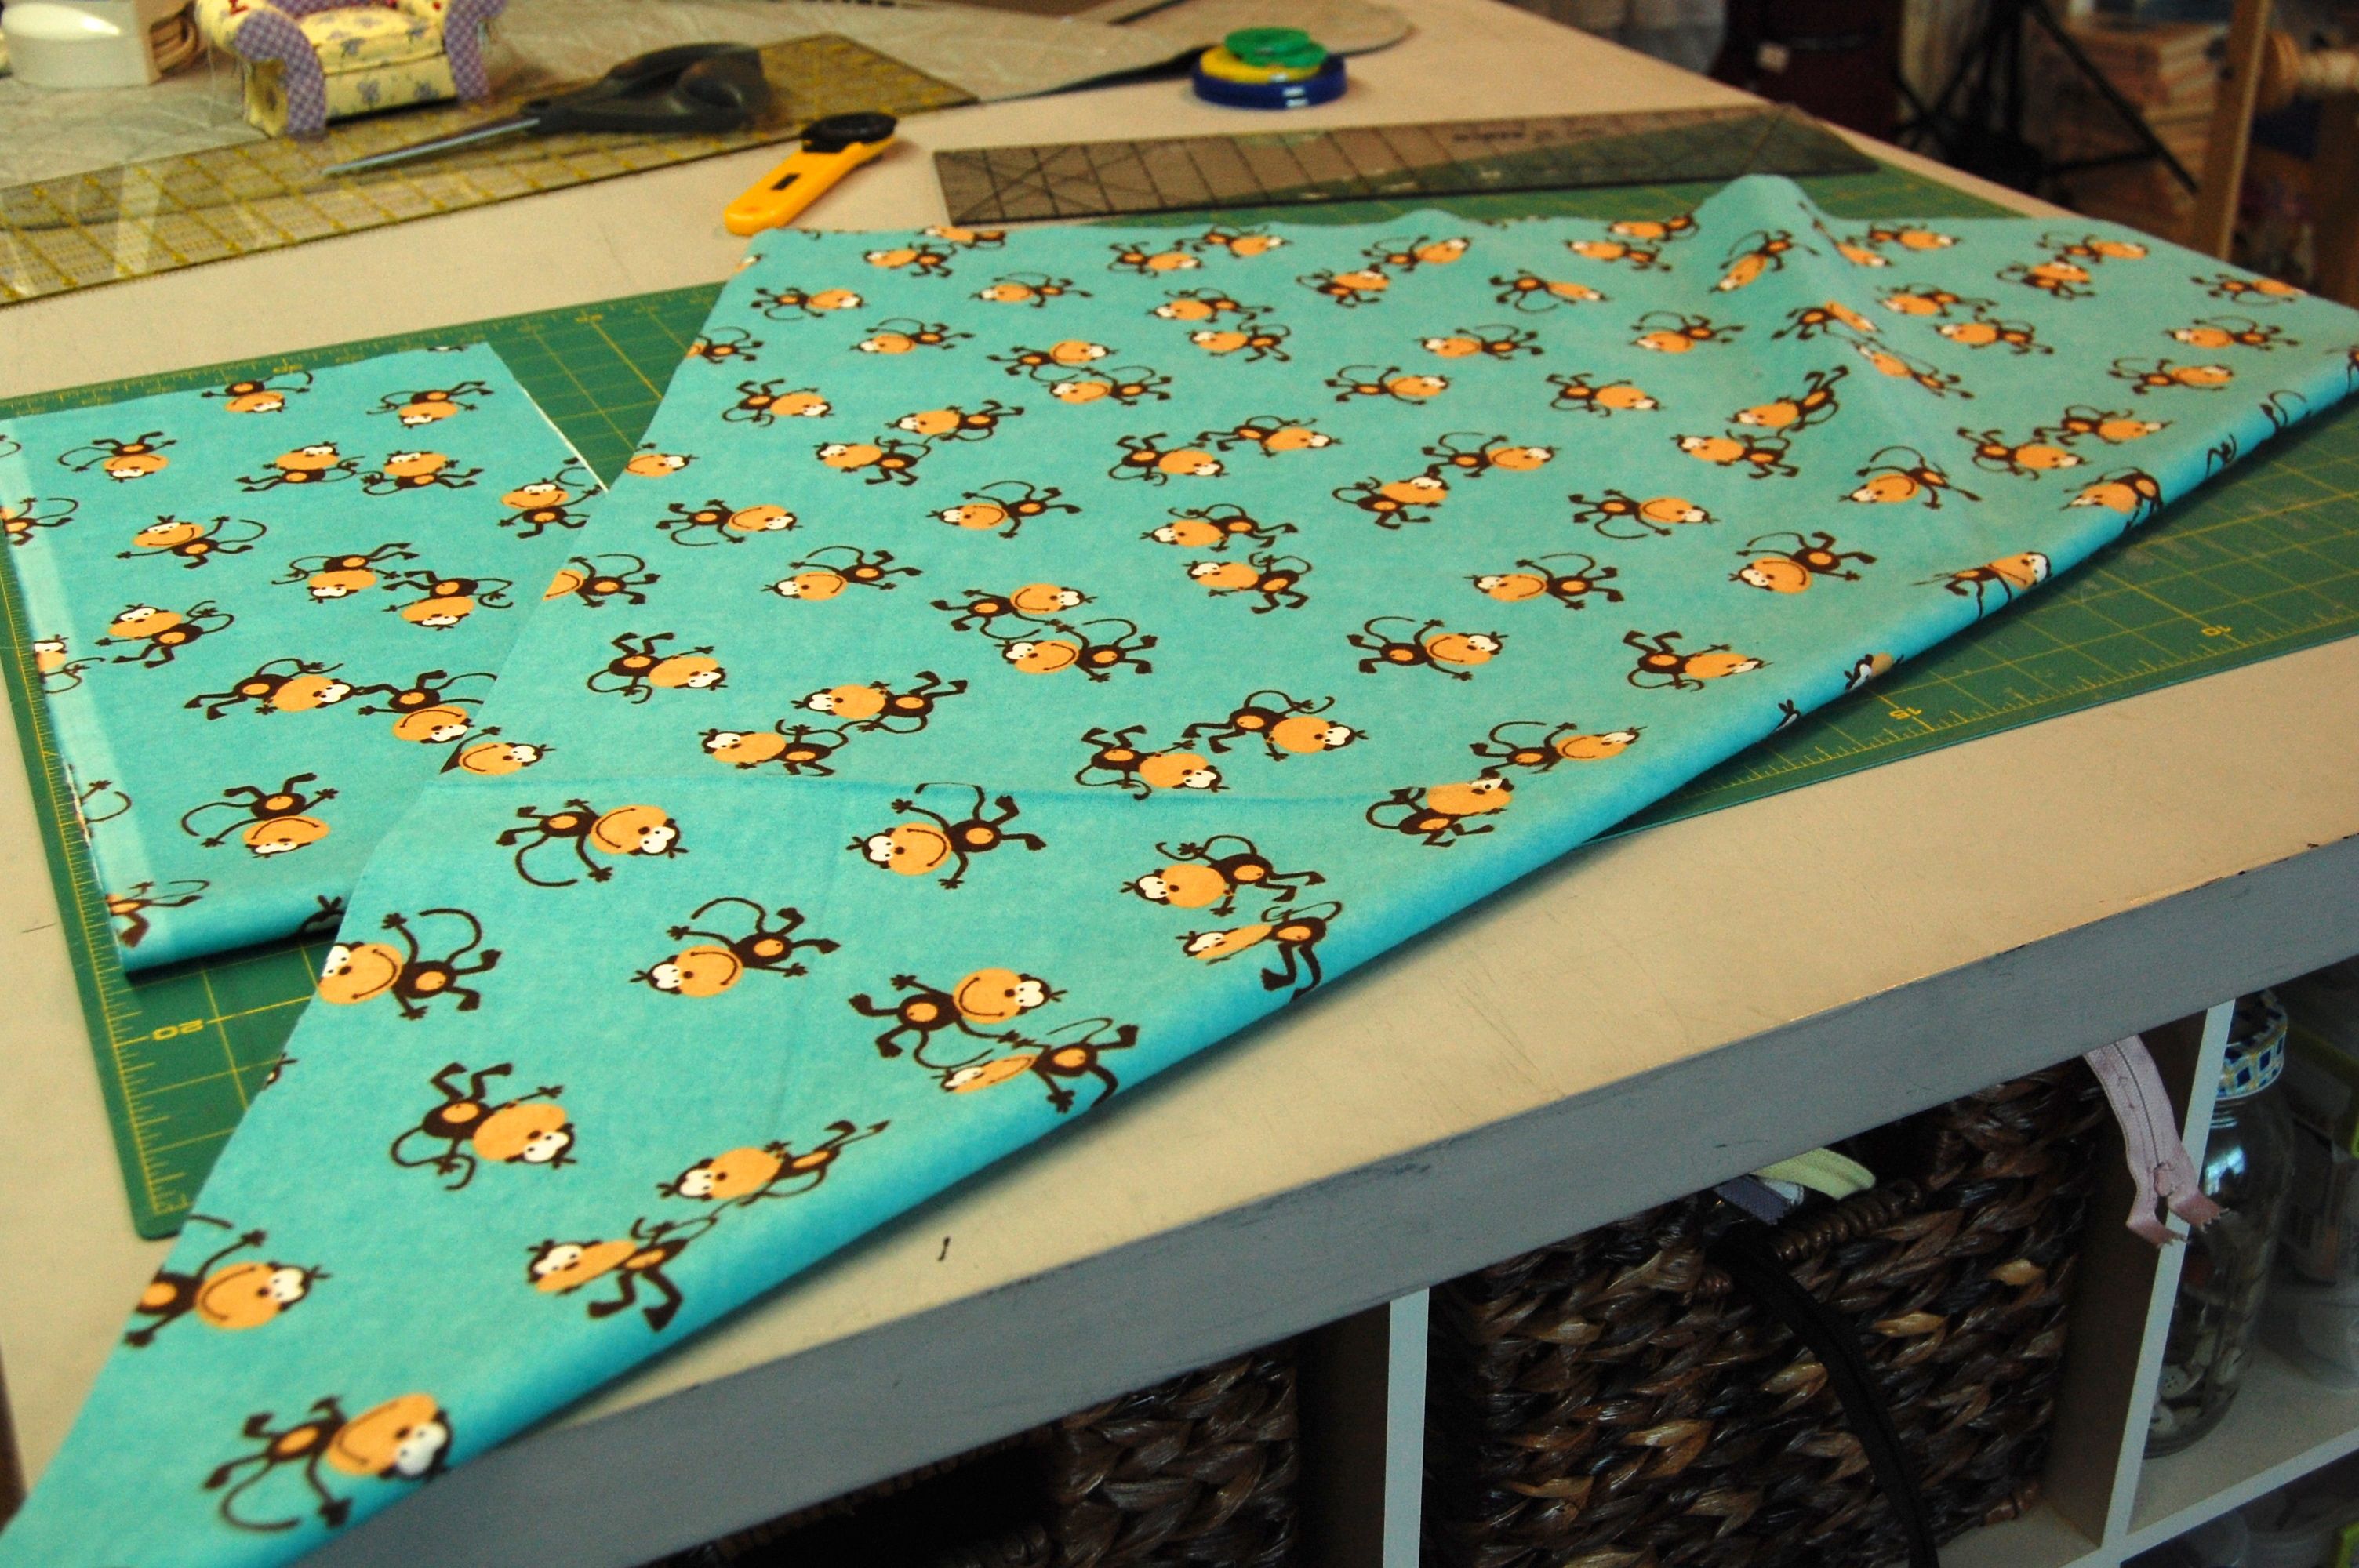
First up is this one yard baby gift.  You will need 1 yard of flannel; and 1 clean towel or scrap of terry cloth  at least 16 x 18 inches. At Hobby Lobby 1 yard of flannel is $5.99 use a coupon and this gift will cost around $3.75 (with tax.) I used knit terry leftover from diaper making. If you use woven terry, use as thin a terry as you can get–cheap towels are perfect.


First find the selvage edge of your fabric that is printed all the way to the edge.  Cut an 8 inch strip off this edge, then cut it in half to get two 18 by 8 inch pieces.  (These will become 2 burp cloths.)

Cut the remaining fabric into a perfect square.  I fold it into a triangle and cut off what’s hanging off–super technical method ;). This will be a perfect receiving blanket between 36 and 34 inches square.  Ever notice that the store bought ones are too tiny to be any good?  I used to make mine 45″ square, but really those were too big.  These are perfect.

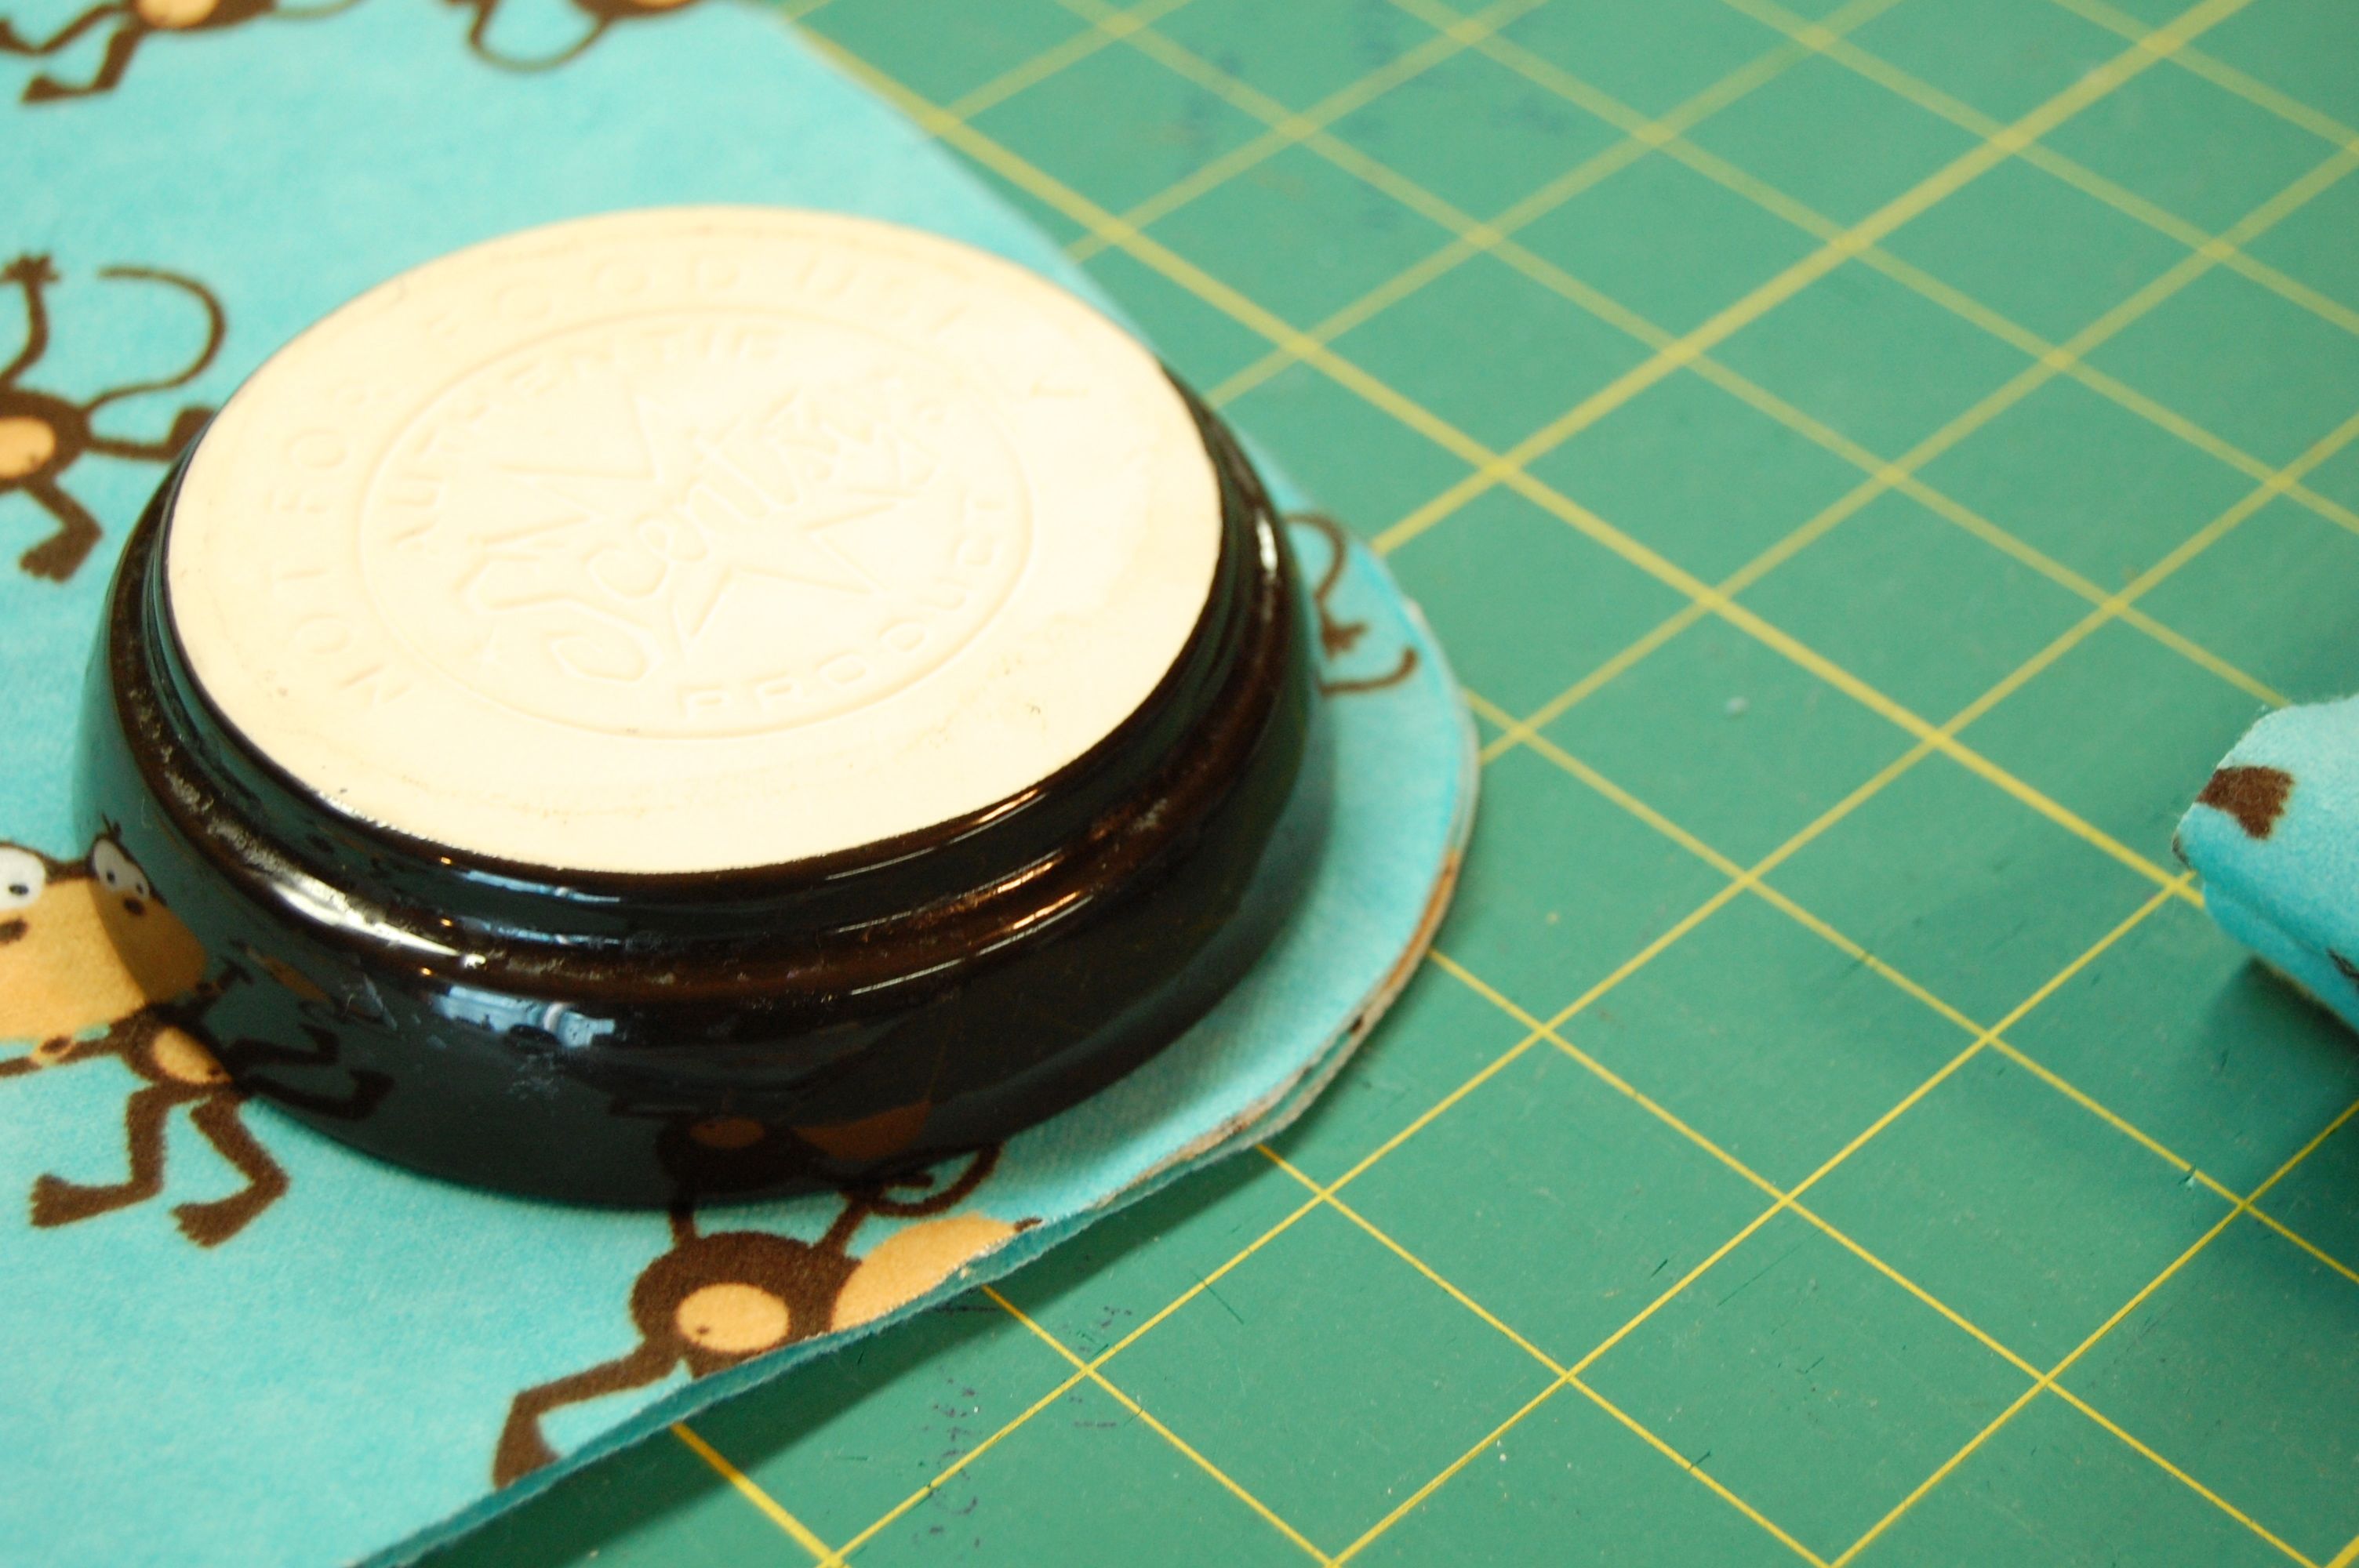
Fold the flannel square into fourths, perfectly lining up the corners.  Take some time to do this well. Then, find something round and trace a rounded edge on the outer corner.  (Double check–no folds here, at all–right?) Then cut it out. (I used a Scentsy top–see the logo? #notanashtray)


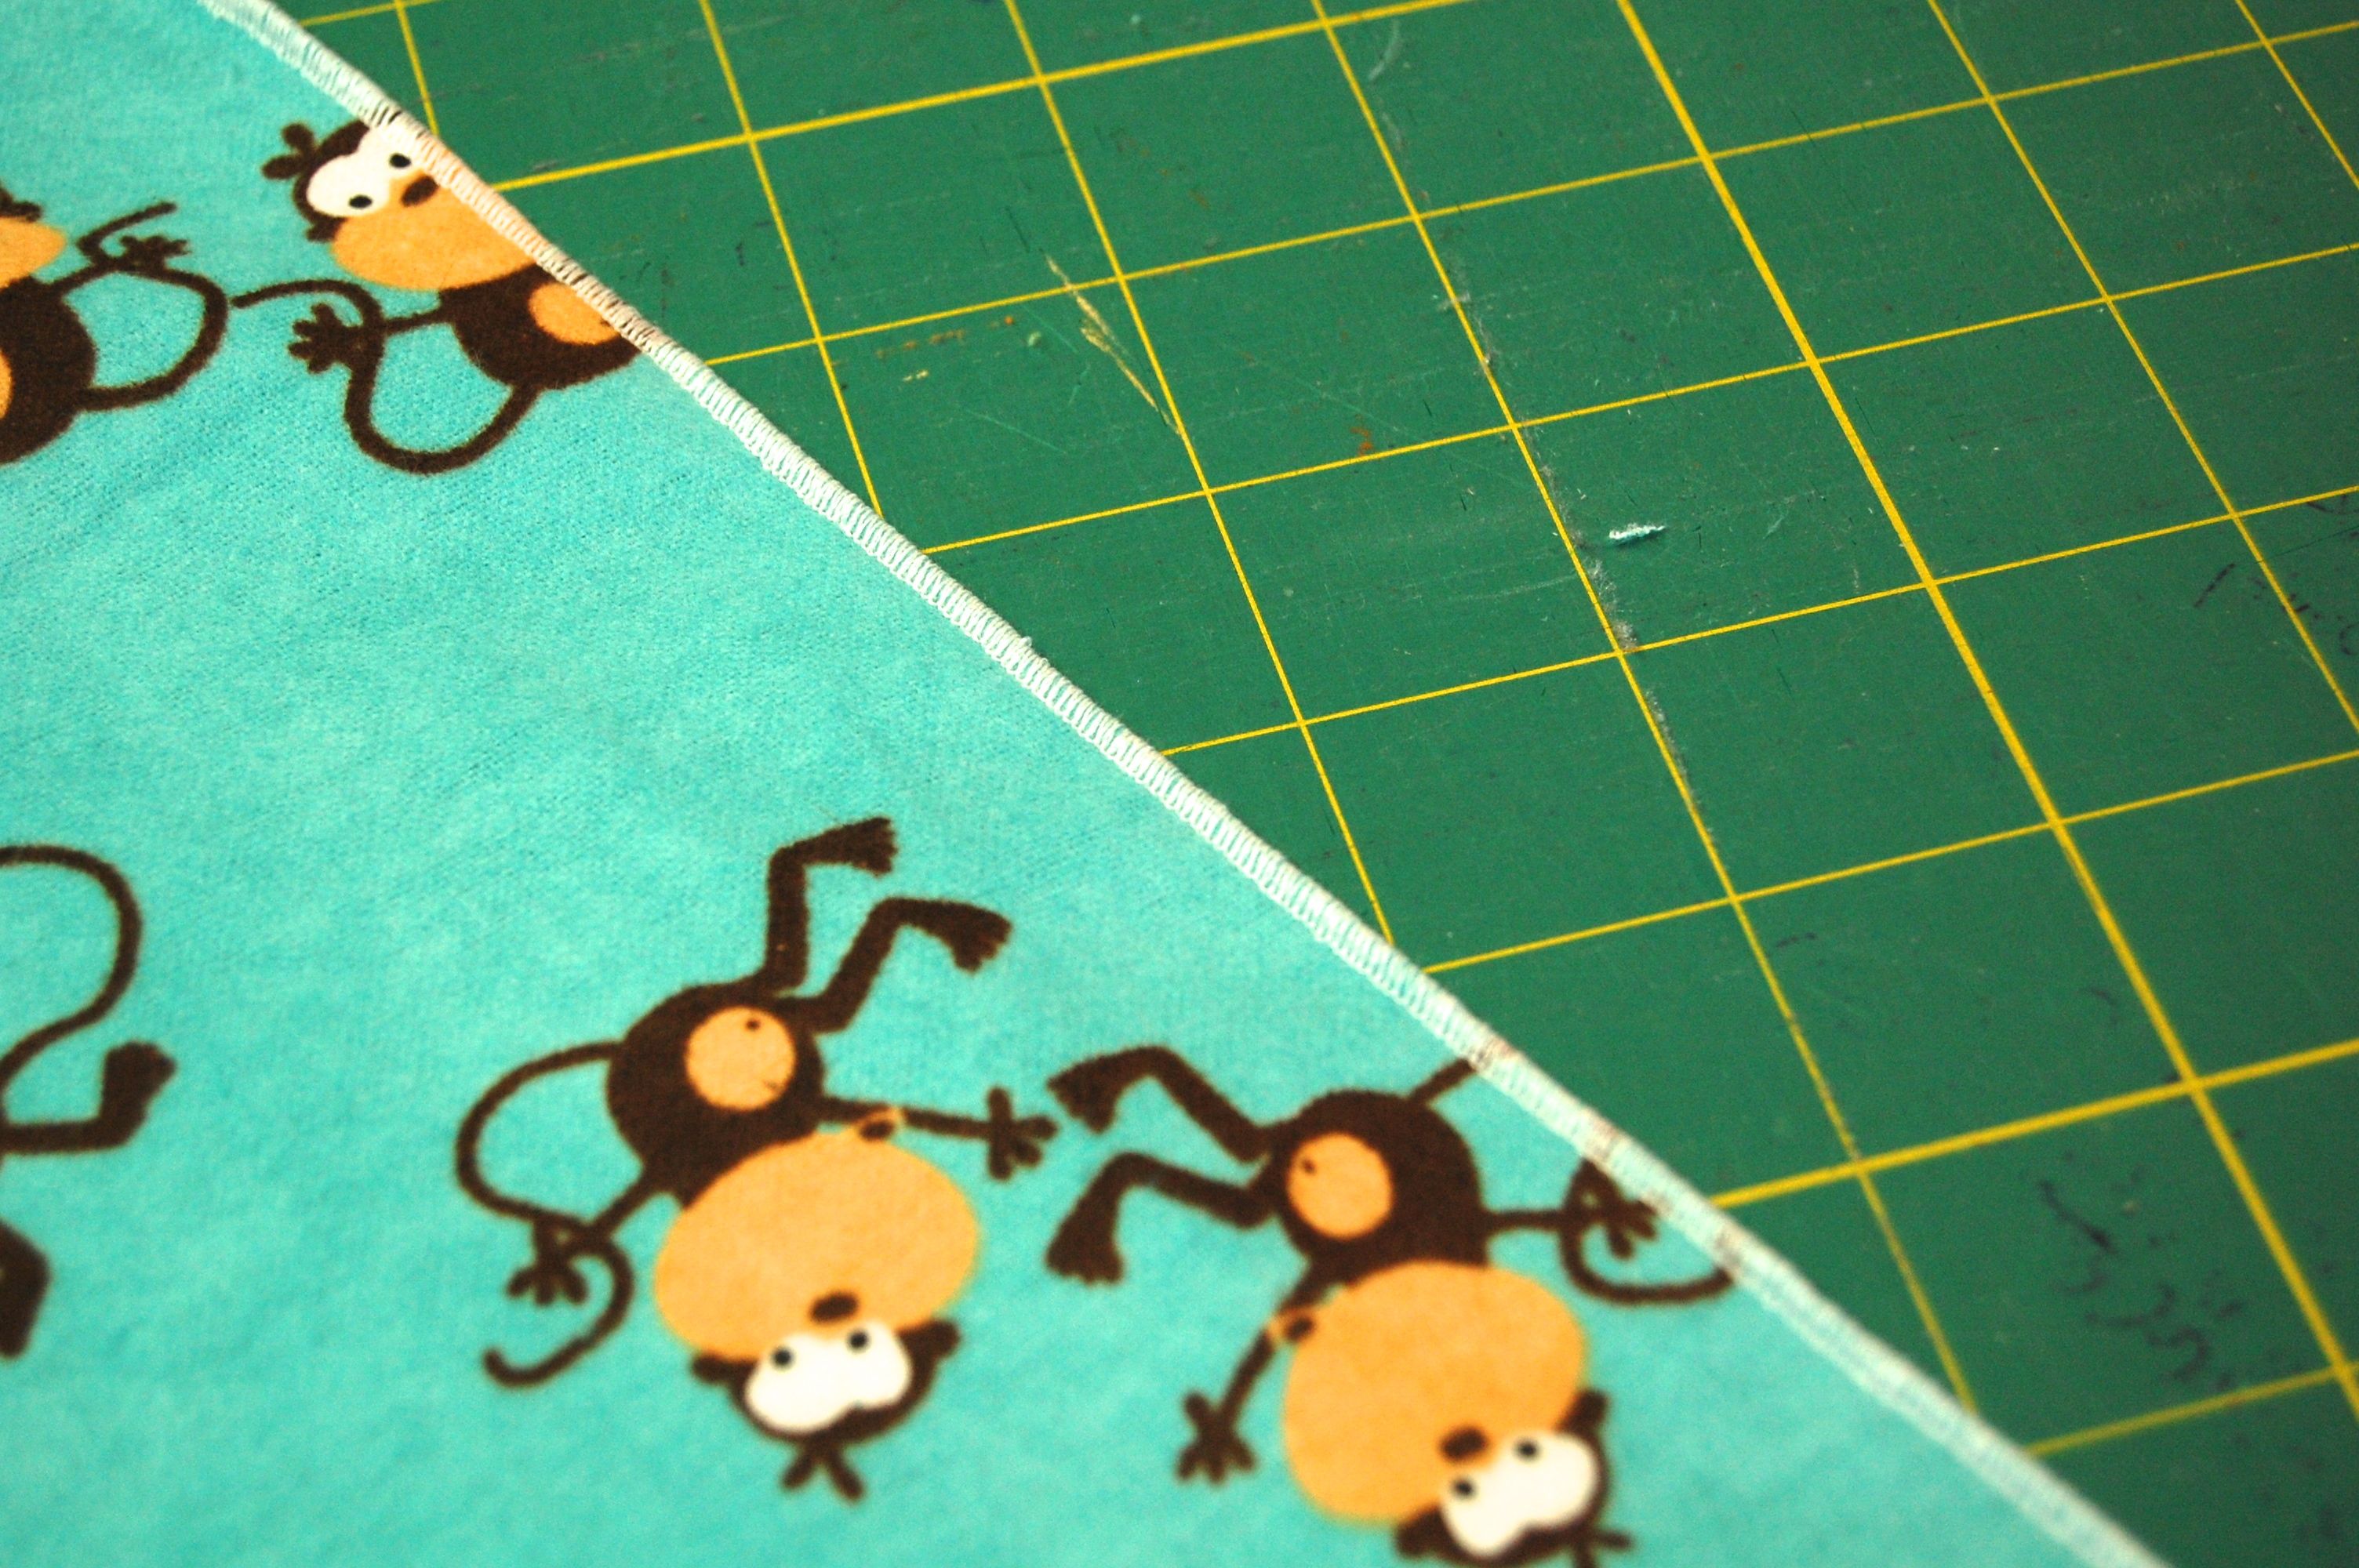
Next run the edge of the blanket through a serger adjusted for a rolled hem. No serger?  Try this.


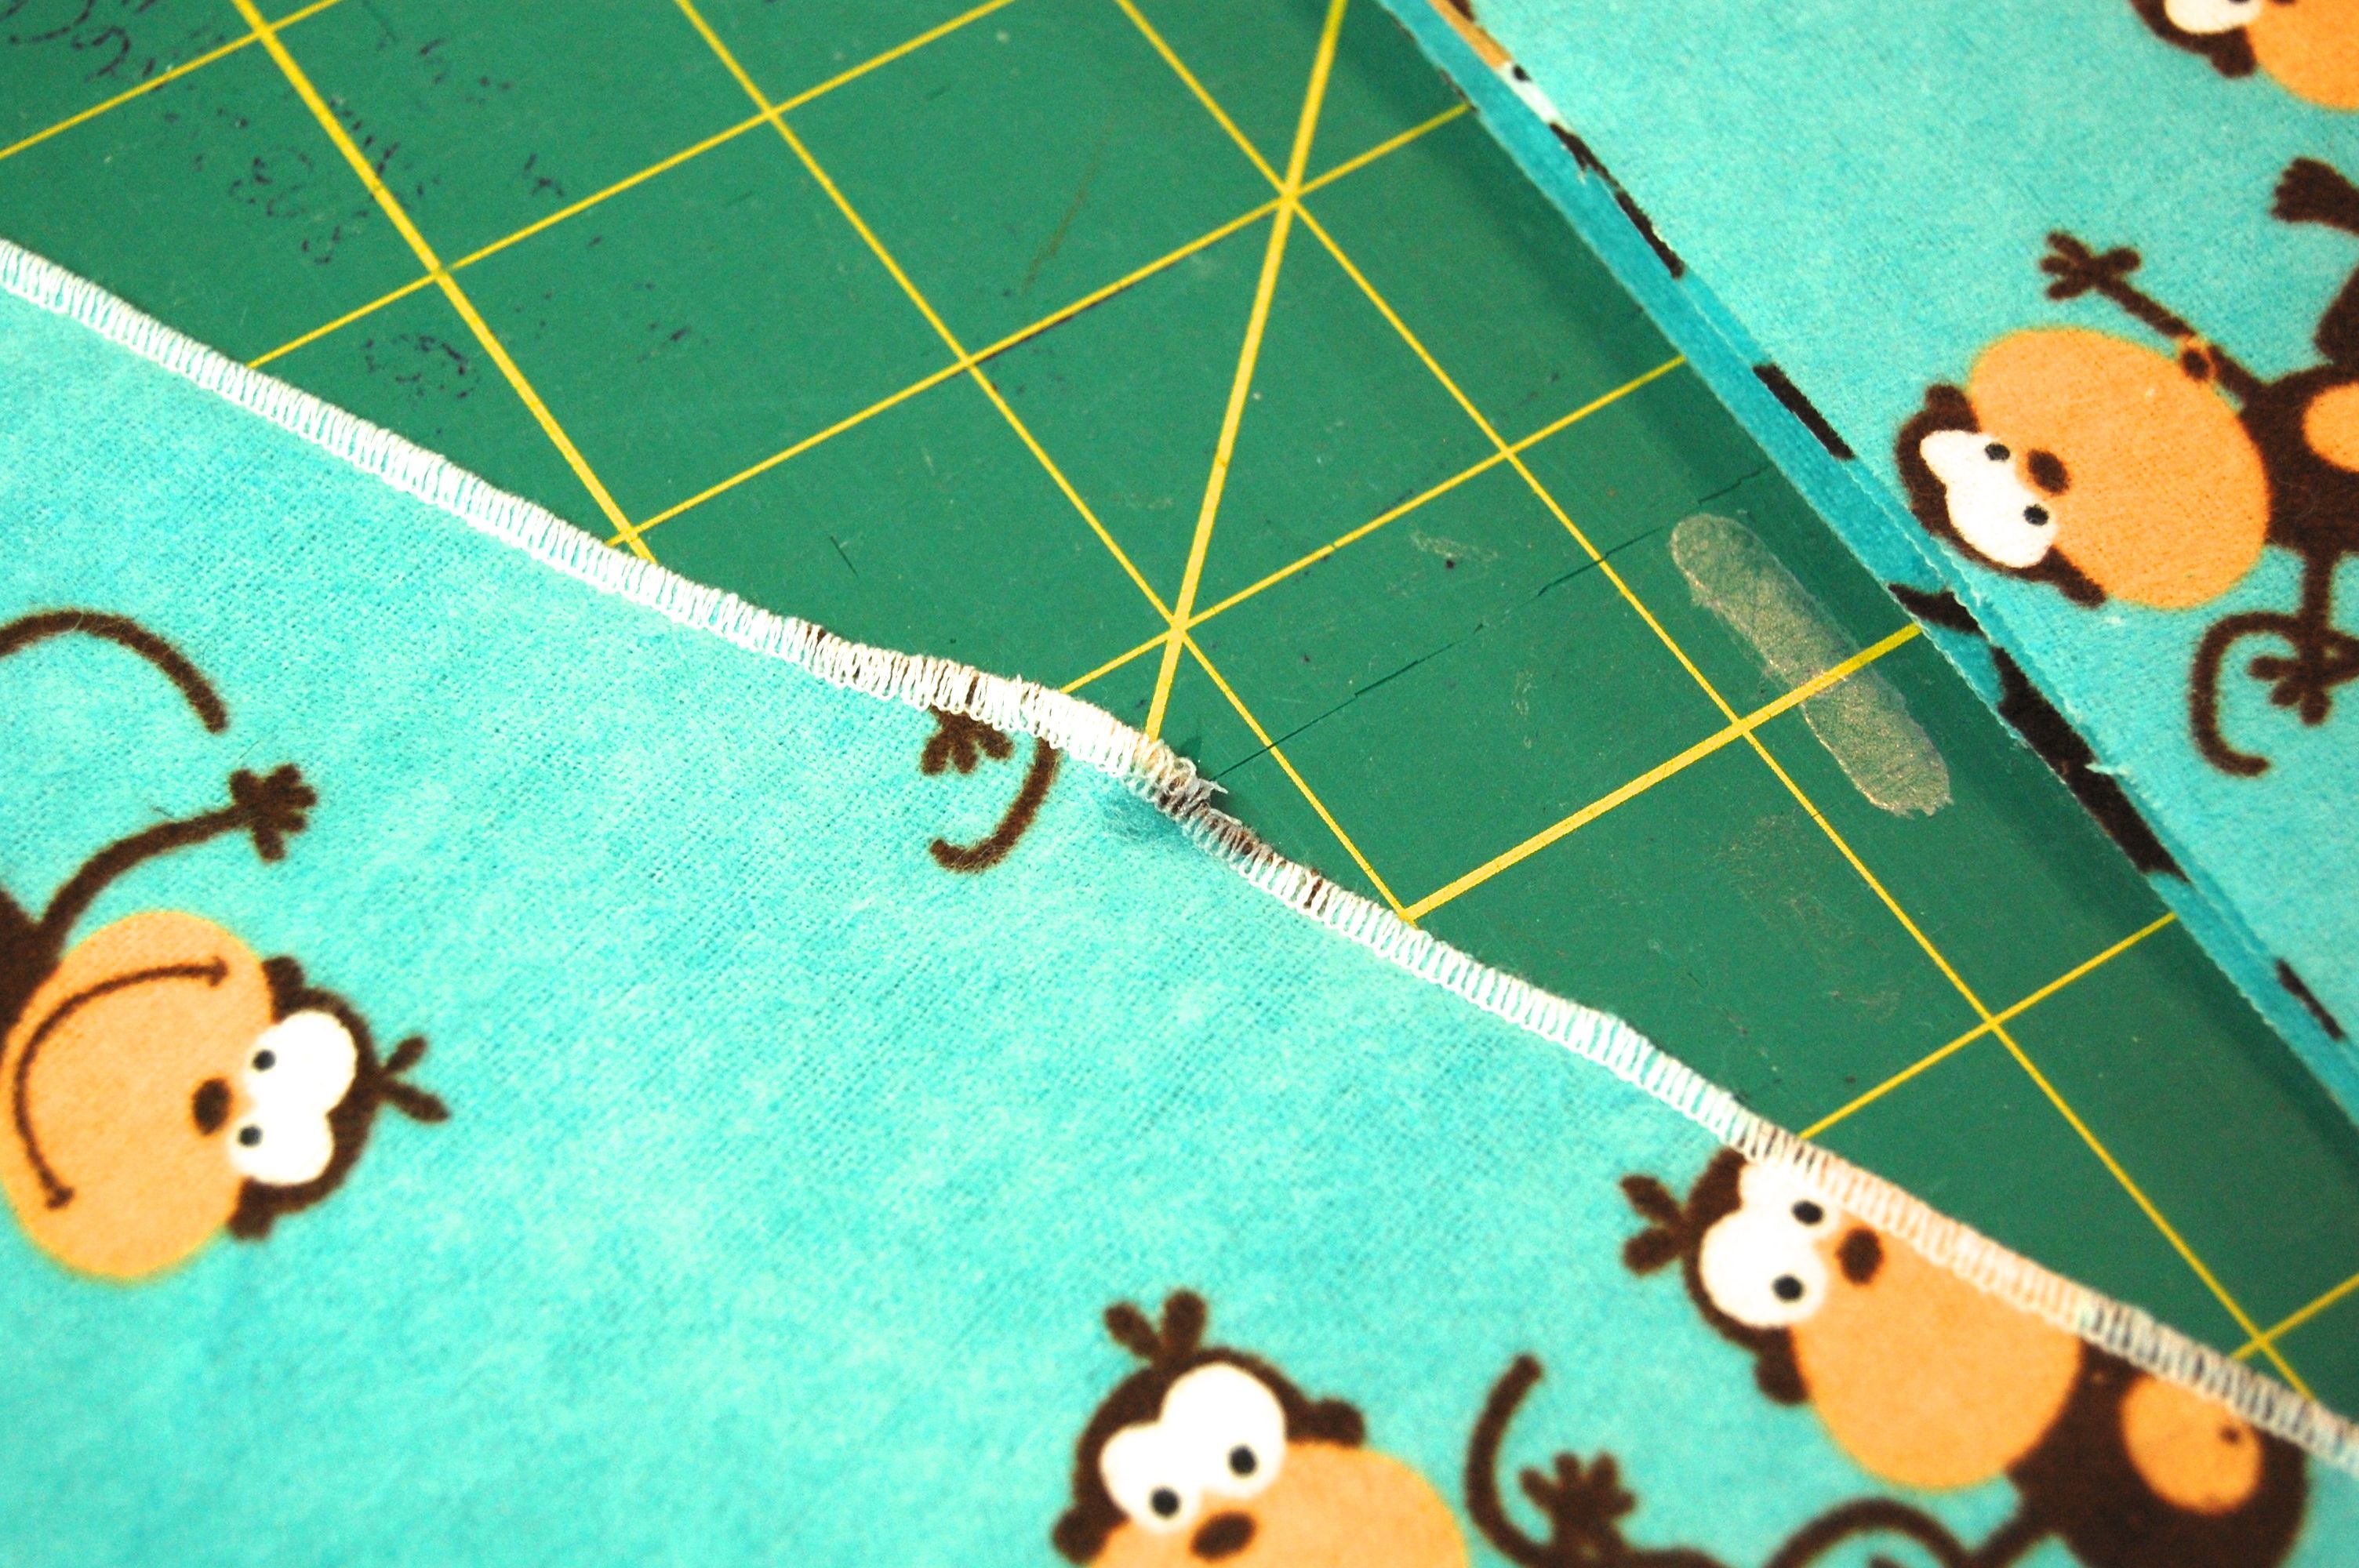
At the place where you start and stop, dab a little bit of fray check to keep it from unravelling.

 To finish the burp clothes use the 2 flannel 8 x 18 pieces you cut out as a pattern to cut 2 pieces of terry cloth.  Place the rectangles right sides together and stitch around the outside with a 1/4 inch seam allowance, leave a 3″ space for turning.

Turn right side out and press.  Then top stitch a scant 1/4 inch away from the edge all the way around.  This will close up the hole and make these wash and dry nice and flat.

1 yard = 1 receiving blanket and 2 burp clothes for $3.75. (Update 3 years later and flannel is on sale for $2.50–score!)

High Five!

If your budget is a little bigger than that, buy 2 coordinating yards and make double.  Or add a toy or an outfit.

I’ll show you what else you can do with these tomorrow.


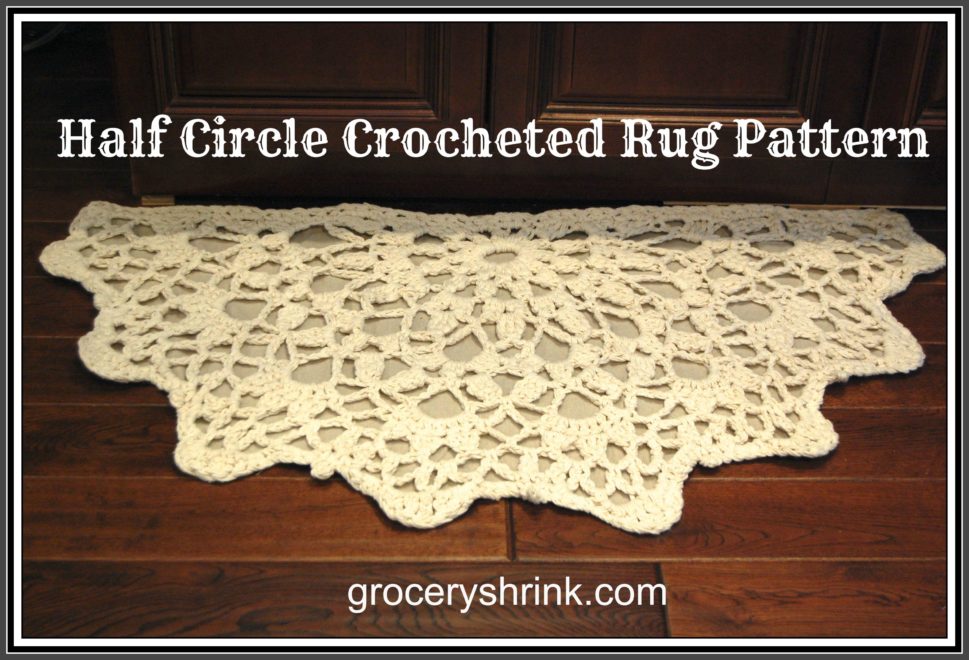
Crocheted Half Circle Rug

When I finished the rug, DH said, “What do you think of it?”

What do think?  I love it!  I hugged it when you weren’t looking.  I did dances around it, took off my socks so I could really feel it under my feet.  Knowing how he feels about crochet, I only said, “I think it turned out pretty good.  What do you think?”

Do you know what he said?  He said, “It’s awesome.  And it didn’t really take you that long.”

“And it was free.” I pointed out.

“Um, except for the 3 skeins of yarn and a canvas drop cloth.”

“Those don’t count” (Has he not been to the craft hoarders school of positive thinking?) “No new money spent, means free–duh. Besides I have half the supplies left, so I could make another one and sell it on Etsy to recoup the amount of money I didn’t spend on supplies.  So it cost half of free.”

I think he might have rolled his eyes.  I feel sorry for him.

I wrote down the pattern after I finished the rug so I plan to make another just to test it and make sure. Might be a few “interesting” parts in the instructions until I work it out for you. A seasoned crocheter won’t have trouble. I adapted the rug pattern from a fine string crocheted vintage doily in my collection.

***************************************

Yarn:  3 large skeins (The super huge ones that cost $10 each but go on sale for 50% off all the time–so wait or use a coupon, please) of worsted weight cotton yarn (like wash cloths are made from.)  Size P hook. This is enough to make 2 :).

Good to Know: These are in American Crochet Terms

Abbreviations:

ch = chain

ss = slip stitch

sc = single crochet

dc = double crochet

tr = triple crochet

cl = cluster

p = picot

2-dc-cl (or 2-tr-cl)= cluster of 2 dc (or 2 tr). To make cluster, hold back the last lp of each st on hook and work 2 dc or 2 tr) into st or sp specified, then yo and through all 3 lps remaining on hook.

3-dc-cl (or 3-tr-cl) = cluster of 3 dc (or 3 tr). Make as above, working 3 dc 9or 3 tr) insted of 2 and work final yo through 4 loops remaining on hook.)

P3 is a picot made with 3 chains.  To make a P3, ch 3 then slip stitch into the 3 ch from the hook.

************************************

Foundation: Ch 10; join with a sl st to form a ring.

Rnd 1: Ch 2, 2-dc-cl in ring, ch 3, [3-dc-cl, ch3] 11 times all in ring; join with a sl st to top of first cl.

Rnd 2: (Sl st, ch 2, 2-dc-cl) all in first ch-3 sp. ch4, [3-dc-cl in next ch-3 sp, ch 4] 9 times. Ch 1, turn.

Rnd 3: (Sl st, ch 2, 2-dc-cl, ch 2, 3-dc-cl) all in first ch-4 sp, ch 2. *[3-dc-cl, ch2] twice all in next ch-4 sp; rep from * around, ch 1 turn.

Rnd 4: (Sl st, ch 3, 2-tr-cl)  all in first ch-2 space, ch 5 [sc in next ch-2 sp, ch 5, 3-tr-cl in next ch-2 sp, ch 5] 7 times, sc in next ch-2 space; ch5; 3-tr-cl in final ch2 sp.

Rnd 5: Ch 6, sc in next ch-5 lp, [ch 5, sc in next ch-5 lp, ch 6, sc in next ch-5 lp] around (final sc goes in top of last 3-tr-cl).

Rnd 6: sl-st, ch 2, 2-dc-cl; (ch 2; 3-dc-cl) twice all  in first ch-6 lp; * sc in next ch-5 lp; ([3-dc-cl, ch 3] twice, 3-dc-dl) all in net ch-6 lp; rep from * around.  sc in top of final  ch-5 lp. (May have error at the end.)

Rnd 7: St st in next (sc and cl), (sl st, ch 3, 2 -tr-cl, ch 5, sc) all in first ch-3 sp, * (sc, ch 5, 3-tr-cl) all in next ch-3 sp **, (3-tr-cl, ch 5, sc)  all in next ch-3 sp; repeat from * around, end at **

Rnd 8: Sl st in first 2 ch of ch-5, (sl st, ch 1, sc) all in next ch, *ch 5, sc in 3rd ch of next ch-5, ch 5, sc between next 2 cl **, ch   5, sc in 3rd ch of next ch-5; rep from * around, and at ** (except at the end just sc in final st since there aren’t two clusters here.)

Rnd 9: * 7 Dc in next ch -5 lp, sc in  next lp**, ch 4, sc in next lp; rep from * around, end at **

Rnd 10: * Ch 3, 3-dc-cl over first 3 dc of 7-dc group, [ch 5, join 3 -dc-cl] twice **, ch 3, sc in next ch-4 sp; rep from * around, and at ** (note: joint cluster means the first stitch of the next cluster is in the same spot as the last stitch of the previous cluster.)

Rnd 11: (Sl st, ch 1, sc, ch 5 sc) all in first ch-3 sp, ch 5, [(sc, ch 5, sc) all in next ch-5 sp, ch 5], [sc in next ch-3 sp, ch 5] twice; *[(sc, ch 5, sc) all in next ch-5 sp, ch 5] twice, [sc in next ch-3 sp, ch 5] twice; rep from * around

Rnd 12: *Ch 1, sc in next sp, [ch 3, sc in next sp] 4 times, ch 1**, sc in next sp; rep from * around, end at **

Rnd 13: (Sl st, ch 1, sc) all in first ch-1 sp, *3 sc in next ch-3 sp, ch 1, (sc, hdc, dc, tr) all in next ch-3 sp, tr in next sc, (tr, dc, hdc, sc) all in next ch-1 sp, ch-3p**, sc in next ch-1 sp; rep from * around

Rnd 14: Sc across front of mat, evenly spacing the stitches.  (I took 60 stitches to get across mine.)
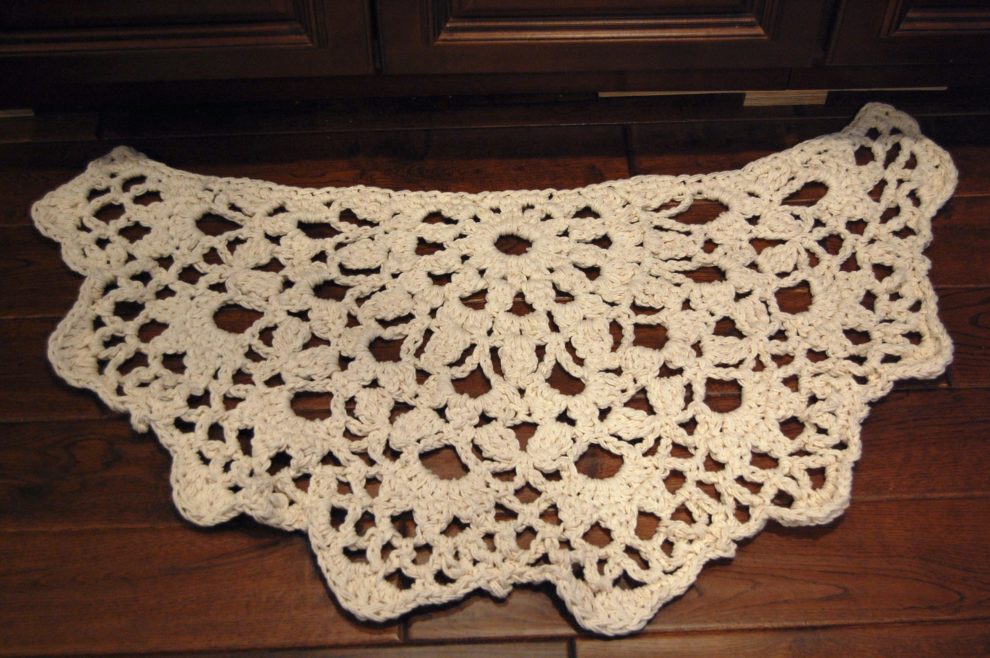
At this point it will look a little wonky.  Throw it in the washing machine on gentle.  This will shrink up the yarn a bit and wet it down so you can block it.
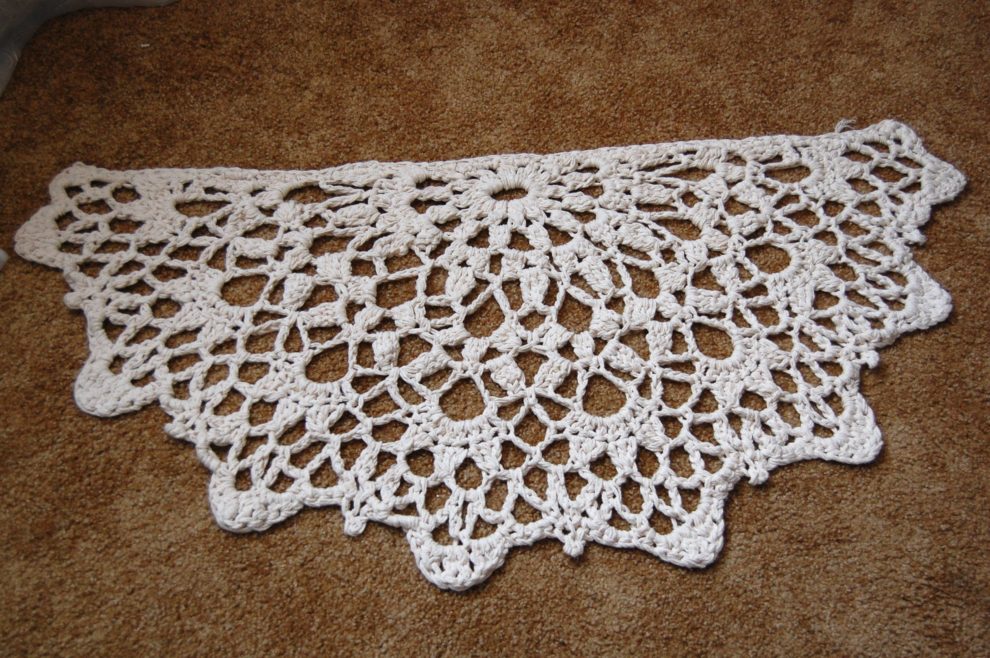
Once it is out of the washer, lay it flat on a towel (or clean carpet) and tug it into shape.  Make sure the front edge is perfectly straight and all the picots are pulled out. Let it dry overnight.

At this point, you can use it as is.  I chose to add a canvas backer so I’d have something to attach a non-slip liner to.
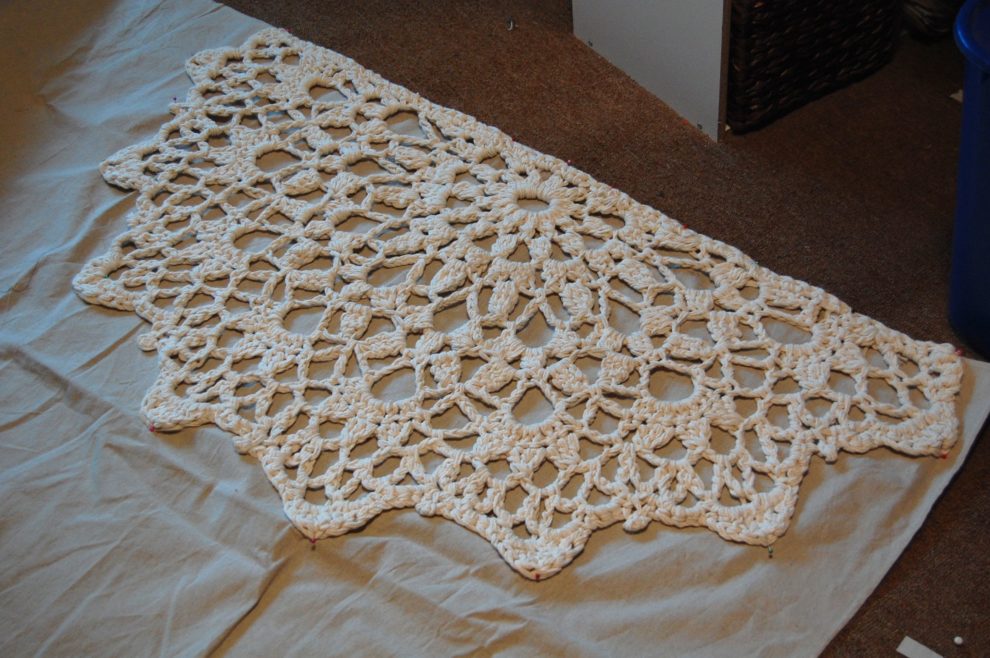
To make a canvas backer, place the rug on a canvas drop cloth (I chose the stiffest one in my stash).
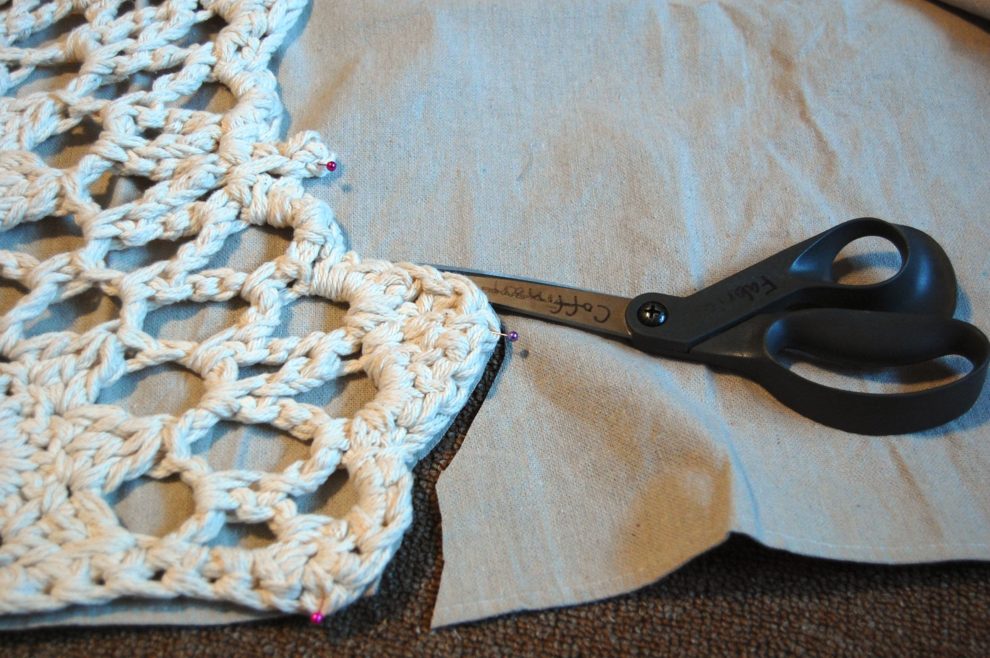
Cut out the canvas to match the size of the rug (I skipped the picot part and just cut it straight behind them.) Finish the edge with a zig-zag stitch or serge the edge.  Then pin the canvas to the crocheted rug. (Don’t skip the pinning part, because crochet stretches and will be a mess if you just try to run it through the machine without pins–trust me, I tried it.)
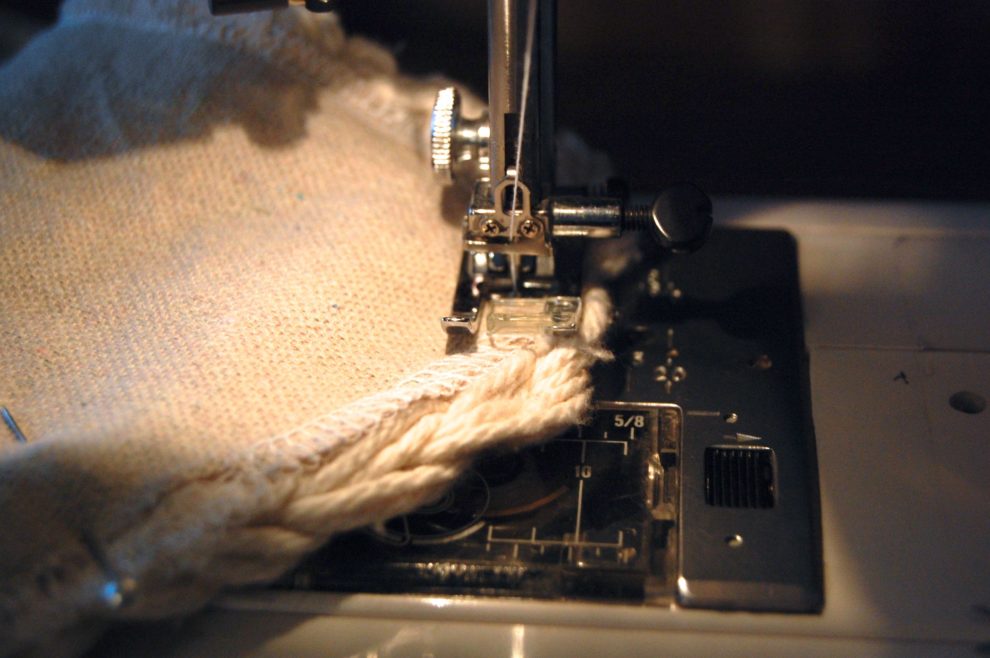
Use a long stitch and coordinating thread to stitch the rug to the canvas around the edges.  This works best if the crocheted side is down towards the feed dogs so the yarn doesn’t get caught in the pressure foot. Also make sure you can see the yarn peeking around the edge, otherwise your backer will show from the front.

If you want to attach a non-slip mat, cut it to fit and then hot glue it to the canvas back.
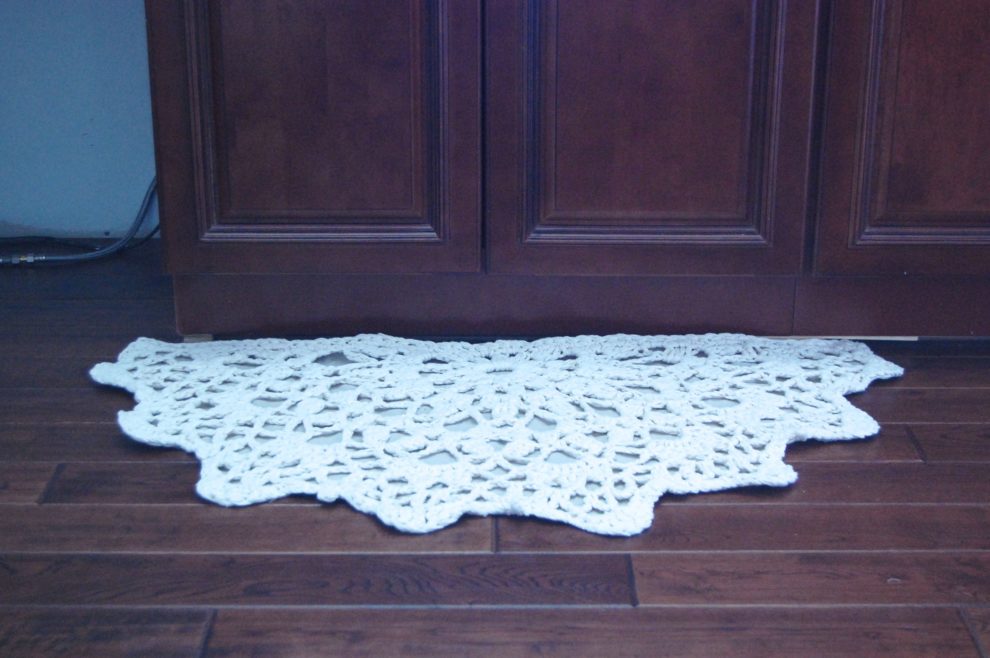
 

It will look even better when we get the dishwasher installed and finish the trim under the cabinets, but those things don’t’ affect my enjoyment of the rug in the least!  I can see one used as a bathmat or at a bathroom sink too. I’m considering an oval version to go by Heather’s bed….
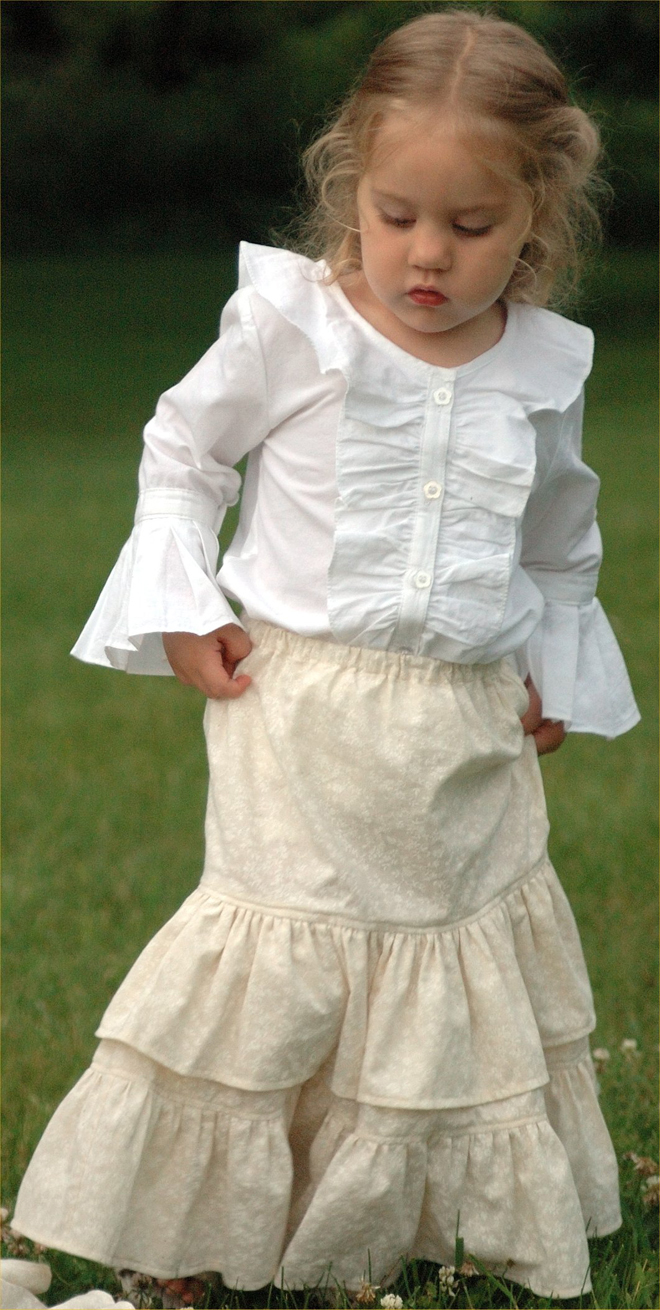
 

Brandon’s Dinosaur Backpack

DSC_1045

Back before we started Heather’s room project, I stitched up Brandon a kindergarten sized backpack.  He loves green and dinosaurs so I dug through my stash to see what I could find.  I had already been to 3 stores and decided that it was hard to find a quality back pack that was affordable too.  (I needed it to be less than $15.)  After I was done sewing, my friend told me she snagged a really great quality bag at the thrift store for $2.  Smack.  (That’s me smacking my forehead because I didn’t think of looking at the thrift store.)

DSC_1050

My goal was to make the backpack entirely out of stash, but I ended up buying $1.50 plastic pieces for the straps.  I had the zipper on hand, because I took it out of a bag that had worn-out fabric before throwing the bag away, and put in my stash.  It pulled a little rough, so I put silicone lubricant on it (from my sewing machine repair box) and that fixed it right up.

I used this inspiration photo. And this tutorial (I skipped the pocket and used wool quilt batting in the straps because I didn’t have fleece in stash.)

 DSC_1047

If I had it to do over, I would have made the bag 2 inches shorter.  It would have still held a folder and fit his body a little better. I lined the inside with canvas from the rest of a drop cloth that I had cut up for a previous project.  Then any exposed seams got bound on the inside with blue bias tape.  It about killed me to use the smoky blue bias tape but it was the ONLY color I had in the right size and I was challenging myself not to buy anything.  The kids put it in perspective for me–“Mom, it’s on the INSIDE.”  They were right.


DSC_1059 DSC_1055 DSC_1054 DSC_1053

Wrist wallet for lunch money.  Tutorial here.
DSC_1063Happy Kindergarten Brandon!


Sew a Child’s Painting Smock: Tutorial

In an effort to save money on school supplies, I’m stitching up a painting smock for Brandon, the Kindergartener.

IMAG2168

I started by following this tutorial.  It is excellent!  I made some changes since Brandon is too big for this size and I didn’t have any oil cloth in my stash.

I did a quick search at fabric.com for oil cloth–just to see if I could justify the cost.  They have adorable prints averaging $15 a yard.  You only need 1/2 yard of fabric to make this, so $7.50 for a cute paint smock isn’t too bad. (But you’ll need to order extra stuff so you can get free shipping :).) Hobby Lobby also has some cute laminated fabrics in their decorator aisle and 40% off coupons available.  If you bind the edges with bias tape, you can wash it (The glue holding the fabric to the vinyl will wash out and separate the two layers without stitching them together in advance.)

Since I’m trying to do this without spending, I put my thinking cap on and remembered I had some clear vinyl in my stash.  So I layered it with a cute cotton print for the same waterproof effect and no money out of pocket!

Materials Needed:

1/2 yard of printed cotton

1/2 yard clear vinyl

4 yards of double fold bias tape

2 inches of sew in hook and loop tape, cut into two 1 inch pieces

1.  Cut a rectangle 40-44″ (selvage to selvage) by 17-18 inches wide. (Straighten your half yard of fabric and see what you have left.)

2.  Fold it into fourths and use a t-shirt to trace a neck hole.  I used a pencil and traced following the seamline underneath.  And cut it out.  While it is still folded round the lower corner (on the opposite edge–none of the rounds should be over a fold–I messed this up the first time.)

image


image

3.  Open up the rectangle and place it face down on the vinyl and trim it–giving yourself about 1″ extra vinyl all the way around.  Pin it with hair clips to keep from making extra holes in the vinyl.

image

4.  Now baste the two pieces together on the machine.  It helps to sew with the vinyl side up and if you have a walking foot, definitely use it.  Mine is broken, so instead I reduced the pressure foot tension a little and reduced the upper thread tension from a 5 to a 2.  (This kept the lower fabric from gathering up as I sewed.  It also helps to have room to lay your stuff out flat to the left of the machine.

IMAG2157

5.  Don’t forget to baste around the neck hole too.  Then trim the vinyl to the same size as your fabric. It looks best if you trim very close to the basting stitches cutting both the vinyl and the cotton.  This makes sure your basting won’t show after you bind it.

IMAG2161

6.  Bind everything with bias tape.  I used a triple zigzag stitch to make sure I caught everything well. I only had narrow bias tape in my stash, but would have preferred wider stuff.  Mine was super vintage–$.45 a package!  And I’m not sure, but I bet they don’t come with 4 yards in a package any more.

IMAG2160

Stitch #8 is the triple zigzag

Stitch #8 is the triple zigzag

7.  Measure 9″ down from the shoulder fold and place velcro or a button on each side to hold it together. I zigzagged all the way around the velcro outside edges.

IMAG2163IMAG2166

All tucked in his school supply bin ready for the first day of school.


Sewing Rooms, Craft Areas, and the Home Office

Prepare to lose all respect for me. This was my office/sewing studio/school room.  It was a mess. (It’s a different kind of mess now.)

shelves 021

shelves 020I forget the actual measurements of the room, but it’s something like 20 feet by 17 feet. If I wanted to get nothing accomplished today I would go measure it for you to be sure.  But then I would start sewing, or cleaning and forget the whole  reason why I was in there.

shelves 019The ceiling has a good pitch and the side walls are barely over 2 feet high.  Which doesn’t make much useable wall space.  But after taking this picture, I realized that I wasn’t fully using the wall space I did have.

shelves 018So I hired a friend to build plywood shelves on two sides of the room.  He bought the wood for me and I painted them.  2 coats of primer and then 2 coats of paint (We used both rollers and paint brushes.  We also purchased a paint sprayer for the project which was a waste of time and money.  It just spit out paint in weird drips and we had to use a roller over it anyway.) Painting all this wood took 2 days. (Not steady work, including dry time.  But our backs, shoulders and arms were sore.)
shelves 032

I had visions of floor to ceiling Billy bookcases in my office, inspired by too many hours spent on Pinterest.  But the nearest Ikea is in the Chicago area–not even sure how far that is. And I have wonky angles in my room that Billy’s really weren’t prepared to handle. Custom was the only way for me.

Homemade baby food 021

We moved everything to the other side of the room so Mark could work.Before Office Shelves

And work he did!

Homemade baby food 032 Homemade baby food 031

Homemade baby food 035 Homemade baby food 034

I went through my fabric and got rid of at least 4 bins, leaving me way too much.  And I ordered comic-book card boards from Amazon.com to make mini-bolts of the fabric I had left.

(Affiliate link above)

They went on the short shelves along the side of the room.

Office Fabric

I love that I can see my stash fabric at a glance.  I buy a lot less this way. I worry that the fabric will get damaged from the lights in the room.  (There isn’t much direct sunlight, but there is lots of florescents.) My plan right now is to cut around the light mark if that happens.  I should sew more stuff and use it up before light damage can happen :).

Office Couch envelope pillow covers

Then I bought a couch on Craigslist and put that on the other side of the room and shoved all the rest of my stuff that I didn’t know what to do with behind it, bwa ha ha.  Look in the corners of the pic and you will see it ;).

I also purchased a desk on Craigslist and a white bookcase from Target.com. I’m waiting for a tabletop from Target to come and have boxes of closetmaid 9 cube shelves to put together to build this:

Pottery Barn Bedford Table

I’m scared about this, because I haven’t figured out the furniture arrangement of it all.  Nothing is returnable once I assemble it….and it was $190 for the set.  (But from pottery barn it would have been $1100!) Right now my sewing machine is taking up precious wall space that I thought might free up with this table.  And I might be able to stand and sew–which would save my back and help me get a lot more done.  I’ll keep you posted with updated pictures when I get some stuff figured out.

If you need more ideas, check out my Pinterest page on the subject:


 http://pinterest.com/angelacoffman/office/


especially this one:

mind-boggling organization.

What kind of projects are on your office or craft room to do list?  Any tips for me?


Doll “Quilt As You Go” Tutorial

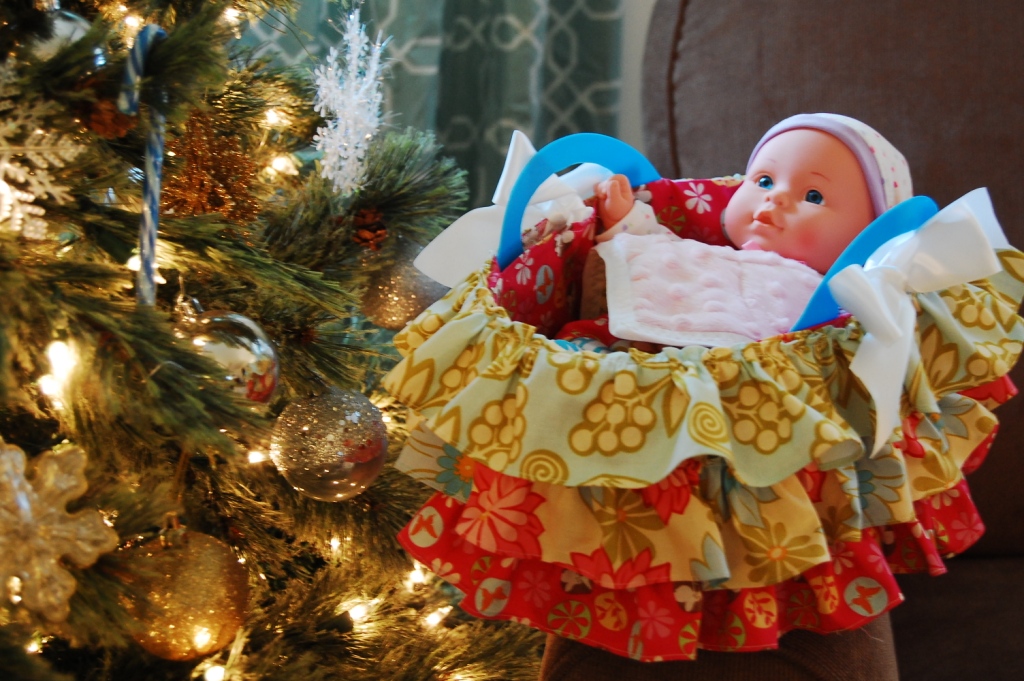
This adorable doll quilt is the perfect companion to our dollar tree Doll Bassinet/ Moses Basket. Tutorial here.

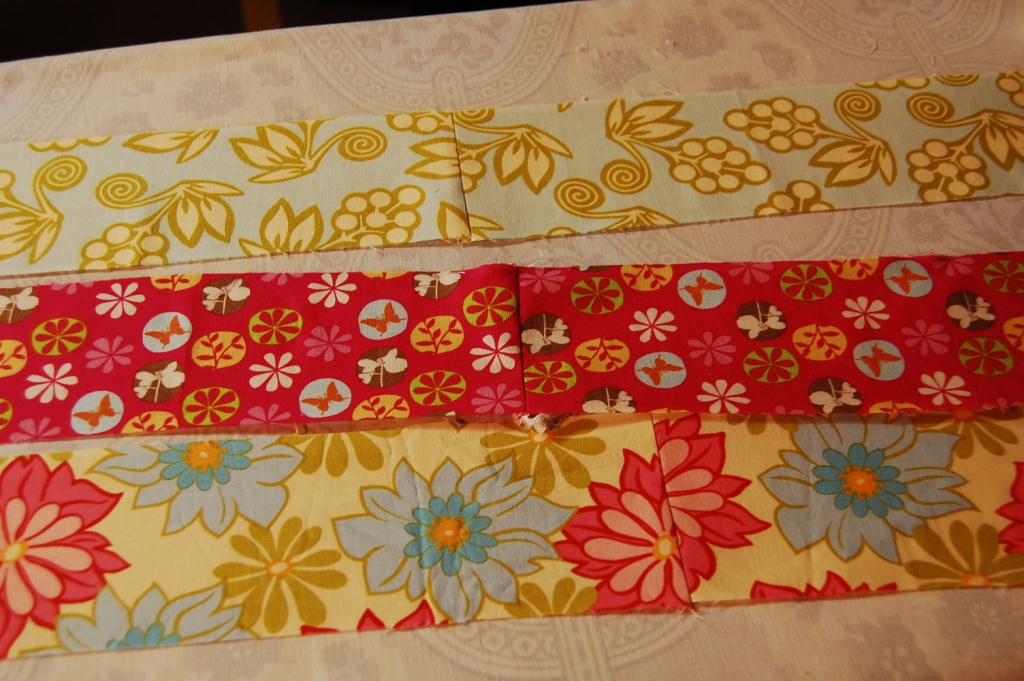
I used the leftover scraps from the basket to complete it.  It took about an hour from start to finish. This same technique can be used to make quilted bibs and larger throws for real babies or for nursing home residents.  It goes together super fast since you quilt it as you go and there is no hand sewing. (My choir students are working together to make a larger version. It’s a little more fiddly to make it bigger, but it still works.)

Read more

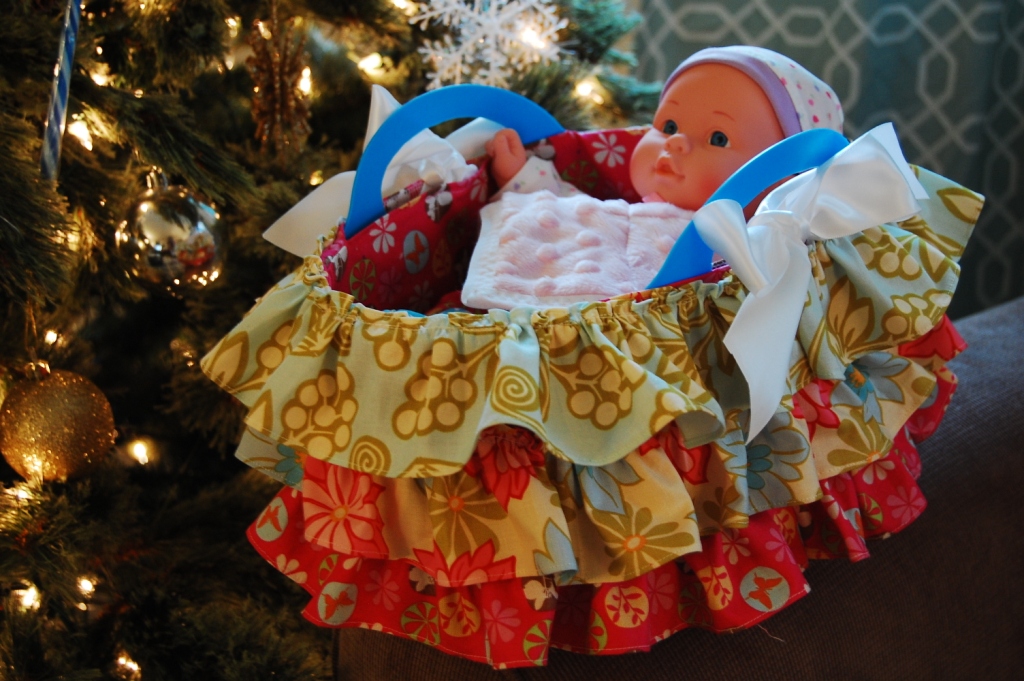
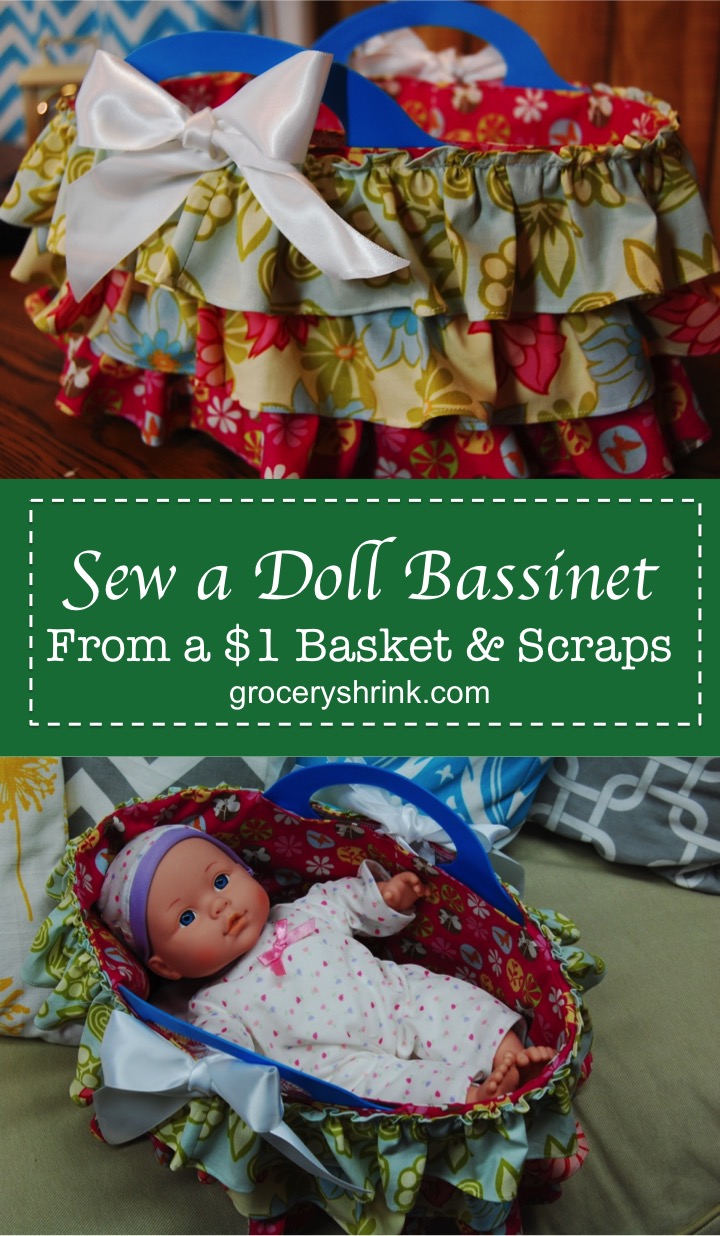
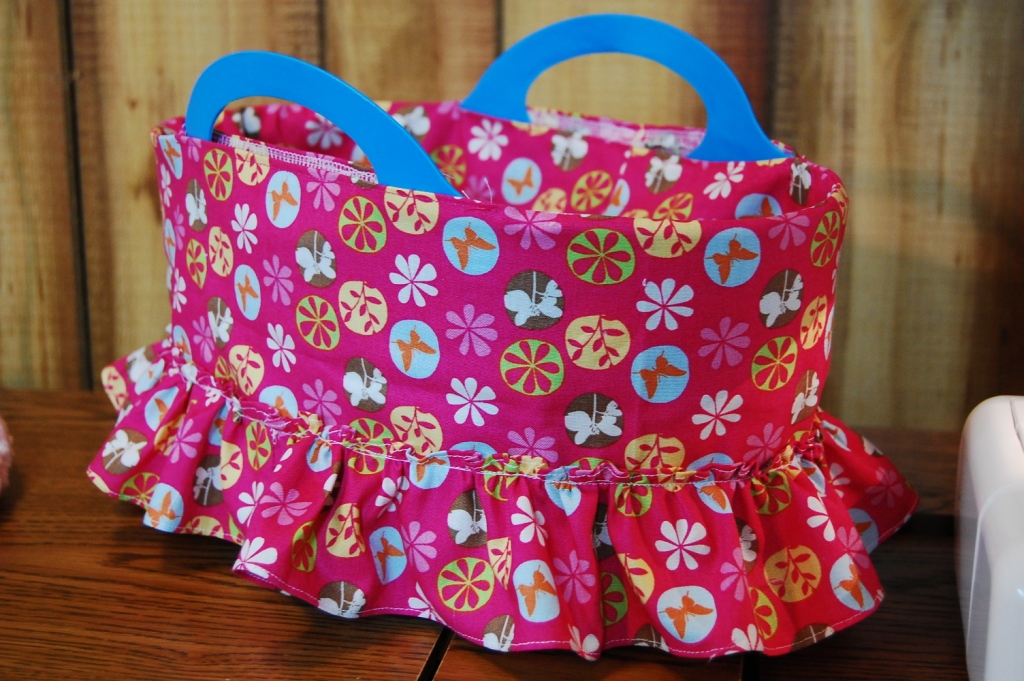
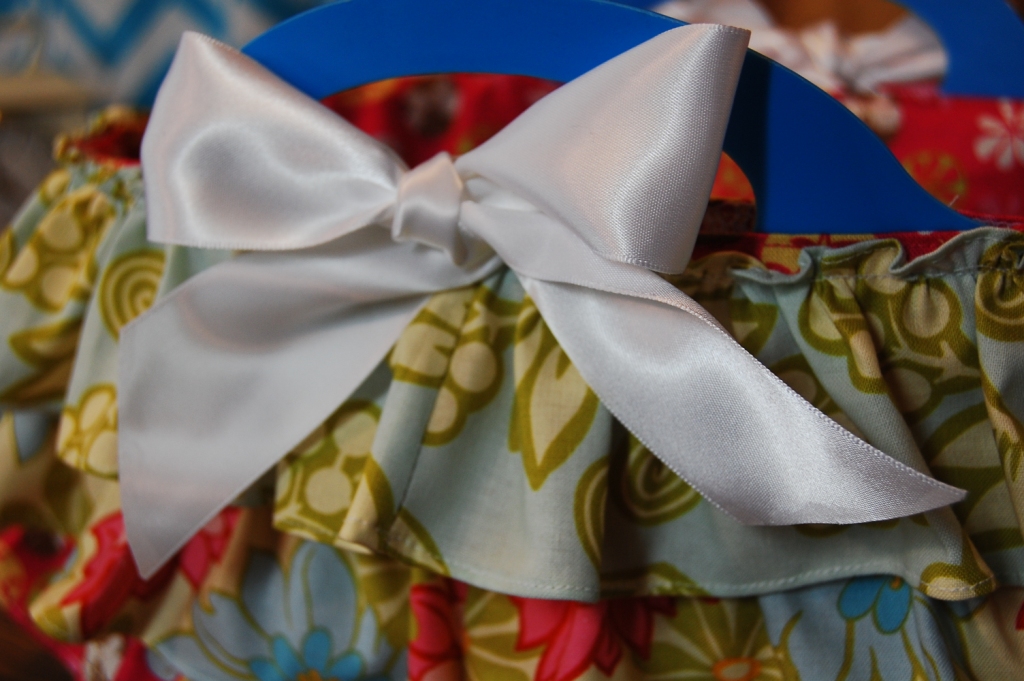
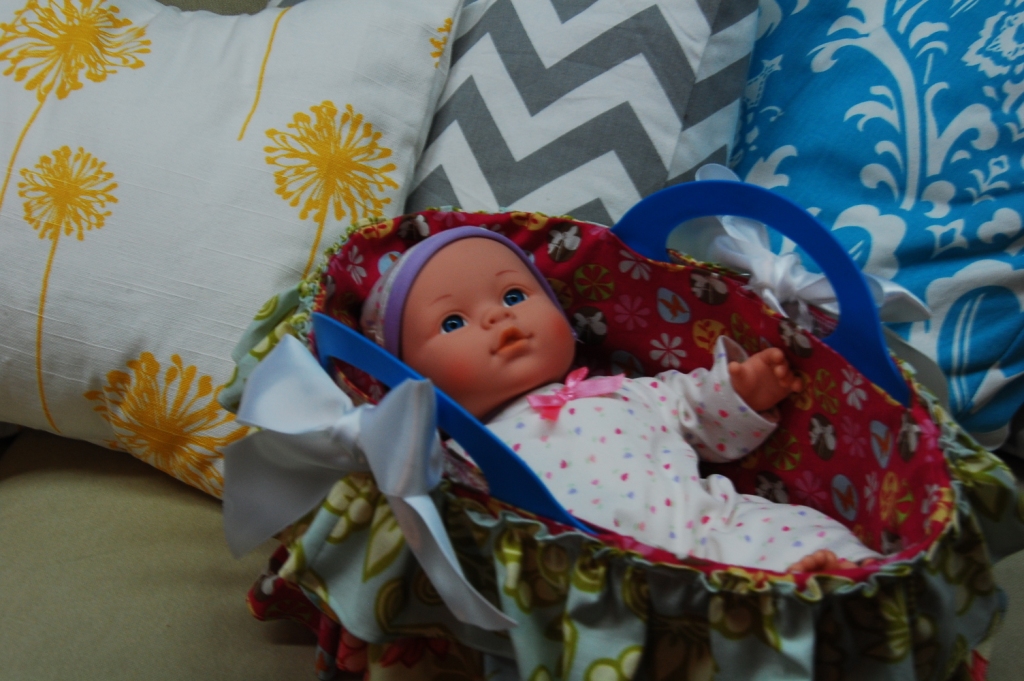
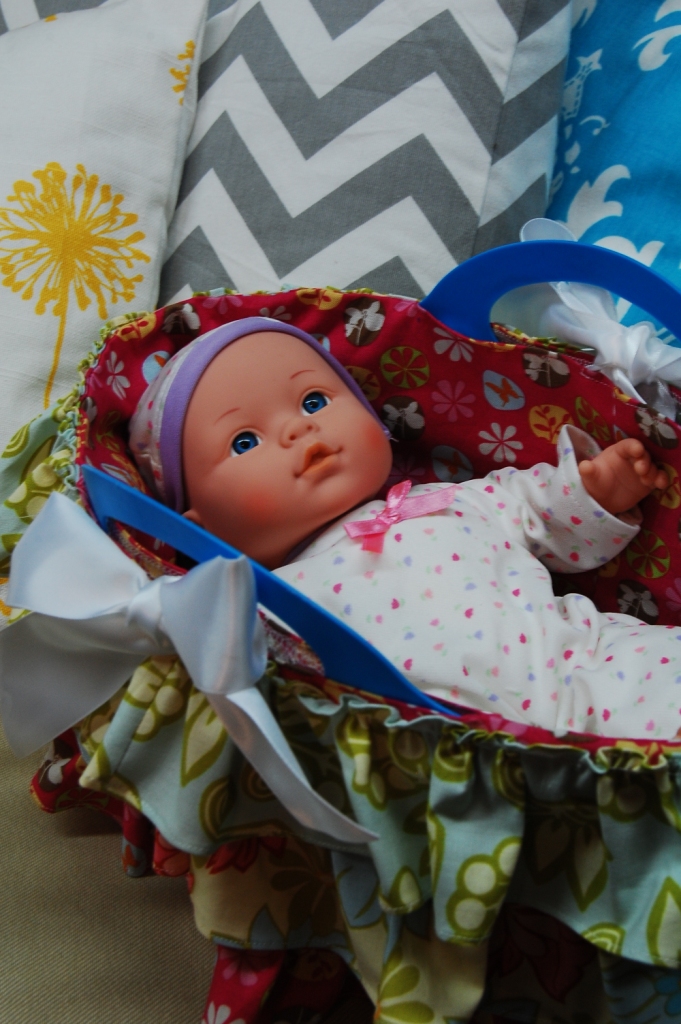
Doll Bassinet or Moses Basket Tutorial

Baby Doll Bassinet Pattern

Wouldn’t a little girl you know be delighted with a new dolly and a basket to carry her in?

For an experienced seamstress, this project takes about 2 hours.  Plan a little more time if you are new at this.

You will need:

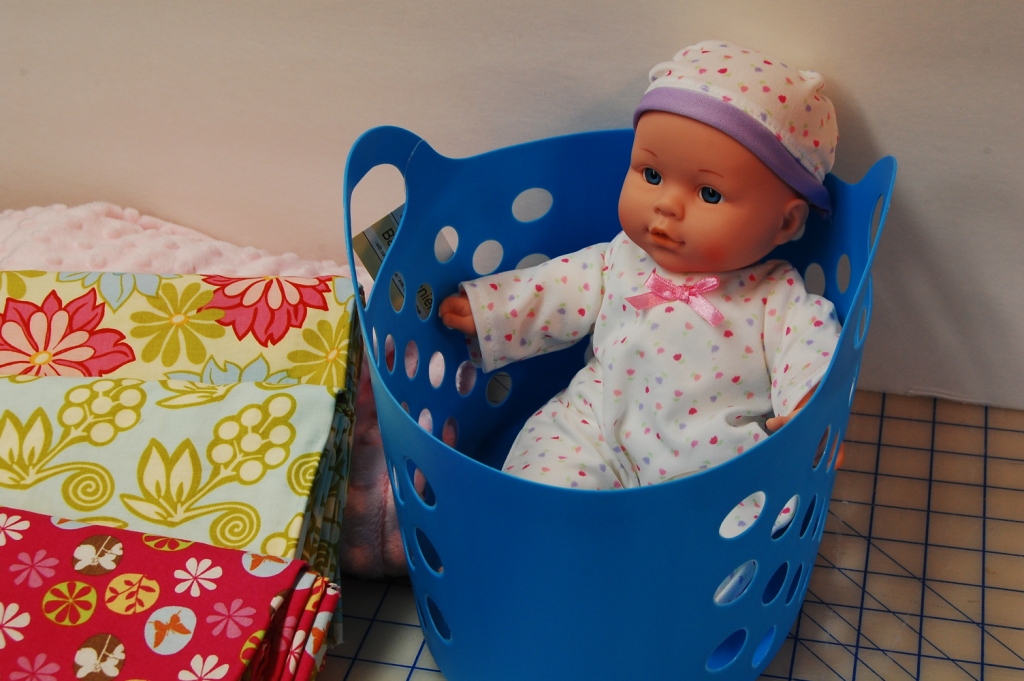
1 dollar tree basket.  This one is about 11 inches long by 7 inches wide (just slightly smaller.)

An 8-12 baby doll fits perfectly. My doll is 12 inches and is from Big Lots.  Just perfect for my 18 month old niece.  This one or this one would also be perfect.

3-4 fabrics.  I chose one for the mattress, and 3 for the basket cover. 1/4 yard of each is plenty–or just scraps.

A small amount of poly stuffing

1 1/3 yards of ribbon

Normal notions: thread, pins, scissors, etc.

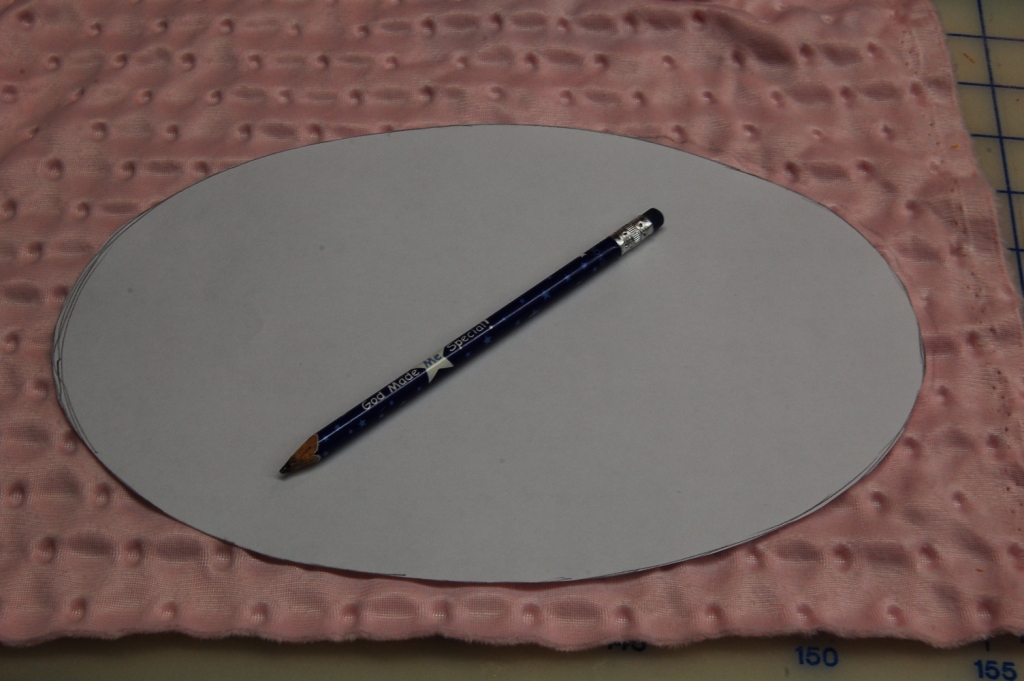
Mattress Pattern Piece

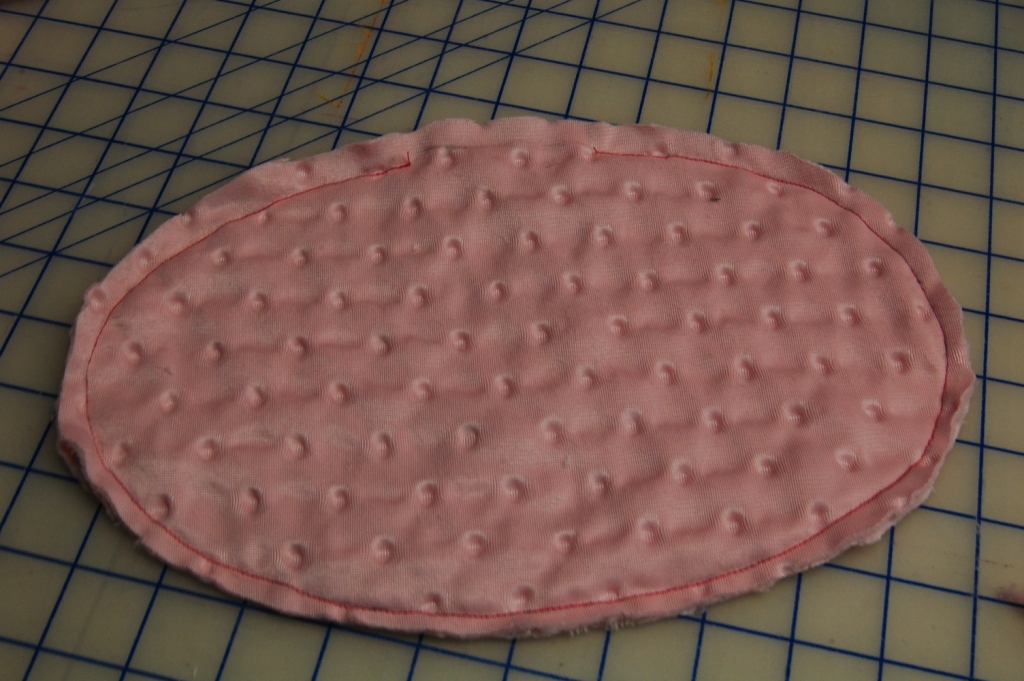
1.  Mattresss:  Trace the pattern with a pen onto your mattress fabric.

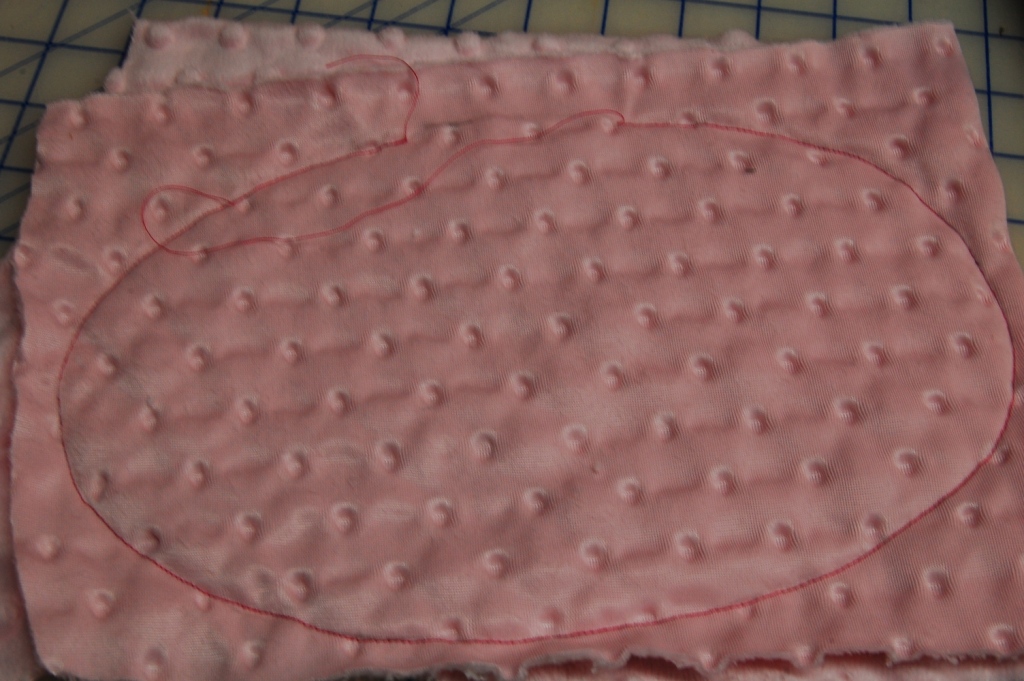
2.  Fold fabric in half and stitch on the drawn line, leaving an opening for turning.

3.  Trim excess fabric leaving a 1/4 inch seam allowance.

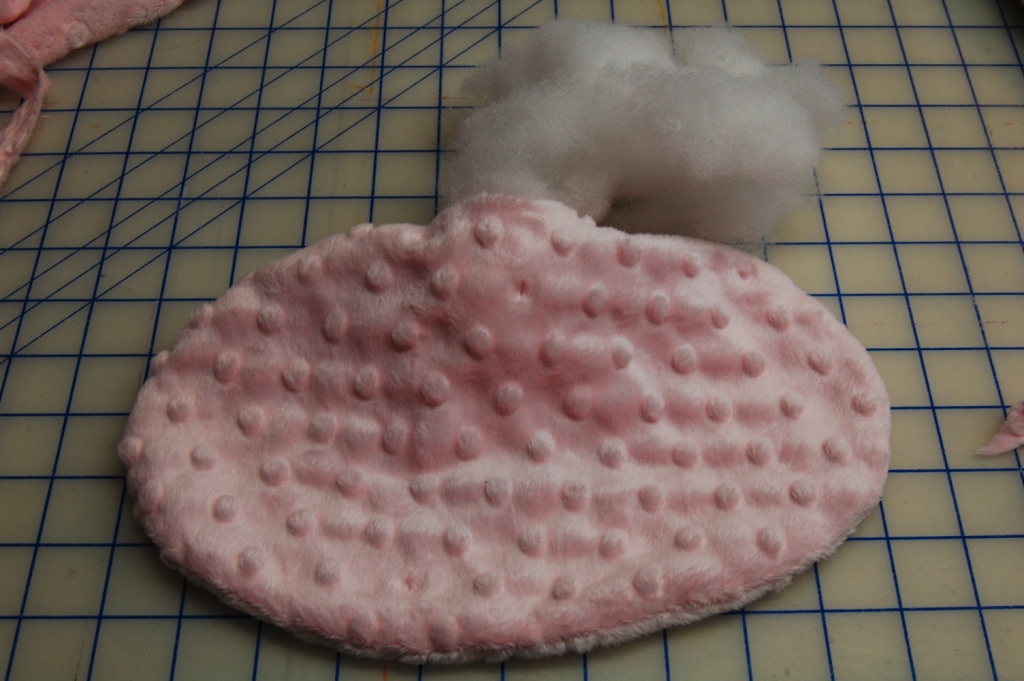
4.  Turn right side out and lightly stuff with a small amount of poly stuffing.

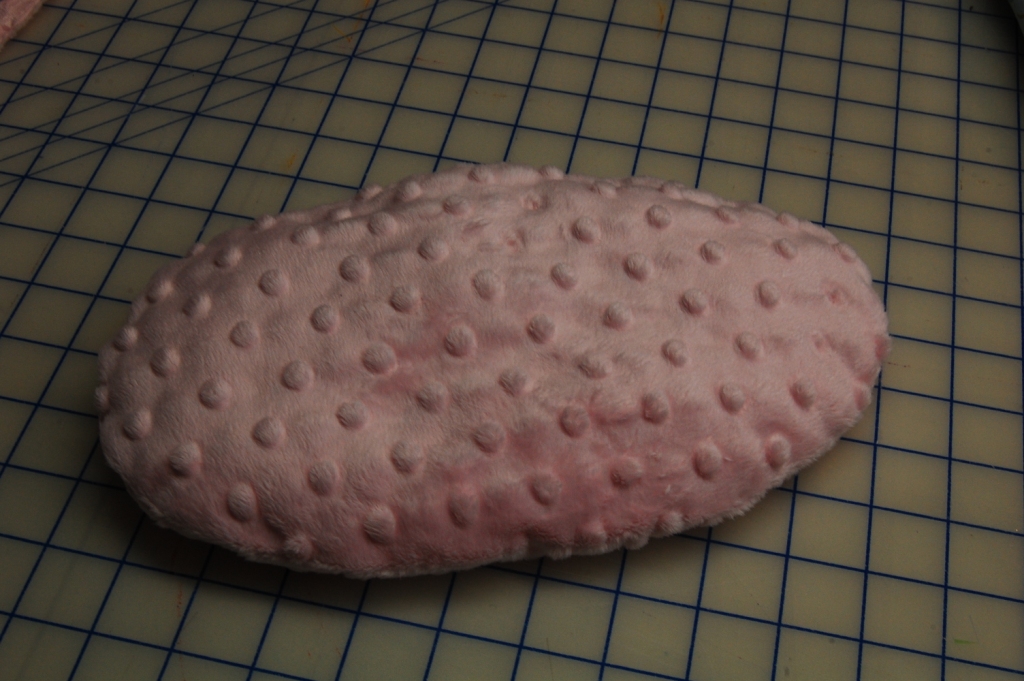
5.  Slip stitch the opening closed and set aside.

For the basket cover: Cut 1 oval

2 rectangles 6 x 31.75 inches for the lining

And 6: 3 x 31.75 rectangles for the outer ruffles. I cut 2 each from 3 different fabrics.

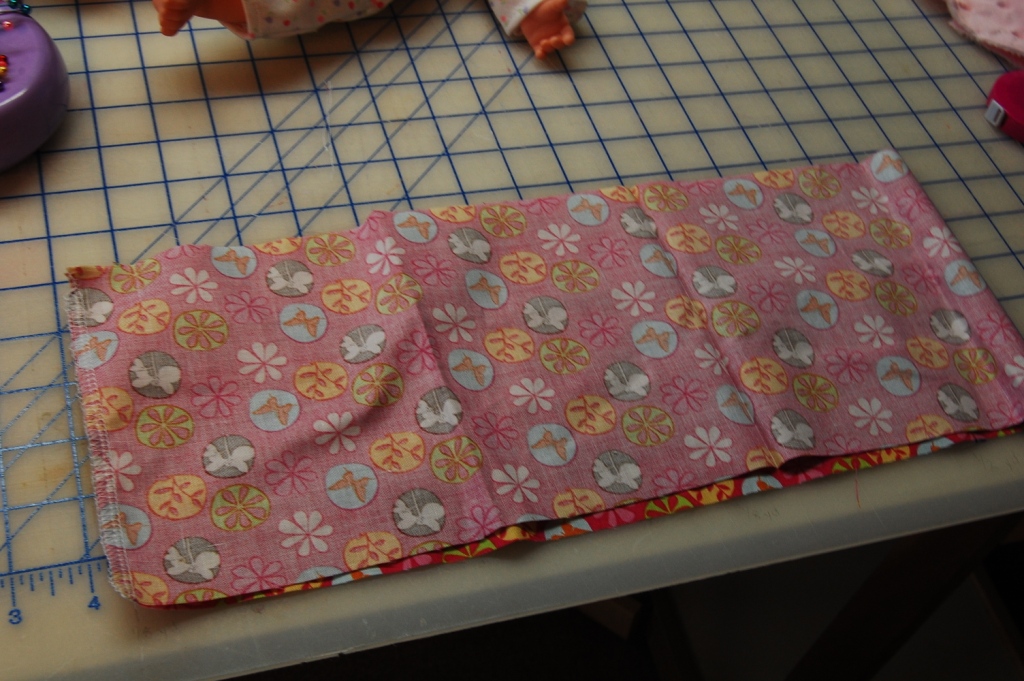
1. Sew each 6″ wide rectangle into a loop using a 1/4 inch seam allowance.  (I used a serger to keep it tidy, but you could zigzag the edges if you don’t have a serger.

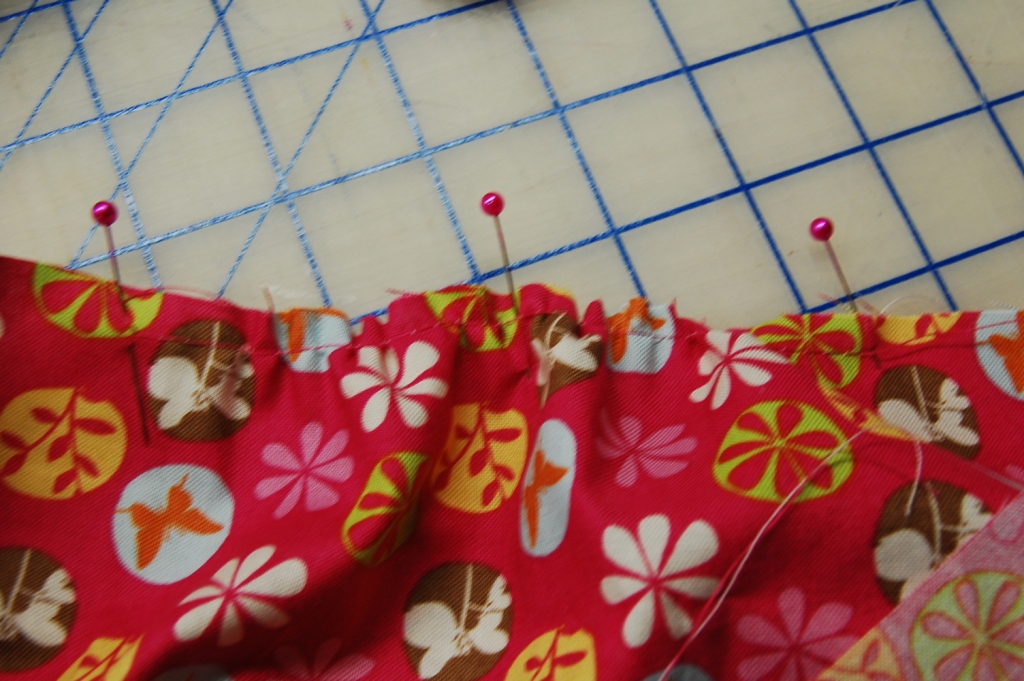
2.  On one 6″ tall loop of fabric only, run 6″ long swaths of gathering stitches on opposite ends from each other.

3. Divide both the oval and the loop of fabric (that you just put the gathering stitches in) into fourths.  Pin them rights sides together, matching the fourths and putting the gathering stitches around the oval ends to help everything fit well.  Stitch with a 1/4 inch seam allowance, then finish the raw edges.

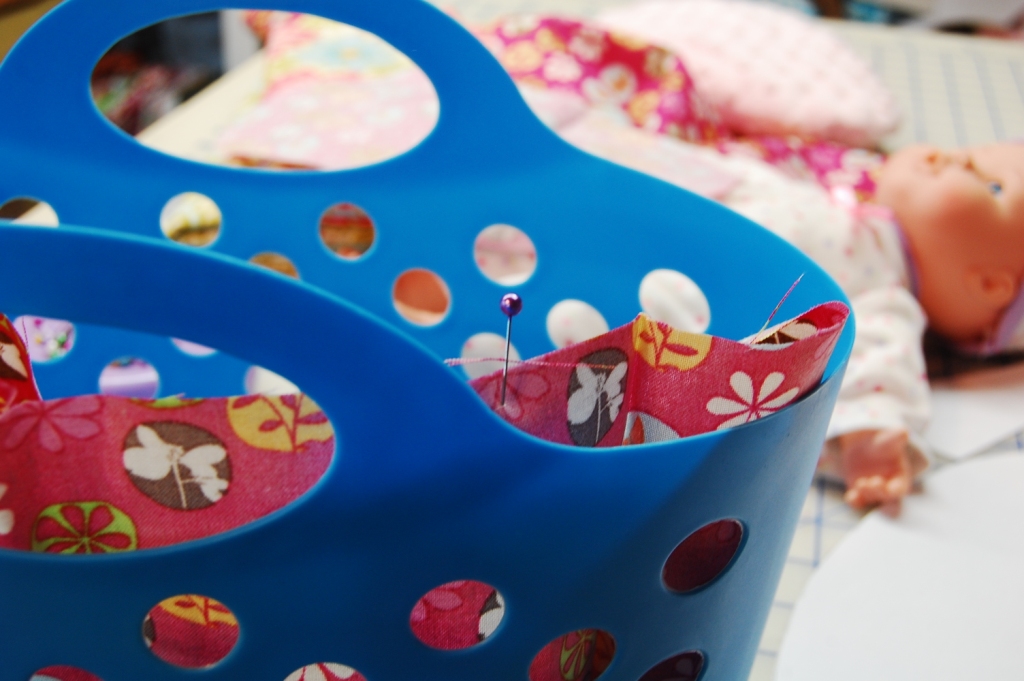
4.  Slip your liner inside your basket and mark each side of the handle with a pin.  Be sure to get the widest part where the handle meets the top of the basket.

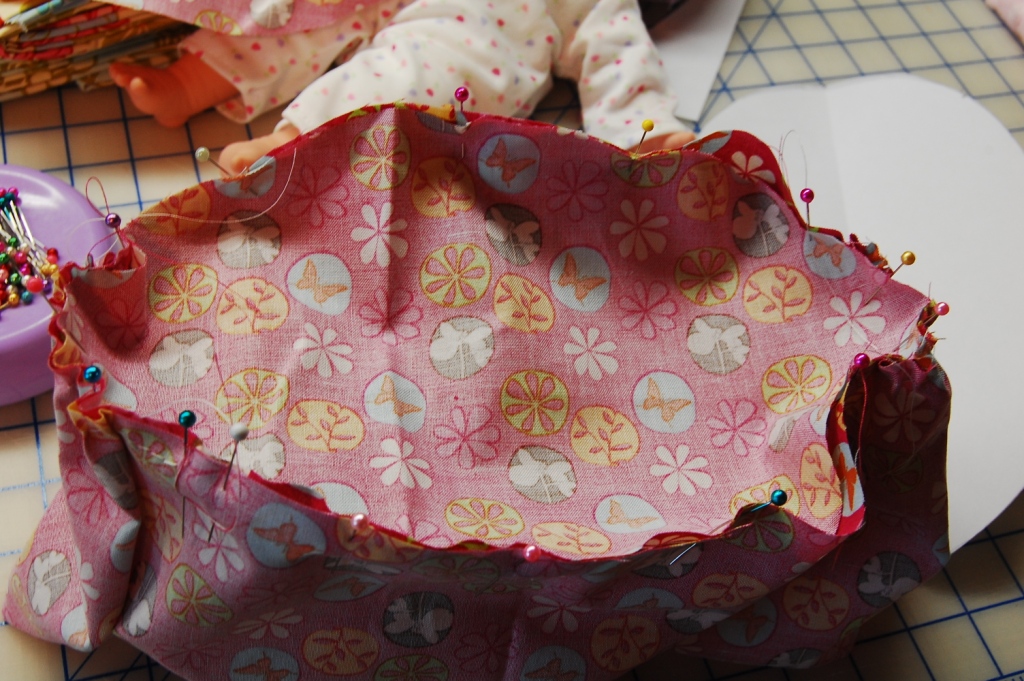
5.  (Note:  Before I did this step, I serged around the top of both loops of fabric so on step 6 the hemmed edges would be finished.)Pin your second 6″ tall loop of fabric to the top of the basket liner, right sides together.  Stitch with a 1/4 inch seam  leaving two openings for the handles between the marks you made with the pins.

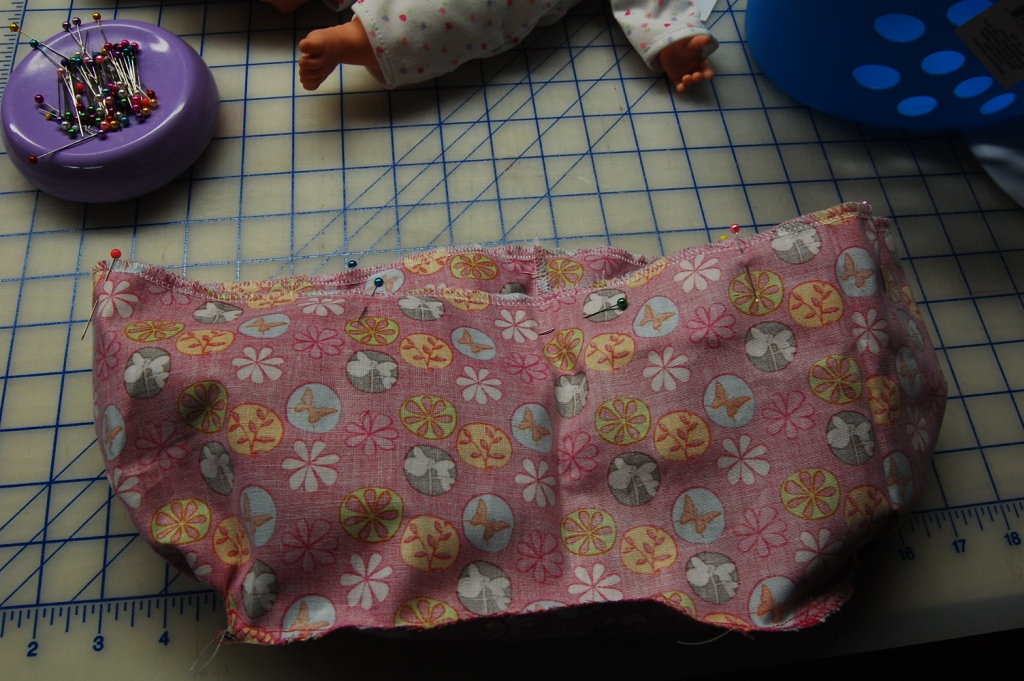
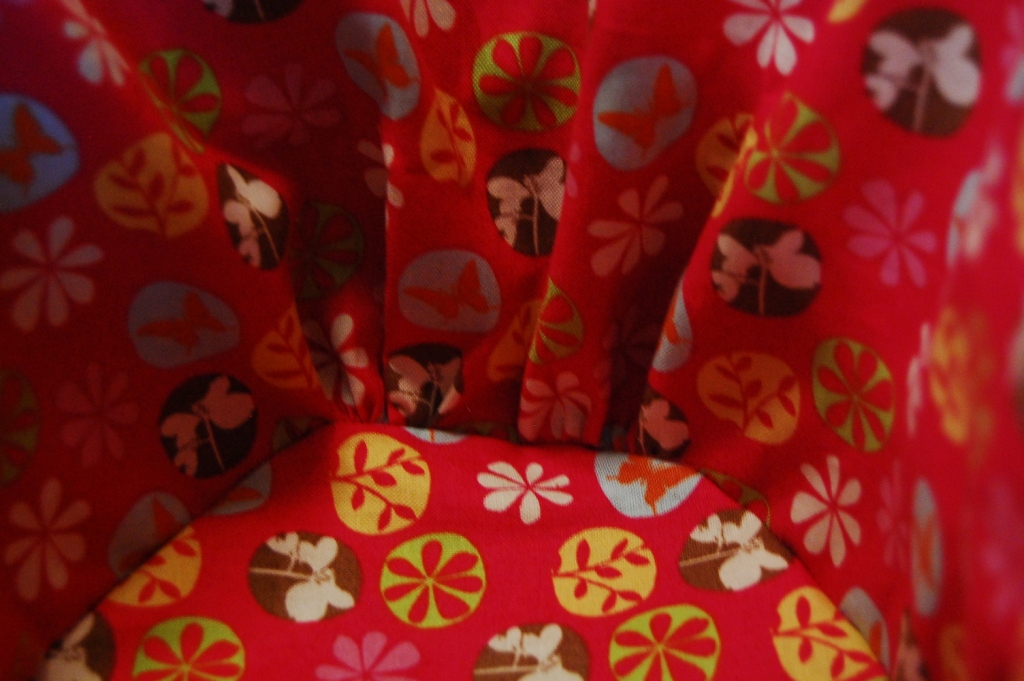
The ends will have cute little gathers like this on the inside.

6. Press the seam allowance under on the openings left for the handles and top stitch all the way around to hem the edges.

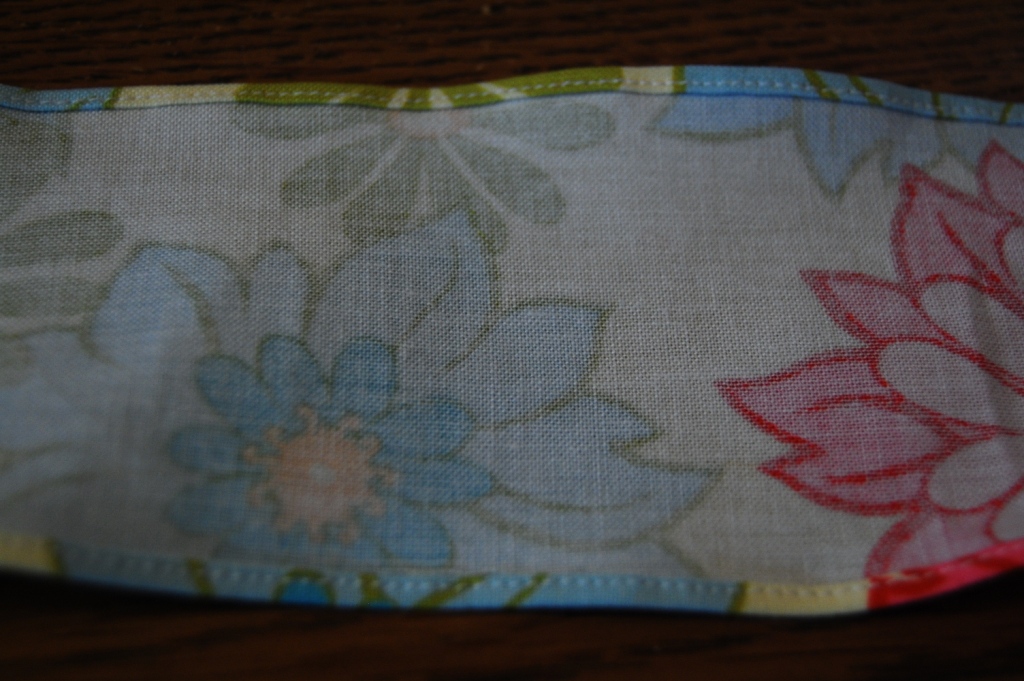
7.  Make 3 pairs of loops for ruffles, by  sewing 2–3″ wide strips of fabric right sides together on the short ends, 3 times. Then hem both long edges of each loop. You could do it the hard way by double pressing narrow hems and top stitching or by using a rolled hem stitch on the serger.  I used a rolled hem foot on my sewing machine, tutorial below.

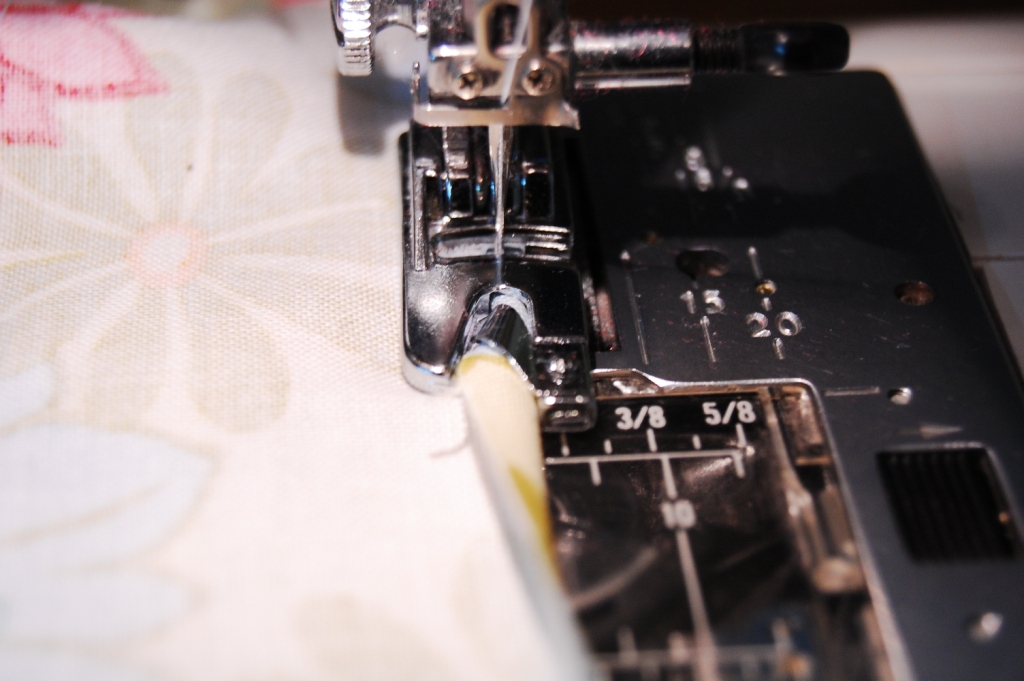
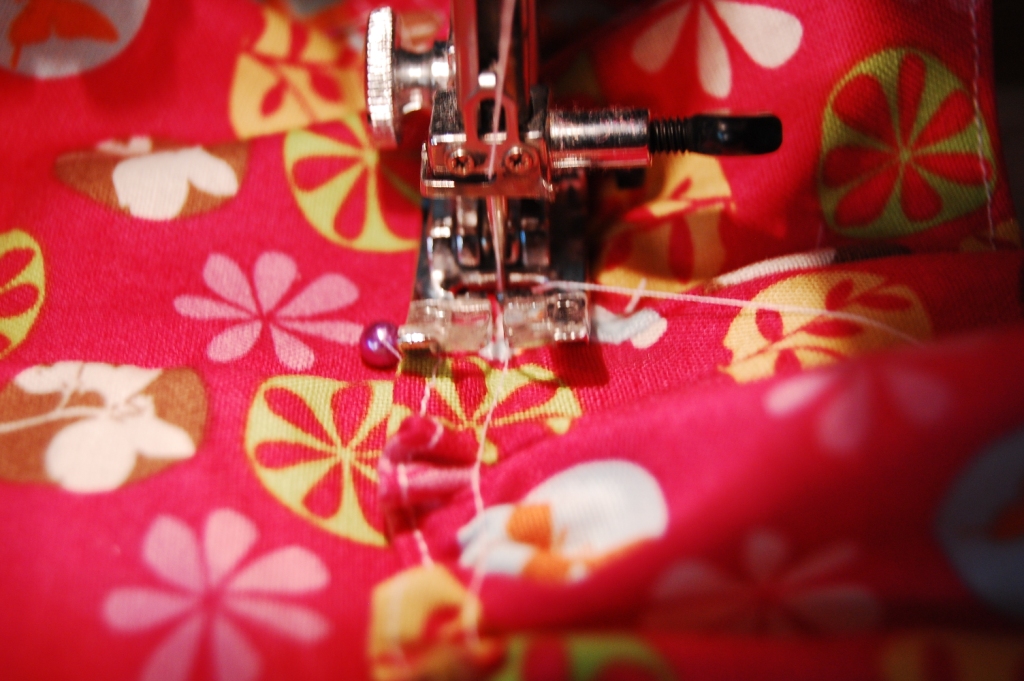
a.  First start your hem by pressing a small double turned hem about an inch down the strip of the fabric. (since it is hard to pull a seam through a rolled hem foot, I waited to sew my second seam until after the pieces were hemmed.

b.  Then slip your fabric into the foot so the raw edge fits into the guide.  The portion you previously pressed under is ready to go under the needle for a perfect (in theory) start.  As you feed the fabric through the foot be sure the raw edge is always fed into the guide correctly.  A little practice with some scraps will have you a pro in no time.


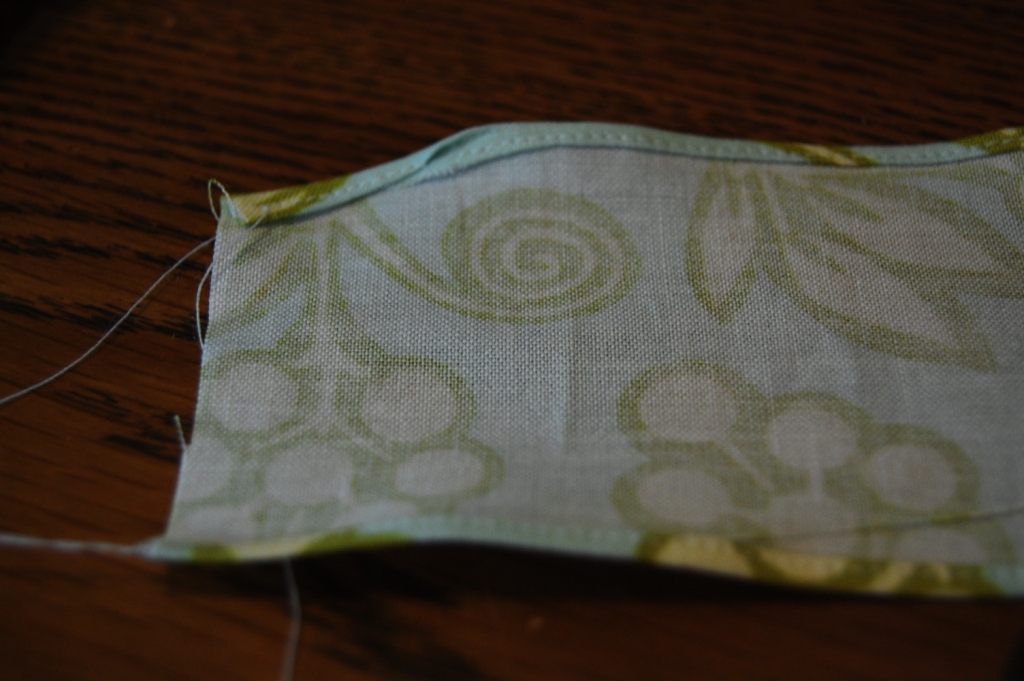
c.  It’s a challenge to go over the seam, you may need to use some gentle pressure to pull the seam through the foot. While you have your hemming foot out, hem the bottom edge of the basket cover too.

I had a rough start on this ruffle.  But once I got the whole thing put together it wasn’t very noticeable.  So relax and have fun with it.

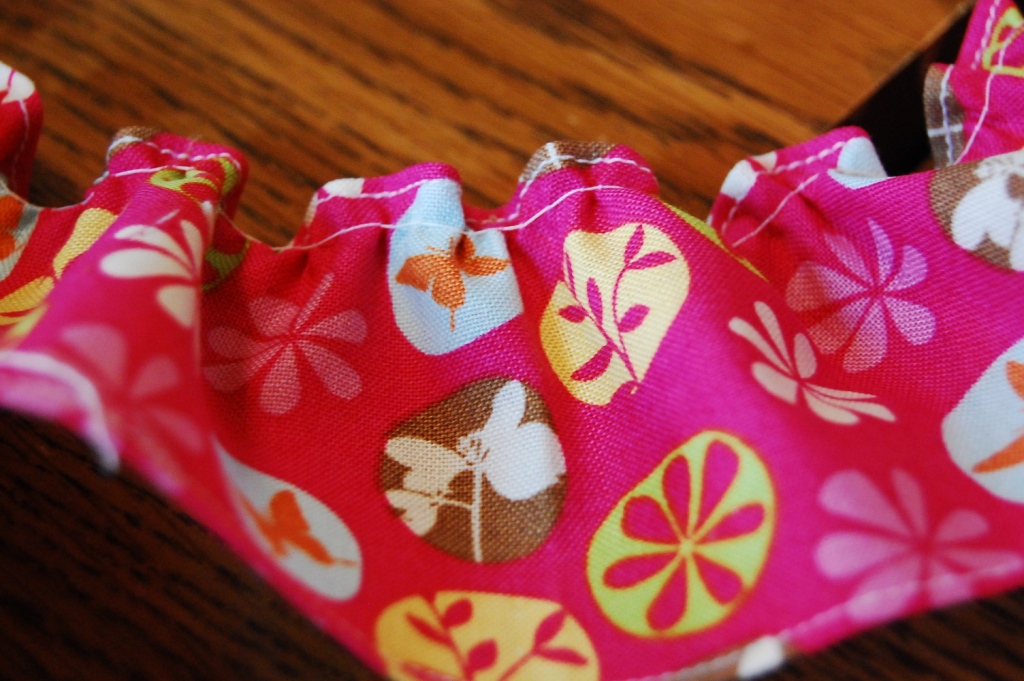
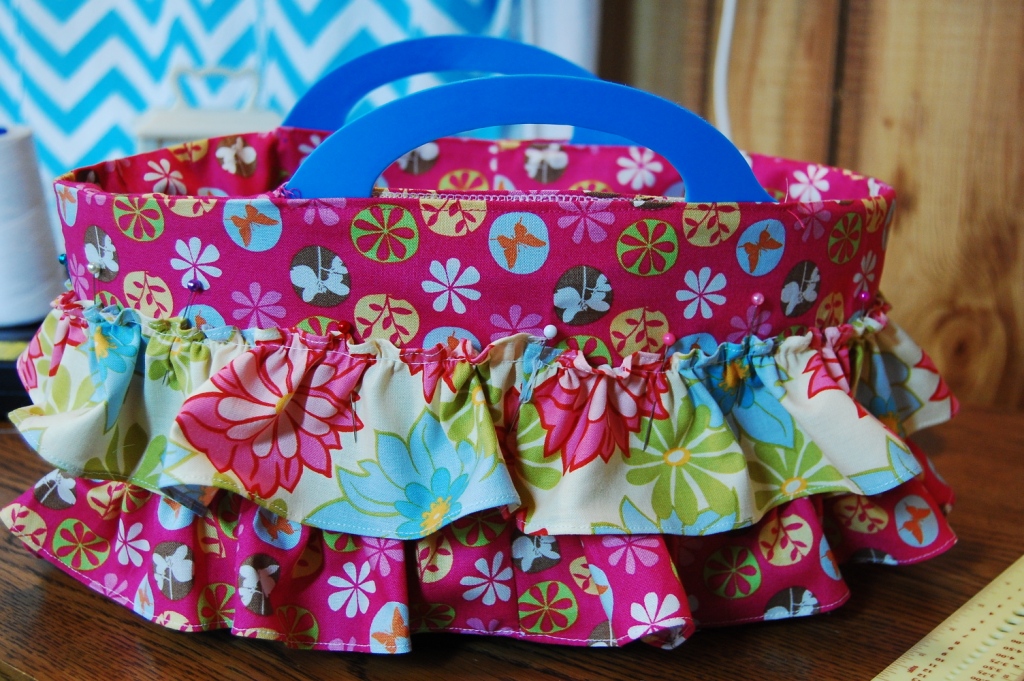
9.  Now that your ruffles are hemmed.  Divide them into fourths with pins, then run a single gathering stitch around the top.  (Hint, if you tighten your top needle tension as tight as it will go, the ruffles will gather themselves as you run the basting stitch. You will see be able to adjust them to fit as you go.)
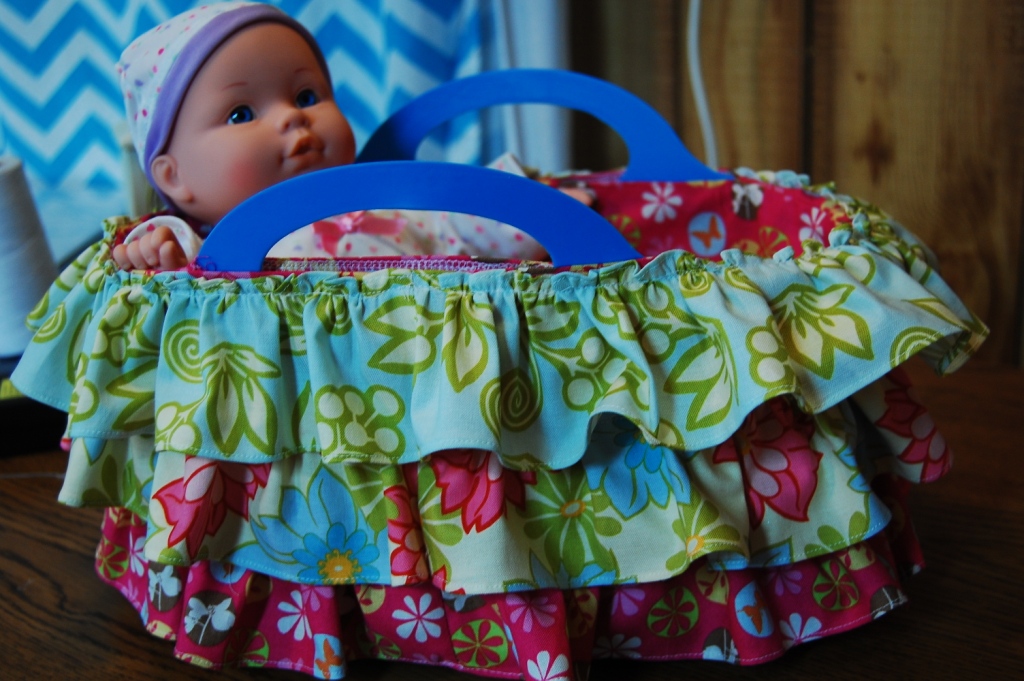
10.  Divide your basket liner in fourths too and pin your ruffle in place, matching the fourth markings and drawing up the gathers to fit. Pin the ruffle so the bottom edge of it lines up with the bottom edge of the basket liner. This was easy to do when the liner was actually on the basket.  Then top stitch the ruffle in place stitching right over your gathering stitches.

This is pretty adorable just like this. So if you want to, you can stop here.  Or add the next two layers of ruffles the same way, overlapping each row just a bit and lining up the top row with the seam line on the basket.

Almost Done!

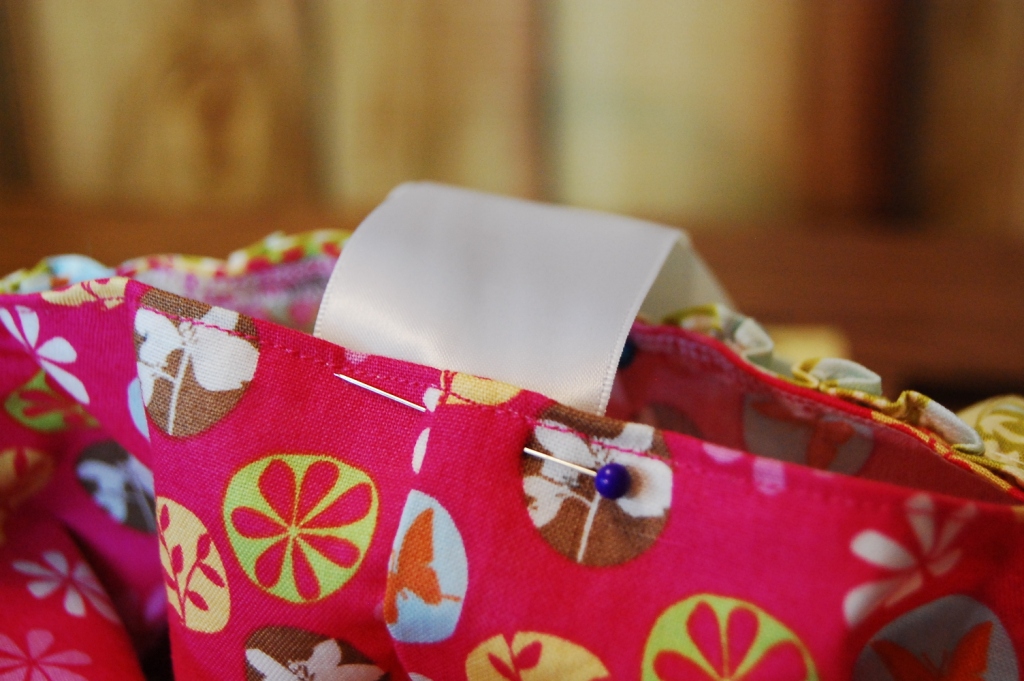
12.  Use Fray Check or a candle to seal the ends of your ribbon.  Then pin in place centered on each side of the gap left for the handles.  Stitch in place along the same stitching line you hemmed with.

13.  Tie your bows, insert the little mattress and the dolly. Stay tuned tomorrow for the matching quilt tutorial.  You’ll be amazed how fast you can piece, quilt and finish it.  Great for last minute gifts.


Post contains affiliate links.