How to Take-in a Skirt Waist

Are you losing weight or plan to but don’t want to lose your favorite skirt?  Here’s a two minute alteration that will keep your clothes fitting great and can be undone if necessary.

Oops!  Youtube linked a racy video to this one.  I apologize if any of you saw that link.  I’m fixing the problem but it will take about an hour.  Check back to see the video.

How to Take in a Skirt Waist from Angela Coffman on Vimeo.

P.S.  This skirt has a side zipper.  If your skirt has a back zipper, put in 2 equal sized pleats on either side of the zipper.  Instead of pressing the pleats to center on itself, press them away from the zipper.

The Girls Get Closet Curtains

I’d like to interrupt this post to announce that the CSN.com surprise has arrived!  I will reveal the big secret tomorrow, so you have until then to get your contest entries and guesses in.  There are several correct guesses in there, but there is a twist to this one that only adds to the surprise.  You don’ t have to be correct to win since the winner will be chosen by randon number generator.  There will be special recognition for all correct guessers and also for the most unique guess.

Before 2

Closet Before Curtains After removing doors, painting and organizing

It’s been a long time in the dreaming since I last wrote this post, but I finally made the closet curtains!  I used the same $1 electrical pipe conduit and $5 ring clips that I put on the laundry room curtain.   I discovered I like curtains that are nice and full and sweep the floor–no high waters here. 

The ring clips made this a 20 minute sewing project.  I cut tore 4 lengths of white muslin 92 inches long.  And sewed 2 together on the long side for 2 extra wide curtians.  Then I hemmed the top and the bottom.  I left the selvage edges on the sides since there was no printing and no fringe on the selvages.  I added lace trim from stash and folded down the top 6 inches for a little ruffle/flap and clipped to the ring. 

I had originally planned to sew tiny ruffles to the bottom 18 inches it like these

From Target

and then considered a rhumba ruffle sections 18 inches from the floor and down–like these:

Click the picture to go to the etsy store with this curtain

But for now, with all the projects we have left to do,  we decided it was perfect just plain and simple.  We can always add more later.

Tie backs make it easy to pick out clothes

We put in tie backs to help the girls keep the curtains back when they are organizing or picking out their clothes.  It is such an improvement over the sliding doors that only allowed access to half the closet at once.  We love it!

Fixing a Hole

Simple mending can save a piece of clothing from the rag bag or trash.  Usually it just takes a couple of minutes, but thinking about doing the mending is hard.  Just do it!  You’ll be so glad you did.

My daughter’s favorite shorts had a drawstring with eyelet holes.  One of the eyeles ripped out and left a hole that threatened to get bigger.  Normally I would have slipped it into my mending basket and left it to sit until they no longer fit.  Fortunately my daughter needed them for camp and I had to act fast.

1.  First I removed the drawstring which was for style only and not really functional.

2.  Then I used a scrap of fusible interfacing on the front and back to reinforce the torn fabric.

3.  Then I picked a scrap of fabric from my stash and ironed a piece of Wonder Under Regular-Weight Paper-Backed Fusible Web to the scrap.

4.  The Wonder Under has a paper backing that is easy to draw on.  I used a pencil to draw a heart shape patch and then cut the fabric on the pencil lines.  (It’s so much easier to cut out fusible shapes after the wonder under is fused to the fabric than to cut the shapes first.)

5.  I peeled off the paper backing and ironed the patch over the hole.  I set my machine to a satin stitch (a zig-zag with a width of 3.0 and a length of .5) and top stitched all around the edge.   It’s not perfect, but it’s sturdy and the whole process took about 5 minutes. 

Fixing a Waistband

My son is blessed with a thin waist and has been able to wear the same swimming trunks for 3 years. Finally chlorine rotted the stretch right out of the elastic and he couldn’t hold his trunks up any more. My first thought was to pitch them and buy a new pair, but finding time to go to the store was harder than just fixing them.

I use this same method to add elastic to the back of garage sale found jeans and slacks too. It helps the kids wear a wider variety of sizes.

Note 1:  Since this was a real mending job, my thread matches perfectly and may be hard to see.  You can click on the pictures to enlarge them and see more details. 

Note 2:  I keep a stash of basic mending supplies that I purchase when the thread and notion walls are half off.  My stash includes hanks of elastic in all sizes ($.50-$1 each) basic colors of thread:  red, black, khaki, navy, white, pink etc.,  interfacing, and sewing machine needles in all sizes and types.  This allows me to do quick sewing and mending without a trip to the store and I never have to pay full price for notions!

Step 1. Use a seam ripper to cut a slit in the inside of the waistband at each side seam.

Make a hole with the seam ripper

Step 2. Measure the width of the opening and choose elastic that is about 1/8 in narrower. Slip a pin in one end and pull it through the waistband. (Wait to cut the length of elastic until the end.)

Use a pin to slide the elastic through

Step 3. Set your machine to a wide satin stitch (a zigzag with a very short stitch, so the stitches lay right beside each other.) Satin stitch over the hole you cut, catching the end of the elastic to secure.

Fix a Waistband Step 3

Pin the elastic in place before satin stitching

Step 4. Adjust the gathers in the back to be even and trim the elastic to the desired length. Satin stitch over the other end to secure and repair the hole.

Satin stitch over the hole

Step 5. Straight stitch through the center back of the elastic to keep it from twisting.

Confession:  After the mending, he wore them once and we plan to donate them to Diabled Veterans instead of throwing them in the trash since the fabric is still good and the elastic gave them years of new life. I thought he deserved a bigger pair of trunks and this time of year is the perfect time to buy a swimming suit. They are on clearance for less than thrift store prices!

Laundry Room Door Curtain

Isn’t it fun when frugal, functional, and beautiful all align?

Before

Our laundry closet used to have a bi-fold door on it. It was dated looking and dangerously easy to pull out of it’s track. When the door was open, I couldn’t get to my cupboards. And it was a pain to open and close every time I wanted to switch my laundry. We talked about custom making some glassed French doors to fit the opening, but it was going to be expensive and time consuming.

During

Finding inspiration in Home and Harmony’s sink curtain I bought a 6 foot by 9 foot painting drop cloth at Home Depot for $10. Later at Lowe’s, I grabbed a set of 14–1/2 inch diameter ring clips for $5, a 1/2 inch diamter metal conduit pipe for $1.32, and 2 screw in hooks for $1.18 each.

Although I can sew, I decided not too. I just folded over the top of the tarp until the curtain was the length I wanted. Then cheered DH on while he screwed in the hooks, and snapped it all together. The screws are super deep–3 inches into the studs, and the conduit is really strong. I think the kids could do chin ups on the bar and not pull it down.  The best part is how easy it slides!

I’d like to put some lace trim on the flap. It’s just pinned on right now. I have perfect gorgeous, dripping, Valencia lace in my scrap bag, but it’s too short a piece.

I could copy the look affordably with Irish Crochet. But I would have to design my own pattern and then stitch it myself and I’m wondering if it’s worth it? I also have this piece of lace in my scrap bag, that is long enough.

I was really hoping for some serious dripping lace, but this is already made and ready to go. What do you think? Custom Irish crochet? Or already made but not as awesome?

It only matters when the light is on behind the curtain. The ready made lace isn’t heavy enough to combat the back lighting.

But how often will I keep the room backlit when I’m not in there?

I love how the curtain color harmonizes with my new light fixture.

If you were to use the ready made lace, would you trim off the web background or leave it on for character?

Instead of towels embroider an apron…

Apron 004

The blank canvas for this proejct was an inexpensive pruchased butcher style apron.  I made it special for a gift by adding a free motion embroidery pattern using the same method as in the towel tutorial hereI had never met the bride before the shower, but I watched her fiance grow up at our church and wanted to show my support.  Her registry showed her kitchen was black, tan and red and I took a risk on the style. She seemed to like it a lot and was surprised when she opened it.

The red ruffles are 2 inch bias cut strips of linen that I put through the ruffling foot.  The edges are left raw and soft and the rose is made from the same strip but pleated on the end instead of in the middle.  I just rolled it up and hotglued it as I went.  A piece of felt and pinback finished the back.  Then I curled the outer petals back to make it look more rose like.

Apron 002 
This whole project was very fast to make.  I threw it together made it carefully right before I left for the wedding shower.  It's nice to have alternatives and still make a one of a kind gift when time is really short.   

Refashioning: The Zebra Skirt

Zebra skirt
My friend, Jamie from California, saw this skirt in a thrift store and knew it would be perfect for her friend. . .as a pillow.  The fabric has a beautiful touch to it and the lining is high quality and very silky and soft.  She packaged it all up to me with handwritten instructions.  In a few days I mailed back this:

Zebra pillow from skirt front
The lining is now a coordinating ruffle, and Jamie even had the great idea to use the tags for decoration on the front, to remind the pillow what it had been.

Zebra pillow from a skirt tag
Zebra pillow from a skirt back

 For those of you wondering if I do custom work, I used to.  I'm focusing my time right now on my kitchen remodel, my kiddoes, and new patterns to publish.  Jamie is very special.  She's the kind of girl that sends you $100 when your husband loses his job and I would do anything for her that was possible.  I didn't consider this a custom project, just a gift from one friend to another.

I’m Back!

I took a little break from blogging when I broke my computer and got the flu then had a wreck and tore up my bathroom (okay 2 of them) and took on custom sewing projects to keep me busy until next March.  But I lay awake at night pondering the genious of other bloggers and finally stole away a few hours today to put a little update in.  First of all I'd like to show you our make do costumes for our Reforamation day party a few months ago.  Many of you wrote to me in response to my plea for help in the Grocery Shrink newsletter several months ago and these costumes were inspried by your ideas.

Caleb went as Alexandar Doniphan in a thrift store sport coat and vintage navy hat.

033

Heidi went as Florence Nightingale and she designed her costume after a portrait of Miss Nightingale we found online.  It was the sleeves that HAD to be, according to Miss Heidi.

052 Florence Nightingale

W.D. and Brandon were dressed as Christian Missionary Vikings Lief Ericson and crew. My mom made the hats out of paper mache and craft paint with fur felt trim and my sister-in-law Erica (who is a creative genius) made the beard out of Lion brand homespun yarn by pulling it through a felt frame and attaching an elastic strap to hold it in place. I sure appreciate their help since I waited until the last 2 days to start on homemade costumes!

056 063
And Heather went as Elizabeth Hopkins, the pilgrim who gave birth to Oceanus on the Mayflower.

038


Two new tutorials

I found two new tutorials for you.  The first one is another recycled towel bathmat from tipnut.  This one utilizes cute fabrics too and is machine washable and less linty than the tied mat posted eariler. Click the photo to go to the instructions.

Bathmat tutorial

The next tutorial is from Jenny at Pearl Street Interiors.  Jenny gives you step by step instructions for turning the ugly cheap mini-blinds into stylish roman shades.  I love this!  It is so genious.  Click the photo to get the tutorial.

Hanging+shade+2

Preemie Knotted Hat Pattern Download

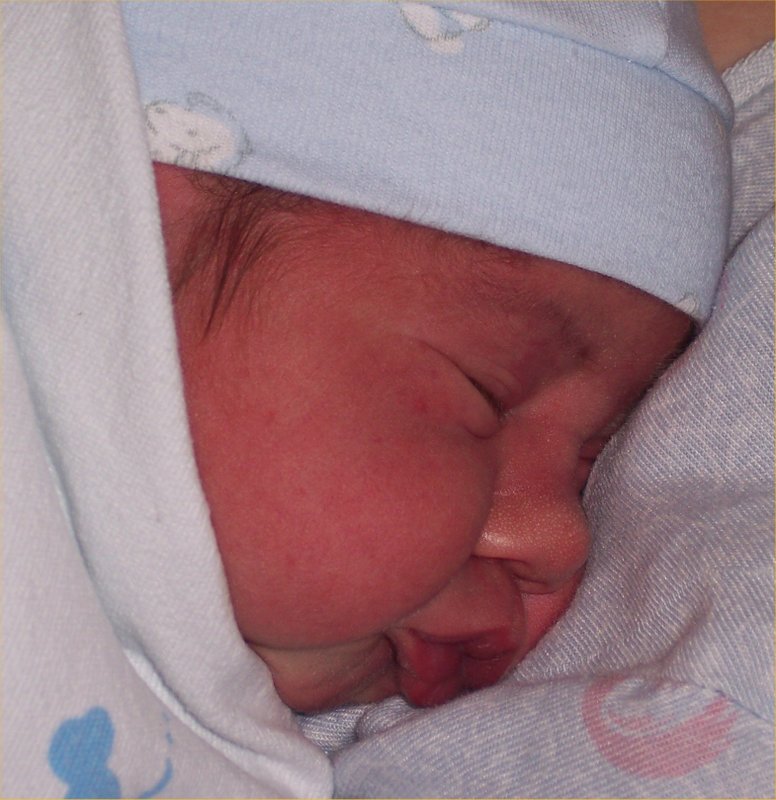
Here’s a great free pattern for you.  Make a hat in 10 minutes and donate it to your local Pro-life Clinic or Newborns in Need.  It also makes a cute package topper fro your next baby shower gift.  This is my favorite baby hat because the knot helps it stay on, its super soft, and it looks so cute!  It is best sized for babies weighing 4-7 lbs.  My model, Brandon was a plump 9 lbs and though the hat worked, it was plenty snug.  Click here to get the pattern.