Envelope Pillow Cover Tutorial

image

I’ve had fabric and pillow forms hanging around my house waiting for me to be fabulous with them.  I had dreams of invisible zippers and piping.  But at this stage in my life (you know–6 kids including 2 toddlers and 4 jobs besides taking care of my home and family) fabulous just isn’t in my repertoire. I modified my expectations and got the job done in a few hours.

image

This is about as easy as you can get for home decor sewing.  If you don’t feel like sewing you can buy these covers on etsy for around $15. I don’t sell them personally, but have seen the same prints I picked out floating around there.  The pillow forms have no zippers or piping to slow you down, but are still removable and washable and look fantastic thanks to a simple overlap on the back.

image

I don’t miss the piping at all–and part of me thinks that piping would have given these an uppity feeling that I wasn’t going for at all. These are so easy that you could sew special covers for every season and switch them out on a whim.

I ordered my fabric from fabric.com with a coupon.  I love that they have great customer service and free shipping on orders over $35.  (They are not a sponsor..I’m just a happy customer.) If you have a piece of fabric that you want to fussy cut so a special part of the motif is centered on your pillow, order twice as much fabric.  (If your motif is very large like the one below.  If it is a small motif you can order less than that–but too much fabric has never been a problem for me :).)

image

Pillow Cubes is a great place to save money on pillow forms. I recommend feather pillows, because they fluff up well and never get permanently flatten.

image

The other 5 of the pillow forms were repurposed from pillows I had lying around. A few I bought at a garage sale for $.50 and just throw them inside whatever cover strikes my fancy.  I will say that I knew the owner of the sale and trusted her cleanliness.  I don’t think I would buy second hand pillows from just anyone.

Here are the basic sizes to cut your pieces:  Please note that these measurements make a cover  1/2 inch smaller than the corresponding pillow form.  This gives a nice full appearance to the finished item that makes it look more luxurious.  I use 1/4 inch seam allowances since I do this on my serger.  If you don’t have a serger, then stitch with a straight stitch and then zigzag over the raw edges to keep everything from raveling.  These measurements give a 4″ overlap in the back which is enough to keep the overstuffed pillow from gapping but not so much that the pillow form is hard to insert.  All measurements are in inches.

Start by Cutting 3 rectangles.  Match the measurements to the size of your pillow form.

10″ pillow form:  1 piece 10.5 x 10.5; 2 pieces 10.5 x 7.5

12″ pillow form: 1 piece 12.5 x 12.5; 2 pieces 12.5 x 8.5

14″ pillow form:  1 piece 14.5 x 14.5; 2 pieces 14.5 x 9.5

16″ pillow form: 1 piece 16.5 x 16.5; 2 pieces 16.5 x 10.5

18″ pillow form: 1 piece 18.5 x 18.5; 2 pieces 18.5 x 11.5

20″ pillow form:  1 piece 20.5 x 20.5; 2 pieces 20.5 x 12.5

22″ pillow form: 1 piece 22.5 x 22.5; 2 pieces 22.5 x 13.5

24″ pillow form: 1 piece 24.5 x 24.5; 2 pieces 24.5 x 14.5

Step 1:  On each of the two shorter pieces hem one long edge by pressing under 1/4 of a inch twice and top stitching next to the edge.  Time saving tip:  If you haven’t learned to eyeball a 1/4 inch hem, try sewing a line through a single thickness of fabric 1/4″ from the edge and pressing on the thread line.  After you turn the second time the thread line will be on the inside and completely hidden.

Step 2: Place the larger square face up on a table.  Lay the two smaller pieces face down on top of it.  Lining up the raw edges around the outside and letting the hemmed edges overlap in the middle.  Stitch or serge all the way around the outside of the piece.  If you are serging this, using your regular machine to reinforce the stitching at the overlap, since this area will receive the most stress.  And use fray check on the corners to keep the stitches from unravelling.  If you do not have a serger, stitch with a straight stitch and then zigzag over the raw edges to prevent fraying.

Step 3:  Turn right side out, use a corner tool or chopstick to make crisp corners. Then stuff with your pillow form and fluff.

Linking UP: Skip To My Lou

Getting Ready for the First Day of School

I know some of you have already started school.  But for the rest of you, here’s a fun idea via pinterest. I’m gearing up for packing lunches and hope to add a few more fun items once in awhile.  I’ve put my brainstorm of ideas into my latest eBook, Homemade and Healthy to Go. It will be available for sale on August 15th, After I give all current Grocery Shrink Plus subscribers their free copy.  Membership has its perks and if it’s not the 13th of August yet, you can still subscribe to the menus and get your free copy too.

This next idea isn’t mine, so isn’t in the book. Isn’t it adorable?  And Smarties are at Dollar Tree :).


Here’s the original pin:

Click the photo to find the original post and instructions


Here’s my version.  Definitely not as cute without the red and white polka dots!  I loved her scallops so splurged on the 3.5 inch cutter below since Joann had them 40% off.  It was still $15 on sale so I will be using these circles everywhere.  On place labels; birthday gifts; Christmas Gifts; baby gifts; cupcake picks…my family is going to get sick of paper scallops.
My color printer is on the fritz, so I opted to cut the scallops out of scrap cardstock, and print just the circles.  Glue dots stuck everything together quickly.

Sprouted Wheat Flour Via Greek Yogurt Update

OOh, I made Greek Yogurt Saturday per my instructions here.  It worked better than ever!  I tried a faster method but still used the slow cooker for finishing.  To speed things up I poured the gallon of milk into a large stock pot and heated it on medium until it was 115 degrees. I used a candy thermometer to keep tabs on it.  Then I removed it from the heat and wisked in about 1/2 cup of plain yogurt until it was smooth.  Meanwhile I had my slow cooker plugged in on high to preheat.  I turned off the slow cooker and poured the warm milk mixture in.  I wrapped the lidded slow cooker in towels to insulate and left it all day.  Oops, then I forgot about it and left it all night. 

The next morning, I lined a colander with one layer of flour sack tea towel and placed it over a large bowl. I poured the yogurt in to drain and went to church.  When I got back, I had 1 1/2 quarts of creamy lovely Greek Yogurt and the rest of the gallon was clear, thick whey.   We are usin the whey for baking, and I’m trying to slow down on the yogurt….but drizzled with a tiny bit of agave, it’s like heaven.  How fast is too fast to eat an entire batch of Greek yogurt?

But I digress.  The real reason I am writing is to show you how easy it is to make sprouted wheat flour.  Fit Yummy Mummy recommends only eating wheat in sprouted forms.  That is a little expensive around here so I tried doing it myself.  It’s not an instant process, but not hard and takes very little hands on time.
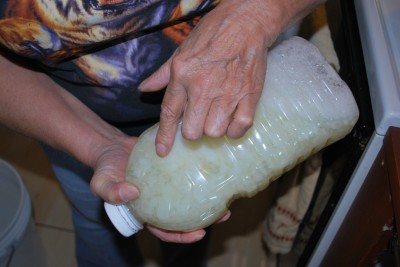
First, I soaked my grains in a large bowl of water for 8 hours.  I recommend starting with a bowl that will hold your wheat plus twice as much water. 

Once the wheat was soaked, I lined a colander with a tea towel and poured the soaked wheat in and rinsed.  Then I placed everything over a bowl to drip throughout the day without making a mess.

Twice a day for 3 days I rinsed through the towel and let it drip in the bowl.  After the 3rd day I could see a little activity on the business end of the seed. That meant it was ready.

There won’t actually be green shoots or anything, just a little sign of activity.  after that, I spread the wheat thinly onto cookies sheets and set it on the counter to dry.  The wheat that was only 1 layer thick dried after 24 hours.  The wheat that was too thickly layered took forever to dry!  I dried some of it in the oven at 170.  But I recommended only sprouting what will fit in the number of cookie sheets you have.

I was really worried about getting the wheat dry enough to grind to not mess up my machine. I found it was fairly easy to “feel” how dry the wheat was.  Dry wheat is light and clink clanks when sprinkled on the tray.  Damp wheat feels cold and heavy. 

I’m hoping to find time to make some sprouted wheat pitas and tortillas this evening.

Just so you know, too.  It took me a week to sprout the flour and I still haven’t baked with it.  So I’m not super-mom by any stretch.  Just taking small baby steps and fitting in the work when I can.  And yes, still feeling completely overwhelmed with life in general.

By the way, We are moving!  We close on our new house tomorrow!!!!  I’ll take some photos to post when we get possession.

Christmas Wreath Ornaments from Stacy Makes Cents

I’d like to welcome back Stacy, from Stacy Makes Cents.  She has a really quick Christmas craft to show us that is fun and appropriate for young children to do.

Hi – my name is Stacy , Queen of Mess. I am not blessed with craftiness, so I have to try really hard to be crafty. This project, however, is EASY. If I can do this, a 5 year old can do it. I’ve been making these ornaments for a few years and they are really fun to make – and they are a super easy project for children. Are you ready? Let’s mess craft!

 All you need are plastic rings, green pipe cleaners, and mini bows. That’s it. No glue included….and my hands are thankful because they have a love/hate relationship with my hot glue gun. If the hot glue comes out, so do the band-aids. The best part about this project? It’s CHEAP. If I’m anything, I’m frugal…..and this ornament is right up my alley. The green pipe cleaners and mini bows always come from The Dollar Tree.  The plastic rings come from……

 bottles you have at home….which are FREE! Is that exciting or what?! You can come across these rings pretty easily. They’re on soda bottles, medicine bottles, and some vitamin bottles. You just have to pay attention. If you want lots of rings, ask your friends and family to save them for you. You’d be surprised how quickly you can collect a ton of them. You’ll be able to make several different sized wreaths since most of these rings are in various sizes. The hardest part of this project is getting the plastic rings off without breaking them or losing your religion.

 Take a pipe cleaner and begin wrapping it tightly around the ring. The wire inside of the pipe cleaner makes it stay put, eliminating the need for glue – a huge plus for doing this project with your kids….or with an accident-prone girl named Stacy.

 This was a fairly large ring, so I used two pipe cleaners total. How many you use will depend on how tightly you wrap them.

 I always make sure to buy the bows that have the ties on them. That allows me to tie the bows on and eliminate the need for hot glue – are you sensing a theme here? Try to find the smallest bows you can. These are larger than I normally like, but they were the smallest ones I could find this year. The next time I find the smaller ones, I might buy all they have. I’m a bow hog.  Tie your bow onto the wreath in the position that you like. Just twist it on there like a twisty tie.

 Ta da! How cute is that?! I’m just tickled with myself. J You can make a lot of these very quickly. They are good for last minute gifts if you need them….or so I hear from OTHER PEOPLE. Because I would never leave any gifts till the last minute. *Cough*

 You might find several different types of pipe cleaners. Here you can see I made some with a plain type and some with glitter green. I like the glitter best – but my husband has banned glitter from our house – funny that his first child was a daughter…not sure how long that rule will stick.

You can give these in a box as a great homemade gift, or you can use them yourself. We used them on my mom’s tree this year. You can add a ribbon to tie them on the tree or you can just slide them on the tips of the branches. Sometimes I just stick mine on there, letting the sticky needles hold them on.

Merry Christmas!

Homemade Extracts

Watch this short video on how to make flavored extracts to use in cakes, cookies, frostings, salad dressings, and marinades.  They make great and inexpensive Chrsitmas gifts.

Liquid Laundry Soap

Yesterday, Stacy, our guest from Stacy Makes Cents, shared with us her favorite Powdered Laundry Soap Recipe.  This is the one she uses most becuase it is so easy and mess free to store.  But I know many of you interested in liquid laundry soap since it is already dissolved completely.  Stacy is back with us today to share her favorite Liquid Laundry Soap recipe.

Homemade Liquid Laundry Detergent

Meet Ruth and Rebecca. They’re expert laundry soap makers. Why are you seeing their photo? Well, because I tried making some laundry soap at home and it was a total dud. I mean, it was the duddiest of the duds. I got mad. This should be something I can do, right? Well, my soap chunked up and became almost un-stirrable. It was sad. I was sad. I was mostly mad though. I hate when I mess something up. So, I contacted Rebecca because I knew she made her own laundry detergent with her mom. I asked if I could come over and take photos to find out what I was doing wrong. Well, I wasn’t adding the same amounts of stuff that they were. Turns out that not everything you read on the internet is true. GASP! Sorry Al Gore. So, here is the story of the soap – the right way.

You need the same things to make this stuff as for the dry version, but you’ll add water…..lots and lots of water. You’re going to boil water like you’re having a baby folks. The amounts that I’m going to give you here are for half of a 5 gallon bucket – or 2 ½ gallons. Yes, I  graduated college with a math degree – not.

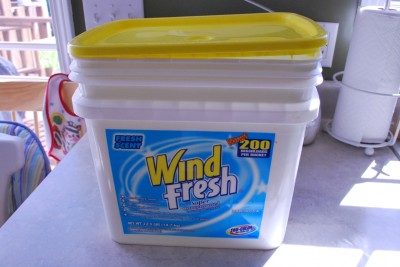
Where does one get a 5 gallon bucket? I’m sure you can buy one at Lowe’s, but maybe you have one just collecting dust somewhere in your garage – or maybe you in-laws have one gathering dust in their garage. Don’t go out and buy one until you ask around for a free one. You can even call restaurants and ask them if you can have their empty pickle bucket…..or maybe you can ask them to donate a few pickles too. I love pickles. Ruth used a big, white bucket with a nice handle – I use this jobber. I got it from Sam’s when I was buying this laundry detergent. That was before mom and I both determined that it was making our washer smell funny. Guess there was  a reason it was so cheap.

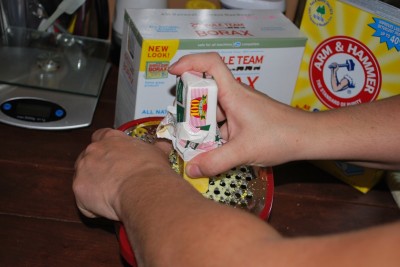
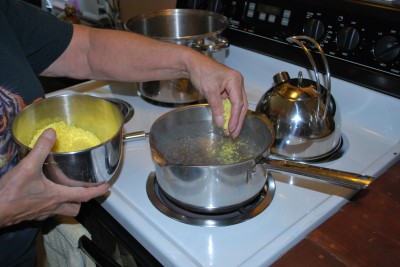
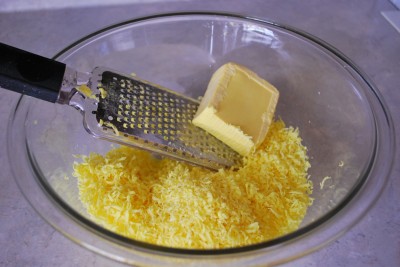
So, you need to grate your soap. About half a bar. It’s going to make your house smell really pretty. I feel pretty, oh so pretty! Oh, and try not to grate your knuckles like me. We don’t want bloody laundry detergent.  Doesn’t Rebecca have nice hands? She should be a hand model.

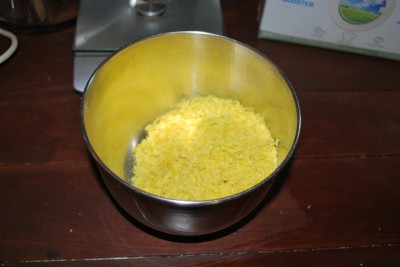
Here it is all done. It looks like yellow snow. Yikes. You know what they say about that. Don’t eat it!!!!

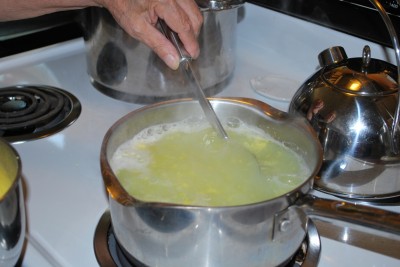
Now, you should have some hot water almost boiling on the stove. I guess I should have told you that earlier. Oops! Add your grated soap to the water a little at a time and stir well.

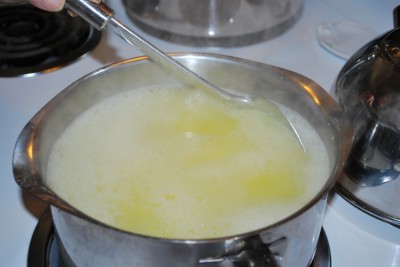
Now, this is important….listen up! Bring the mixture to a boil and stir until the soap is all melted. I didn’t do this part, so maybe that was part of my issue. You need the soap totally melted. Mine never got that way because I didn’t boil it. I just let it warm over low heat. Thanks for the tip, Ruth!

Here is it melted. It will look like yellow Kool-Aid. But please don’t drink it – unless you have a dirty mouth. Keep stirring and boiling until it’s all melted and no little clumps remain.

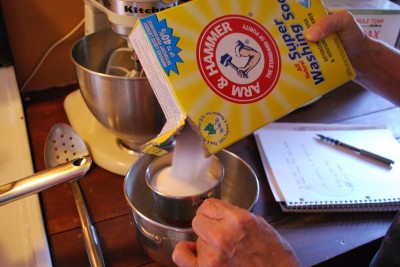
Grab a smallish bowl and add one cup of Washing Soda. Like I said yesterday, you can find this stuff at Food City and Kroger. If you know of somewhere else to find it, please let us know!

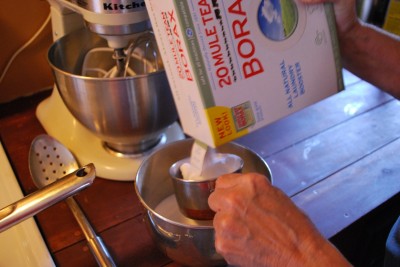
Now, add a cup of Borax to the Washing Soda. Mix well. If you have clumps of Borax, just use your hand to break them up. For some reason my Borax always clumps….but Ruth says her’s does too so I’m in good company.

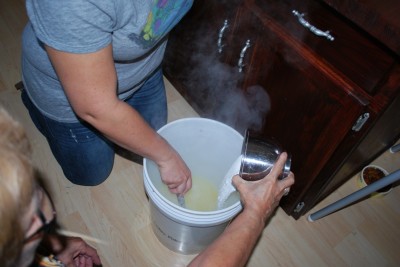
Pour your soap mixture into your big bucket. Add the dry mixture to the soap water and stir well until it starts to dissolve.

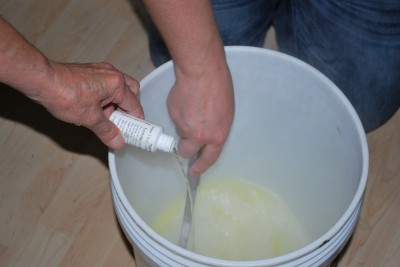
If you want your soap to smell all pretty and nice, then you can add ½ ounce of essential oil. They used Lemongrass Sage. It was delightful! I would love to smell like Lemongrass Sage all day……or Tootsie Rolls.

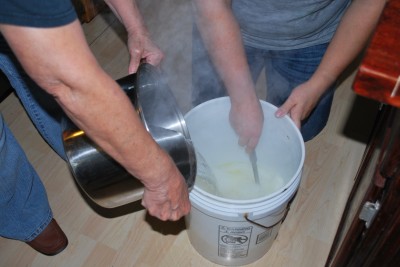
Oh, and I also should have told you to have a big pot of water simmering on the stove. When you’re done stirring your Borax and oil mixture then you can add this additional water. Stir until the dry ingredients are totally dissolved.


Now, top off your bucket – half full for this 5 gallon bucket – with warm water from the tap.

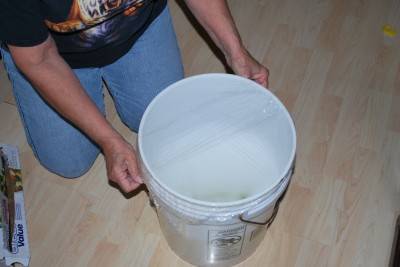
Ruth covered her bucket with Saran Wrap. But if your bucket has a lid, then you can do that. You’ll want to stir it a couple times over a 24 hour period – you won’t use it for 24 hours anyway.

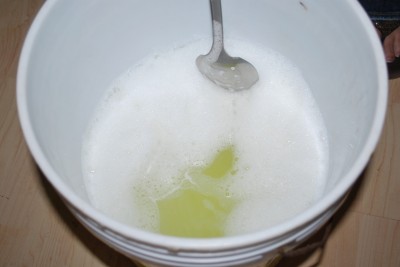
Now, Ruth says that this detergent is like soup – no two batches are the same. It could be that your detergent is really thick and chunky, like goop. Or it could be thick on top and thin on the bottom. That’s ok, because you’ll need to stir it each time before you use it. So, if you look at your detergent and think “this isn’t right” then congratulations! It’s right. Mine was terribly wrong because it had large chunks of soap that hadn’t dissolved and a large, LARGE layer of foam on top. I didn’t let my soap all melt. Don’t make my mistake. Don’t be stupid. Ruth says her detergent looks like snot. Yep, I’d agree with her. But guess what? It’s really pretty smelling snot!

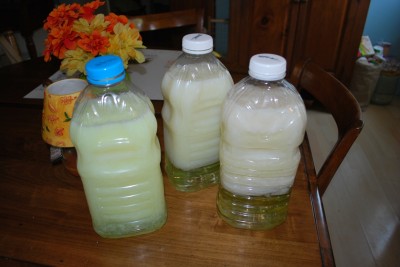
Now, after Ruth and Rebecca let their detergent sit for 24 hours, they divide it into smaller containers like this. That allows them to shake the bottle to incorporate it all together instead of stirring like I’ll do in my large bucket. You could also use an old, empty laundry bottle….but Ruth said that didn’t really work for them. See how it separates? That’s why you have to shake/stir before each load of laundry.  You’ll use 1/3 to ½ cup per load.

The cost difference for the liquid is about the same as for the dry version, about $.02-.05 per load….versus $.20+ for the store variations.

Like the dry version, this is also compatible with high-efficiency washers, easy on sensitive skin, and reportedly safe for cloth diapers.

Guess what? When I tried it the second time, it worked. Thanks Lord! I really didn’t want to make a million batches to get it right…….but I’ll probably use the dry version most of the time because of space issues.

Thank you Ruth and Rebecca for sharing your time with us and showing us how to be better home economists!

½ bar Fels Naptha, grated

1 cup Washing Soda

1 cup Borax

Homemade Powdered Laundry Soap

One of the most popular parts of my blog are the free homemade cleaning recipes.  And the #1 asked question is for a recipe for homemade laundry soap?  I used to make my own, but after a few months, it no longer satisfied me. I now buy Arm and Hammer brand powdered detergent from Wal-mart which is $.13 a load.   I’d feel bad giving you the recipe I didn’t like when I won’t use it myself.  So I found someone that loves to use homemade laundry soap and asked her to write about it here.    Stacy’s recipe is about $.05 a load–a little less than half of what I spend.

I’d like to introduce you to Stacy from Stacy Makes Cents.  She’s a wife and mom and she loves to save money!  Here’s her recipe for powedered laundry soap:

Homemade Powder Laundry Detergent

I had been wanting to make my own laundry detergent for a while….but being busy with Annie and other things kept me from it. However, when a reader asked me to write about the process, it was the shove that I needed – but in a good way, not like a shove off a cliff. The verdict? I really, really like it. It gets everything super clean and at a fraction of the cost of store-bought detergent. My mom and I have been using it and we’re both fans. I think when I empty out the last of my stash, I’ll only be using homemade detergent.  From what I can tell with my mad math skills and reading on the internet, this soap costs about $.05 per load, give or take. Most laundry detergents from the store cost around $.20+ per load. That’s a winner for me! Let’s get clean, y’all.

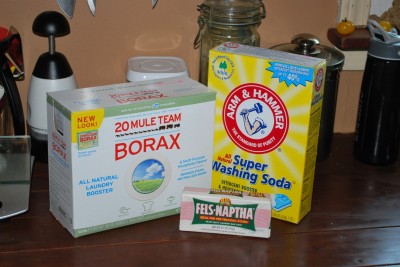
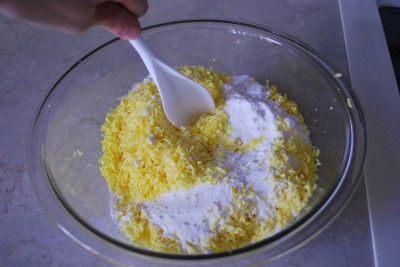
To make this powder detergent, you’ll need Washing Soda, Fels Naptha Bar Soap, and Borax. That’s it. (I’ve gotten a lot of feedback about the dangers of Borax;  Here’s I feel about Borax.  I personally believe it is safe for my family when used correctly, but you are free to use your own judgement on that.) All this stuff can be bought at Kroger. Strangely, the Fels Naptha Soap isn’t with the regular soap at my Kroger…..it’s with the mops. Tell me how THAT makes sense? The Arm and Hammer Washing Soda was on the top shelf near the Borax. A good source (thanks Rebecca!) tells me that these items can also be found at Food City. If you can’t find them at either store, you might be able to find them at a hardware store. Ivory soap can also be used, but Fels Naptha is really great for getting clothes clean. You can also use it as a pre-treater and just rub the soap right on the stain. Nice!

Now, you need to grate your soap. I used my microplane. Somehow when I bought it, I never thought I’d be using it to grate soap. Cheese, yes; soap, no. But it worked great! If you don’t have a microplane grater, you can use any regular type of grater. I won’t judge you because you don’t have the most awesome grater of all time in your kitchen. I’m not here to point fingers. Oh, and this soap smells really good so when you’re done grating you’ll smell like you just had a shower. You’ll need to grate the whole bar – your arms will get tired. You’ve worked out today, baby!

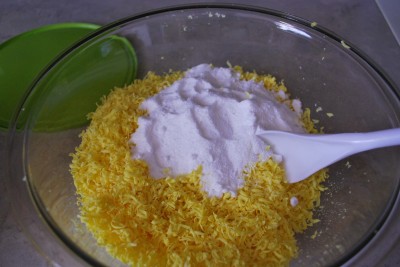
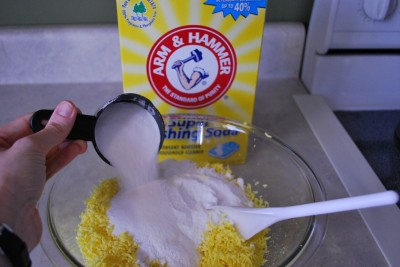
Add 1 cup Borax. Borax is going to give your detergent that little extra stain fighting power. It can be used interchangeably with Oxy-Clean but at a fraction of the cost. Have I mentioned that I just love Borax?

Add 1 cup of washing soda. I read on several forums that some people just use baking soda, but then I also read that it doesn’t work quite as well. We don’t want to bake our laundry. Cakes, yes; socks, no.

Time to mix it up. This isn’t a time to sit down on the job. Unless you want to sit down while you stir – that’s cool. You really need to stir this puppy.

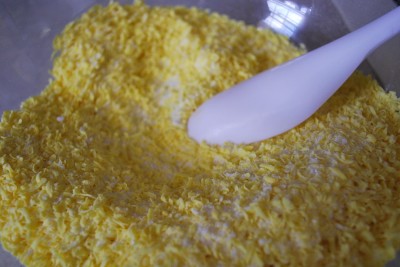
You’re supposed to stir it until it’s well incorporated and looks like powder. This is what I had after what felt like an eternity of stirring – or maybe it was only like two minutes. Don’t judge me.

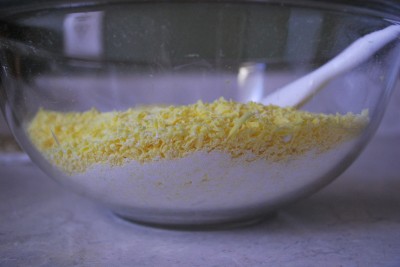
I wasn’t happy with it because you can see all the white powder on the bottom. Hmmmmmm. I’m a perfectionist. So, I broke out…….

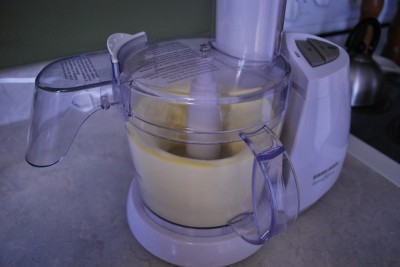
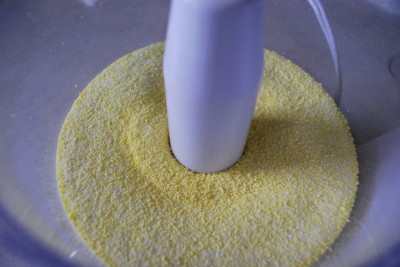
the food processor. Yes, I use mine daily. It’s up in my top five kitchen tools. I poured my soap in there and let it mix away. So much for my workout. You know, I never thought I’d use my kitchen tools to make soap – but I like to adapt. Wonder if Barry would mind if I used his workshop tools in my kitchen. Survival of the fittest.

This is more like it! Powder! Isn’t it pretty? And it smells so nice and fresh. But here’s the funny part – it won’t make your laundry smell like the soap. Your clothes will come out smelling just non-dirty. They’ll be clean, but they won’t smell like Tide. If you NEED your clothes to smell pretty, then just sock a dryer sheet in the dryer with them. Me, I can just settle for not smelling like sour milk.

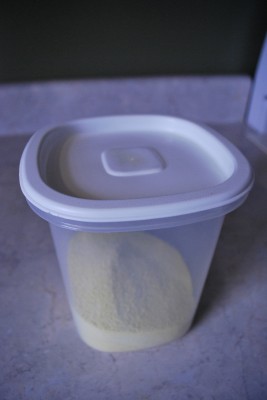
I stored mine in a Tupperware container. You’ll use two tablespoons per load. That’s it. Don’t overdo it! I actually put a tablespoon in mine to help. Next time I think I’ll just use my food processor to make the whole batch.

When you’re ready to wash, add your powdered detergent to the water before you put the clothes in. That will assure that it will dissolve. And don’t expect bubbles. This stuff doesn’t bubble, but it does clean.   So, a few handy things to know:

  1. This will also work in HE Washers
  2. I use it on Annie’s laundry without any sensitive skin problems….and I read online that other people do this successfully as well.
  3. It’s so FAST! I made my batch in like 5 minutes. I love fast, frugal things!

So, I’ve tackled that for you. If you’ve been too scared to do it now you don’t need to be! I’m a good source for trying things first to make all the mistakes. You’re welcome.

We interrupt this blog…

. . . To remind you that Valentine’s Day is coming!!!  But don’t worry, you don’t have to spend a fortune to make the day special.  Here are some recipes, tutorials and activity ideas to get your creative juices flowing. 

Click the photos to go to the tutorials

Gorgeous Paper Flowers even a Child Can Make from Divine Party Concepts.

Look at this Adorable Tic tac toe game tutorial from Roots and Wings!

What litle girl wouldn't squeal with delight to find one of these hairclips wrapped up in her lunch on Valentine's Day? Thank you Creations by Kara for this great tutorial.

We ate our last authentic thin mint today and thought we would have to wait until next year for more until 101 Cookbooks came through with this from scratch recipe. Yay! But don't worry cute little girlscout friend, I will still buy from you.

Imagine your thin mints cut with a heart cutter and dipped only half in chocoate.   Adorable! 

Eat Good 4 Life has this amazing Pretzel tutorial. They have a natural heart shape, even more so with a good pinch at the bottom. I'm thinking these would make a fantastic Valentine morning breakfast.

Family Fun has done it agian. I rarely buy hotdogs but picked some Turkey dogs up on the $.65 special this week for our Valentine lunch. My kids will be so excited!


I've always wanted to try making English Muffins. I can't think of a better time to try! Thanks again Family Fun.


These look fast and easy. I think my mom has some mini canes leftover from our Christmas celebration.

Here's an adorable basket from Jennifer Meyer. I plan to have the kids make their own smaller versions in the morning and I will fill them with little treats to put by their place at lunch.

Stop reading here Darren!  For celebrating with Daddy, I’d like to set the dinner table with the paper roses the kids have made earlier in the day.  We are making heart shaped mini meatloaves and mashed potatoes with steamed green beans, lettuce salad, and strawberry pretzel salad for dinner, with heart shaped cheddar biscuits on the side.    It is our family club night at church so we will be home late.  I’d love to have my bedroom clean by Valentine’s day so I can put fresh sheets, rose petals, and wrapped chocolates on the bed, but I’ll try not to be too disappointed if I don’t get it all done.  And thankfully Darren is appreciative even if only a small amount gets accomplished.

Christmas Gift Tutorials 3

It’s not too late to whip up these lovely things for the holidays.

1.  Petal Pillow:  http://www.cluckclucksew.com/2008/09/petal-pillow-tutorial.html

2:  Gathered Cluth:  http://noodleheads.blogspot.com/2010/04/gathered-clutch-tutorial.html

3.  Ruffly Headband:  http://heart-of-light.blogspot.com/2009/06/ruffly-headband-tutorial.html  

4.  Knitted ear warmer:  http://imtopsyturvy.com/index.php/knit-ear-warmer-with-crochet-flower/