Heather’s Bedroom Birthday Surprise Part 4

Day 3 was brutal.  We went to church in the morning, came home for a fast lunch of creamy tortilla soup from the slow cooker.  And then to work! Normally we would nap, study and do other sacred things on this day. But my ox was in the ditch to make our deadline before Heather’s return.

The plan was to give the ceiling a quick sanding and then prime it in time for a nap and off to church in the evening.  Bwa ha ha ha.  What was I thinking?

I sanded down the ceiling from the first mudding job and saw that it need another coat of mud.  I’m not a fan of working with my arms overhead.  My shoulders muscles were getting really pinched feeling, but I found out I could keep going if I kept icy hot on them.

Darren was frustrated that I started this project even though our kitchen is not finished.  My excuse was: I wasn’t about to let some contract workers who couldn’t meet a deadline steal my daughter’s birthday surprise.  That is just not right.  My Mama Bear was raging.  So I said some stuff I shouldn’t have, and picked a fight with Darren when he was still in Sunday mode–resting. Did he not get the memo? This week was not going to be fun, but the look on our little girl’s face would be worth it.

Somehow he still found it in his heart to help me in the afternoon.  He started to tear up our family room floor which we planned to reuse in Heather’s room for a no-cost option.  We had already planned to replace that area as part of the kitchen remodel.  Only, the tongues were glued to the grooves and there’s no way to uninstall it without destroying each board.  He called the previous home owner just to make sure.  Things were not looking good.

I said, “Let’s buy her a laminate wood floor.”  He said, “That will be $500.”  I rolled my eyes.  Then got out my tape measure.  I found the cheapest laminate and underlayment I could—It was $450.  He was right.  Phooey!  I could paint the underlayment with porch paint….only I’d have to buy the paint.  And it would need an extra day to dry.  I could put down a paper bag floor with the leftover supplies I had from our dining room–only that needed 3 days to dry. What to do?

DSC_1178

DSC_1180

I took a break from the ceiling and sanded, deglossed and spray painted Heather’s bed and desk. I underestimated how much paint I needed and since rain was on it’s way, made a trip to the hardware store for more.  I looked fabulous:

DSC_1162

While at the store I also purchase a wooden curtain rod, finials and rod holders ($50!) for her window.  And shopped for new drawer pulls.  With all the shopping I did ahead of time, I hadn’t thought of everything and it was adding up.  Her desk is not good furniture and buying 2 cans of spray paint, 1 can of primer, and 1 bottle of deglosser was $20, plus new hardware would be between $12 and $20 more —I needed time to think about it.  Did I really want to put that much money into junk furniture?  I left without hardware.

DSC_1158

My mom showed up late afternoon.  Darren abandoned the frustrating floor to help her with the ceiling. Both of them are way better at mudding than I am and several hours later the ceiling had a new coat of mud.

It still needed to dry and then be sanded down again.  But it was way past bedtime.  We were officially behind schedule.  I showered and made peace with my husband.  We both agreed that we would hire the ceiling mudding for our big kitchen project.  I went to sleep praying for strength to be nice during the rest of the project and vowed to remember that people are more important than projects.


Heather’s Bedroom Birthday Surprise Day 3

The goal for Day 3 was to peel the popcorn off the ceiling, then remove the carpet and baseboards.  I woke up to the sounds of Eden’s tree crew in my yard!  Hooray!  It was going to be an even better day than I thought. They had 2 climbers.  One was the best climber in the midwest (not pictured.)  This second guy was really good too.  And hilarious.  The first guy was having promotional pictures taken while he worked on our property.  The second guy said, “Hey, I want my picture taken too.  I want to be famous.”

DSC_1155

Another crew member said, “Can’t, You’re too pretty.  We are about tree service here and if we put your picture on the flyer, girls would be calling for dates.  We’re not that kind of company.”  So here you go on my blog.  Now you can be semi-famous–second tree climber.  
DSC_1153 DSC_1154

They took down 2 huge walnut trees growing way too close to the house.  The climber would cut off 3 foot sections.  Tie it off and then slowly lower it down to the crew on the ground.  This made sure they didn’t crack the driveway just dropping stuff and to make sure nothing hit the roof.  When the logs were on the ground, many of them were hollow.  The tree was not healthy and I’m glad we didn’t put off the project any longer.
DSC_1140

But back to Heather’s room.  Heidi was faithful to work with me until the project was done.  What a great big sister!

DSC_1143 DSC_1144 DSC_1145


Darren got into the action a little too.

DSC_1150

We finished in just about an hour–hooray!  So after lunch, we worked on mudding and patching the divets.  I was feeling really great about things at this point.  Since we weren’t scheduled to mud until tomorrow…but ahem, patching and sanding is a LOOOONG process, especially for the unskilled.  Time would tell that if we hadn’t started patching early, we would be too far behind to make our deadline.  Lesson for the day: rest when the project is done.  If there’s still time  keep plugging ahead.

Heather’s Bedroom Birthday Surprise Part 2

We said goodbye to Heather at 5:00 pm on Friday.  As soon as the car was out of sight, we started working.  I was hoping that Heather didn’t forget anything and decide to come back for it—not sure what story I would have told, lol.  This is My daughter Heidi with her friend JJ and little sister Bea (names changed to protect the girls.)  What a pretty crew!

DSC_1097

Bea is one of Heather’s closest friends.  She called not long after Heather left to see if Heather could walk down the street to play.  I told her the sad news that Heather would be out of town for the week, and then told her why.  She said, “Why didn’t you tell me!!!! This is a huge surprise.  If someone did this for me, I would die!”  Then she rushed over with big sister support to lend a hand.

Here’s Heather’s room before:


DSC_1116 DSC_1118
DSC_1101
DSC_1099

It’s a big room–15 x 11.5 feet.  With a small walk in closet (door above) for storage and a 6 foot traditional hallway closet leading into the room where Heather puts her clothes.

DSC_1108


Here’s a close up of the toy eating orange shag.  In it’s defense, it is super soft and I’m sure it’s super cool.  Only I’m not cool enough to appreciate it….
DSC_1107


Bea assured me it IS super cool.  She said, “You’re getting rid of this carpet?!!!!! I LOVE this carpet.  Can I have it for MY room?”  Sorry, Bea, but it fell apart in the removal process—it is 43 years old you know.

The pretty crew had Heather’s room packed up and empty in 30 minutes.

DSC_1134 DSC_1135 DSC_1136

We stacked all the stuff across the hall in a corner of brother Caleb’s room.  He was not thrilled.  It’s only for 6 days, Caleb.  Deep breath.  (Yep his room is original to the house too.  Red shag and check out that wall paper.  He loved it when we first moved in, but is ready for a change too. Only I can’t talk about that right now….too many projects going on.)

DSC_1127

Darren ran out to get McDonalds, because I had hives already just thinking about the next 6 days.  I spent the rest of the evening cutting, hemming, ruffling, pinning and sewing on ruffles for Heather’s duvet cover.  I finally called it quits at midnight.  That’s a lot of ruffles….
DSC_1131


When I’m done, it will look something like this–only in ombre:

Duvet originally from Urban Outfitters, but discontinued.

Duvet originally from Urban Outfitters, but discontinued.

That’s the end of the short day 1.  Tomorrow I’ll show you day 2.

Heather’s Bedroom Birthday Surprise Part 1

We’ve  lived in our gigantic house that needs lots of love for 18 months now.  The first room we did was our oldest daughter’s bedroom.  She is 13 and will graduate High School in 5 years.  It could be 5 years before we get to every room in our home–so we wanted her to be able to enjoy hers as long as possible.

You can imagine how our second daughter felt about all this.  She was a great sport, but it was a little hard to see Heidi’s beautiful new room and to be living in an orange shag paradise for who knows how long. About a year ago, Heidi and I started planning a huge birthday surprise for Heather.  We started a pinterest board for her and encouraged her to pin room inspiration ideas that she loved.

She pinned these:

Whew, that’s a pretty big mix of styles.  And if pressed, Heather doesn’t like to choose just one.  So Heidi and I decided we would try to surprise her, choosing from the elements she loves.  Here’s what we decided:

1.  Curvy daybed with lots of pillows in bright fabrics

2.  Turquoise blue walls (we are going VERY pale to let the other brighter elements in the room take center stage)

3.  Hardwood floors–her previous shag rug ate small toys.  I also want to add a fun area rug–so far it’s sold out and won’t make it here in time for our big reveal :(.

4.  Paint her desk in a fun accent color (we chose coral pink.)

5.  A bed drape with bed crown

6.  A huge furry beanbag

7.  A gallery art wall

8.  A reading corner with hula hoop tent

9.  White trim to make the light blue walls pop

Darren’s mom came and picked Heather up last Friday to spend the week at the farm.  All Heather knows is that it’s her turn with Grandma.  And I don’t think she suspects much even though I’ve had to sew on things while she was home last week.  We have 6 days to complete the transformation–and there’s no HGTV crew here to make the magic happen.

Come back tomorrow to see our day 1 progress.

Homemade Canvas Wall Art

This is not a new idea.  It’s been floating around Pinterest for awhile.  But I tried it and thought I’d tell you what I thought.

I purchased pdf printable files from etsy here. They were $3.50 for each design and I purchased 5 different designs.

DSC_0301

This one is for my girls:  I chose the gray one for Heidi and the brown for Heather.

il_fullxfull.427557840_6l69

I also got this one for free.  There are lots of different color options over at her site.

16x20LOVEABOUTHOMEweb-1

After I got all the prints I wanted I uploaded them to the Costco online photo printer.  I chose the 16×20 poster print option (not the poster board option) for $5.99 each. I made a big mistake.  It’s automatically set to color correct which does NOT correct colors.  It makes them all wonky.  You have to un-click that before completing the order or it won’t print right.  They were kind and reprinted my order for free, but it was a hassle since I didn’t look at the prints until I got home and had to go back and stress about it.

Once I got the prints correct I headed out to Hobby Lobby.   I bought their bargain priced 16×20 stretched canvas that come 2 to a package.  I can’t remember the exact price but I think it is $6 before coupon. (But if you were planning ahead you could just grab a pack each time you went in and use a 40% off coupon on each.  Since these are already so low priced, they aren’t included when the other stretched canvases go on sale.)  I also grabbed a small bottle of craft paint to match each poster; and a bottle of matte modge podge.  Matt makes it look more like canvas.

So here’s a quick list of what you’ll need:

Drop cloth

Paint brush

Modge Podge

Stretched Canvas

Art Print

1.  First paint the edges of the canvas to match your print and let it dry.
DSC_0297

DSC_0298

DSC_0303

2.  Then spread a thin layer of modge podge evenly over the front of the canvas.

Center your print on top and smooth it down so there are no bubbles.  Start in the center and work out. Let it dry. The print will look shiny and not at all like canvas.  You will wonder if you should have just spent the extra money to get your poster printed on canvas in the first place.  Hold on–it gets better.

3.  Use a bristle brush to brush modge podge over the whole top of the print.  At this point you will think you messed up. The white of the modge podge will look splotchy and the brush marks will show.  But the print won’t smear.

DSC_0317

4.  Let it dry and cover with a second coat.  Let this one dry too.  The brush marks will give texture to the top of the print and stay after drying.  This makes it look more authentic like canvas, though the texture is not the same.

Then they are ready to hang:

DSC_0346
DSC_0341

DSC_0348 DSC_0327

The colors came out wonky in the above picture but I wanted to show you that I picked prints to coordinate with the Boy’s bath rug.  Each boy has his own color and a towel to match.  It’s a tiny room, but big enough for the boys :).

Heather’s print isn’t up yet.  She doesn’t read my blog, so I can tell you that we are planning a HUGE surprise for her 10th birthday.  Her room is still original 1972 green and orange shag carpet with walls to match.  No art, no window treatments….You  get the idea.  In August and we are sending her to the farm for the week while we surprise her by redoing every inch of her room.  I’m planning the project while we work on the kitchen, so it feels a little crazy and I’m hoping that we get the kitchen done on time so it will all work out.  Heidi is helping me pull everything together.  We have been buying things all year and saving them in a corner of my office ready to put it all together.  It will be one of the fastest room redos. I’ve done and I’m afraid we will feel like we are trying to pull off a HGTV style remodel without any staff.


How We Budgeted Our Remodel

From periodextensions.com.au

From periodextensions.com.au

When we thought about our kitchen and master bedroom remodel, we thought about how much we were willing to spend not how much we “ought” to spend.  We committed to spending cash and not putting anything on credit cards (made easier since we don’t have any :).)

We had to wait a year for our previous home to finally sell and when all was said and done we had about $42,000 to work with.  Typical remodels of this magnitude cost $100,000.  We knew that meant we would be doing more of the work ourselves and bargain shopping for materials.

Here's a drawing of what it will look like after the remodel.

Even though we got it at an amazing price, our home is in an affluent neighborhood. So whatever we did we wanted to be quality.  Real stone counters, real wood floors.  But that didn’t mean we decided to pay high end prices for our high end stuff.

wpid-IMAG1635.jpg

To help make budgeting easier, I opened a clean spreadsheet in excel and brainstormed a list of things that we would have to spend money on.  Then I researched via the internet what average things cost and dropped a number in.

Kitchen budget 2013-06-23_1954

Here’s an example.  The center column with numbers in it is stuff that comes out of the $42,000.  The stuff on the right are things we can do much later as we save up money for it.  The blank lines are for things that we will do ourselves or are budgeted in a lump with another line.  And the negative number for tearing out cabinets means I got someone to pay me for the privilege of tearing them out and taking them home.  (Slick, I know ;).)

This is just a snapshot of the whole project.  We have other rooms included in our $42,000 budget.  The bottom of the middle column is set to automatically sum so I can see if we are on budget or not.  As soon as we spend something, I plug that real number in to make the budget more accurate. As always, my goal is to spend less than budgeted to make some room for extras at the end.

By budgeting this way, I could see right away that either my wood look tile floors or gas range were going to have to go–possibly both. (We found a Cragislist range and traded in the tile for real wood that can go through the whole main floor of the house.) I also saw that things like drapes, area rugs, and furniture might be years into my future, or come out of extra money that I earn by selling stuff or spending less on other budgeted remodel items.

How about you?  Have you planned out a project big or small?  How did you do it?


How We Planned Our Remodel

1.  Filled a pinterest board with all sorts of ideas and dreams for inspiration

This one has the doorway on the opposite side, but the colors and style are more like what I'm hoping for our space.</p><br /><br />
<p>From Traditional Home: http://www.traditionalhome.com/design_decorating/kitchens/kitchen-update-pay-back_ss16.html

2.  Decided on a design and layout.  Hired an architect to draw the plans and an engineer to double check his work to make sure none of the walls that we were taking down were load bearing.  This drawing was made by Cabinet Giant.

Dining Wall After

3.  Gathered price information on our appliances; plumbing; electrical; drywall; flooring; cabinets etc.  Reworked our plan when we figured out our first flooring choice was way too expensive. Our first cabinet bid from Lowe’s was $30,000!  Then we went to CabinetGiant.com and did basically the same design for $7,000.  We had used their cabinets before so knew the quality and weren’t nervous about that.  Also, I dreamed of an $8,000 6 burner viking range.  I almost scrapped that dream until I found a used one on Craigslist for a fraction of the price. I <3 Craigslist!

Viking Range

4.  Brainstormed a work list of all the tasks big and small to complete the remodel and then put them in chronological order.  This included calling around for pricing and ordering a dumpster. Then managing all the demolition tasks into the one week we could keep it before being charged extra time fees.

DSC_0590

5.  Assigned a person to each work task.  I was the most available as far as time goes and the least skilled.  While my husband is most skilled but least available (since he works full time; runs our Cub Scout program; is Caleb’s camping buddy; and works on the security force at church.) He taught me some of the skills I lacked (Like how to use a sawzall.) So I could do more things.  But some things I just wasn’t strong enough for. Then we assigned the jobs that we were going to hire out.

DSC_0512

6.  Then I divided my list into weeks.   I put way less into a week than I thought we could get done, so that we would actually get it done, lol.  I found in our previous remodels that if I pack the time too tightly I get discouraged and stop working all together.  Plus, I still needed to keep our family running smoothly with laundry, meals, kid activities, my jobs online, and things relatively clean.  Also, Darren and I are in and out of town some this summer at alternating weeks while we take kids to camp and work there.  Those weeks I left open so the remaining parent could just handle kids without the added stress of working on the remodel.

DSC_0562

7.  Once we knew the dates things were happening, I knew when to order flooring (which was when it goes on sale :).) And when to schedule our hired workers to come.

I still need to order cabinets!  That’s stressing me a little.  I found a mistake in my measurements which means my 24″ home organizing center won’t fit.  It will save us $600 on our cabinets though.  I just need to find a new place to house it and will look for a craigslist armoire to take it’s place.  With so many walls gone I’m just not sure where to put it now.


Here’s a pdf to look at of my plan. I removed some of the dates for our protection.

Work List for Remodel

I was going to talk about budgeting here too, but this is already so long, I’ll save it for the next post.


Kitchen Remodel Update

If you missed reading all the comments on the last post–go do it now.  They have so many good ideas!

I wish I had something gorgeous to show you, but we are taking this remodel slowly.  We are on schedule, but I purposefully made it a long one, so I could still keep up with laundry, the children, and housework (somewhat) while we did quite a bit ourselves.

Here are some photos of before, during and current.

Dining room before and after

The first before and After of my dining room. I can’t believe I tore this room up! And only a few months after I finished it. But the after is going to be so much more functional for us.

Here's a current view of our dining room window.  (The only part of this remodel that makes me sad is I just painted this room and added molding.  This was before we knew that tearing down walls was possible.

Here’s a before view with the hutches in place.

Dining room ceiling down

I used a garden sprayer to spray the popcorn ceiling and then scraped it onto the paper floor. The paper floor never adhered to the vinyl well, so I was able to roll it up in one sheet and carry the mess out.

  DSC_0658

Paper floor all rolled up.  Buh bye!

Paper floor all rolled up. Buh bye! At this point I hollered for Heidi to help me carry it out. She also helped roll it so it wouldn’t tear down the middle.

Laundry Wall Down

When the floor was cleaned up, Darren sawzalled the laundry room down, just cutting through the nails and preserving the wood. We reused all the wood to frame the new wall and arched door.

Arched Door

Here’s the arched door all framed in.

Kitchen before

Here’s a view of our old kitchen before we started tearing it down.

Here's another before from a different angle

Here’s another before from a different angle

Pantry studs

Here’s a view of the pantry studs left in the opening and plumbing sticking up from our old sink area. It was time to call for professionals to move the plumbing and gas lines that were in the walls.

Kitchen Cabinets Out
On the other side of the room, the kitchen cabinets and peninsula are out. And I took the wallpaper down last Saturday.

Pantry studs gone

The plumbing and gas line are gone.  The vinyl floor is gone too. We’ll be taking up the residual glue this week. And to the right you can see stacks of boxes. That’s the new hand scraped wood floor getting used to the climate of the house. We still need to do electrical, plumbing, drywall and paint before it can go down. The bucket in the middle is to catch the drips from the second floor air conditioner.  The plumber will reroute that when he comes back.

Just for fun here’s a before and current of the view from the formal living room.

DSC_0239DSC_0758
This is a HUGE project.  We are moving walls, relocating pluming and electrical.  We thought about it and planned for months before digging in.  I’ll share how we planned it a little later this week.  And how we know if we are on schedule–and how we stay on budget, which is the hardest part of all.

Kitchen Update

My kitchen currently looks like this.  This is the new wall brought into the space two feet further than before.  There is an arched doorway framed across from the washing machine.  I plan to hang a cute curtain behind the opening for times when guests are around.  But I do so much laundry it will be a blessing to have that doorway open and instantly accessible most of the time.

I have more photos on my good camera (this one is a cellphone pic) but I won’t be able to get to it for a week.  So for now this is it.  Except for some sneak peaks from where we are right now :).
image

I don’t know why I’m always amazed at how easy it is to keep a space clean when there’s not much in it.  Makes a person think…
image

image

image

Ooh and we had new front doors installed with…..WINDOWS!
image

P.S. I woke up my blog over at Centsably Fit in time for Holly’s Summer Transformation Challenge.  Who’s joining that with me? I’ll be posting measurements and starting pics tomorrow if I can find a scale around here somewhere…


3 Ingredient Slow Cooker Biscuits and Gravy

This recipe is a man pleaser.  It’s not Fit Yummy Mummy approved or Trim Healthy Mama approved.  It’s not gluten free or dairy free–it’s just yummy.  It’s easy–so easy a child could make it and get tons of compliments.  And if you are hosting an early morning breakfast rehearsal for High School men, definitely bring it.  Even if the center biscuits are not quite done, they will eat it all and one of them will lick the pan and then ask you to bring a double batch next time.

3 ingredient Slow Cooked Biscuits and Gravy


3 Ingredient Slow Cooker Biscuits and Gravy

Ingredients

  • 1 lb breakfast sausage (in a bulk log)
  • 2 cans refrigerator biscuits (I used the small ones that come 10 to a can)
  • 2 cans cream of mushroom soup

Instructions

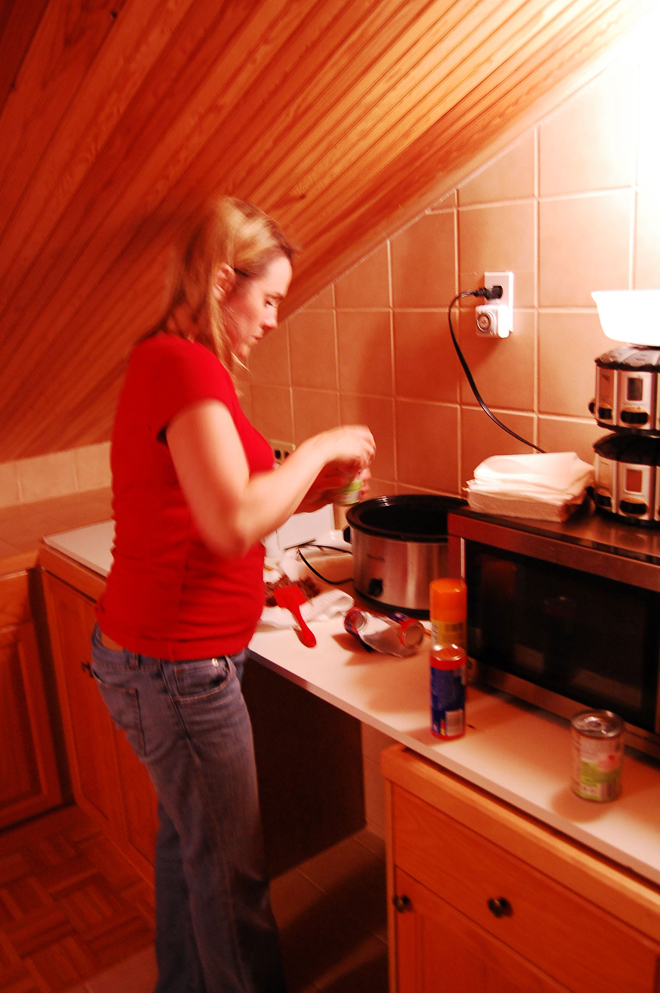
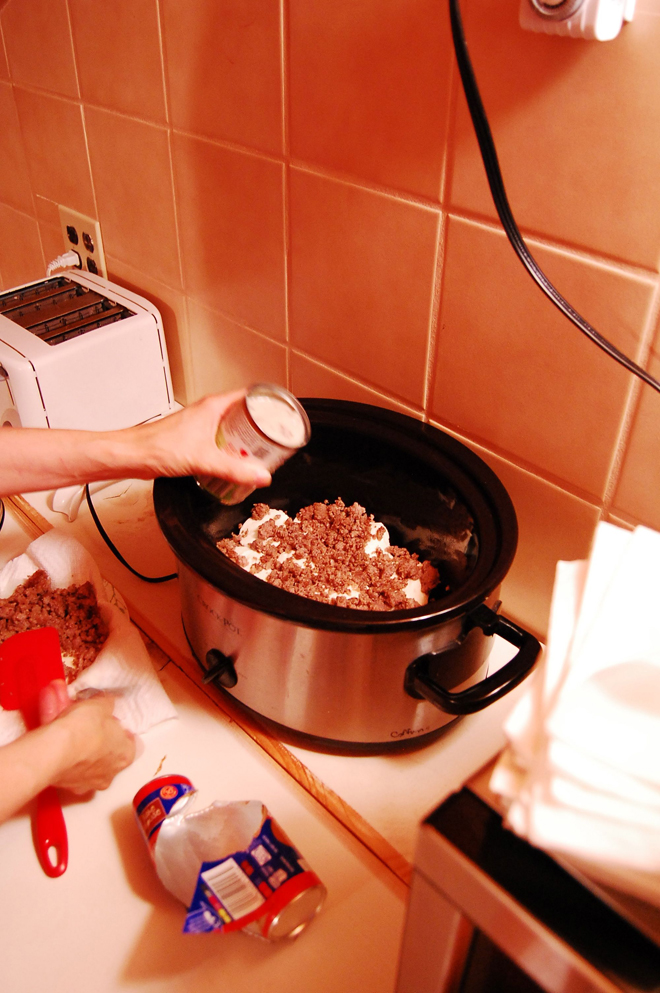
  1. Brown and drain the sausage
  2. Layer 1 can of biscuits in the bottom of a greased slow cooker.
  3. Top with half the sausage and then 1 can of cream of mushroom soup.
  4. Repeat the layers once more.
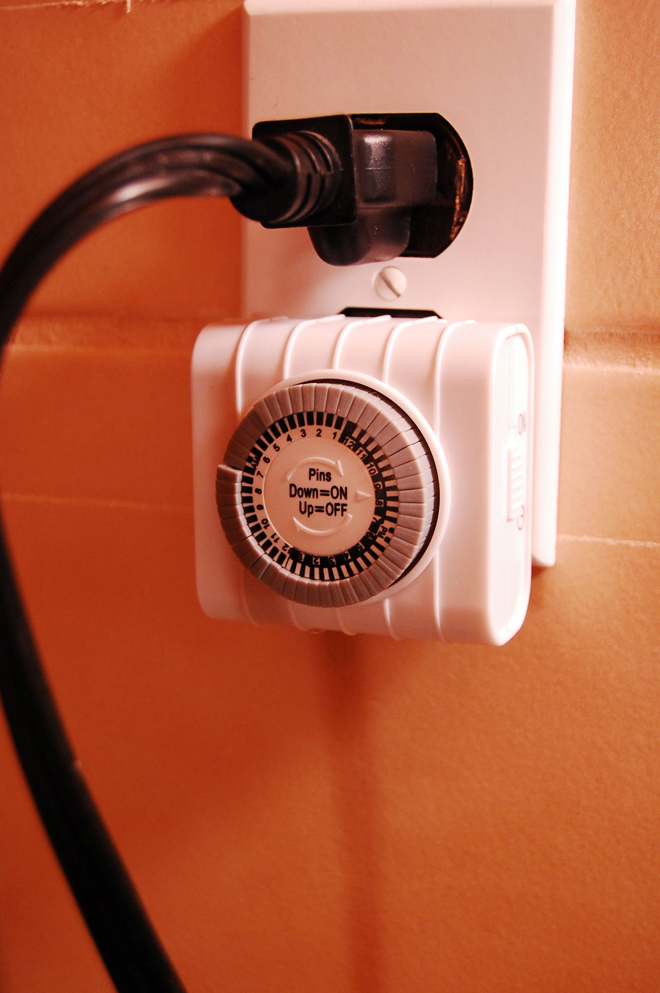
  5. Set on time delay to cook on high for 2 hours just before time to serve breakfast.
  6. Or 4 hours on low. (An outlet timer works great for this.)
https://www.groceryshrink.com/3-ingredient-slow-cooker-biscuits-and-gravy/

I anticipate the most frequent question asked will be, Is it safe to leave a slow cooker out on the counter this long before cooking?  I’m not sure. We did it–twice.  And no one got sick.  I think it would be more dangerous if it sat a long time AFTER cooking since the cooking process will kill any bacteria.

If the thought bothers you, you can keep it in the fridge and get up a few hours early to turn on the cooker and go back to bed.  (Allow an extra hour for a cold crock.)  Or you can bake this in the oven at 350 for 45 minutes or until golden.

The first time I made this, I used homemade biscuit dough and homemade gravy made with milk and flour and baked it in the oven.  It was wonderful too.  I haven’t tried the slow cooker method with homemade gravy.  With the 2 hour cooking time, it might make it through without curdling.  If you try it, let me know.  And now some photos my hubby took of the process.

3 ingredient biscutis and gravy 7
3 ingredient biscuits and gravy 8 3 ingredient biscuits and gravy 10

3 ingredient biscuits and gravy outlet timer