Update on the Zone Cleaning for Kids

We’re two thirds through the summer so I feel like I can safely update on how our zone cleaning is going.  If you missed the first post describing our system, find it here. First of all, it’s still going!  That’s a win in my book since most of my efforts at chore charts have ended by the 2nd week.

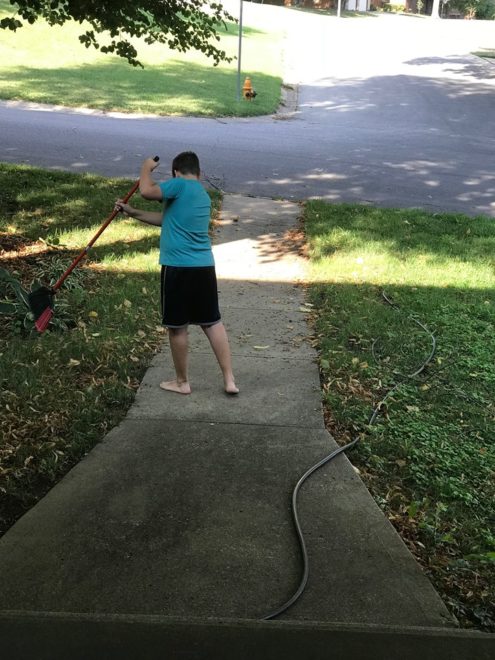
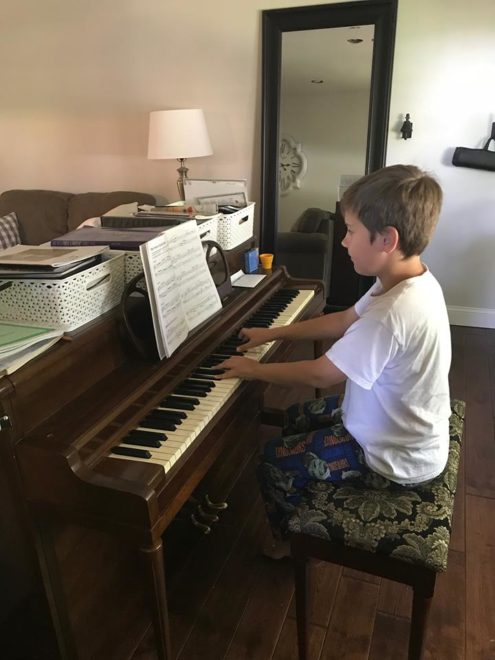
Here are a few photos of zones in action:
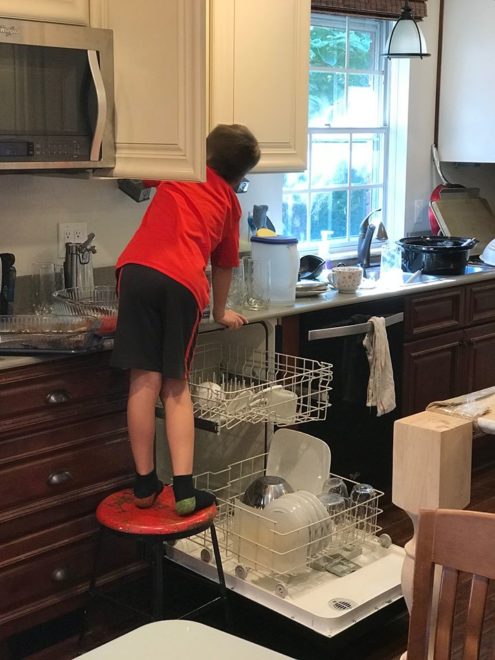
I show these photos as they are because I want to be transparent that our house isn’t magazine ready at all times just because we’re doing zone cleaning.  It’s not perfect for sure, illustrated by the boy practicing the piano in pajamas (and my clutter all over) even though getting dressed is higher up on his list.  I’m focusing on the fact that the boy is PRACTICING.  The amount of music progress we’ve made since the charts came out is staggering and worth the whole effort by itself.

So what’s working?

  1.  The fact that we have a consistent plan. The boys are thriving on the consistency and are helping to hold each other accountable in a mostly good natured way.
  2. I have passcodes on all the devices (except for the shared chrome book they use for school.)  Even the ones they bought with their own money.  So they have to bring it to me before they can get on it, which means I have the chance to ask if they are done with their zones.
  3. The boys are getting a lot of pride out of their zones. Check out this facebook post:
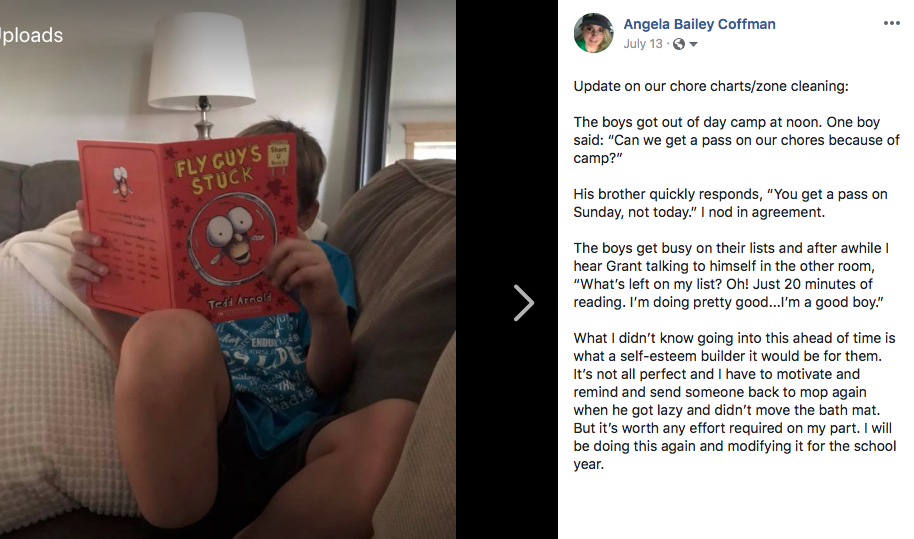
5.  We had a fail one day where I caught all the brothers in a dark room under a blanket watching a video on the Chromebook. The video was on my approved list but nobody had done anything on their list. They were all still in PAJAMAS!  It was 9am and I gathered up every electrical device in the house and locked them in my room.  I was like, “Bummer.  I’m so sorry this happened. Don’t worry, tomorrow we start again.  You can have everything back tomorrow, after your zones are done, as long as you get today’s zone work done too.”   There was weeping and wailing and gnashing of teeth.  It’s the kind of day that you PRAY for when you are doing a system like this, because they knew I meant business and that I WOULD follow through.  We’ve never had a problem like this again.

6.  I’ve had the opportunity to teach them how to do some new chores that they hadn’t done before.  Like secrets about getting the pink mold out of the bathroom, how to clean the shower without getting your hands dirty, and what it means to be truly clean.  Plus they’ve finally learned where all the dishes go in the kitchen! I try really hard not to be too picky, but after we’d been going several weeks, I started doing inspections and sending kids back to redo sub-par work.

7.  This is the most consistent we’ve ever been with reading and music practice!!!

What’s not working?

  1. I can’t remember the order of the zones and the boys often can’t find their paper on Sunday when it’s time to trade.  I’m constantly asking, “Who’s in this zone?” It would help if I had a row of nails for them to hang their clipboards on when not in use. Then we could find them easily and I could see who goes where.  It would also help if I made up a file with all the zone assignments for the year.
  2. The list is pretty overwhelming for Grant (he’s 7 with some sensory issues.)  Some days it makes him want to curl up in a fetal position and never get out of bed.  I often work his zones with him, teaching him how to do things along the way.  He does help and as long as he’s working too, I’m fine with it.  I’m thinking about making separate, shorter zone sheets for him to rotate through that are different from his older siblings.
  3. Since the kids are able to pick and choose what to work on in their zones, several items never get done….like cleaning around the base of the toilets, scrubbing the bath tub or wiping down the cabinet fronts.
  4. Sometimes the work is just poorly done and I have to send them back to do a decent job.  This definitely takes more management than it seems.  The boys will get lazy and not set a timer, do a 5 minutes job in their zone and think they are done.  I have to be consistent with accountability on spending a good quality 20 minutes in their zones.  The more consistently I check on them the less likely they are to try to get away with stuff.  In the beginning I had to check every time, and I used it for a chance to give them atta-boys as often as I can.  Now I only have to check a few times a week. Because they never know when an inspection will pop up, they do good work most of the time.
  5. Sometimes I need help later in the day with emptying the dishwasher or setting the table.  Invariably the boy asked to help says, “That’s not my zone.” or “I already did my 20 minutes.”  They are not allowed to respond to me that way when given a direct request and in the scheme of the amount of work required to run our house 20 minute is NOTHING.  So we’ve had a lot of correction to do in this area and it’s still a work in progress.

What do you think?  Do you have any chore tips or stories for us?


How to Take a Family Cruise on a Budget

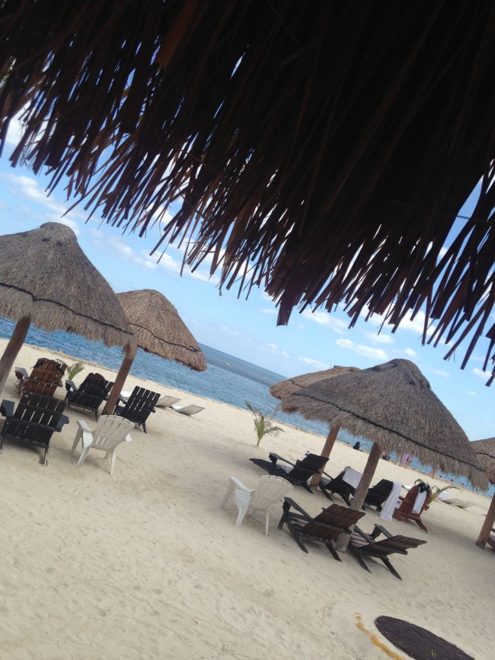
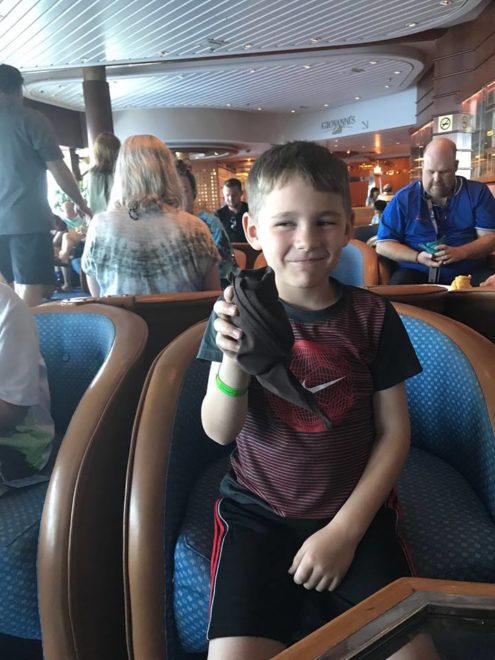
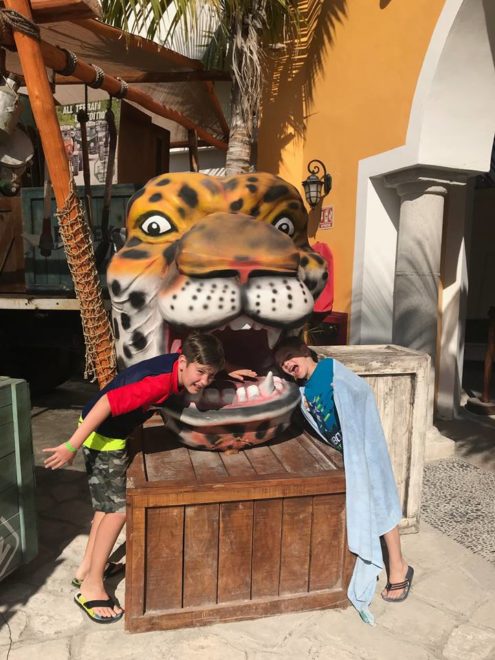
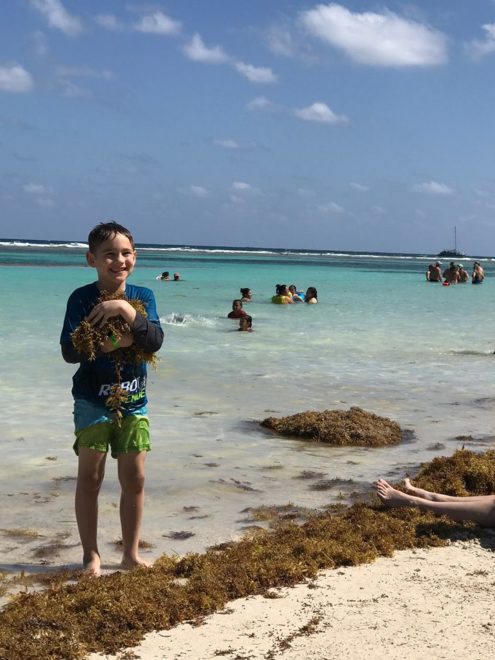
We just got back from our Spring Break cruise to Mexico and even though it was full of luxury and pampering it was a fairly low cost vacation.  Here’s how we kept the prices low.

1. Choose a port that you can drive to, eliminating flight costs.  The more people in your family the bigger the savings!  We drove 14 hours to Galveston, TX and it was great fun to watch movies and talk in the car.  We took some healthy snacks so we only ate out one meal on the way down.  We could have packed a lunch but I was maxed out on time getting us ready to go and since we never eat out it was a super big treat for the kids. On the way back the kids were so tired, they giggled slap happy style until they fell asleep in a pile like puppies (but with seat belts.)  There are also ports in California, Florida, New Orleans, Washington State, and along the East Coast, so you can choose the closest one to you.

2. Choose the ship and cruise line you want, then watch prices at Vacations to Go. Buy the deal when the prices drop. This is even easier if you are very flexible on the destination and sailing dates.  We had to be more specific since we didn’t want to take the kids out of school, but still found a deal for $300 a person.  It’s not an exact science to know when prices are the lowest.  Just decide ahead of time what your buy zone is and call immediately when you see it. Deals like that sell out FAST. I sat on the deal for a few hours and when I finally called it was sold out.  They did have a slight upgrade for $50 more (still a great deal!) which gave us a window in each room.  We’d never had a window before and it was great!  It’s not worth the extra money for a window though if you can get an inside cabin.

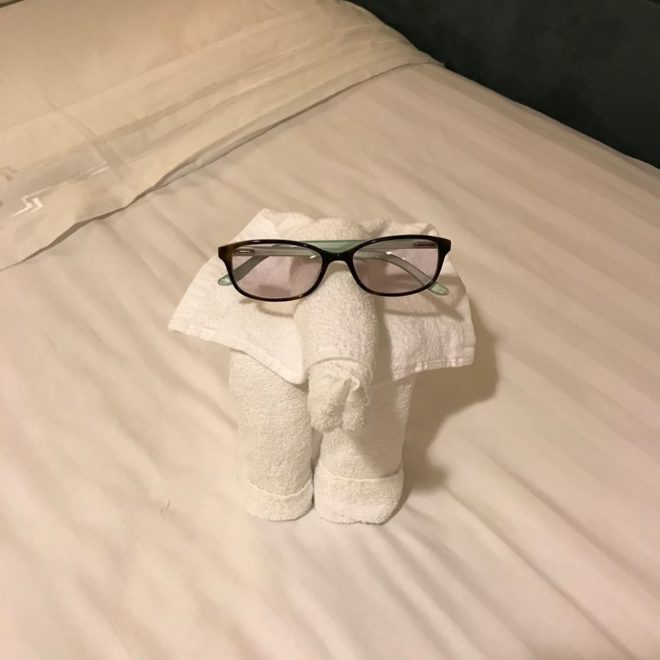
Remember, no matter which room you’re in, you still get the same great service with folded towel animals, twice daily maid service, and meals included.  We don’t spend much time in our rooms with all the things to do on the ship, so as long as it had a bed we were happy.

3.  Ships want to sail FULL.  So if you are super flexible on the price, watch the 90 day ticker.  You can get a really great deal if you can leave in a few days.  If they aren’t full they start slashing prices just to get bodies on there.  Once you’re there they’re hoping you’ll buy alcohol and other things so they’ll make a killing off of you, (but don’t.)

(The main dining hall requires formal dress at least one night of the trip and business casual the rest of the time. We had fun shopping thrift stores for several months before we left to get everyones wardrobe in shape.)

4. Ask about larger occupancy rooms.  Often the 3rd and 4th persons in a cabin are 1/2 price, though there is no age discount for small children (not even babies.) Our cruise was completely sold out and we got some of the last rooms, so they didn’t have any bigger rooms to offer us by the time I called. Our rooms also had several rooms in between them which made me nervous since 3 of our rooms were just unsupervised kids.  It worked out fine though.

5. Buy a motel room the night before the ship sails.  We drove all night to minimize missed work but still bought the hotel room, Beachcombers Inn in Galvaston. They offered free parking, so it was cheaper to pay for the room we only slept 4 hours in, and a taxi to the dock, than it was to pay for parking at the dock during the trip. We used hotels.com to find the best prices.  My dad booked his room a few months before we did and ours had dropped in price $5 from what he paid.  It’s ok to watch hotel prices to see if they drop.

6. If you are set on buying excursions (sight seeing trips when the ship stops at a land destination) buy them early.  Once you get on ship the price gets higher.  We chose to skip all the excursions for budget reasons and did our own sight seeing by foot and taxi at the ports.

7. Take lots of cash, but break it up into different locations.  In tropical countries they are used to haggling with the prices.  If you pull out too much money at once, they become less flexible on the price. Never take their first price offer as the final offer.  Look contemplative; use few words, and if all else fails start to walk away

8. Don’t forget to budget for tips.  Most ships add $14.50 per person per day to your final bill and if you have a lot of kids this can add up quickly. The cruise staff works super hard for you and is worth every penny of that gratuity.  You can opt out of paying it, but please don’t.  Just plan ahead so it’s not a hardship.

9. Don’t drink alcohol on the ship.  It’s crazy expensive. Some people on our trip paid an extra $1200 per person just for alcohol and sodas.

10. Watch out of other additional charges.    Upgrade restaurants, spa treatments, fitness classes, shopping, gambling, bingo.  We skipped it all so only had tips on our final bill.  There was plenty of free things to do that kept us happily engaged while we were on the ship.  Our absolute favorite was a kick boxing class.  My 2 daughters and I were the only ones that showed up for it, so we got a private training session from the coach.  It was supposed to only last 30 minutes, but we were having so much fun he coached us for an hour and 15 minutes.  It was way out of our usual thing to try and was a fun bonding experience.

Things to keep in mind:

  1.  You won’t have cell or internet service on the ship, though you can pay extra for internet if you need it for work.  This was tricky for us to keep track of 6 kids all in their own rooms, without being able to text. If you have walkie talkies, it’s a great idea.
  2. Your room doors are metal and will take a magnet.  My mom brought cute little magnet animals for each of our doors and wrote our names on them with a magic marker.  It was so helpful to be able to find our room quickly, especially with so many doors between the rooms in our party and everything in the  ship looking alike.
  3. If you pack your luggage in a way that you can carry it all yourself, you can get off the ship 30 minutes faster at the end of your journey and be on your way.  Just skip the luggage tags they leave you at the end and don’t put your luggage out the night before for pick up.
  4. You aren’t allowed to carry on your own luggage at the start of the trip, because they will let you on the ship 3 hours before you have access to your room.  It takes them awhile to deliver everyone’s luggage so I recommend a backpack or carry on bag with essentials that you might want to freshen up for dinner.
  5. If you eat dinner in the dining room (vs the buffet area) and I recommend you do! You’ll need to request either early (5:30) or late dining (8:30) when you book your trip.  There is a strict dress code for the dining room which means no flip flops, shorts, hats, or tank tops. One or two  of the nights, it will be formal only–meaning dinner jackets, ties, and cocktail dresses.
  6. I took a bunch of clothes I never wore.  I did all the free fitness activities offered and pretty much lived in workout clothes or my bathing suit and cover up while on the ship.  Then I wore sundresses or formal dresses for the dining room (the sundresses doubled for classes like napkin folding or the informational spa session) and I didn’t even touch my shorts outfits. Think about what you like to do and might not need as many clothes either.  A cute swimsuit cover up is a must if you plan to visit beaches and the onboard pools or hot tubs.  Then you can just slip it on and go to casual dining whenever you fancy.
  7. Not all cruise lines are kid friendly.  We booked our first cruise with kids on Carnival and their idea of a kid’s program is to clear out a smoke filled bar and plunk down some crayons.  Even the smaller Royal Caribbean ships have dedicated kids and teen areas with quality programs that will have your kids begging to go.  My teens loved the teen center too, but it was on the 10th deck and they could feel the sway of the ship way too much to stay up there.  We’re now super loyal to Royal Caribbean and don’t plan on sailing with anyone else ever again.
  8. Plan ahead for sea sickness.  My kids were helped by the acupressure sea bands, and we had essential oils (ginger) and dramamine for emergencies. I packed my diffuser which floated around the kids rooms as various ones felt seasick. Since colds and flu can travel around the ship quickly, I also packed my fast acting natural remedies just in case.
  9. The ship goes quickly and even in tropical climates the breeze at night can get chilly in the fall or spring.  Take a comfy jacket or sweatshirt just in case, if you like walking around outdoors.
  10. The tropical sun is different than the sun in Missouri.  We used 50 SPF sunscreen and applied often and still got burned.  If you have fair skin, take protective clothing as well.
  11. Think outside the box.  We wanted to go snorkeling as a family, but just renting the gear was going to be over $100.  We paired up and rented gear for half the people.  They snorkeled while the rest played on the beach, then we swapped gear and the 2nd group went snorkeling.  Everyone had a blast and we saved 50%.


An Archeological Dig

Caleb mapping stonesSummer time is the busy time around here.  As soon as school was out at the end of may, I headed to Yellowstone via Wall South Dakota as a tagalong on the Grandparent trip for my youngest 2 kiddoes.  Every year for the last 4 years my parents have taken 2 of their grandchildren on a cross-country adventure.  This time they felt Grant was too young to go without his parents, so Darren and I got to come along.

Yellowstone

We were home for a couple of days, just enough to wash and repack everybody.  Then I kissed Darren goodbye and took the kids to Lamoni, Iowa for reunion.  I think other denominations might call it family camp or camp meeting.  It was a week of living as families in University dorms. We had prayer and testimony service and classes every day, time for recreation in the afternoon, and powerful music and preaching in the evening.  It’s a time to rest from the cares of the world and get a fresh perspective on our Christian walk.  The leaders encouraged us to stay off the internet to keep apart from the influence and cares of the world.  I had to get on a little to make sure the meal plans went out on time and take care of customer service issues, but for the most part I tried to rest.

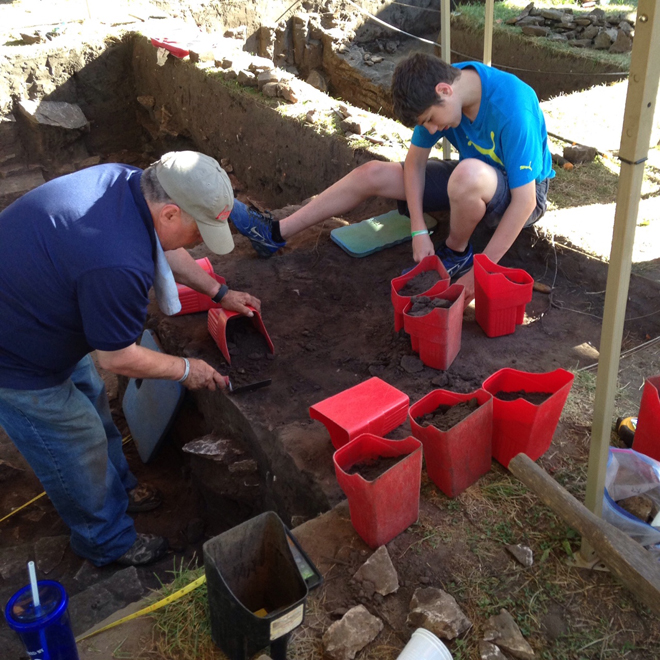
The day reunion ended, I filled my mom’s car with 5 of my kids and all their stuff and sent them back home.  My 14 year old son and I headed east to an archeological dig in Nauvoo, Illinois.  He’s at the age where he’s trying to make some decisions about a career and education.  At first he wanted to be a novelist, so we homeschooled his 8th grade year with the One Year Adventure Novel program.  It was a great program but showed him that he prefers to write for a hobby and not to make a career of it.  When he mentioned archeology as his next choice for careers, I used some connections to join the end of a dig unearthing an 1840’s home foundation and artifacts.

IMG_2800

He’s still trying to unpack the experience and see if it’s a career option he wants to pursue, but it was super interesting to learn about all the different aspects of the dig.

Last year it took the team most of their month long dig to locate the foundation of the home.  It was a lot of digging to find nothing and trying again to get just the right location.  This year they were able to get started right away in the correct position and make progress.  By the time we arrived they had found 3 of the 4 walls of the home and the 4th wall was uncovered while we worked.

IMG_2859

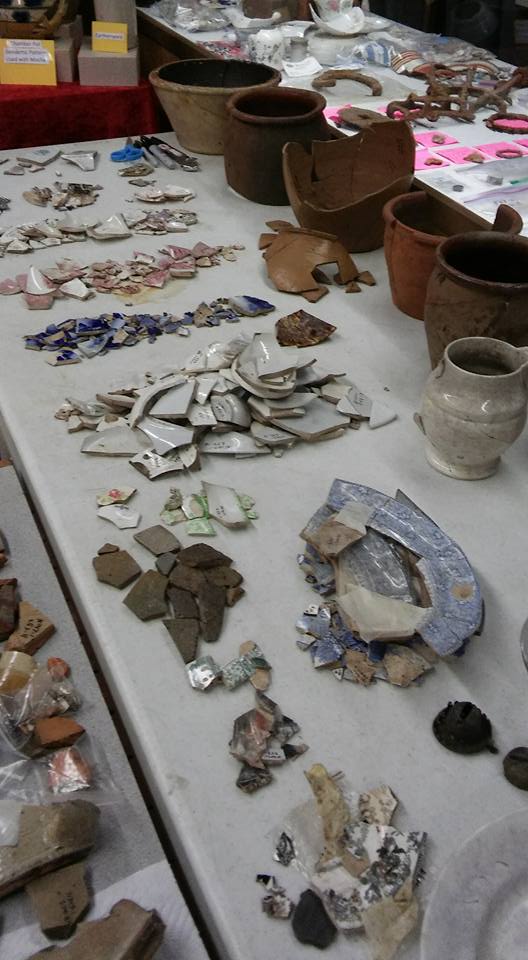
We found things like flatware, scissors, square sewing pins, marbles, square nails, china and other earthenware, glassware, cast iron cookware, animal bones, teeth, fossils, buttons, and a cast iron trivet for a clothing iron.

IMG_2829

Each 5 foot square was dug down 2 inches at a time.  The diggers would gently scrape the soil to protect any artifacts that might be hidden beneath.  The loosened soil would go into red scoops (we called them fire trucks) and sent over to the sifters.

IMG_2842

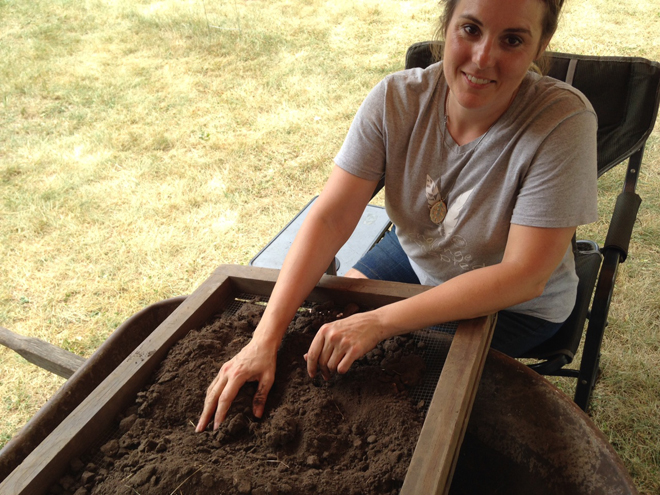
Another team member (ahem–me, so hot and sweaty) would rub the dirt through a screen and look for smaller artifacts that might have been missed by the diggers.  All artifacts were placed in a green scoop labeled with a sticky note to show the quadrant and soil level it was found in, then sent over to be washed with a soft brush and clear water.

IMG_2840

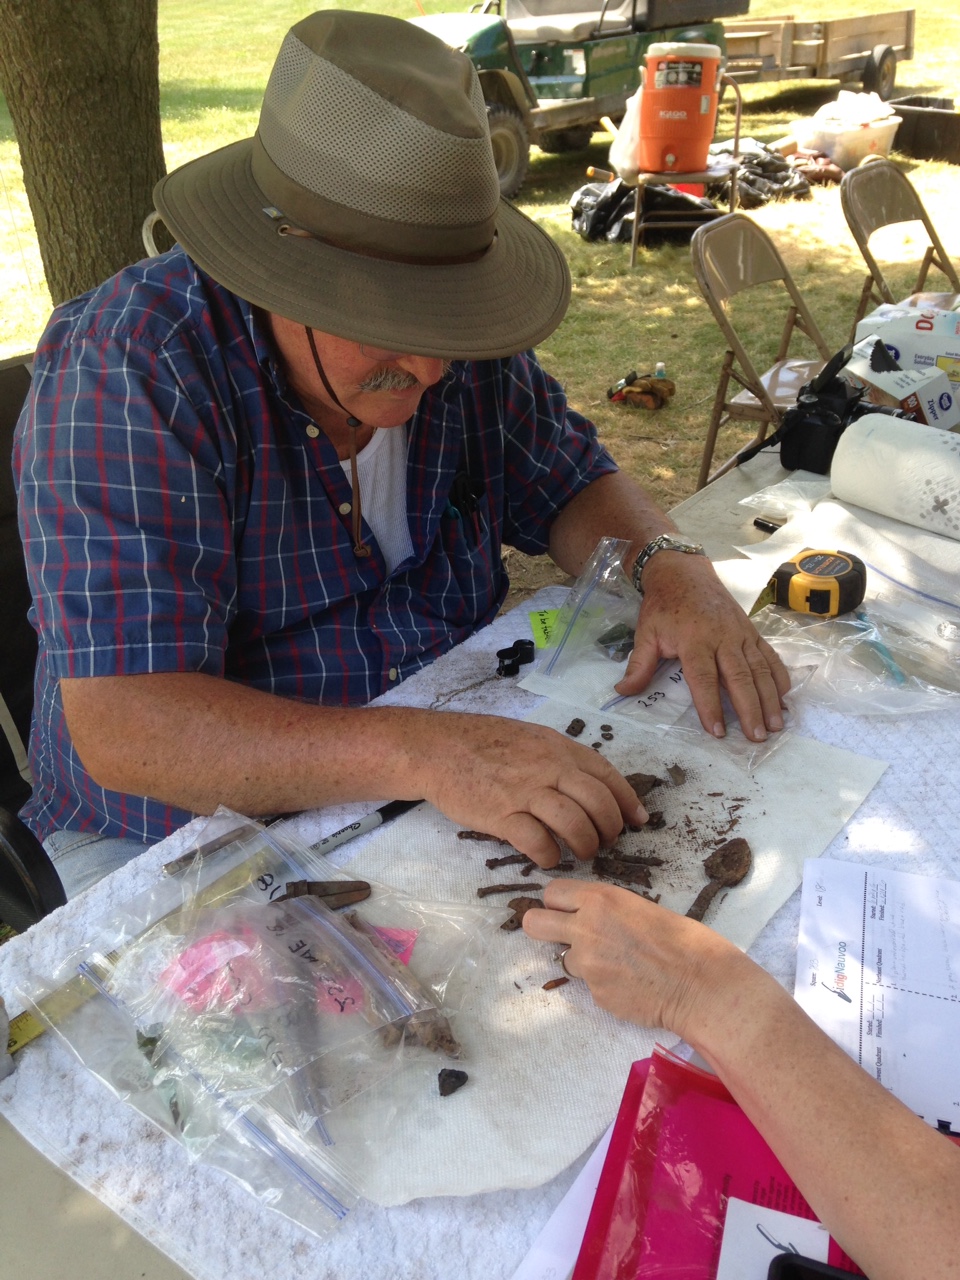
Then the artifacts were carefully dried and sent to the head archeologist, Paul Debarthe who would identify and document each piece in a database.

IMG_2855

Finally the documented pieces were sent to the restoration lab, where Synthia glued pieces back together for display.  It is the team’s end goal to rebuild the home just as it stood in 1840 and display the artifacts inside.
13450943_1012268108862829_7607377967401943150_n

It felt awesome to play a part in recovering history, but it was also a dirty, sweaty, exhausting job.  Caleb and I only dug 3 days with the team.  Most of them were there for a solid month!


Saving Money on Kid Birthday Parties Part 2

Save Money on Birthday Parties Part 2

One of the lowest stress parties our kids were invited to was at the school district pool.  The mama didn’t have to clean her house.  She brought cupcakes for a swimming break and sent home movie boxes of candy for party favors. Genius.

The other low stress party we attended was at the roller rink.  Let the kids skate, throw them a cupcake (some rinks include drinks and a snack with the party package too) then send them home exhausted. No cleaning, no clean up.  That’s my kind of party.

Grant's 4th birthday cake

The highest stress destination party I’ve seen is at Chucky Cheese.  If you like strobe lights, deafening noise, trying to keep eyes on kids going in all directions at once, helping with ticket exchanges with multiple kids simultaneously, and strangers eating your pizza while you try to manage it all…you’d like it.

I’ve been determined to have a low stress destination party the last few times our kids rolled around to a significant age.  I researched locations and prices and when it came time to book it, I just couldn’t spend the money.  Most of the parties I researched were about $300 and I still had to get my own cake and party favors.   In the moment that was more stressful to me than cleaning my house.  If your budget doesn’t sweat over a $300 party you might feel differently.  Either way is ok.  Don’t apologize if you have a destination birthday party, and don’t apologize for having one at home.

Heidi's 15th birthday

The trend for at home birthday parties has been going OVER THE TOP.  I’m all for taking it down a notch or 200.  The kids don’t care if it belongs in a magazine.  They care if you care about them.  If magazine parties are low stress for you, go for it.  For some people it’s a gift and comes naturally.  There’s nothing wrong with using your gifts to create an incredible event.

Caleb's 13th birthday

My gift is not decorating or crafts or anything like that.  My gift is encouraging words.  The best way I can throw a party is to greet each guest at the door by name, be completely overjoyed to see them, and then stay and hang out and play along with the kids.

Caleb's 13th birthday gifts

This month, we found ourselves in the unusual position of having 2 birthday parties within a week of each other.  With our “significant” age party rule, that has never happened before and it won’t again.  It was super fun and exciting and also potentially rough on the budget.  I tried to talk the brothers into having a joint birthday part at the archery shop.  Our friends own it and if I’m going to spend a wad on a party I’d feel great about giving it to them.  The boys would have had to cut their guest list to just 3 friends each (or ban brothers and sisters from coming along.) One brother was all for it, the other was not at all.  He had his heart set on a lego party with friends, cousins and family. The idea of giving that up brought him to tears.

Lego Head Marshmallow Popsicles

So I invited each son to come and cuddle up with Pinterest and help me gather ideas for their parties.  To keep things low stress I limited the parties to 2 hours each, and scheduled them for in between meal times. I set a budget of $150 per party, which was the same if they had shared a party at the archery shop.  We ended up spending much less than that, saving around $90 overall.

Here’s how we broke it down for the lego party:

•Lego sets for party favors $5 each x 10 = $56.85 56.85
•Lego Sweet Tart Candy 16.56
•Lego Candy Molds 4.99
•Postage for invitations 4.5
•Printing for Invitations 5
•Yellow Cups: 1.08
•Yellow Plates: 1.08
•Blue Napkins 1.08
•Edible Marker 4.99
•Balloons: Yellow 1.00
•Cake Mix x 2 2.08
•Chocolate melting Discs 5.2
Ice Cream 3
 Frosting  $2
112.37

Nerf War Party Target Practice

and the Nerf War Party

•Nerf Gun Party Favors:  $5.49 x 10 = $55 55
•400 extra bullets $18.64 18.64
•Plates, cups, napkins $3.24 3.24
•Postage for invitations $4.50 4.5
•Balloons: 5
•Cake Mix $1 1
•Ice Cream $3 3
Game supplies:  poster board etc $8
98.38

I decided instead of buying a bunch of little trinkets and candy for party favors that we would buy the kids a small gift for around $5 each and send something home that they would treasure for awhile.  I purchased the lego sets directly from lego.com (they had the best price and selection after I searched all around.) And I bought the 3 shooter nerf guns from Amazon. We used them for target practice, in the epic capture the flag nerf gun party, and then they took them home. I’ll give details on the lego party tomorrow and the Nerf gun party after that.

This is Day 27 of our series 31 Days of Kids and Money

Saving Money on Kid Birthday Parties Part 1

Saving Money on Birthday Parties Part 1

Birthdays were a big deal when I was growing up.  My mom was frugal but super creative.  I had a friend party every other year with traditional games like pinata and pop the balloon that’s tied to your friend’s ankle.  One year we turned the whole house into a giant spider web with colored yarn.  Each guest had to wind up their own string and at the end was a small prize.  This game not only decorated the house for the party, but it naturally cleaned itself up as we played :).  Mom always baked the cake and decorated it at home.  Since computers weren’t a household item and the guy who invented Pinterest was probably still eating paste, we got our inspiration from library books.

DSC_0049

The years I didn’t have a friend party, we invited over grandparents for dinner, cake and presents.  Mom did her best to make those times special too.  One year she put a clue inside each balloon.  I had to pop the balloons, read the clues and use them to find my presents.   As fun as these parties were they were a far cry from the super stylized Pinterest parties of today.  I thought they were pretty special anyway.

Brandon 8th birthday blowing out candles

When I became a mom I wanted my kids to have special birthdays too.  Life for me was a little more overwhelming since I’ve been pregnant, nursing or chasing toddlers (or all of the above) for the last 16 years.  We decided that with the size of our family we would limit friend parties to monumental ages:  5 (starting school), 8 (age for baptism), 10 (double digits!), 13 (now you’re a teenager), and 16 (Driving a car).  We would still celebrate the other years, but as a family in stress free ways.

Tomorrow I’m going to show you how I budget for birthdays and some ways we save on games, decorations and party favors.  Today, I want the takeaway to be:  Plan the party for the kids and don’t worry about impressing adults or making it Pinterest perfect.
DSC_0007Keep it low stress and try to let the kids help with stuff even if it won’t be perfect.  I know letting the kids help and keeping it low stress can be opposites.  Take a deep breath and try to go with it.

DSC_0002

It’s all about the memories, building their sense of worth, and showing them that you’re GLAD you get to celebrate with them.  You don’t want to loose the child in all of the preparations and end up making them feel like a burden instead of a blessing.

DSC_0074

Here are my less than perfect cupcakes from our Nerf party this past Saturday.  I was embarrased about how ugly they turned out.  Not one child even blinked.  I jokingly said, “What do you think the cupcakes are supposed to be?”  They didn’t laugh or make fun of my poor decorating job, several matter-of-factly said, “Targets.”  Delicious targets that they devoured in 5 seconds and asked for more.  I’m so glad I went with green—they almost look like something else, but no sweet little boy mind even went there.  The funny thing is, I did them myself.  Brandon asked to help and I didn’t let him.  He couldn’t have made them worse; I should have let him help.

Brandon's 8th birthday heather helps

If things turn out badly, everyone will assume you let the kids help.   So let them help–it’s a great reason for things to be wonky. Sometimes it turns out pretty good and the kids feel ownership about the party.

I love Pinterest and use it heavily for inspiration but I no longer try to recreate a magazine spread all by myself for kids who just want to eat sugar and play games.   That means my kids get a calm and happy mama to host their birthday party.  Who doesn’t want that?

This is Day 26 of our series 31 Days of Kids and Money


Should We Limit Kid’s Activities?

Should we limit kid activities

What we are about to discuss is a first world problem. We are blessed to live in a land where our kids can learn anything and be anything.  The limitless possibility sometimes comes with a bucketful of guilt. I mean, what if Tiger Wood’s parents hadn’t taught him golf as a toddler?  What if Titus never saw a basketball until High School?

We’ve been debt free for 10 years, but last year I found myself lying awake knowing I couldn’t pay bills that I had promised to pay–and it all had to do with extras for the kids.  Our income had been steadily declining for 3 years and it finally hit a spot where we could no longer meet our obligations.  The hard part was their teachers were our friends and limiting activities not only meant disappointing our kids but also cutting our friends’ paychecks–not fun.

Heidi soccer

It was so awful that instead of calling it quits right then we sold some personal possessions to meet the obligations for the rest of the year.  Then we had some serious talks about how we would continue.  I begged for a chance to mess with the budget and see how we could make it work.  Darren was glad to give me shot–though he already knew what I would discover. Our lifestyle wasn’t sustainable anymore. We finally realized there would be no private school, no dance class, and no sports this fall.  I cried when I told the kids.  They took it surprisingly well (except for Dub and school–he still asks me often how long before he can go back.)  The idea of a slower schedule appealed so much to the girls, they asked if they could stop going to the weekly girl’s meetings at church.  That was hard for me also but I agreed.   I wasn’t the only one that needed the crazy merry-go-round of life to slow down a little before I lost my lunch.

Heidi Violin

We started Heidi in violin when she was 6.  I was convinced with musical genes from both sides of the family that the early start would boost her to greatness, and she was all for it. When she was 12, her friends took up the violin too.  In a few short months they caught up to her, learning in that time what it took her 6 years to master.  I figure I wasted about $4,680 trying to give her an early start—-PLUS the time and agony of forcing a young child to practice day in and day out.  She’s still playing today, so it wasn’t a complete waste (and it did help with cognitive development.) Still, I’m not a big advocate of starting them young anymore — unless the child is a prodigy.  You’d know pretty quickly if that was the case.

The truth is, we messed up a lot over the last few years, putting kid activities above more important financial needs–like retirement investing.  It feels selfish to tell my kids NO so I can sock money away for our life when they are grown.  I want to give everything to them now. In my quest to give them activities and lessons, I made their lives crazy.  They weren’t old enough or mature enough to say, “That’s ok, Mom.  I’d like to do it, but I’d like to be with the family and see you and Dad retire comfortably more.”  When we were forced to do cut activities, it was a relief all around.

We still do a few things like Boy Scouts, Youth Group, and music lessons.  Two are still studying violin,  5 are taking piano, and Heidi earned a fun role in the musical at her new school (which is free!) The music alone is $420 a month. It’s still a lot, but 1/3 less of what we were forking over last year.

How about you?  Do you limit activities?  How do you choose?

This has been day 15 of 31 Days of Kids and Money

How to Motivate Your Kids to Practice


How to Motivate Your Kids to Practice

Music is the language of God.  The more I study it, the more I’m convinced it’s a fact. As an adult it’s easy for me to spout the benefits of music study….especially when it comes to brain development in the language and mathematic areas.  You would think these lofty truths would motivate my kids to practice.  What they hear is, “Wa wa wa wa wa wa.”  (Read in an adult Peanuts voice.)

They want to play music for the self-expression and the opportunity to play in a group.  But they do NOT want to practice.  Lessons are expensive and going unprepared is a complete waste of money and time.  This pains me in my frugal organ.

So, a few weeks ago I told my kids that they were going to start paying for their own music lessons.  I offered them $3 a day for a good session of practice.  If they fit 5 practice sessions into their week, they’d have the money to pay for their lesson.  If they practiced more than that, they could pocket a little extra. If not, the lesson money came out of their piggy bank.

It was motivating!  It worked!  With a little problem.  The kids would practice and I would be too busy to hand them the $3 right then. Getting the money right away is a very good behavioral reinforcement and we were missing that. A few days would go by and I’d forget exactly how many times they practiced, and they would too.  We were sloppy.

Practice Boards

So I made a little clipboard to keep track of it for us.  It cost $3 a board.  $1 for the clothespins and $2 per board (Dollar Tree sells these for $1….but ours are never in stock.)

I hung them upstairs near their practice spaces (their bedrooms.) They practice.  I hear them.  I give them permission to get their money.  They put it in their cash envelope labeled “Violin Lessons” which is kept in their cases.  They are too smart to steal the money off their board when I’m not looking.  I trust but verify.

The little clothespins came from the dollar section at Target (I bought them November 1st, 2014–so depending on when you are reading this, they probably still have them.)  Before I saw those pins already decorated, I was shopping for printed paper tape to jazz up some regular sized wooden clothespins.  The tape cost the same as these pins already done….so I took the easy route.

practice boards 1

I used a ruler to line them up.

practice boards 2

Then hot glued them in place.

The name tags are 6 x 3 inch squares printed onto card stock.  I just typed something up in Powerpoint.

If you wanted to get all fancy, decoupage and scrapbook or wrapping paper would be fun.  I’m spending my spare moments building stuff in the garage, so decided the natural board was GORGEOUS.

I’m not sure how long this will motivate the kids, but for now is the most genius thing I have thought of in my life.  I really like watching them hand their hard earned money to their teachers at lesson time.  I think it sends the kids a message about what things really cost.

How do you motivate your kids to practice?  I’d love to hear.


A little Phonics and Laundry

Laundry Phonics

Here’s a fun, turn off the TV game for early learners.  To set it up, write the names of basic clothing items on sticky address labels, leaving a space between each phonogram.  Here’s the list we used:

sh ir t

b e l t

P a n t s

h a t

s o ck

c oa t

Here are some other ideas:

s c ar f

sh or t s

t a n k   t o p

DSC_2765

Cut between the phonograms and stick to clothespins. Then let your early learner hang the items up putting the pins in order.

DSC_2756

DSC_2759 DSC_2758 DSC_2757
DSC_2769 DSC_2768 DSC_2764 DSC_2763 DSC_2773


Homemade Silly Sludge aka GAK

Gak rainbow

Happy President’s Day!  We love our founding presidents for sure. We celebrate their day by working on the house and trying to keep the kids from watching movies or playing video games ALL day.   Day time clothes are optional.  Bathrobes and fuzzy pajamas are acceptable for the dress code.  (We talk about patriotism nearly every day, so I imagine it will come up today as well.)

Last night I knew I needed a plan if I wanted this to be a happy day.  Hubs and I each wrote out a “would be nice to accomplish” list.  Knowing that we would probably only get one thing done.  Then I did a quick search for an idea to keep the kids occupied so I could work.  Schedule for the kids: clean rooms; waffles with mom; special activity; play in the snow; board games; electronics after 3pm.

DSC_2501

1/4 cup Elmer’s white glue, 1/4 cup cold water and 2 drops of food coloring.

I found a pin from Sugar Bee Crafts written by guest blogger Love and Laundry on making Silly Sludge or Gak. All the ingredients were on my basement shelf, minimal mess, short time involvement for me.  Long time involvement for kids.  Perfection.

DSC_2505

After they mixed the glue,water and coloring together.  We dissolved 1/2 tsp borax into 1/4 cup hot water.  And poured that into the glue.  It immediately started a chemical reaction creating a smooth polymer.

DSC_2506

Aaak! Mom, I cannot touch this!

Not all of the water absorbed into the Gak right away.  I used a spoon to lift the polymer out of the remaining water and onto a piece of foil. (Wax paper would have worked too, but we were out.) The kids kneaded it and kneaded it until it was smooth ball. Some of the kids opted to work the remaining water into their sludge.  That worked out well.

DSC_2510

Their first reactions were mixed.  Heather didn’t want to touch it at all, but soon was enjoying herself with the rest.

DSC_2504

Dub’s reaction.

DSC_2517

Brandon’s reaction

DSC_2512

Grant’s reaction.

It’s kind of a rule around here, that we don’t laugh when someone else is crying.  (It’s only fun when everyone is having fun.)  I broke the rule.

DSC_2514

Grant didn’t take it well. The picture is fuzzy, because I’m laughing so hard.

Caleb is our sensitive one.  He went after Grant and brought him back to play on his shoulders.

DSC_2525

We’re sorry; want to try again?

DSC_2521

Eventually they all had fun. 2 hours of it.

DSC_2533

DSC_2509 DSC_2508 DSC_2518 DSC_2498 DSC_2500 DSC_2499
DSC_2530

DSC_2527

DSC_2526

The next two pictures show you a sneak peak of how our kitchen project is going :).  There’s my lovely craigslist range in the background and a few of our cabinets in place.  There’s still a lot left to do, but my heart is pretty happy right now.  Darren is working hard today and I may have a kitchen sink in a month or two.
DSC_2537

DSC_2538


Gak rainbow


One of the things I loved about this activity was experimenting with colors.  We used the cheap liquid food colors that come in red, yellow, green and blue.  In order from left to right these are the color combos:

1 drop yellow, 1 drop red (pale orange)

2 drops blue

1 drop blue, 1 drop green (bluegreen)

2 drops green

2 drops red, 1 drop blue (pinky lavender)

1 drop red, 2 drops blue (purple)

For the detailed recipe visit Sugar Bee Crafts.