Update on Cleaning Week

I blinked and lost a week!  I’ve been crazy busy here making the final switch over to a new menu website.  And I’m super excited about it.  The menu service is now being hosted at http://www.groceryshrinkplus.com which gives me the ability to offer discounts for subscribing for longer periods at once.  You know how I love a good discount!

I’ve also been on the phone a lot interviewing programmers to make the site even more amazing.  That’s all I can say about that, until everything is closer to finalization.  But IF all the new stuff means prices go up on the site, those who are already subscribers won’t be affected by the increase.  Hmmmm, not a bad reason to jump on board now :).

Also, I’ve been busy planning Heidi’s 13th birthday party.  I’m going to use the printables above to make the table super cute. The guest list was the hardest part.  She could have easily invited 30 girls, but that just wouldn’t work out. We did NOT want to leave anyone out–what’s to do? Originally we were hoping for an indoor pool party, but our local pool had swim meets every weekend for 2 months and we just didn’t want to wait that long.  A pool party could have had unlimited guests. We decided on a Mystery/Treasure hunt party at our home.  My mom came over this morning and helped me plan all the clues.  Oh My!  I’m still giggling.  It’s going to be a fun time with a small group of girls.

cleaning supplies

I missed cleaning week last week so plan to pick up where I left off this week. I’ve had some requests to see pictures of my kid’s bedrooms and what we are doing for organization there.  I hope to do that this week too.  I feel pretty inadequate in that area.  I have so many plans for their spaces but am severely limited on time and money right now.  But I have good news!  We have a contract on our old house.  Inspections are done, and all that is left is for the financing to come through on their end.  It will feel very good to have that chapter in our lives closed and then we will be able to talk about what’s to be done in our new house!

So anyway, next week I’ll share some of my favorite cleaning recipes.  And some of the new beauty recipes I’ve seen to help us get through dry skin season and get ready for Valentine’s Day.

So the two questions I have for you are: What cleaning recipe would you love to find most?  And what is your biggest beauty trouble spot you’d love to solve naturally?

Russian Orphans and Gingerbread Houses

I’m going to be a sewing maniac today, but first I wanted to share a few photos from the weekend.  Friday night our family worship group gathered in my home to put together Christmas boxes for an orphanage in Russia.  One of our member’s father visited there a few weeks ago on a missionary trip and what he found just about broke his heart.  Every child there was so precious and had so many needs. He felt almost powerless to help.

His daughter had the idea to recruit some help to gather necessities and some fun items to send out to the children.  All of our children helped choose what to gather.  Then on Friday we put it all out on my dining room table.

There were handmade hats and scarves (from all over the USA) and gloves.  Toothbrushes; soap and washcloths.  (Check out how cute these are!  Pam bought plain white washcloths then appliqued a heart on each one.)

For the Girls

For the Boys

There were small baby dolls; toy cars; bouncy balls and yo-yos.  Stamps; crayons, coloring books, calendars, pencils, silly bands, and bookmarks.  And for the older girls journals and lip gloss.  There was also gum and several kinds of candy.  Each of our children drew the age and gender of a child from the orphanage, then walked around the table choosing the right things for that gift.

Then the kids headed back to their parents to wrap a gift box so it could still be opened by Russian officials at inspection.

With 6 boxes to wrap (that was tricky!) I stopped taking pictures here.  But what a great evening!  It wasn’t without a little drama.  Some of the kids were confused and took more than one of each item for their bag.  It was traumatic on their egos to spread things out. But after explaining how the children might feel to find their friend with 3 and themselves with none…it made more sense. And my dear little Brandon thought he was making a gift for he and his best friend Isabelle to share.  When he found out that wasn’t the case, it was pretty awful. But after a few tears he was able to find the joy in giving a gift to a child he didn’t know who has nothing and will be able to truly appreciate it.

Then the next morning, I packed up the kids and headed to Grandma’s for our traditional gingerbread making party with cousins.  No kits were used here.  My mom bakes everything from scratch using a cast iron mold that she has had for nearly 20 years.

My nephew, Sean (what a cutie!)

Aunt Erica helping Brandon

My Heather

Heidi, almost 13! and my niece, Maddie.

Caleb

It was a hoot trying to get all of them to look at the camera at the same time.

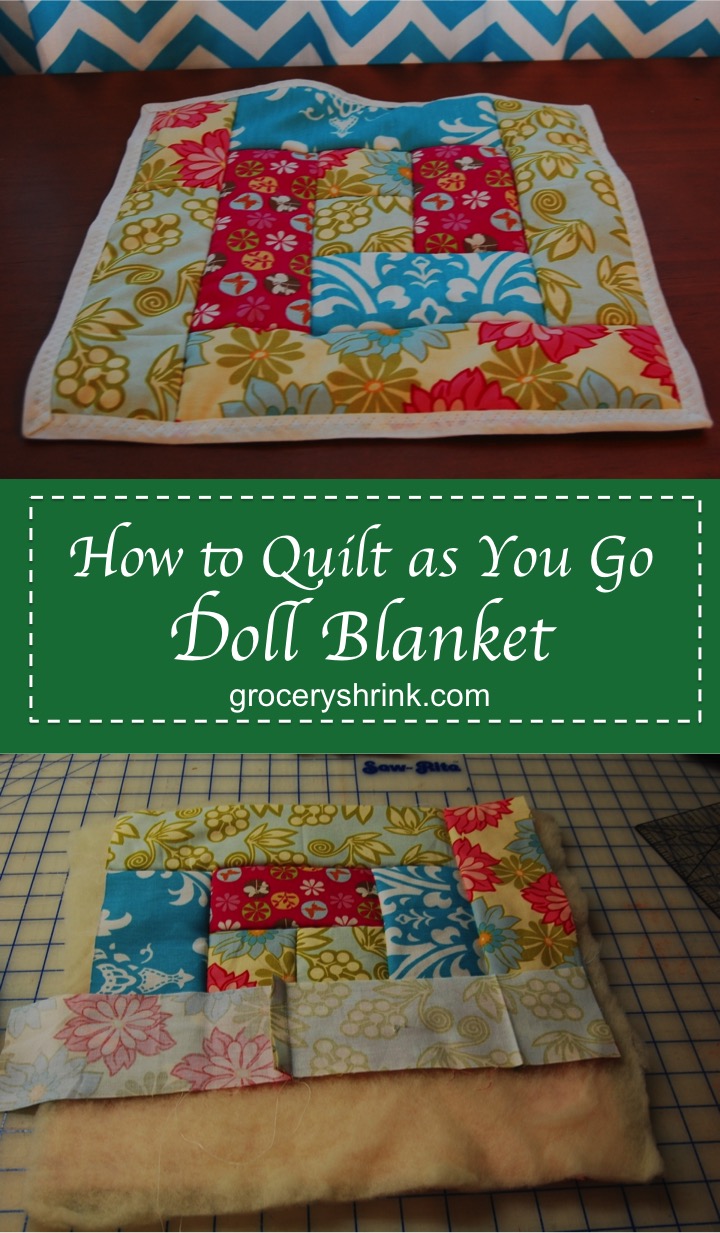
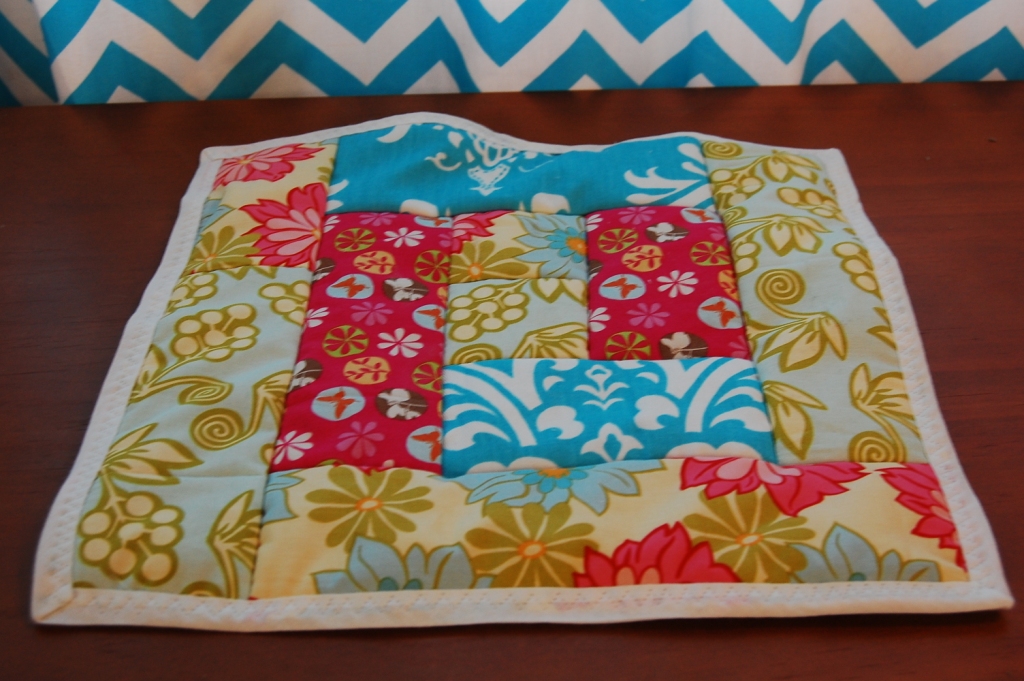
Doll “Quilt As You Go” Tutorial

This adorable doll quilt is the perfect companion to our dollar tree Doll Bassinet/ Moses Basket. Tutorial here.

I used the leftover scraps from the basket to complete it.  It took about an hour from start to finish. This same technique can be used to make quilted bibs and larger throws for real babies or for nursing home residents.  It goes together super fast since you quilt it as you go and there is no hand sewing. (My choir students are working together to make a larger version. It’s a little more fiddly to make it bigger, but it still works.)

Read more

Doll Bassinet or Moses Basket Tutorial

Baby Doll Bassinet Pattern
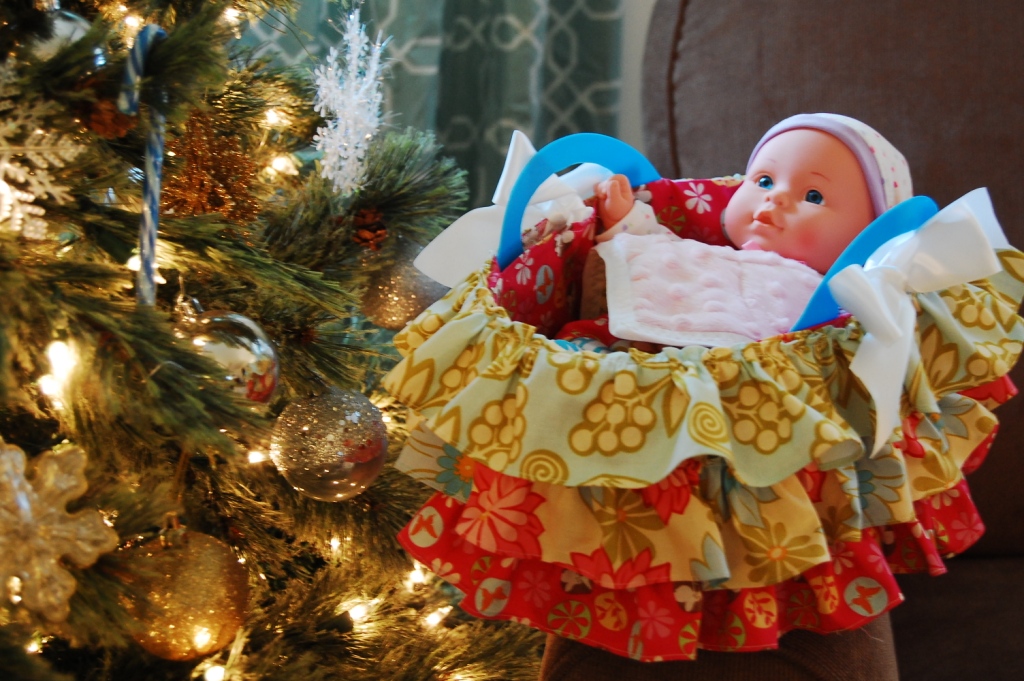
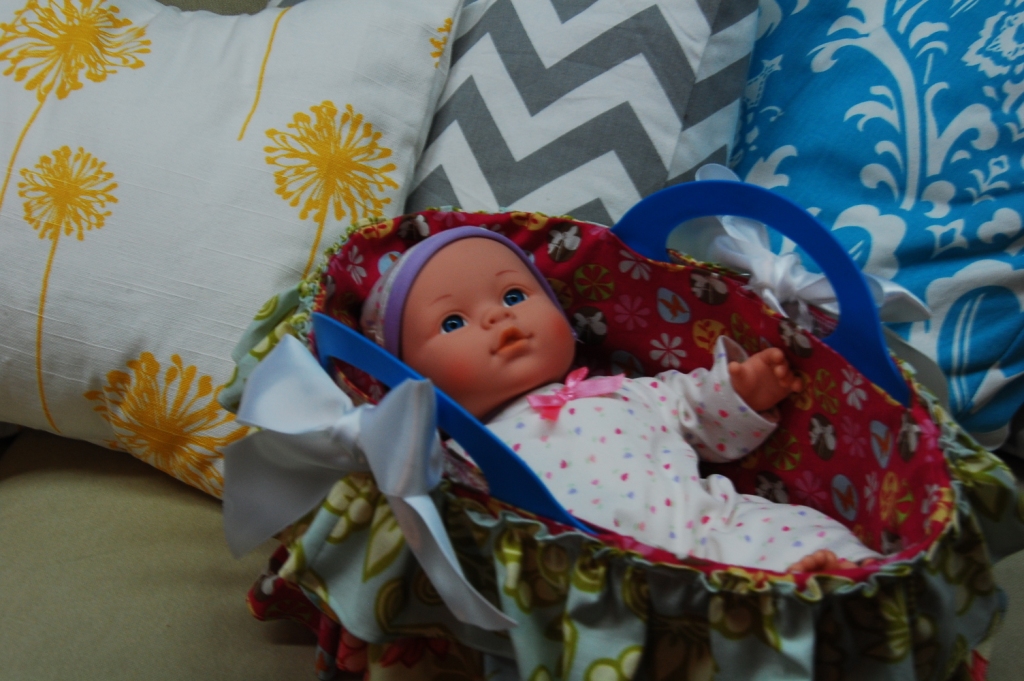
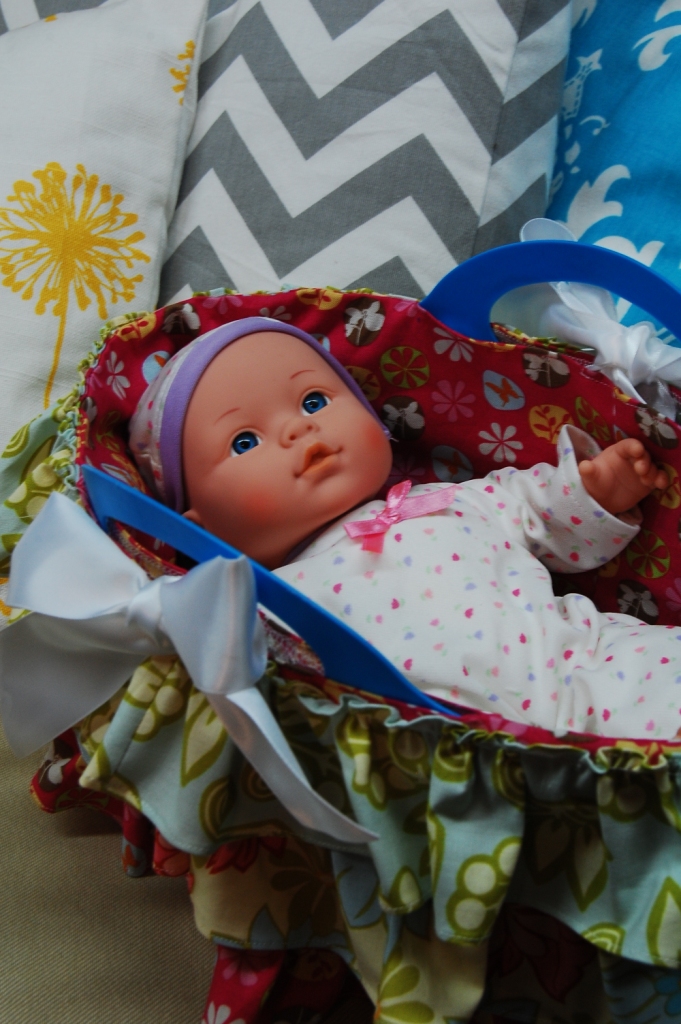
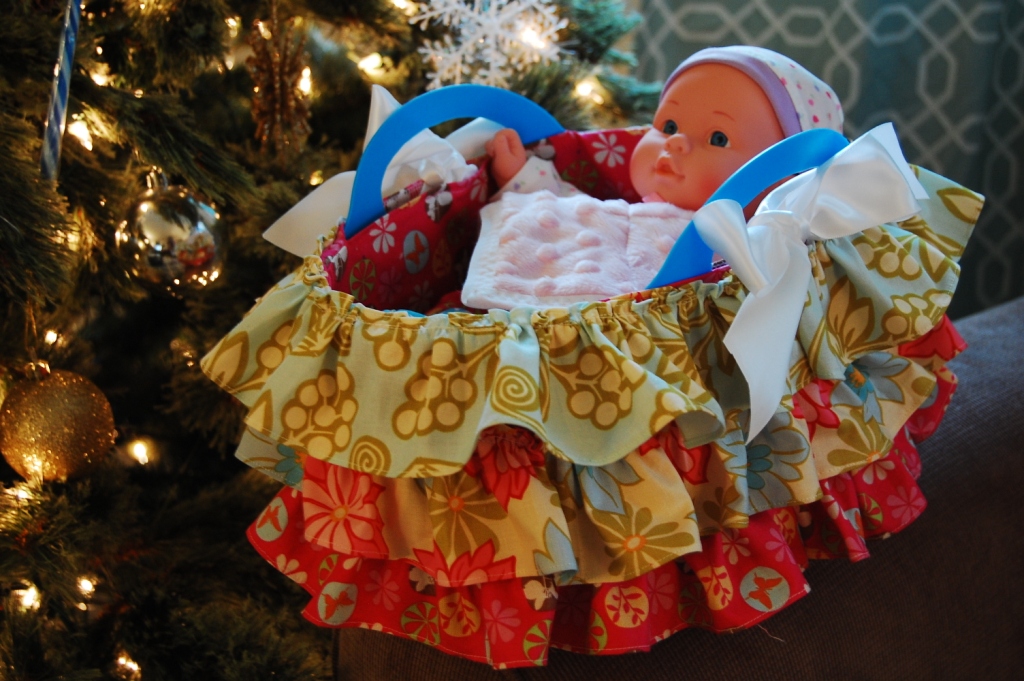
Wouldn’t a little girl you know be delighted with a new dolly and a basket to carry her in?
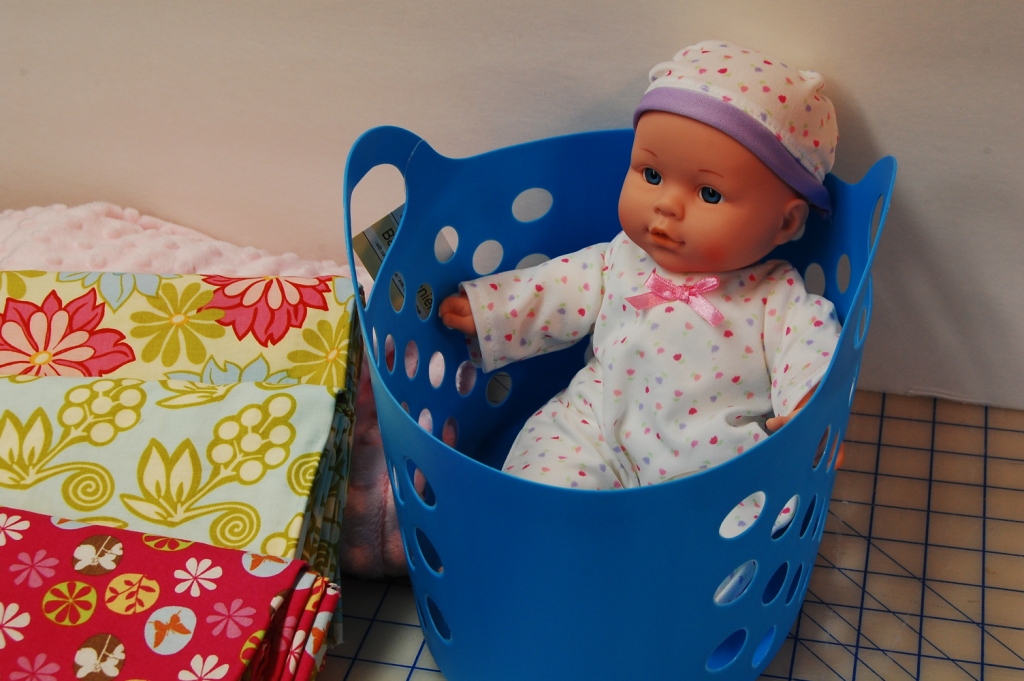
For an experienced seamstress, this project takes about 2 hours.  Plan a little more time if you are new at this.

You will need:

1 dollar tree basket.  This one is about 11 inches long by 7 inches wide (just slightly smaller.)

An 8-12 baby doll fits perfectly. My doll is 12 inches and is from Big Lots.  Just perfect for my 18 month old niece.  This one or this one would also be perfect.

3-4 fabrics.  I chose one for the mattress, and 3 for the basket cover. 1/4 yard of each is plenty–or just scraps.

A small amount of poly stuffing

1 1/3 yards of ribbon

Normal notions: thread, pins, scissors, etc.

Mattress Pattern Piece

1.  Mattresss:  Trace the pattern with a pen onto your mattress fabric.
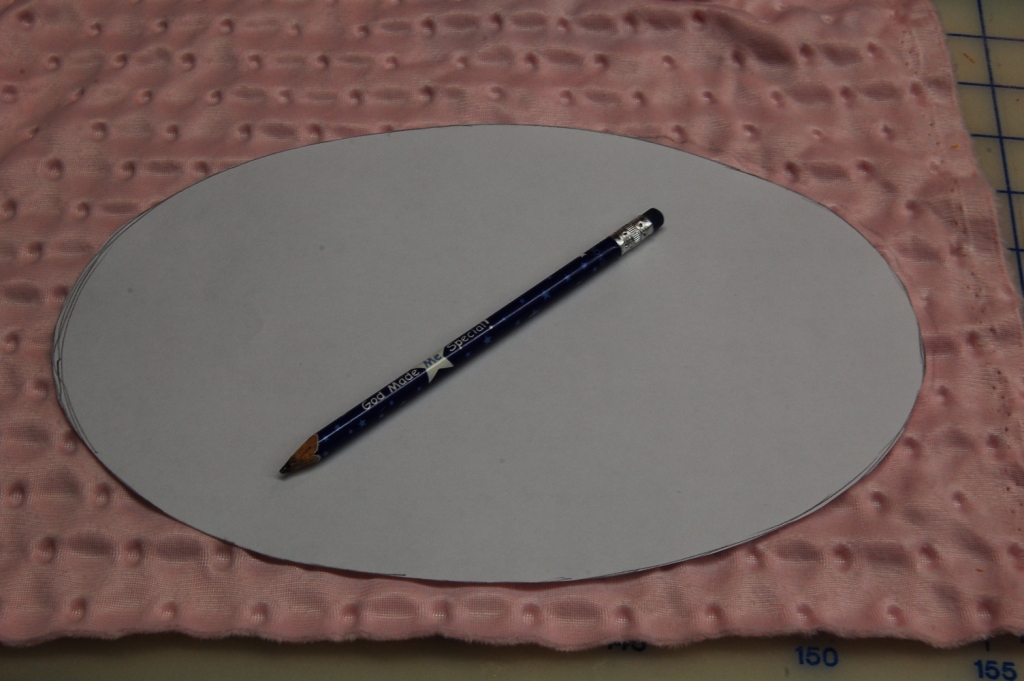
2.  Fold fabric in half and stitch on the drawn line, leaving an opening for turning.
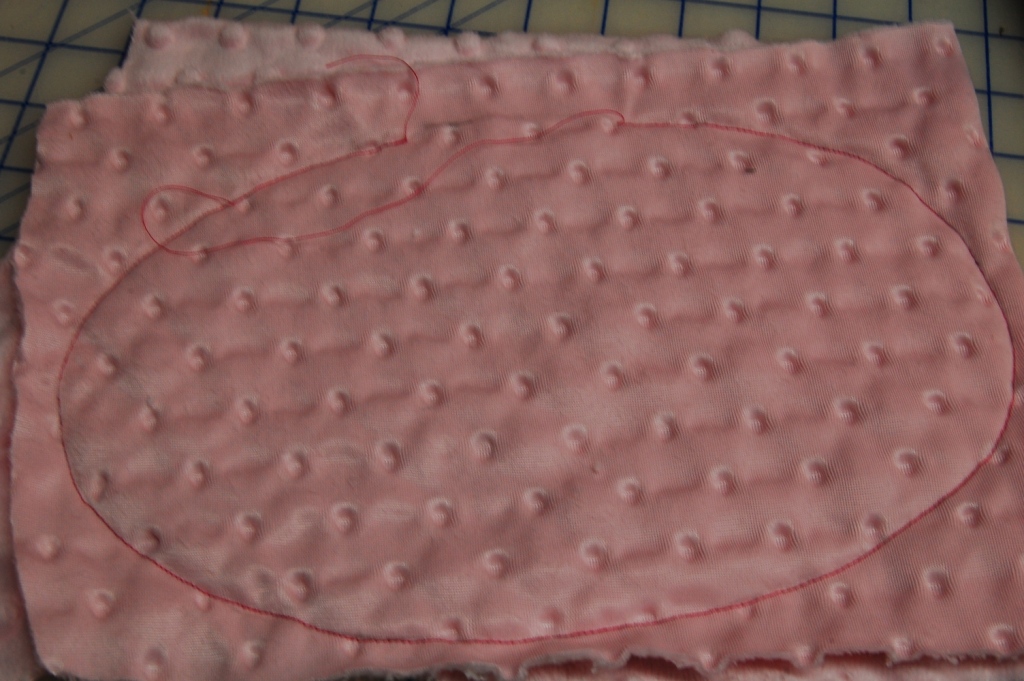
3.  Trim excess fabric leaving a 1/4 inch seam allowance.
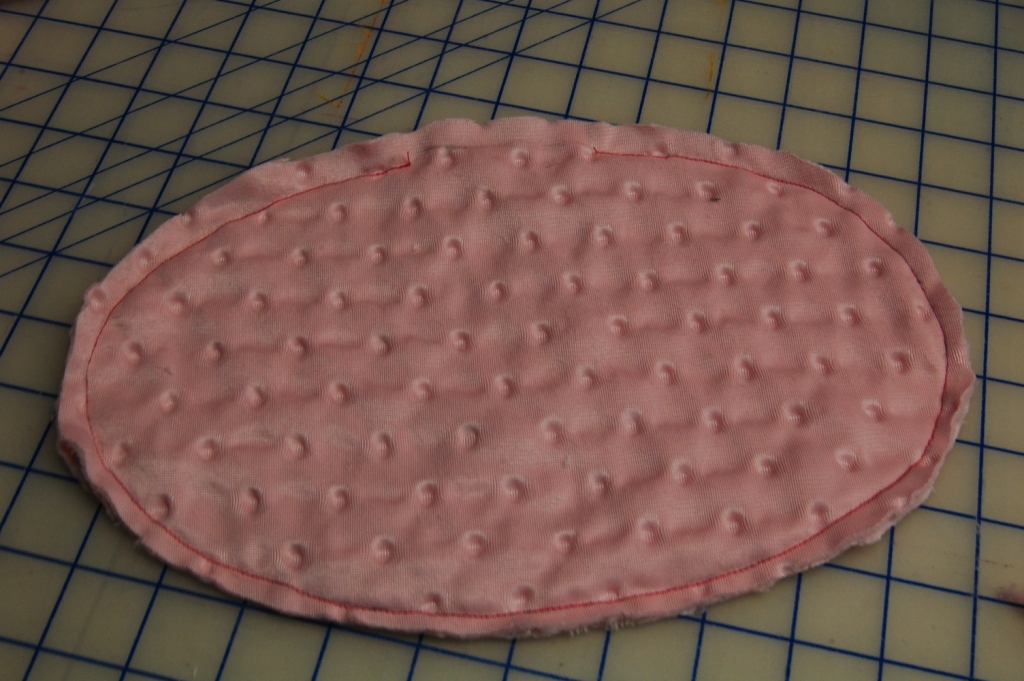
4.  Turn right side out and lightly stuff with a small amount of poly stuffing.
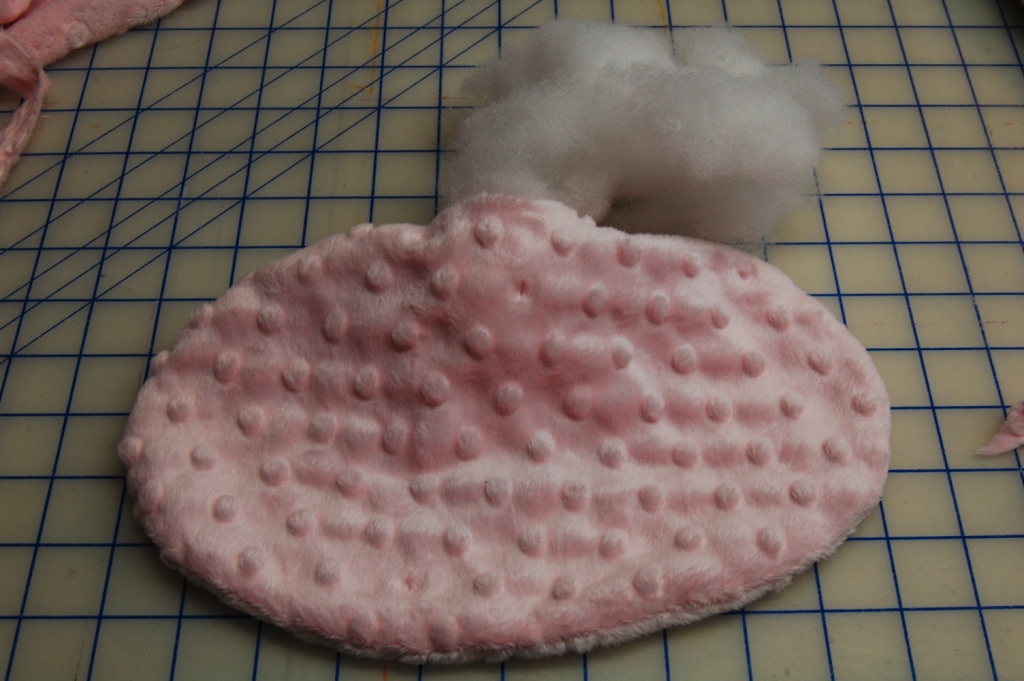
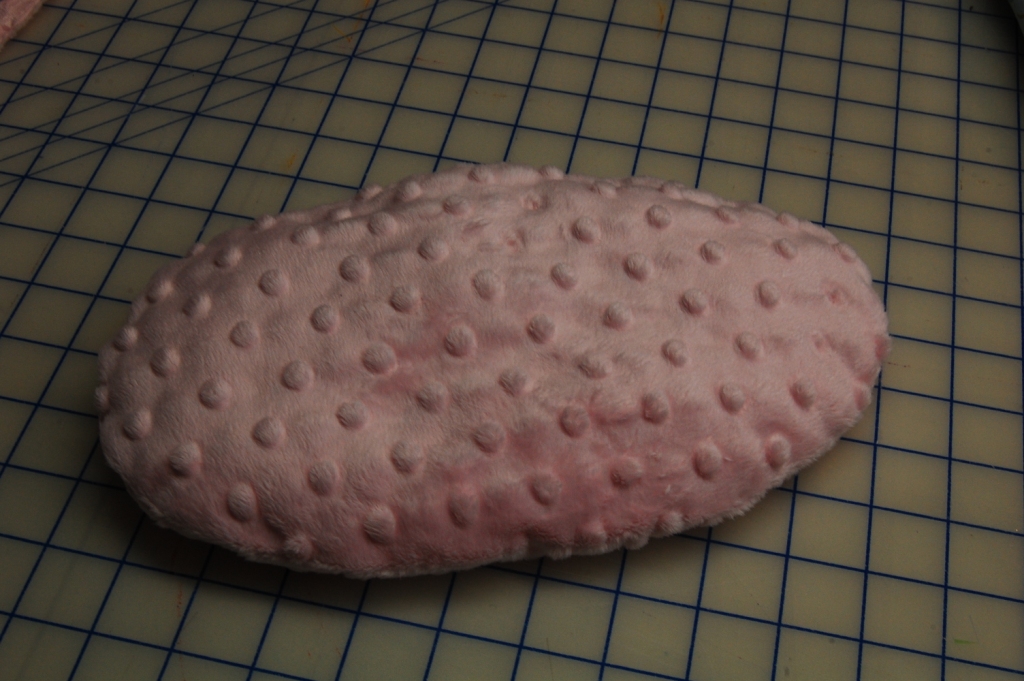
5.  Slip stitch the opening closed and set aside.
For the basket cover: Cut 1 oval

2 rectangles 6 x 31.75 inches for the lining

And 6: 3 x 31.75 rectangles for the outer ruffles. I cut 2 each from 3 different fabrics.
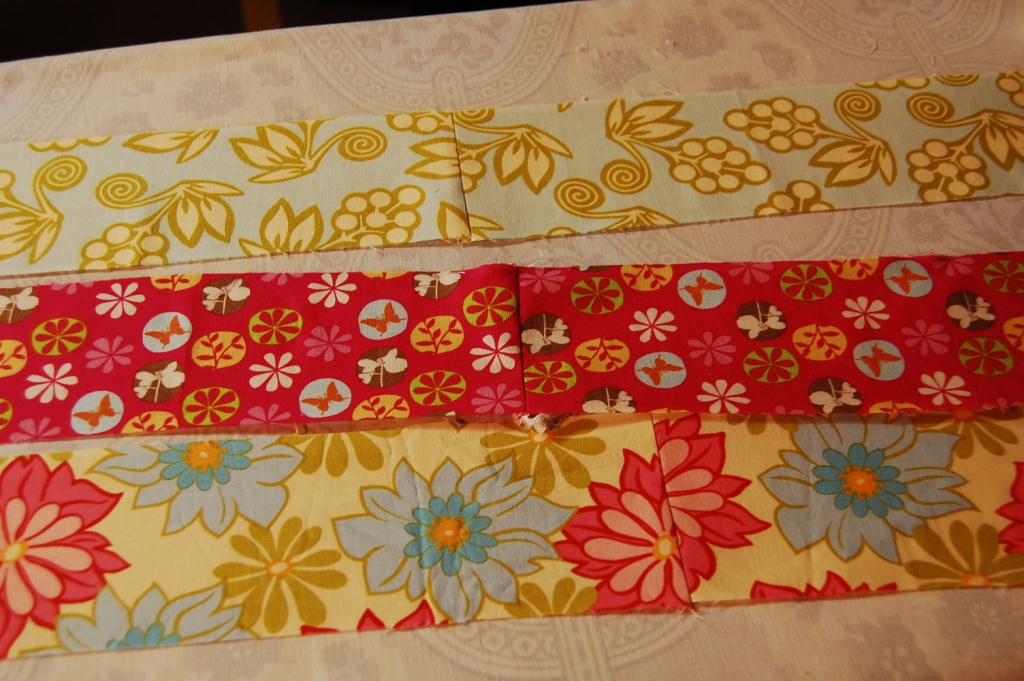
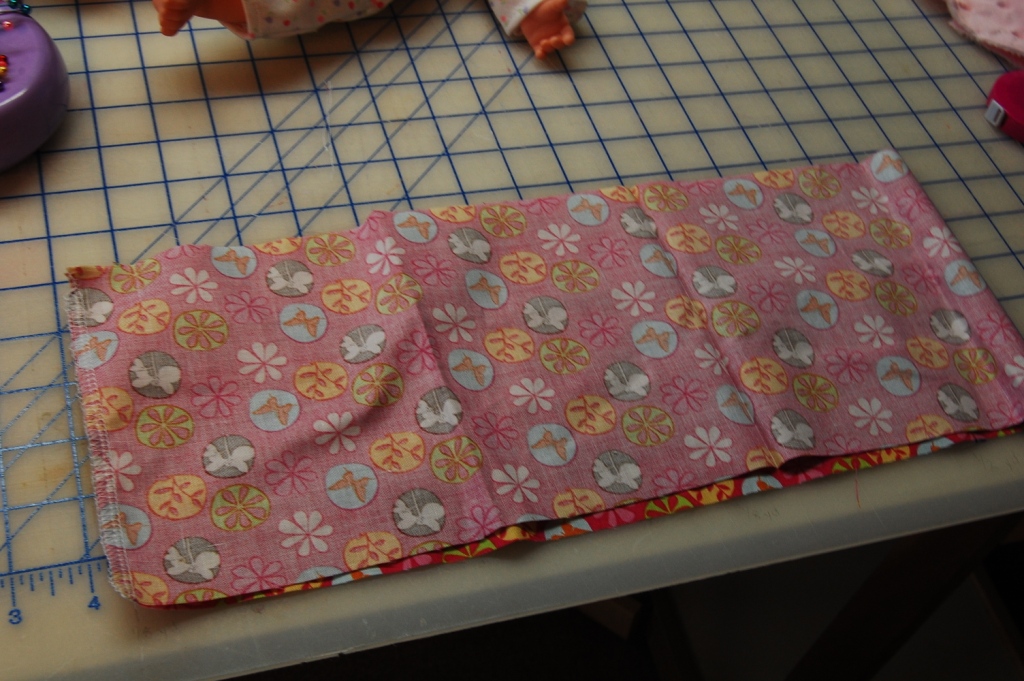
1. Sew each 6″ wide rectangle into a loop using a 1/4 inch seam allowance.  (I used a serger to keep it tidy, but you could zigzag the edges if you don’t have a serger.
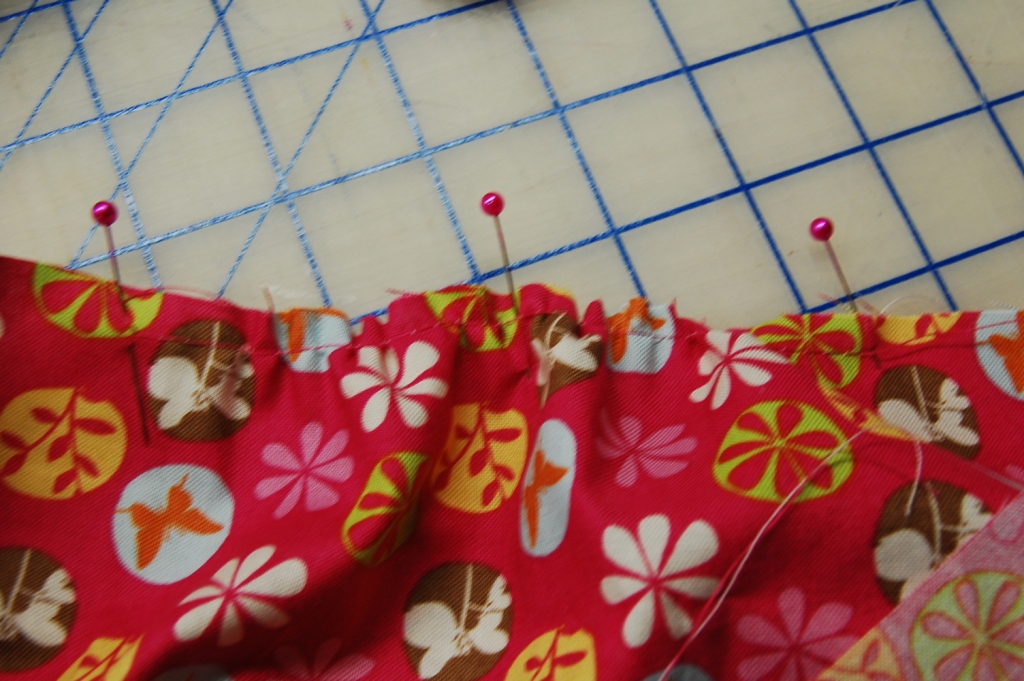
2.  On one 6″ tall loop of fabric only, run 6″ long swaths of gathering stitches on opposite ends from each other.
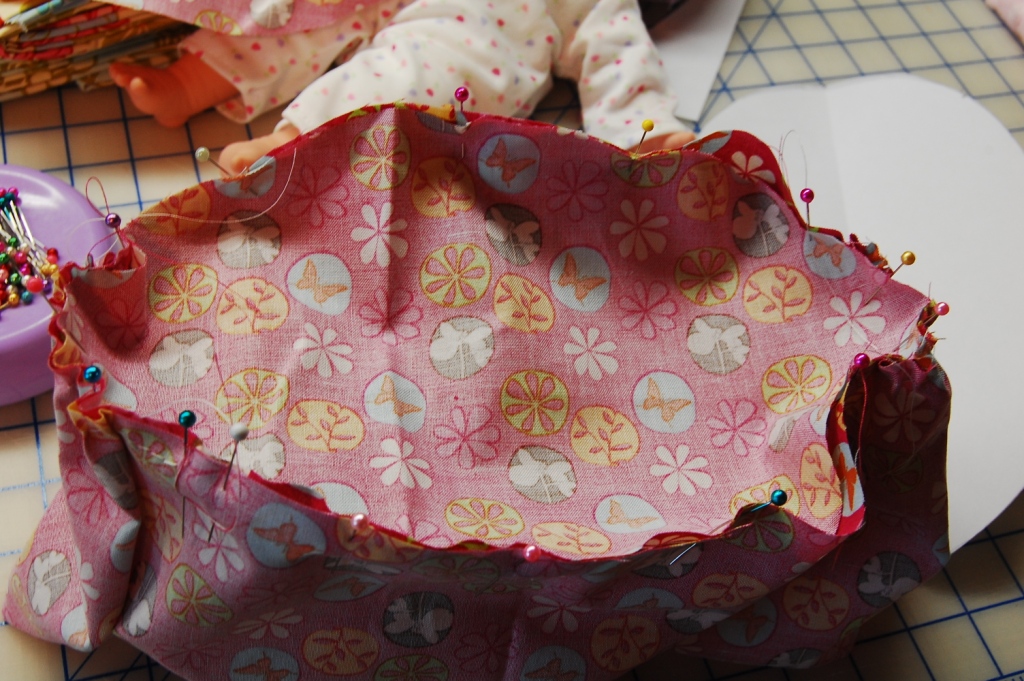
3. Divide both the oval and the loop of fabric (that you just put the gathering stitches in) into fourths.  Pin them rights sides together, matching the fourths and putting the gathering stitches around the oval ends to help everything fit well.  Stitch with a 1/4 inch seam allowance, then finish the raw edges.
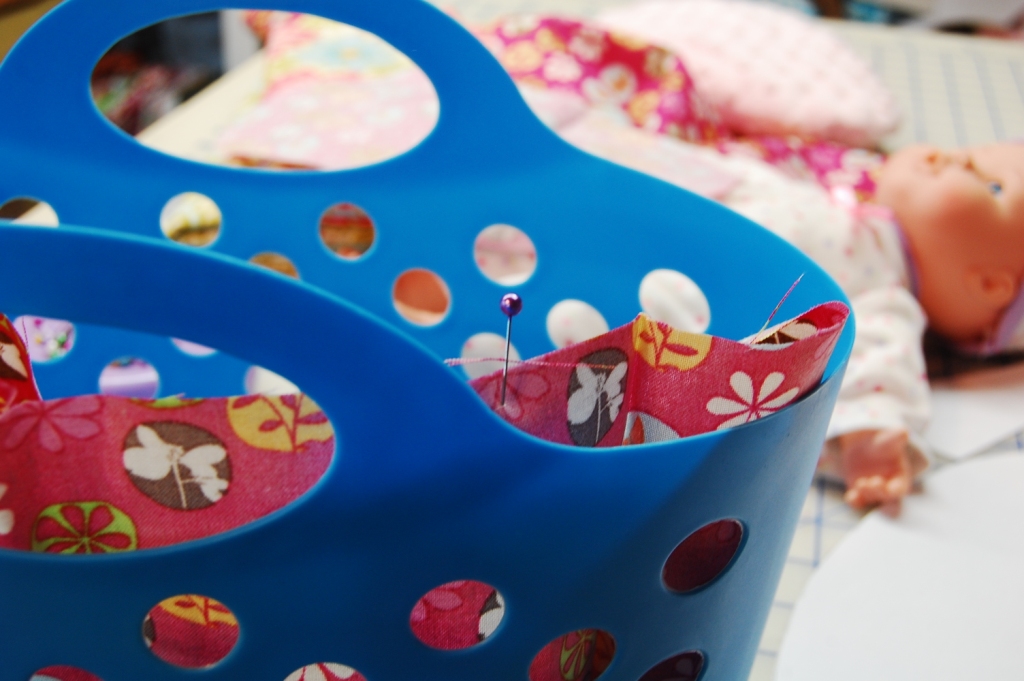
4.  Slip your liner inside your basket and mark each side of the handle with a pin.  Be sure to get the widest part where the handle meets the top of the basket.
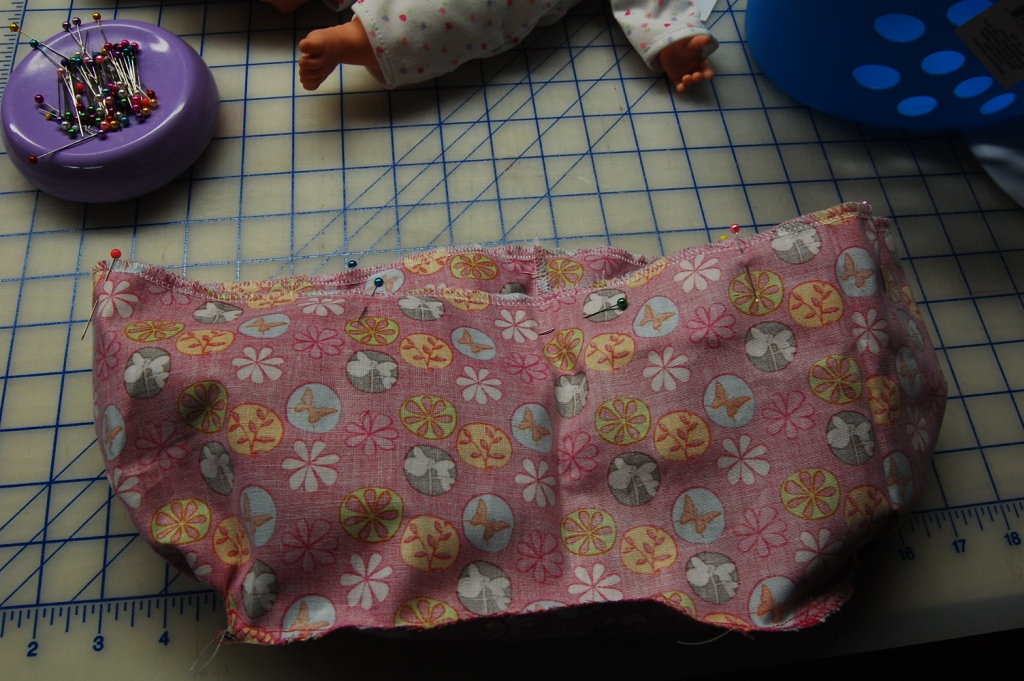
5.  (Note:  Before I did this step, I serged around the top of both loops of fabric so on step 6 the hemmed edges would be finished.)Pin your second 6″ tall loop of fabric to the top of the basket liner, right sides together.  Stitch with a 1/4 inch seam  leaving two openings for the handles between the marks you made with the pins.
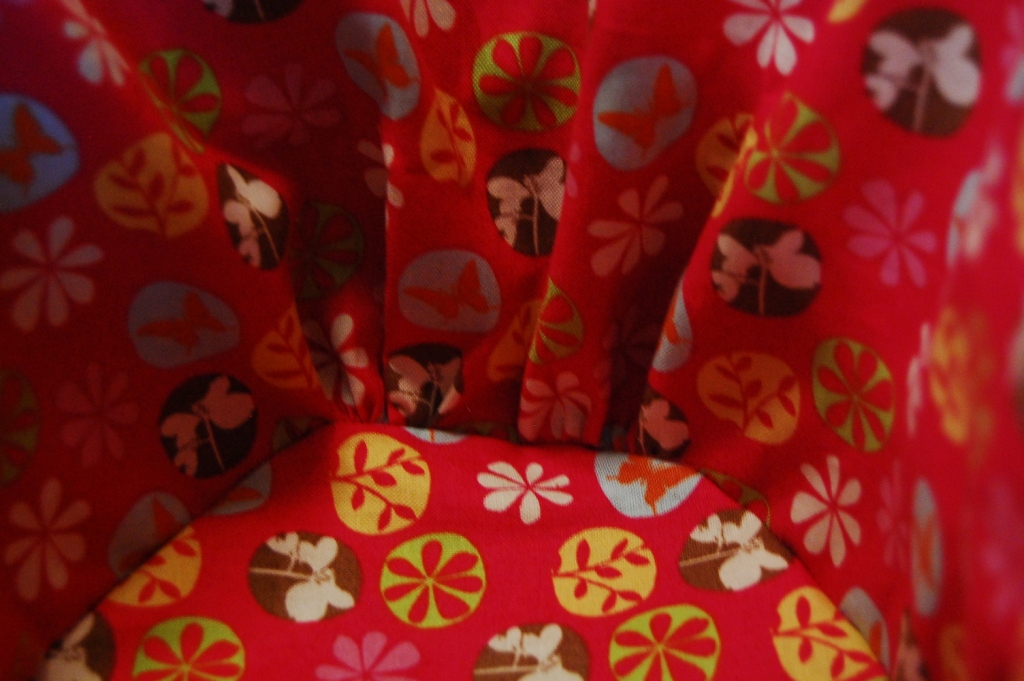
The ends will have cute little gathers like this on the inside.
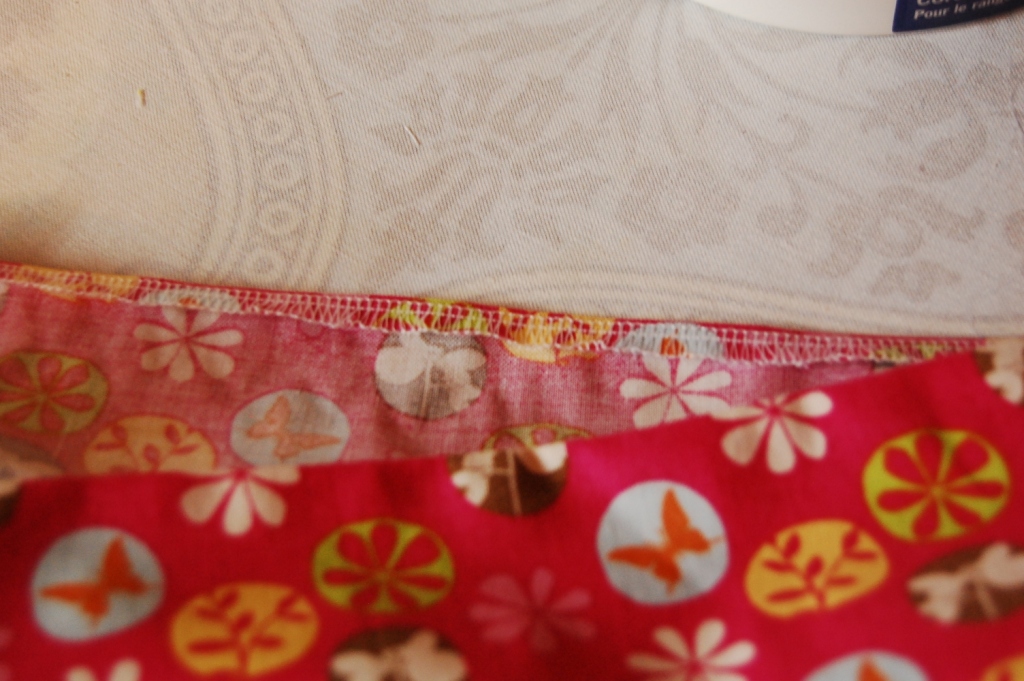
6. Press the seam allowance under on the openings left for the handles and top stitch all the way around to hem the edges.

7.  Make 3 pairs of loops for ruffles, by  sewing 2–3″ wide strips of fabric right sides together on the short ends, 3 times. Then hem both long edges of each loop. You could do it the hard way by double pressing narrow hems and top stitching or by using a rolled hem stitch on the serger.  I used a rolled hem foot on my sewing machine, tutorial below.
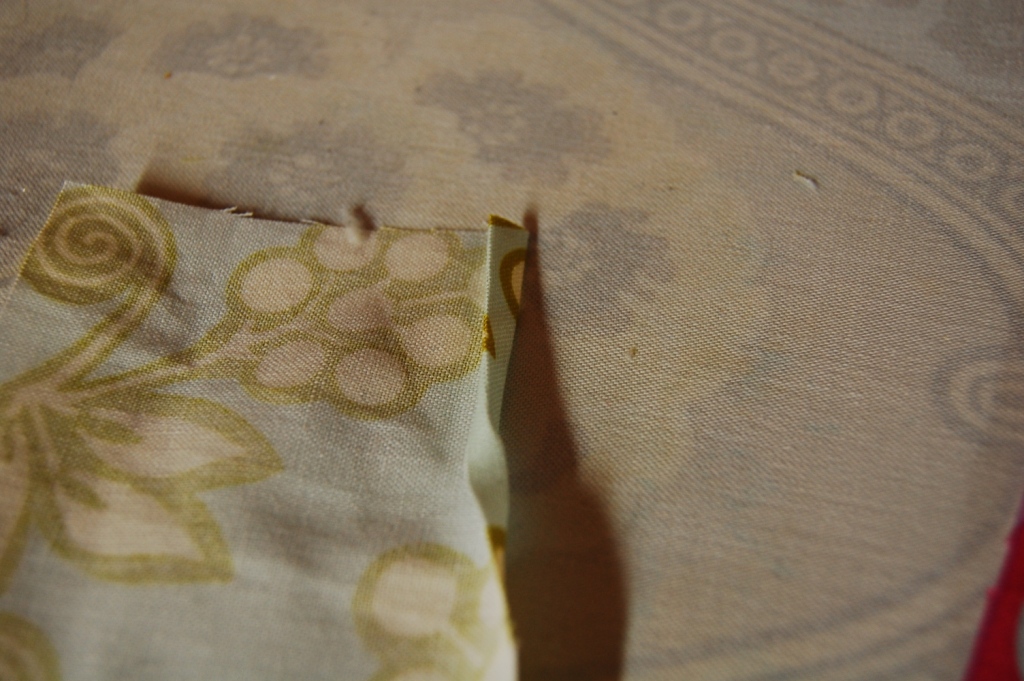
a.  First start your hem by pressing a small double turned hem about an inch down the strip of the fabric. (since it is hard to pull a seam through a rolled hem foot, I waited to sew my second seam until after the pieces were hemmed.
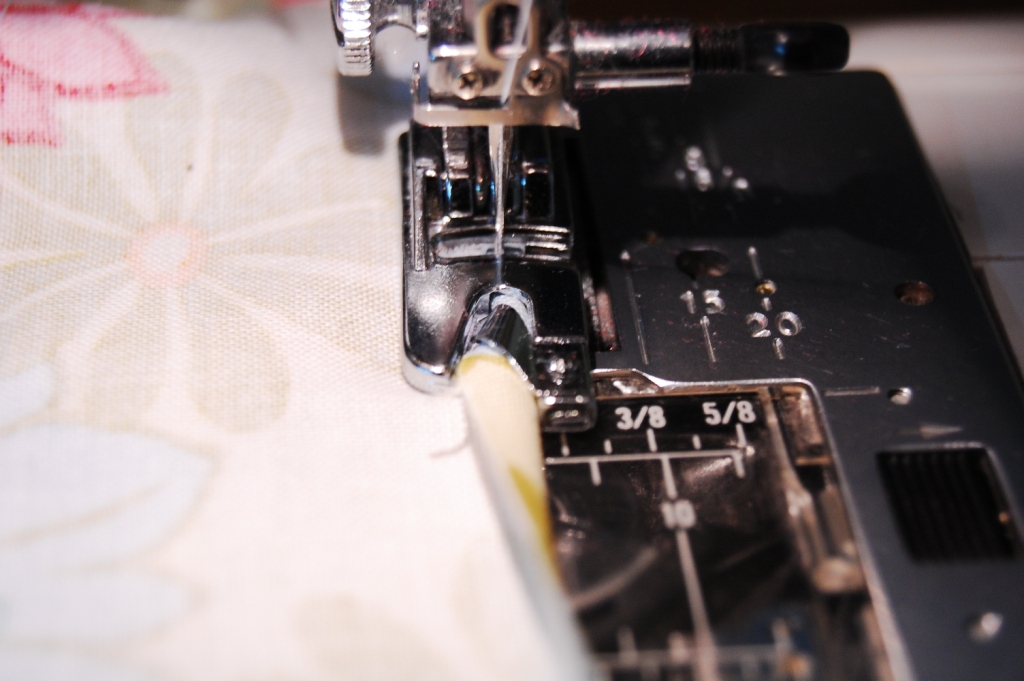
b.  Then slip your fabric into the foot so the raw edge fits into the guide.  The portion you previously pressed under is ready to go under the needle for a perfect (in theory) start.  As you feed the fabric through the foot be sure the raw edge is always fed into the guide correctly.  A little practice with some scraps will have you a pro in no time.
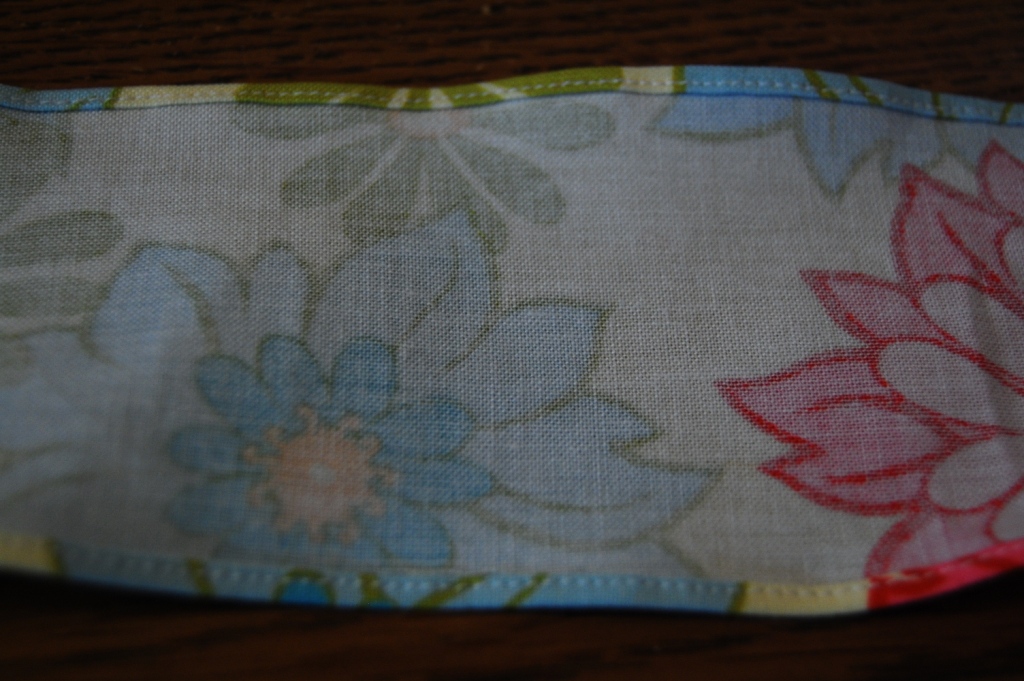

c.  It’s a challenge to go over the seam, you may need to use some gentle pressure to pull the seam through the foot. While you have your hemming foot out, hem the bottom edge of the basket cover too.
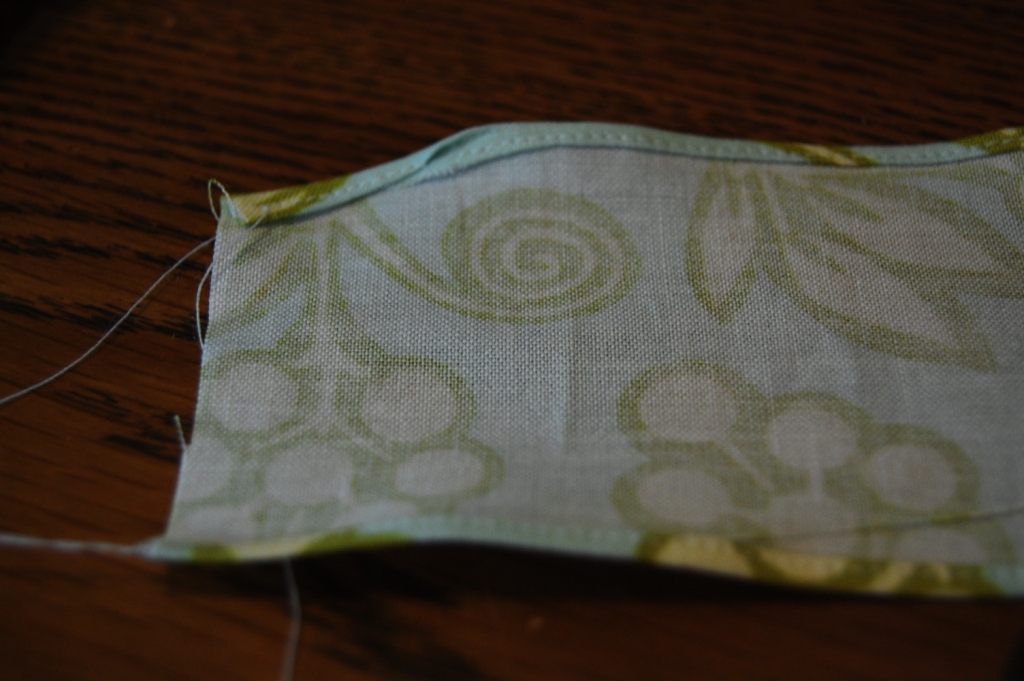
I had a rough start on this ruffle.  But once I got the whole thing put together it wasn’t very noticeable.  So relax and have fun with it.
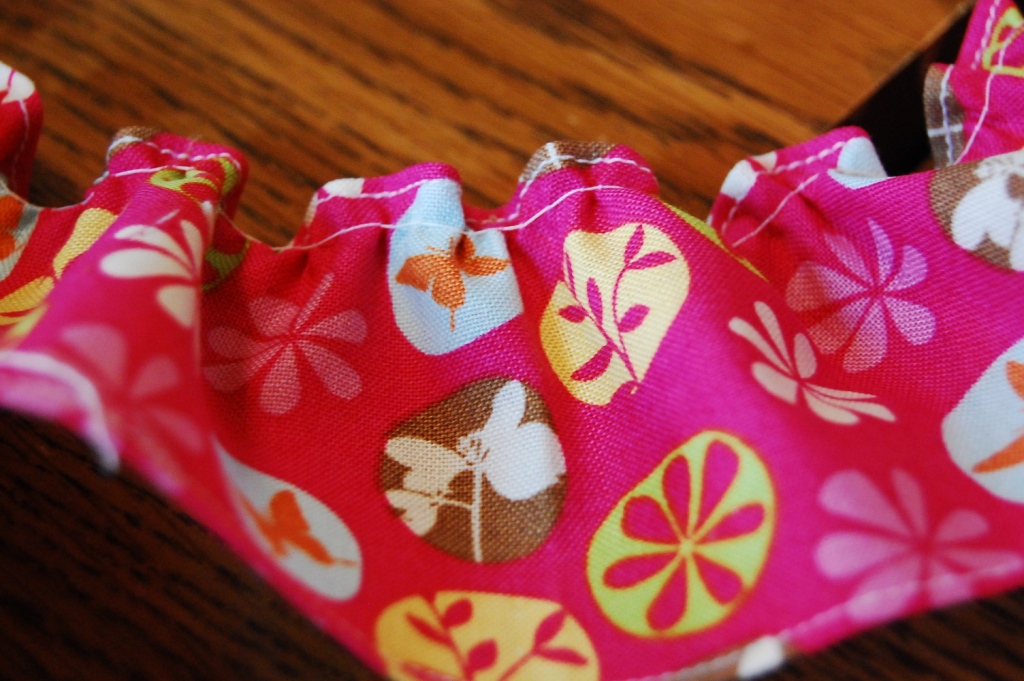
9.  Now that your ruffles are hemmed.  Divide them into fourths with pins, then run a single gathering stitch around the top.  (Hint, if you tighten your top needle tension as tight as it will go, the ruffles will gather themselves as you run the basting stitch. You will see be able to adjust them to fit as you go.)
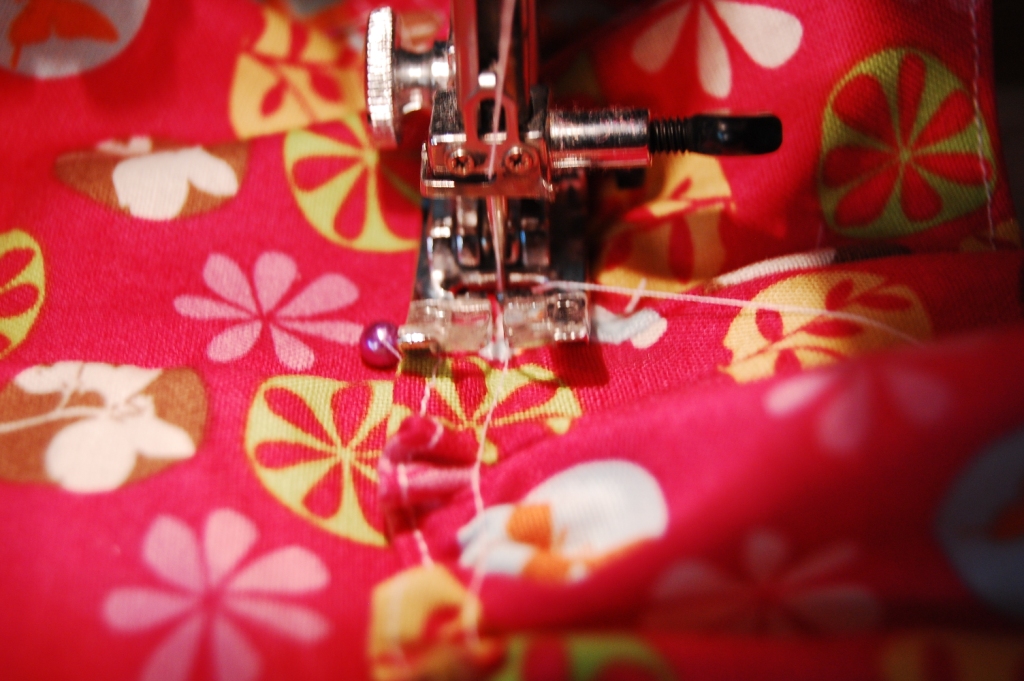
10.  Divide your basket liner in fourths too and pin your ruffle in place, matching the fourth markings and drawing up the gathers to fit. Pin the ruffle so the bottom edge of it lines up with the bottom edge of the basket liner. This was easy to do when the liner was actually on the basket.  Then top stitch the ruffle in place stitching right over your gathering stitches.
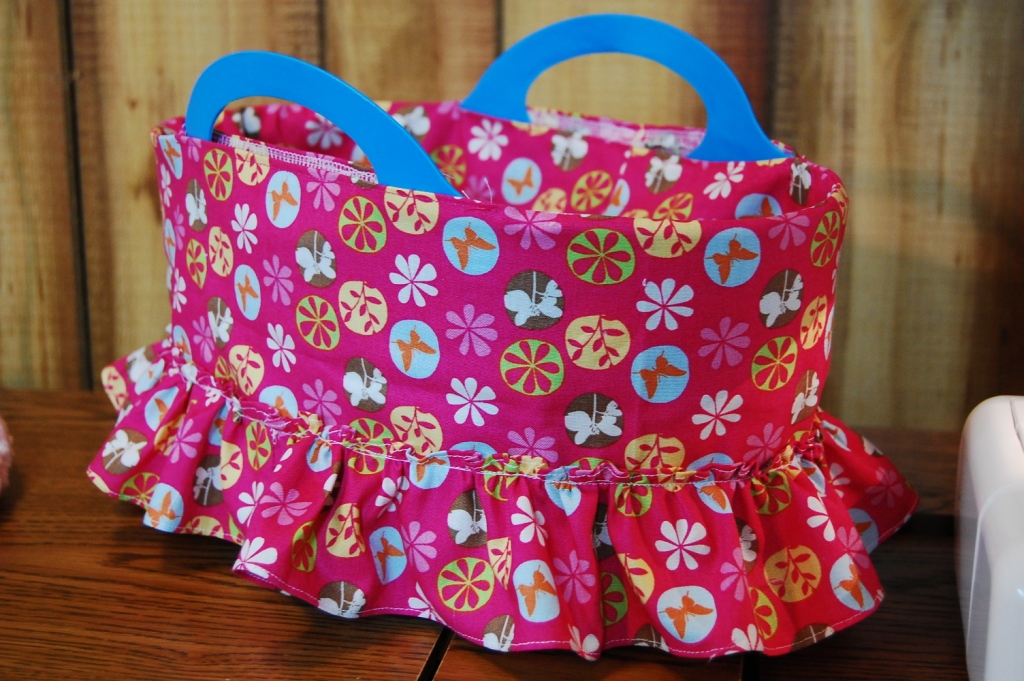
This is pretty adorable just like this. So if you want to, you can stop here.  Or add the next two layers of ruffles the same way, overlapping each row just a bit and lining up the top row with the seam line on the basket.
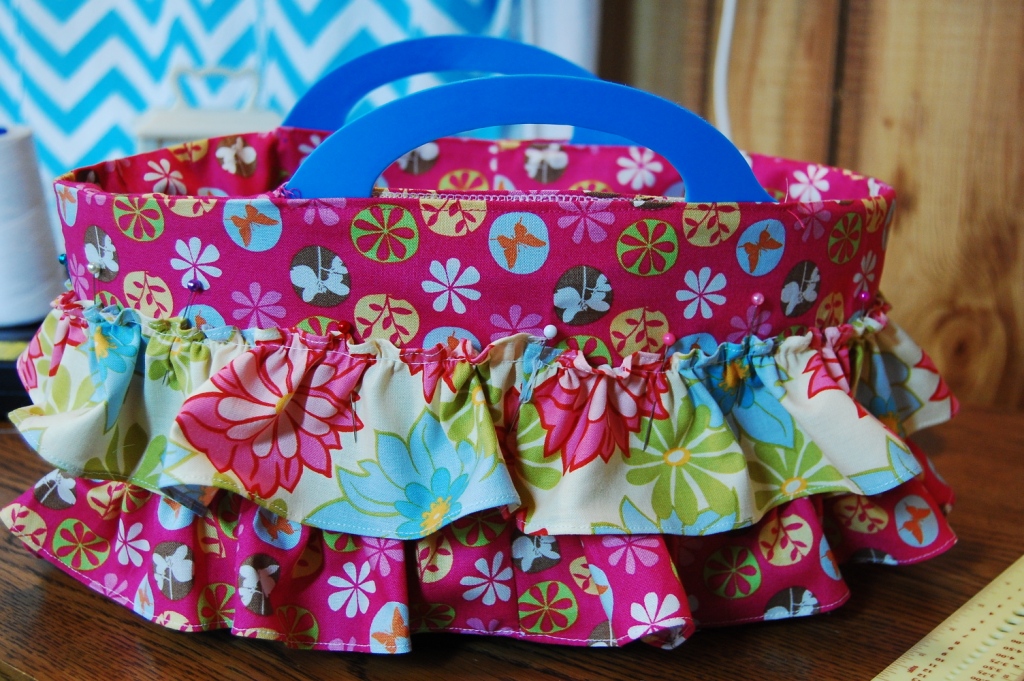
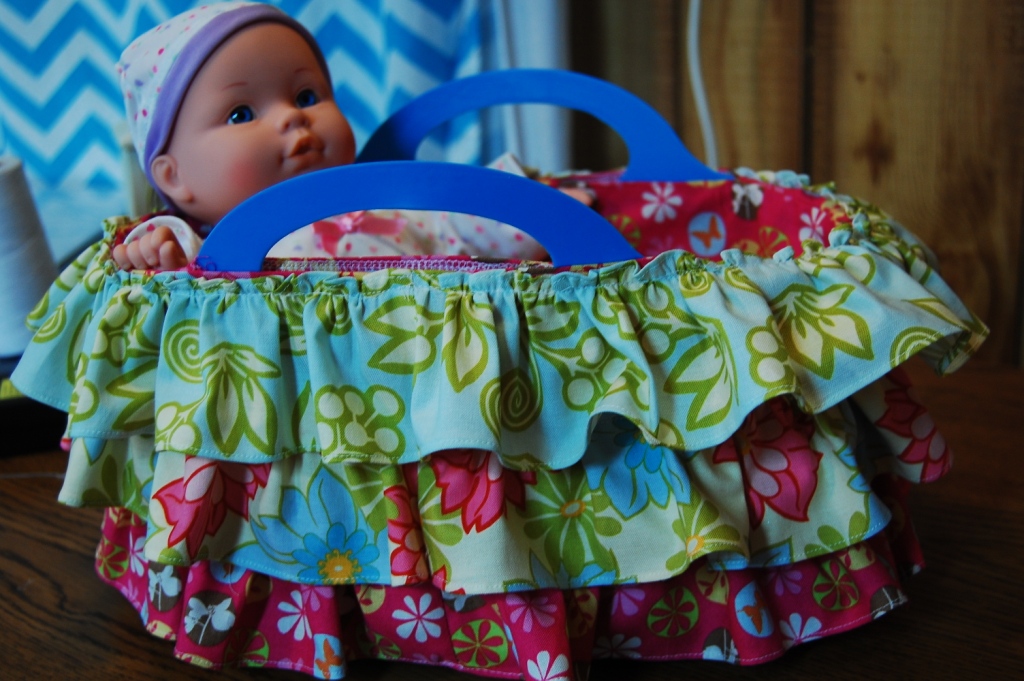
Almost Done!

12.  Use Fray Check or a candle to seal the ends of your ribbon.  Then pin in place centered on each side of the gap left for the handles.  Stitch in place along the same stitching line you hemmed with.
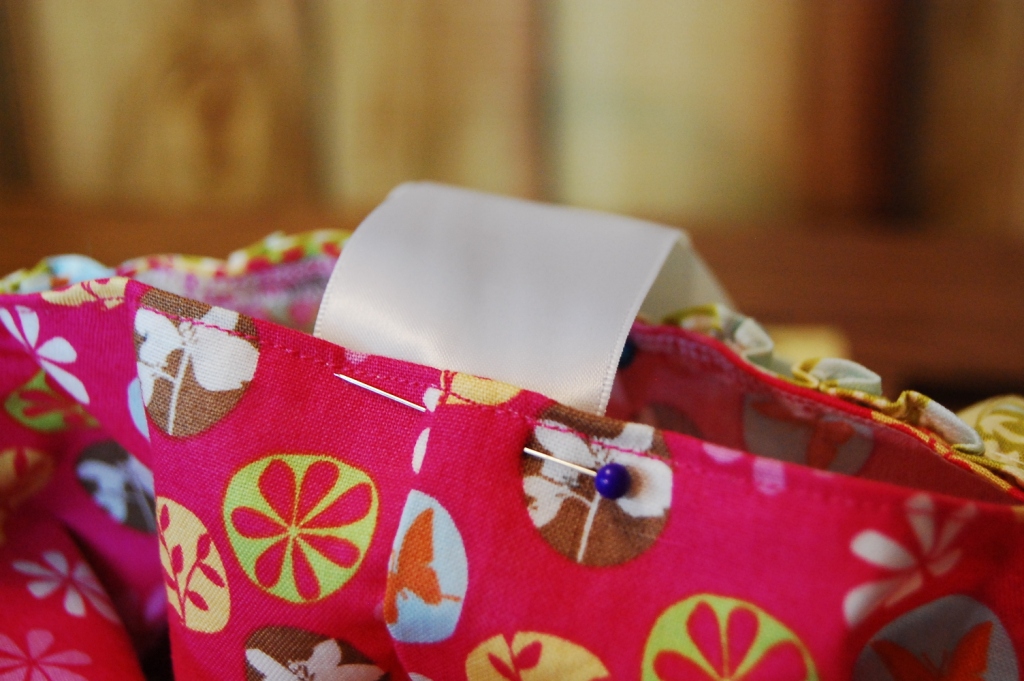
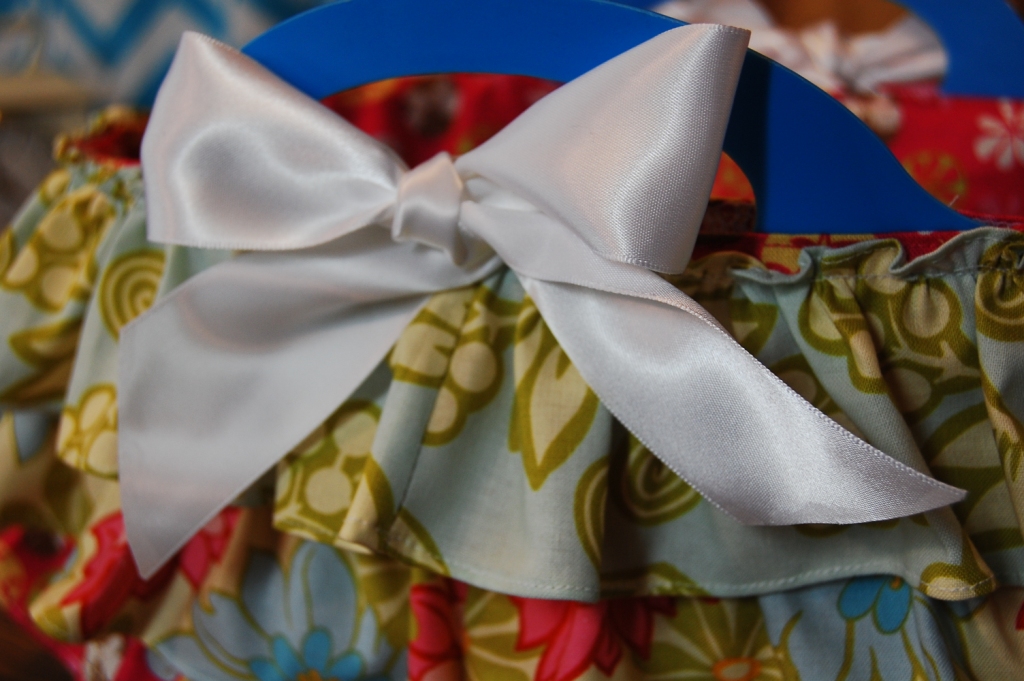
13.  Tie your bows, insert the little mattress and the dolly. Stay tuned tomorrow for the matching quilt tutorial.  You’ll be amazed how fast you can piece, quilt and finish it.  Great for last minute gifts.
 

Post contains affiliate links.

Christmas in My Living Room and the Sky

image

Did I ever show you my when my furniture came in and then my new rug? How about my garage sale curtain brackets, finials from the scrapped Queen Anne Setee upholstery projecy, and bargain plain curtain rods from Lowes?  I finally put them all together and hung my Target curtains and love it!

Of course, I still haven’t painted, or done moldings, or found any art for the walls. But with a tree like that to look at, I can wait :).

image

Last week we went to Christmas in the sky. It’s a fireworks display choreographed to Christmas carols on a local radio station. We parked nearby and turned up the car speakers. Lots of cousins were there and everyone danced and laughed. But not many children actually looked in the sky.

image

Darren laughed that we could have just put a boom box in the yard and had some cousins over and had the same good time without the long drive. And he was right, but somehow stuff like that never seems to happen without scheduling it in like the city did.

image

And I would have missed Dub pretending to create the colorful explosions with his arms and fists. That still makes me giggle. But very quietly in case my boy with the fragile ego might hear.

image

OOh, did I tell you about my new love of the Dollar Tree? Oh please don’t tell me it’s all from China. La, la, la. I can’t hear you. Everything in this display was off the dollar tree shelves and I love it. Unfortunately Grant does too. He can’t keep his pudgy hands off it.

I also finished my dining room floor. The shiny poly totally makes the streaky finish okay with me. I will move in my
dining room table tonight. But will wait a bit before the big reveal.  I have a bunch of DIY to do still and it’s going to take some time.

So I’ll leave you now with one final shot of my tree. Ah. Isn’t she lovely?

image

Not a Swimming Pool

But I’m excited. Here’s a before shot:

image

This is actually a picture of the twin closet in the adjoining room. But they were set up the same. I painted it ultra pure white, even the ceiling. It helps reflect the most amount off light in the windowless space, and shows the clothes in their true colors.

And After:

image

I’d like to make cute labels for the baskets. But for now I’m just putting things away.  RugsUSA.com is hinting at a nice black friday rug sale and I’m thinking about getting one of these for the closet floor if they go cheap enough. Do you have a favorite?

image

Or

image

I also plan to look for an affordable large framed mirror for the end of the room. Old Time Pottery usually has somethig fantastic at a good price.

I snagged this one on second discount from Big Lots:

image

It’s too girly for them though. I hung it in the Living room already even though I still need to paint. You can see a smidge of the new paint color peeking to the right of the mirror.

image

It’s a light taupy gray and looks awesome with white trim. I used it in the bottom half of my dining room.

image

She’s already to lay the paper floor over the ugly vinyl. I’m so glad I made a detailed tutorial on how to do this a few years ago on my blog. It’s been so long, I need a refresher. Caleb is holding his breath for me to finish it, so he can have his birthday party. He was 11 October 22nd and still hasn’t gotten his cake or presents yet!  Whatever I do for his party, it better be good. The saying goes, “Good things come to those who wait.

Dinosaur Party

image

Cake made from 2-9 inch round cakes. The eyes are one marshmallow cut in half. Pupils and nostrils are chocolate chips. Orange slice claws and eyebrows and chocolate covered grahams cut in half for spines. I found the directions on Pinterest.

image

Posterboad Dino cutouts, paper mache volcano, and felt dino beanbag toss, all made by my mother. She made the volcano base from and oatmeal carton with crumpled paper around to build shape. This was displayed in the entry with green streamers hung at the doorways like moss. And a dinosaur sound effect clip playing in the background.

image

Cousins getting ready to compete in the beanbag toss.

image

The birthday boy, hunting for dinosaur eggs. Those crazy dinosaurs will lay eggs anywhere!

image

My nephew, Sean, showing me his “only 2 left!” Face. This was a cousin only party, per Brandon’s request.

image

Dino helium balloons, inspiration from Family Fun Magazine.
We also played hatch the dinosaur. I placed small rubbery dinos inside balloons and the kids had to pop them as fast as they could to get the dinosaurs out.

And we played musical foodprints– marching around paper dino tracks to the tune of “We are the dinoaurs.” When the children were “out” I gave them a dinosaur sticker scene craft to work on as their prize.

We also planned a dino egg (water balloon toss) and a dino dig in the sand pit out back, but we ran out of time. I just passed out coloring books and squirty dino head prizes instead.

image

Enjoying the grub. I missed getting a picture of the buffet. I hope my mom took one. We served Dinosaur Meat Chili (Tastes like beef.) Dino Bites (Tastes like chicken,) Dinosaur Teeth (sliced green apples,) Dinosaur claws (bugles,) Prehistoric trees (steamed broccoli,) and mixed swamp ferns (gourmet salad blend.)

image

Grant preferred the chocolate covered grahams to the cake or icecream. He’s my chocolate lover 🙂

Happy 5th Birthday, Brandon!

Fall Colors on a Missouri Drive–Plus guess the answer

Darren preached in Macon yesterday. It was a 3 hour drive. We left home with 3 kids in tow at 6:30 so I slept most of the way. My eyes popped open when we were 30 minutes out and I was overcome with how beautiful the trees were.  I snapped sone pictures:

image

image

image

image

image

Grant enjoyed the drive too 🙂

image

The older children stayed home and went to our regular church for the first Christmas program rehearsal. It’s hard to believe it’s already that time of year. Speaking of Christmas, do you know when the cheapest prices are for buying Christmas gifts? Put your guess in the comments below and I’ll reveal the answer later this week.

Restaurant Style Spinach Queso Dip Recipe

Heidi and Caleb are home after spending a week on the farm. It took about 2 days for me to get over how easy it was to set the table and put children to bed with 2 less and then really start to miss them. I’d think of questions to ask them, things I wanted to show them…and then realize they weren’t there. Sniff. When they showed up yesterday, Grant took turns grabbing their necks and just leaning in. It really made their day…and mine too.

School starts on Thursday for us. Wednesday is Heather’s birthday and we have shopping plans :). And I just signed on as our school’s High School music teacher. I’m super excited and nervous all at the same time. I have to leave in 5 minutes for my first staff meeting in 11 years. But first, I want to give you this fantastic recipe that I developed last night in honor of my children’s return.

Everyone in the family loved it. Even the picky non-spinach eaters. We used mild chilies and it was decidedly not spicy. You could use spicier chilies or add more cayenne if you like. But taste it first and adjust as you go.

2 cups milk

1 tsp salt

1/4 cup flour

1/4 tsp cayenne

1 tsp cumin

1 can, 4 oz, green chilies

2 cups finely chopped spinach (I used fresh, but frozen would work too.)

Whisk flour into milk and add remaining ingredients.  Cook and stir over medium high heat until thickened.  Stir in 2 cups of cheddar jack cheese (Costco has this in 5 lb bags for a bargain.)  Cook a little longer just until cheese is melted.  Serve with tortilla chips.

Driving through Needle Pass

We were watching our home videos after getting home from the trip and had to laugh at ourselves. It doesn’t take much to send me off in a Bible or Science lesson, lol.  Even though I’m sending my older children to Christian school this year and am only homeschooling Preschool, I will always be a home school teacher at heart.