Guest Post: Heather Boyd from the Cozy Cape

Hi Friends over at The Grocery Shrink!
First, I want to offer my Congratulations to the Coffman family on their new addition! That’s so exciting… which brings me to why I’m over here at Angela’s blog today. This month Angela has asked several bloggers to tackle the topic of organization while she’s on maternity leave. I first discovered Angela’s ol’ blog when she wrote this guest post for Layla and Kevin Palmer.  You see, when I’m not blogging over at The Cozy Cape, I produce the television program The 700 Club. I had Kevin and Layla on the show more than a year ago (see their segment here). Then when I read Angela’s frugal food tips, I knew she’d make a perfect guest for the show. So, we flew her out and she did a great job (See her two segments here & here).  

During Angela’s time in Virginia Beach, I learned that she needed guest posts during her maternity leave, so here I am.
Angela asked that I write about organization. Let’s get one thing straight—I do not claim to be an organizer extraordinaire. In fact, I’m quite the opposite by nature. (Angela’s Note:  That’s exactly why we want to hear from you–grin.  If you can do it; we can too.) However, living in an older home (1950’s Cape Cod) has forced me to get creative. Things are still crazy and disorganized at the Boyd casa at times, but I do my best to find ways to know where things are and to minimize stress. So today, I thought I’d share simple tips that I’ve learned along the way that will help in the organization department.
Tip #1: Our Pantry.
Our pantry looked like this at one time…

I knew I had to get it under control. I had great shelving space but it was a jumbled mess. So I headed to The Dollar Store where I picked out these fabulous and colorful baskets.


15 baskets equaled 15 bucks. Score! These baskets caught my eye because the plastic makes for easy clean-up. Plus, their holes make it simple to spot what’s hiding in those baskets. I whipped up some cute labels using chalkboard sticker tags from Leen the Graphics Queen and some spare scrapbook paper that I had on hand.

Now everything has a spot.

And if I ever need to change the contents of the baskets, the chalkboard tags allow me to change the labels with one wipe of a paper towel (shh, don’t tell Angela that I haven’t given up my paper towel obsession. I’m still working on that!)
Tip #2: Speaking of Chalkboard tags
I had two tags leftover from my pantry makeover… so I slapped those babies onto two glass containers and filled them up with sugar and flour.

A simple and clean look in a matter of seconds! And we’ll say it’s a bonus that my flour and sugar now stay fresh and it freed up some room in the cabinet above. Oh, and if anyone is wondering, those glass jars were purchased at Walmart on the cheap.
Tip #3: Decorating Doubles
About a year I began redecorating our home on a budget… and I haven’t stopped since (see our living room makeover here.) As I planned out the new look for our home, I always looked for furniture that had more than one use. Here are some examples:
Storage ottomans purchased from Target:


They live by our front door. When they are pushed together, they act as a bench where we can put on our shoes. Then, when we are entertaining we can pull them out for extra seating. And when we want to sit back and relax, we pull them in front of our sofa so we can curl up and watch a movie.

What’s that, did you say it was cold in here? Well, no problem. The tops open right up so we can house (and hide) blankets for those cold winter nights.


Tip #4: Dishwasher Despair?
This tip revolutionized my life. Okay, well maybe that’s an overstatement… but it certainly cut down my kitchen cleaning time. As you load your silverware, put all the silverware’s mates in the same compartment. Knives go together; forks go together; spoons go together. You get the idea.

Then, when it’s time to empty the dishwasher, you can put away all of the forks in one fell swoop. Rinse and repeat with the rest of the silverware.
Tip #5: Closet Claustrophobia
Yep, that’s right. I have closet claustrophobia! We have small closets and I’ve wracked my brain in an attempt to find a solution. I thought I’d leave you with a project that I’d like to do to in an attempt to remedy my small closet issues. I came across this post from Ana White of “Knock off Wood.” Ana expanded her daughter’s storage space with a few 2×4’s.
Here’s the finished project. (The next 3 photos are from ana-white.com)

If you’d like the 4-1-1 on the full project, head on over to Ana’s blog. You can get the full how-to right here.

I look forward to seeing some of you at The Cozy Cape. Angela, thanks for having me. I enjoyed my stay!

Heather

Liquid Laundry Soap

Yesterday, Stacy, our guest from Stacy Makes Cents, shared with us her favorite Powdered Laundry Soap Recipe.  This is the one she uses most becuase it is so easy and mess free to store.  But I know many of you interested in liquid laundry soap since it is already dissolved completely.  Stacy is back with us today to share her favorite Liquid Laundry Soap recipe.

Homemade Liquid Laundry Detergent

Meet Ruth and Rebecca. They’re expert laundry soap makers. Why are you seeing their photo? Well, because I tried making some laundry soap at home and it was a total dud. I mean, it was the duddiest of the duds. I got mad. This should be something I can do, right? Well, my soap chunked up and became almost un-stirrable. It was sad. I was sad. I was mostly mad though. I hate when I mess something up. So, I contacted Rebecca because I knew she made her own laundry detergent with her mom. I asked if I could come over and take photos to find out what I was doing wrong. Well, I wasn’t adding the same amounts of stuff that they were. Turns out that not everything you read on the internet is true. GASP! Sorry Al Gore. So, here is the story of the soap – the right way.

You need the same things to make this stuff as for the dry version, but you’ll add water…..lots and lots of water. You’re going to boil water like you’re having a baby folks. The amounts that I’m going to give you here are for half of a 5 gallon bucket – or 2 ½ gallons. Yes, I  graduated college with a math degree – not.

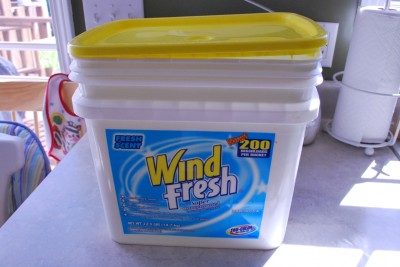
Where does one get a 5 gallon bucket? I’m sure you can buy one at Lowe’s, but maybe you have one just collecting dust somewhere in your garage – or maybe you in-laws have one gathering dust in their garage. Don’t go out and buy one until you ask around for a free one. You can even call restaurants and ask them if you can have their empty pickle bucket…..or maybe you can ask them to donate a few pickles too. I love pickles. Ruth used a big, white bucket with a nice handle – I use this jobber. I got it from Sam’s when I was buying this laundry detergent. That was before mom and I both determined that it was making our washer smell funny. Guess there was  a reason it was so cheap.

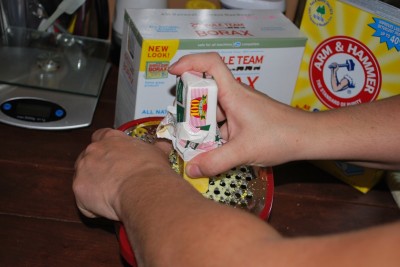
So, you need to grate your soap. About half a bar. It’s going to make your house smell really pretty. I feel pretty, oh so pretty! Oh, and try not to grate your knuckles like me. We don’t want bloody laundry detergent.  Doesn’t Rebecca have nice hands? She should be a hand model.

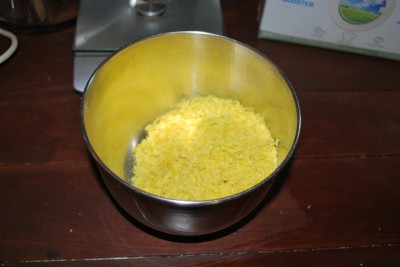
Here it is all done. It looks like yellow snow. Yikes. You know what they say about that. Don’t eat it!!!!

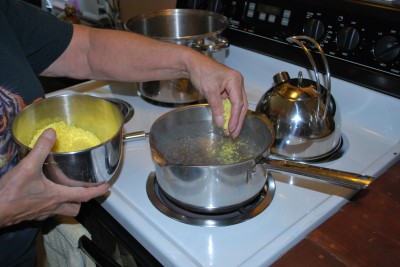
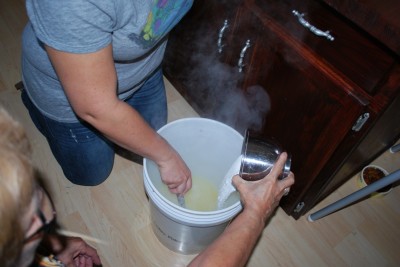
Now, you should have some hot water almost boiling on the stove. I guess I should have told you that earlier. Oops! Add your grated soap to the water a little at a time and stir well.

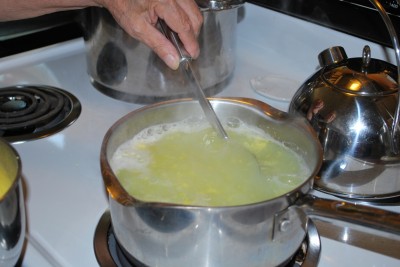
Now, this is important….listen up! Bring the mixture to a boil and stir until the soap is all melted. I didn’t do this part, so maybe that was part of my issue. You need the soap totally melted. Mine never got that way because I didn’t boil it. I just let it warm over low heat. Thanks for the tip, Ruth!

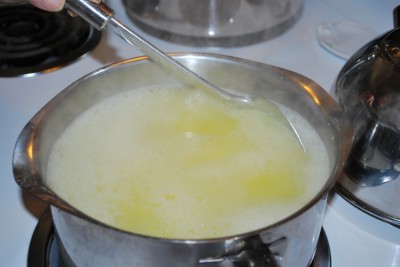
Here is it melted. It will look like yellow Kool-Aid. But please don’t drink it – unless you have a dirty mouth. Keep stirring and boiling until it’s all melted and no little clumps remain.

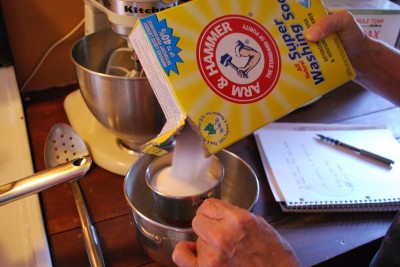
Grab a smallish bowl and add one cup of Washing Soda. Like I said yesterday, you can find this stuff at Food City and Kroger. If you know of somewhere else to find it, please let us know!

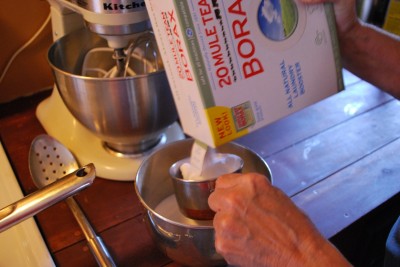
Now, add a cup of Borax to the Washing Soda. Mix well. If you have clumps of Borax, just use your hand to break them up. For some reason my Borax always clumps….but Ruth says her’s does too so I’m in good company.

Pour your soap mixture into your big bucket. Add the dry mixture to the soap water and stir well until it starts to dissolve.

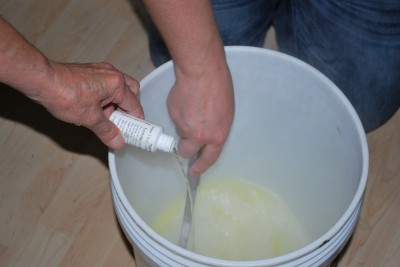
If you want your soap to smell all pretty and nice, then you can add ½ ounce of essential oil. They used Lemongrass Sage. It was delightful! I would love to smell like Lemongrass Sage all day……or Tootsie Rolls.

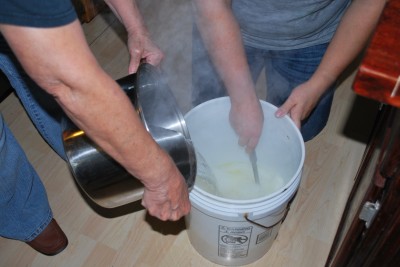
Oh, and I also should have told you to have a big pot of water simmering on the stove. When you’re done stirring your Borax and oil mixture then you can add this additional water. Stir until the dry ingredients are totally dissolved.


Now, top off your bucket – half full for this 5 gallon bucket – with warm water from the tap.

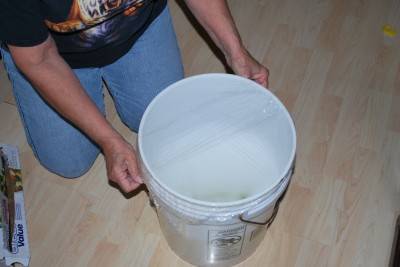
Ruth covered her bucket with Saran Wrap. But if your bucket has a lid, then you can do that. You’ll want to stir it a couple times over a 24 hour period – you won’t use it for 24 hours anyway.

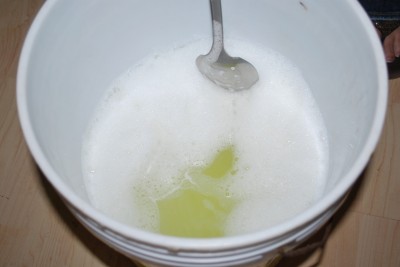
Now, Ruth says that this detergent is like soup – no two batches are the same. It could be that your detergent is really thick and chunky, like goop. Or it could be thick on top and thin on the bottom. That’s ok, because you’ll need to stir it each time before you use it. So, if you look at your detergent and think “this isn’t right” then congratulations! It’s right. Mine was terribly wrong because it had large chunks of soap that hadn’t dissolved and a large, LARGE layer of foam on top. I didn’t let my soap all melt. Don’t make my mistake. Don’t be stupid. Ruth says her detergent looks like snot. Yep, I’d agree with her. But guess what? It’s really pretty smelling snot!

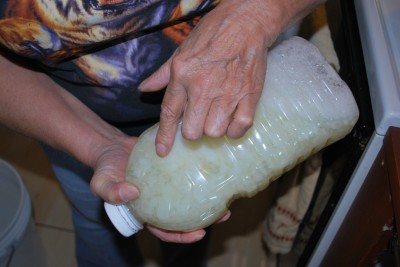
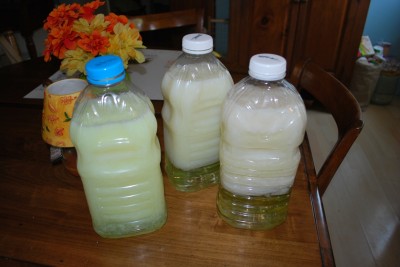
Now, after Ruth and Rebecca let their detergent sit for 24 hours, they divide it into smaller containers like this. That allows them to shake the bottle to incorporate it all together instead of stirring like I’ll do in my large bucket. You could also use an old, empty laundry bottle….but Ruth said that didn’t really work for them. See how it separates? That’s why you have to shake/stir before each load of laundry.  You’ll use 1/3 to ½ cup per load.

The cost difference for the liquid is about the same as for the dry version, about $.02-.05 per load….versus $.20+ for the store variations.

Like the dry version, this is also compatible with high-efficiency washers, easy on sensitive skin, and reportedly safe for cloth diapers.

Guess what? When I tried it the second time, it worked. Thanks Lord! I really didn’t want to make a million batches to get it right…….but I’ll probably use the dry version most of the time because of space issues.

Thank you Ruth and Rebecca for sharing your time with us and showing us how to be better home economists!

½ bar Fels Naptha, grated

1 cup Washing Soda

1 cup Borax

Homemade Powdered Laundry Soap

One of the most popular parts of my blog are the free homemade cleaning recipes.  And the #1 asked question is for a recipe for homemade laundry soap?  I used to make my own, but after a few months, it no longer satisfied me. I now buy Arm and Hammer brand powdered detergent from Wal-mart which is $.13 a load.   I’d feel bad giving you the recipe I didn’t like when I won’t use it myself.  So I found someone that loves to use homemade laundry soap and asked her to write about it here.    Stacy’s recipe is about $.05 a load–a little less than half of what I spend.

I’d like to introduce you to Stacy from Stacy Makes Cents.  She’s a wife and mom and she loves to save money!  Here’s her recipe for powedered laundry soap:

Homemade Powder Laundry Detergent

I had been wanting to make my own laundry detergent for a while….but being busy with Annie and other things kept me from it. However, when a reader asked me to write about the process, it was the shove that I needed – but in a good way, not like a shove off a cliff. The verdict? I really, really like it. It gets everything super clean and at a fraction of the cost of store-bought detergent. My mom and I have been using it and we’re both fans. I think when I empty out the last of my stash, I’ll only be using homemade detergent.  From what I can tell with my mad math skills and reading on the internet, this soap costs about $.05 per load, give or take. Most laundry detergents from the store cost around $.20+ per load. That’s a winner for me! Let’s get clean, y’all.

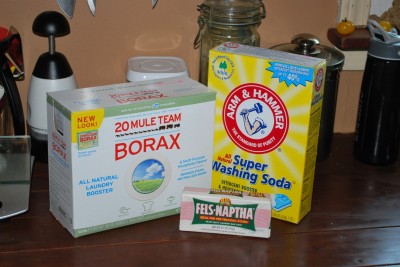
To make this powder detergent, you’ll need Washing Soda, Fels Naptha Bar Soap, and Borax. That’s it. (I’ve gotten a lot of feedback about the dangers of Borax;  Here’s I feel about Borax.  I personally believe it is safe for my family when used correctly, but you are free to use your own judgement on that.) All this stuff can be bought at Kroger. Strangely, the Fels Naptha Soap isn’t with the regular soap at my Kroger…..it’s with the mops. Tell me how THAT makes sense? The Arm and Hammer Washing Soda was on the top shelf near the Borax. A good source (thanks Rebecca!) tells me that these items can also be found at Food City. If you can’t find them at either store, you might be able to find them at a hardware store. Ivory soap can also be used, but Fels Naptha is really great for getting clothes clean. You can also use it as a pre-treater and just rub the soap right on the stain. Nice!

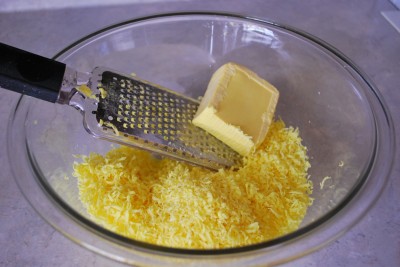
Now, you need to grate your soap. I used my microplane. Somehow when I bought it, I never thought I’d be using it to grate soap. Cheese, yes; soap, no. But it worked great! If you don’t have a microplane grater, you can use any regular type of grater. I won’t judge you because you don’t have the most awesome grater of all time in your kitchen. I’m not here to point fingers. Oh, and this soap smells really good so when you’re done grating you’ll smell like you just had a shower. You’ll need to grate the whole bar – your arms will get tired. You’ve worked out today, baby!

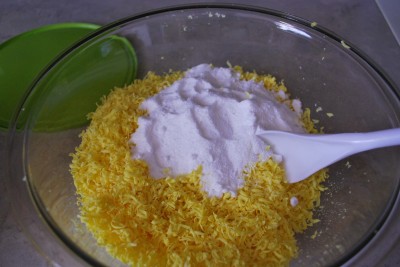
Add 1 cup Borax. Borax is going to give your detergent that little extra stain fighting power. It can be used interchangeably with Oxy-Clean but at a fraction of the cost. Have I mentioned that I just love Borax?

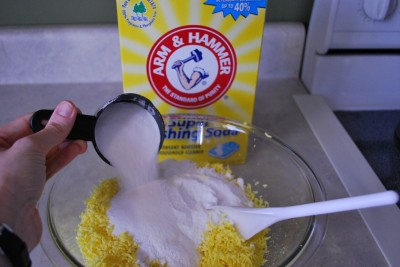
Add 1 cup of washing soda. I read on several forums that some people just use baking soda, but then I also read that it doesn’t work quite as well. We don’t want to bake our laundry. Cakes, yes; socks, no.

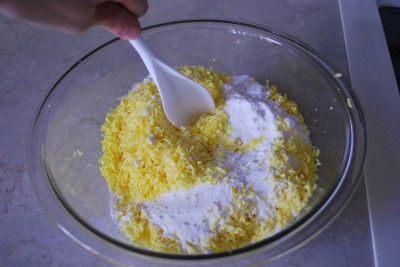
Time to mix it up. This isn’t a time to sit down on the job. Unless you want to sit down while you stir – that’s cool. You really need to stir this puppy.

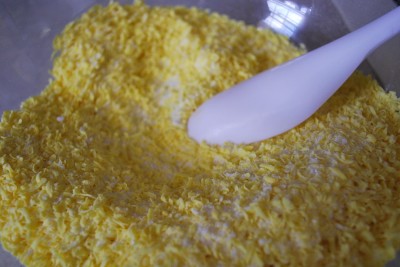
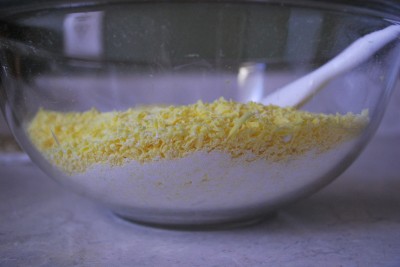
You’re supposed to stir it until it’s well incorporated and looks like powder. This is what I had after what felt like an eternity of stirring – or maybe it was only like two minutes. Don’t judge me.

I wasn’t happy with it because you can see all the white powder on the bottom. Hmmmmmm. I’m a perfectionist. So, I broke out…….

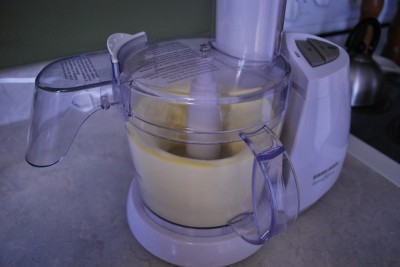
the food processor. Yes, I use mine daily. It’s up in my top five kitchen tools. I poured my soap in there and let it mix away. So much for my workout. You know, I never thought I’d use my kitchen tools to make soap – but I like to adapt. Wonder if Barry would mind if I used his workshop tools in my kitchen. Survival of the fittest.

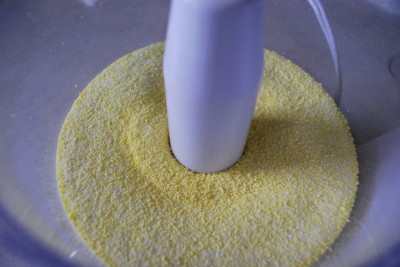
This is more like it! Powder! Isn’t it pretty? And it smells so nice and fresh. But here’s the funny part – it won’t make your laundry smell like the soap. Your clothes will come out smelling just non-dirty. They’ll be clean, but they won’t smell like Tide. If you NEED your clothes to smell pretty, then just sock a dryer sheet in the dryer with them. Me, I can just settle for not smelling like sour milk.

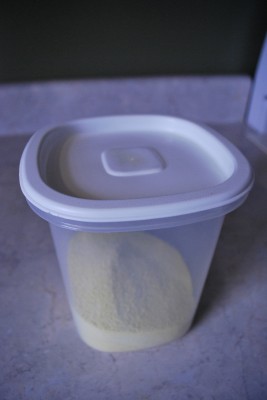
I stored mine in a Tupperware container. You’ll use two tablespoons per load. That’s it. Don’t overdo it! I actually put a tablespoon in mine to help. Next time I think I’ll just use my food processor to make the whole batch.

When you’re ready to wash, add your powdered detergent to the water before you put the clothes in. That will assure that it will dissolve. And don’t expect bubbles. This stuff doesn’t bubble, but it does clean.   So, a few handy things to know:

  1. This will also work in HE Washers
  2. I use it on Annie’s laundry without any sensitive skin problems….and I read online that other people do this successfully as well.
  3. It’s so FAST! I made my batch in like 5 minutes. I love fast, frugal things!

So, I’ve tackled that for you. If you’ve been too scared to do it now you don’t need to be! I’m a good source for trying things first to make all the mistakes. You’re welcome.

How to be Successful at Line Drying

Did you pause at the title of this post?  I mean, how can you mess up line drying?  I hope most of you have it down perfectly, but so many people quit after a bit because:

1.  Their clothes come out stiff and wrinkled

2.  They get black marks from the line

3.  Their neighborhood won’t allow the line

4.  It takes too much time

Here are some tips for you to help you stick with it.

1.  Know why you want to line dry.  Is it the fresh smell?  The savings from electricity?  The stain removal and disinfecting power of the sun?  Whatever your reason, make sure it’s good enough to help you stick with it.

2.  To prevent marks on your clothes from the line, the first dry after a long break with the line, give the line a wipe down with a damp cloth.  This removes any dust marks left by the rain or winter snow so they won’t end up on your clothes.  It should only take a few minutes.

3.  Before hanging your clothes on the line, shake them out really well.  This will smooth any wrinkles–especially the wrinkles that form in ruffles.  If they dry straight, you won’t have to iron.

4.  Think about where the clothespin dimples will end up on your clothes.  I like to hang my shirts upside down so that any dimples will be at the hem where they are hardly noticeable and not right at the shoulder.

5.  If you have any stains left on your clothes, make sure they are facing the sun when they line dry.  Chances are the stains will be gone when the clothes are dry.

6.  Don’t leave clothes out too long when they are dry.  The sun can fade the colors, it might rain, and it makes neighbors cranky. 

7.  Store your clothespins inside.  It might be a pain, but it keeps the pins from getting weatherd and moldy.  I have a hanging clothespin bag that will slide along the outdoor line while I’m using it, but also has it’s own hook in the laundry room for inbetween uses.  This is very convenient, since I often use clothespins for indoor tasks, such as closing food bags.

8.  If your clothes come off the line too stiff for your taste, 3-5 minutes in the dryer with a dryer ball will have them soft in no time and takes very little energy compared to drying them in there.

9.  If your neighborhood won’t allow clothes lines, consider getting a fold up drying rack.  These are useful for indoor and outdoor drying and camping too.

10.  Some clothes dry well on a plastic hanger.  Men’s button-down shirts are one example.  I like to secure the hanger to the clothesline with a clothespin to keep them off the ground.  Knits don’t do well on a hanger as it tends to add big dimples in the shoulders.

11.  If hanging clothes on the line takes up too much time, try training a child to do it.  Even a young one can learn to do it well, and often a healthy dose of praise is the only reward they need :).

12.  I’ve found I prefer the wooden clothespins over their plastic counterparts since I store them indoors.  The plastic ones break very easily while the wooden ones have lasted for years.