$6 Left

Last weekend I finally ventured to Costco for the month and when I was done, I had $6 left for food in April.  It’s been awhile since I ran out of money this early in the month and I know exactly what happened.   Marshmallows and All Beef Hot Dogs several times a week add up. Plus they taste really good with chips and soda…also expensive and not healthy.

Follow me on instagram here.

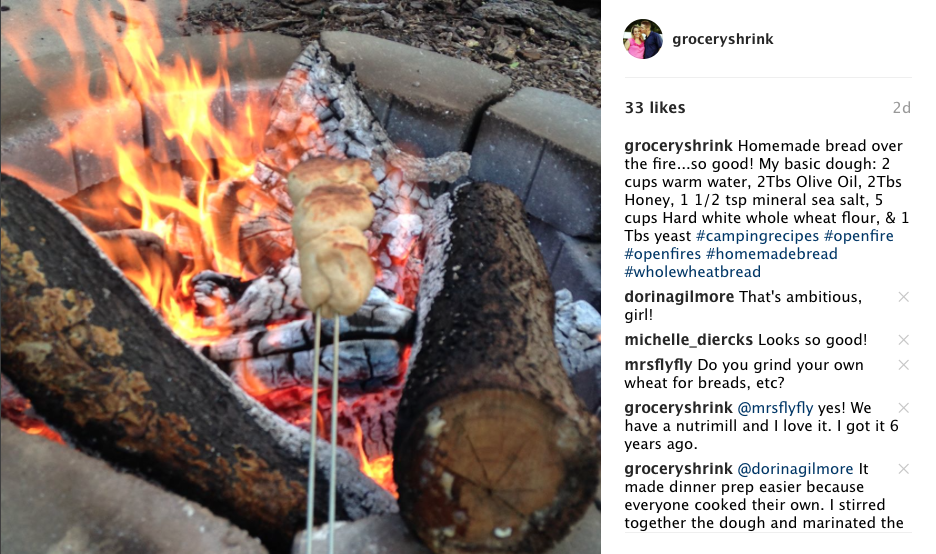
Our new fire pit is so much fun, but I didn’t know what else to cook out there at first.  We’ve since broadened our horizons.   Marinated chicken and homemade whole wheat bread dough will roast on a hot dog fork.  And oh man!!! They are delicious.  You can also fork roast vegetables (like zucchini, mushrooms, peppers, and onions) and fruits like apples.

But really that’s not the point.  I broke one of my own rules this week and it didn’t end well.

Necessities FIRST! Rare treats after.  

I can have roasted marshmallows once in a while (but 4 bags a week might be overdoing it.)  I just should have made sure that I had enough money for all the essential foods first.

Necessities are any affordable foods that promote health:  In season fruits and vegetables, whole grains like oats, brown rice and 100% whole wheat bread or flour, unprocessed meats, nuts, beans, and some dairy items like milk, butter and cheese.

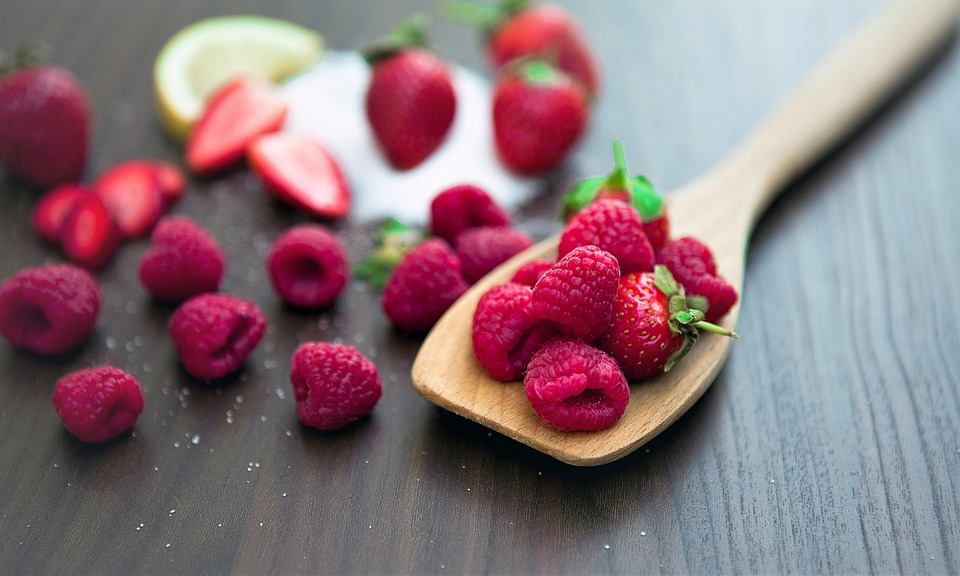
Rare treats are processed foods like crackers, chips, lunch meats, desserts, sodas, juices, and other beverages. They also might include higher priced healthy foods like steak or fresh raspberries. I’m not saying never buy these, just make sure of the necessities first.

We’ll be ok on $6 this week.  It’s enough to buy a couple of gallons of milk and my pantry is well stocked with enough stuff that we’ll eat just fine.  It’s a good chance to practice my creative pantry cooking skills, but I’ll be doing things differently in May.

A Family Friendly Yard on a Budget

Our house has so many projects! My foyer has been primed but not pained for several months now and I’m still not done with my built in bookcases or trim in the living room.  Already my heart is turning outside.  We have a couple of gorgeous months ahead of us and I would LOVE to add a firepit and some swings to our yard and just hang out there with my people.

back-yard-before

Two weekends ago we piled our driveway full of brush and yard trimmings, revealed our raised beds and split enough wood for two winters. Then last weekend we built 4 more raised garden beds, and mulched around trees and pathways.


pathway to school

Here’s a close up of the bushy area to the right after cleaning up. The yard is looking almost pretty.  The two days working together as a family was really fun and bonding, except for the poison ivy that I found. It’s the city’s job to keep the fence clean 😛 We can work on our side, but the other side remains a jungle.  I suppose there’s more privacy that way.

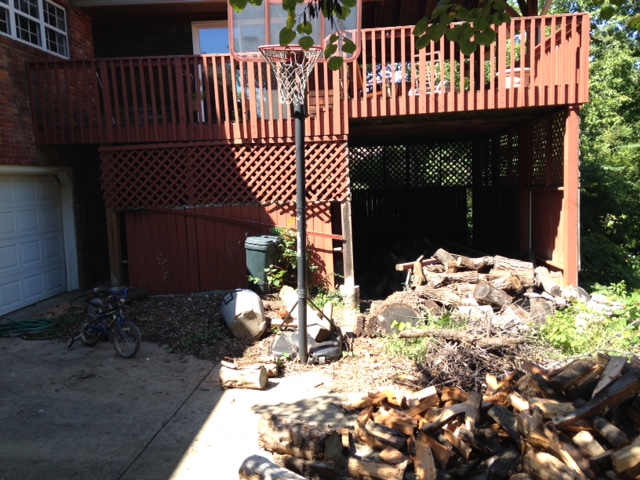
under the deck

Darren is talking out loud about building a seating area under the deck.  I’ve been talking about it for years and he would respond with all the reasons why it was a bad idea.  Now, it appears it is HIS idea and I’m all for it. Above is what it looks like today, sigh.  There’s a LOT of work to be done.  But I’m envisioning removing the wall covering on the side facing this, and the side facing the yard to the right.  We’d like to leave the covering on the back wall, because that is the north side and blocks the worst weather for us.

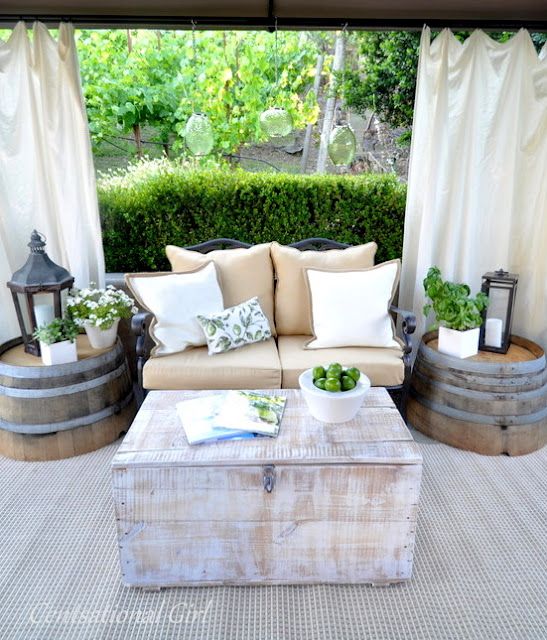
Then I’d like a slew of comfy seating and eating areas where our huge family can gather.  (Just my husband’s immediate family is 28 people.)  Something with the feel Centsational Girl created here:

901fd840058babb0f75307a4df689358

This will be the most expensive backyard project on our list because we’ll need to jackhammer some extra footings that aren’t being used anymore, and bring in several yards of gravel to create a temporary floor.  Concrete would be ideal, but it would be around $10,000 to pour a spot this big.

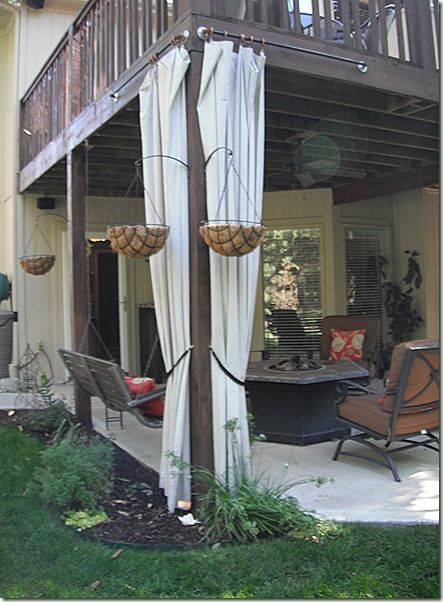
c472ce7d082360464e48225a33f02e20

Here’s another inspiration photo from Redoingit.blogspot.com. They have a fabulous tutorial there on making outdoor curtains from canvas drop cloth and plumbing fittings.

how-to-build-a-diy-firepit-for-60

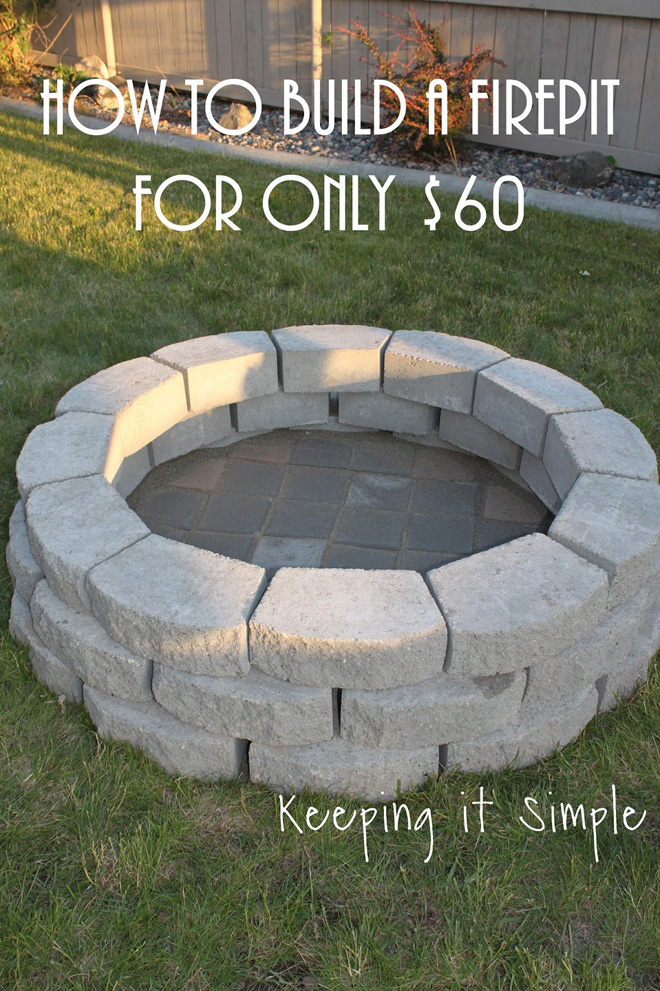
While we save up the cash for the gravel floor, I’d like to build a fire pit like this.  I go back and forth on the kind of bottom to put in the pit. The flat stones as shown here would make shoveling out ashes a snap, but we have a couple of bags of sand that the previous homeowners left and it would make a free floor that drains well.  The stone blocks are a lot more expensive in my area than described in this tutorial (more than double) but I have seen them on Craigslist recently (I was just too slow to text and they were already sold, sob.)  While we do the necessary clean up work, I’m going to keep watching for another good deal.

with-swingset

This simple swingset can be built for less than $100, even after modifying the plans to make it taller and wide enough for 3 swings.  We had a hard time figuring out where to put the swings with all the trees and tall back fence.  Darren finally had the idea of turning it sideways (we already plan to take out the tree right by the garden beds) so the kids would have more room to swing without hitting the fence.  It’s not as aesthetically pleasing to me as one turned the other direction, but I’ll be able to see it from the house which was really important to me.


It’s One Pot Wonder Week!

one pot wondersOooooooh, I’m so excited!  One Pot Wonders are deliciously easy meals that
require minimal clean up.  They often work well for outdoor cooking over an open fire with a skillet. (A flame is ok, no need to wait for coals.) And a lot of them can go in a freezer bag for make ahead prep, and dump and go cooking.

This is my preferred cooking method when I’m in a hurry, low on groceries, or tired of washing dishes. (And by preferred method, I mean using one pot on our indoor stove, not an open flame.) It’s perfect when the fridge is mostly bare, because you can combine bits of leftover things and turn it into one BIG dish.  If that sentence just grossed you out, try to hang on a little longer.  There are a few “rules” to make sure you get something delicious at the end.  Here’s what you need:

1.  Flavor theme:  Southwest, Italian, Oriental, BBQ….. For best results, stick to one flavor profile.

2. Protein:  Ground beef, Shredded chicken, Ground Turkey, Smoked Sausage, Breakfast Sausage; Italian Sausage; Eggs; Shrimp; Salmon…

3. Vegetables: Southwest: bell peppers; onions; corn; tomatoes. Italian: everything. Oriental: Everything, but especially baby corn; sugar snap peas; bamboo shoots; water chestnuts. BBQ: corn, carrots, onions, mushrooms; sweet potatoes; potatoes.

4. Starch: Pasta; Corn; Potatoes; Sweet Potatoes; Beans; Rice.

5.  Sauce or herbs; Cheese

I’ll be featuring recipes of tried and true one pot wonders the rest of this week.  I’m sure you can think of some you’ve had before:  Frittata; stir fry; fried rice; skillet lasagna; (hamburger helper….)

What’s your favorite one pot wonder?  Leave a comment and help us with ideas.


Freezer Bag Cooking: Lunch and Dinner

Freezer Bag Recipes lunch and dinner

Yesterday I shared with you some really simple Freezer Bag Breakfast Recipes perfect for camping or just to make ahead for busy moments.  Today I’m going to give you my best Freezer Bag Lunch and Dinner recipes.  When meals are packed frozen in a cooler, you need less ice and they gradually thaw to be ready when needed. (My FAVORITE part of this series is how often I can use the word smoosh <3.)

 Dutch Oven

Dutch Oven Pizza

Crust: 1 2/3 cup water; 1 Tbs yeast; 1 Tbs olive oil; 2 Tbs Honey; 1 tsp salt; 4 cups flour.  Mix together, kneading right in the bag, then press out the air and freeze.

Sauce: 6 oz tomato paste; 1/4 cup water; 1 tsp sugar; 1 tsp garlic powder; 1 tsp onion powder; 2 tsp parsley flakes; 1 tsp basil; 1/4 tsp oregano; a few dashes of oregano.  Mix in a smaller baggie and freeze.  Snip the corner to easily spread onto the pizza crust.

Additional ingredients:  Shredded mozzarella cheese; browned ground beef, pepperoni;

This is enough for 2 pizzas. Spread the thawed crust in the bottom and up the sides a bit of your well seasoned dutch oven.  Top with sauce, cheese and desired toppings.  Top with a lid. Bake for 20-3o minutes with 7 briquettes under the oven and 21 on the lid.
Sloppy Joe

Sloppy Joes

2 lb Ground meat (I use a combination of turkey and beef.)

1 cup diced onion

1 cup diced bell pepper

2 cans, 8 oz tomato sauce

2 tsp chili powder

1 tsp garlic salt

2 tsp Worcestershire sauce

Brown the ground beef, peppers and onions together, drain.  Place the tomato sauce, chili powder, garlic salt and worcestershire in a freezer baggie.  Smoosh it around.  Add remaining ingredients and smoosh to mix evenly. Seal well and lay flat to freeze.  To prepare, squeeze thawed contents into a dutch oven or saucepan and heat through. Serve on buns or stuffed into pitas with slices of cheese.


goulashGoulash

l lb macaroni noodles (dry)

8 cups tomato juice

4 tsp sugar, xylitol or similar

1 tsp salt

1/4 tsp pepper

2 tsp garlic powder

1 lb ground beef, browned and drained

1 cup chopped onion

1 cup chopped bell pepper

8 American cheeses slices

Brown ground beef with onion and bell pepper, drain.  Combine all but the cheese slices in a baggie (pasta should still be dry.)  Seal, and smoosh flat to freeze.   To prepare, pour contents of the bag into a casserole dish or dutch oven.  Top with cheese slices.  Bake at 350 for 45 minutes (For a Dutch oven: 7 hot coals on the bottom 21 coals on the lid) or until heated through and pasta is soft.

simple-spaghetti-008-400x266

Spaghetti

8 oz broken spaghetti noodles

4 cups tomato sauce

3 cups water

1 tsp basil flakes

2 tsp parsley flakes

1 tsp salt

dash of cayenne pepper (opt)

1 lb ground beef

1 cup onion

Brown and drain ground beef with onion.  Add all ingredients to a freezer bag (use the noodles dry.)  Smoosh flat and freeze.  To prepare, pour thawed contents of the bag into a pot, bring to a boil and simmer for 15 minutes or until pasta is tender and dish is thickened.

Fajitas

2 lb boneless, skinless chicken breast, sliced into strips.

1 green bell pepper

1 red bell pepper

1 yellow bell pepper

1 red onion

1 white onion

1/4 cup olive oil

1/4 cup lime juice

1 1/2 Tbs Seasoned Salt (like Lowry’s)

1 1/2 Tbs oregano flakes

1 1/2 Tbs ground cumin

1 Tbs garlic powder

1 Tbs chili powder

1 Tbs paprika

1 tsp salt

In a large baggie combine the oil, lime juice and herbs and spices.  Smoosh all around.  Add the chicken and sliced vegetables.  Press flat and freeze.  To prepare, thaw the bag. Use tongs to lift the meat and vegetables out of the bag into a hot skillet, discard remaining marinate. Stir fry until meat is cooked through and vegetables are tender.  Serve with tortillas and salsa.  (Other toppings as desired: lettuce, cheese, chopped tomatoes, sour cream, guacamole….)

Fiesta Chicken Bowls

2 lb boneless, skinless chicken breasts, cut into bite sized pieces
1/4 cup lime juice
1 bunch cilantro, chopped
1 lb corn kernels
1 tsp garlic powder
1 chopped red onion
1 can, 15 oz  black beans, drained and rinsed
1 tsp cumin
1 tsp salt
1/4 tsp pepper
Combine everything into a freezer bag and smoosh flat to freeze. To prepare, thaw bag.  Pour entire contents into a hot skillet and sauté until meat is cooked through.  Layer bowls with crushed tortilla chips and chopped lettuce.  Top with chicken mixture and serve with salsa, cheese, and ranch dressing.

Teriyaki chicken over Rice

2 lb boneless skinless chicken breast, cut into bite sized pieces

1 lb sugar snap peas

1/2 cup soy sauce

1/2 cup pineapple juice (I drain it from canned pineapple)

1 tsp fresh grated ginger

1 tsp garlic powder

Combine all ingredients into a freezer bag and smoosh to freeze.  Freeze 4-6 cups cooked brown rice in a separate bag.  To prepare, pour contents of the bag into a skillet and saute until chicken is cooked through. Heat rice, by simmering the bag in hot water for 2-3 minutes.  Serve Teriyaki chicken over rice.

Taco Soup

2 lb ground beef or turkey

1 cup chopped onion

1 lb corn kernels

2 cans, 15 oz each black beans, rinsed and drained

1 can rotel tomatoes, undrained

4 Tbs taco seasoning

Brown ground beef with onion, drain.  Combine everything in a freezer bag.  Smoosh flat to freeze.  To serve, pour contents of the bag into a stock pot or dutch oven. Add 1 cup of water. Heat through.  Serve with Frito style corn chips and cheese or sour cream.
Freezer Bag Cooking: Breakfast

Freezer Bag Recipes Breakfast

Prepping food at home and freezing it in baggies takes up less space in the cooler for camping.  Things stay colder longer this way. (Here’s hoping they thaw out in time for cooking. I’ll let you know on that one.) Even if you aren’t planning a camping trip, these recipes can easily be cooked in a regular kitchen and make rushed mornings that much easier.

Today is just about breakfast.  Tomorrow we’ll talk about dinner and then desserts :).  All of these recipes are good feed our family of 8.

Quick tip: Be sure to label your bags with a sharpee.  A few weeks later pancake batter and frozen smoothie can look kind of similar.

Breakfast Recipes

protein pancakes 033

Pancakes

3 cups flour

1 Tbs sugar or stevia blend

1 Tbs baking powder (or 1 tsp baking soda plus 1/4 tsp cream of tartar.)

3 eggs

3 Tbs oil

3 cups milk

Blend all ingredients together and process for 1 minute.  Pour into a gallon freezer baggie and squeeze out the air.  Lay the bag flat smooshing all the batter into an even layer and place it on a cookie sheet or tray to freeze it flat.

To cook, thaw the batter.  Then snip off a lower corner of the bag and use it to pipe the batter into a hot skillet.  (I’m going to test this method on my protein pancake batter and let you know how it freezes.) If you don’t want to use a blender, you could also just dump the ingredients in the bag and smoosh it around. It won’t be as smooth, but it will be ok.

Hash Brown and Egg Casserole

1 lb frozen hash browns (Raw potatoes don’t freeze well, so if you want a homemade substitute, cube leftover baked potatoes. For a low carb substitute, try frozen cauliflower bits or diced radishes.)

1 lb bulk sausage, browned and drained

1 cup diced onion

1 cup diced bell pepper (I like the baby bell peppers because of the pretty colors.)

1 cup sliced mushrooms

1 cup shredded cheese

8 beaten eggs

1 cup plain yogurt or sour cream

2 tsp salt, 1/2 tsp black pepper

Beat yogurt or sour cream and salt and pepper into eggs.  Pour into a gallon baggie and add remaining ingredients. smoosh around until well blended.  Seal well, removing all air. Lay flat and freeze on a tray to keep it flat. To bake, pour thawed casserole into a dutch oven.  Use this handy guide to decide how and where to place your coals: http://www.dutchovendude.com/campfire-cooking.shtml Bake at 350 for about an hour.  You’ll need around 24 hot briquetts, 6 underneath and 18 on the lid.

This casserole can be made without all vegetables (but why?!) To make it dairy free, 1/2 as much plain almond milk can be subbed for the yogurt and the cheese can be left out or replaced with Daiya cheese.  I’m slightly milk sensitive, but found Daiya cheese (cheddar variety) to be pretty gross and would rather just skip it.

Apple Muffins

¾ C milk

½ C applesauce (or oil)

1 egg

2 C flour

½ C sugar

3 t baking powder

1 t salt

½ t cinnamon

1 med apple, pared and chopped

Mix everything together in the gallon baggie, then freeze flat.  To bake, snip off a corner and pipe into a seasoned cast iron muffin tin OR fill hollowed out orange skin halves 2/3 full with batter. Wrap loosely with aluminum foil (to give room for rising batter.) Nestle down into the hot coals (right side up!) and bake for about 1o minutes.  Any muffin batter can be baked this way.  Imagine chocolate in an orange. (If you compare recipes, the difference between a muffin and a cupcake are minimal….)

Omelets

Use a quart sized freezer bag for each person.  Crack in 2 eggs then add whatever you like:  spinach, onions, peppers, mushrooms, tomatoes, ham, bacon, sausage, cheese etc.  Mush it all around, then freeze.  To cook, drop the bags in a large kettle (or dutch oven) of boiling water.  Boil for 8 minutes.  Only put in enough bags that can float freely (you don’t want them resting on the bottom of the pot.)

Smoothies

Blend up your favorite smoothie ingredients, then freeze flat in a freezer bag.  Thaw until slushy, cut off a corner and pipe into drinking glasses.

Portable Yogurt

Fill snack size baggies with a half cup of flavored yogurt.  Fold over and tape the zipper seal to the side and freeze firm. Snip off the end and push up to eat. Credit

Quick Oatmeal

This doesn’t need to be frozen, but goes in a baggie….so here you go.  Add 1/3 cup quick oats; 1 Tbs sweetener (brown sugar, coconut sugar, or xylitol etc….); 2 Tbs dried fruit; and 1/4 tsp of flavor (Cinnamon, nutmeg etc.)  Other flavor options: 1 Tbs chopped nuts; 1 Tbs mini chocolate chips;  1 Tbs peanut flour; 1 tsp flax meal; 1 tsp chia seeds; 1 Tbs cocoa powder; 1 Tbs dry milk; scraped vanilla bean.  To prepare, pour contents of the bag into a mug.  Add 2/3-3/4 cup of boiling water and let stand for 5 minutes.

Just for fun, let’s clear up some confusion about the different types of oatmeal.

1. Whole Oat Groats: look similar to wheat berries and are the hulled seeds of the oat plan. Since the seed is intact, there is no danger of oils going rancid. These take a long time to cook.

2. Steel cut oats: Whole oats that have been chopped into pieces for faster cooking.

3. Old-fashioned rolled oats: Whole oat Groats that have been rolled on a press. Oats can be thick rolled if the setting is changed on the roller.

3. Quick Oats: Rolled oats that have been chopped into smaller pieces for faster cooking. Nutritionally no different than Old-Fashioned roll oats.

4. Instant Oats: Quick oats that have been steamed and re-dried for faster cooking.  There is likely some nutrition loss in the heat process, but instant oat’s bad reputation mostly comes from the sugary additions in the prepackaged individual serving variety that make it so yummy.  By packaging up your own flavors you can control the quality of the ingredients and nutrition profile.

The Solar Oven

We’ve all heard the phrase, “It’s so hot you could cook an egg on the sidewalk.”  But cooking with the heat from the sun is not a cliche.  With about $5 in materials you can create a solar powered oven that will bake bread, cook a casserole, or even boil water.  For 3rd world areas where cooking fuel is scarce, solar ovens can give natives a way to purify their water.  For the rest of us, solar ovens offer a cost effective way to cook our summer meals without heating up the kitchen.

Solar Oven cooking times resemble those of an electric crock pot, but will vary based on the cloud coverage and time of day.  If your box is well insulated, the outside temperature is not as crucial as how direct are the sun’s rays. It helps to invest in an inexpensive oven thermometer positioned so you can read the temperature without lifting the lid.  Also helpful are black or dark pans that aren’t reflective. 

I’ve searched the web for the best online instructions for building yoru own solar cooker.  Try it with cardboard and plastic first and if you like it, you can build a more permanent model from wood, metal hinges, and glass.  Click the photos to go to the instructions.

Also See:  http://www.backwoodshome.com/articles/radabaugh30.html and http://articles.cnn.com/2009-04-09/tech/solar.oven.global.warming_1_cardboard-solar-box-cookers-international-simple/2?_s=PM:TECH

Solar Cooking fascinates me, and tomorrow I’ll show you some other types of solar cookers, plus show you the most affordable places to buy your own if crafting isn’t your thing.

The Summer Grill

Cooking outdoors on a grill gives great flavor to food, reduces fat, and prevents heating up the kitchen.  If you have a covered porch to grill on, a summer shower doesn’t have to stop your cooking plans.  We enjoy our gas grill but the most economical way to grill is in a traditional fire grill (Like a Weber), with coals made from fallen wood that has been allowed to cook down into coals.

When you think about a grill, what foods do you think of most?  The first thing that popped into my mind was BBQ chicken, then hot dogs and hamburgers.  But there’s even more that can be cooked on a grill, including stew and pizza!

To make the most of your grilled foods, consider marinating them.  There are lots of commercial marinaids available for sale, but homemade ones are easy, cost effective and delicious.  Marinades typically have oil, an acid ingredient like vinegar, pineapple or lemon juice, and herbs and spices.    I’ve found that I can replace the oil with water which saves money and calories.  We didn’t notice a difference in flavor. 

You can marinate meat or vegetables, just don’t marinate them together.  To marinate, mix all ingredients, pour over the food in a zipper seal bag and store in the refrigerator overnight.  Flip the bag over and continue to marinate until time to grill.  Discard raw meat marinades after use.  If you’d like to brush the meat with marinade as it cooks, save some separately before you marinate the food to keep it from getting contaminated.

Here’s my favorite chicken marinade recipe:

3/4 cup water or oil

1/2 cup soy sauce

1/4 cup vinegar (red wine or rice vinegars are nice)

1 teaspoon fresh thyme

Favorite Fajita Marinade

2 Tablespoons oil

2 Tablespoons lemon or lime juice

1 1/2 teaspoons seasoned salt

1 1/2 teaspoons oregano

1 1/2 teapspoons cumin

1 teaspoon garlic powder

1/2 teaspoon chili powder

1/2 teaspoon paprika

************************************

Zucchini is one of my favorite vegetables to grill.  We like to slice it thick (about 3/8″) and marinate it in low calorie Italian dressing before grilling.

We’ve also grilled corn on the cob:  http://whatscookingamerica.net/Vegetables/GrillingCorn.htm

http://www.backyardandbbq.com/easy-grilled-pizza/186

Here are some links for grilled pizza instructions:  http://slice.seriouseats.com/archives/2008/05/how-to-make-grilled-pizza-tips.html and http://pizzatherapy.com/grilling.htm

)

Photo Source: Food Network

Or try making your own individual meal packets in foil and grilling them.  We love hamburger patties with carrots, potatoes, green beans, garlic and salt.  Or fish with carrots, zucchini, onions and lemon pepper.